
Related Manuals for D-Link DG-102SP


Summary of Contents for D-Link DG-102SP
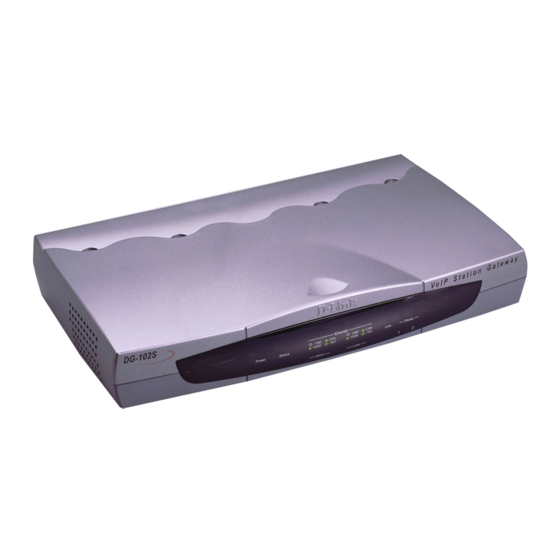
- Page 1 D-Link DG-102SP VoIP Station Gateway Manual Version 1.10 Building Networks for People...
-
Page 2: Table Of Contents
Contents Package Contents ................3 Introduction....................4 Features and Benefits ................5 Getting Started ..................6 Configuration ..................10 Using Web-Based Management ............11 Configuration Using a Console ............37 Using the Boot Menu ................48 Command Line Interface ..............56 Technical Specifications ..............64 Warranty ....................67 Registration ..................70 Contacting Technical Support ..............71... -
Page 3: Package Contents
Package Contents Contents of Package: D-Link DG-102SP VoIP Station Gateway Ethernet Cable (Straight-through CAT5 with RJ-45 connectors) 12V/1A A/C Power Adapter If any of the above items are missing, please contact your reseller. System Requirements: Computers with Windows, Macintosh, or Linux-based operating systems with an installed Ethernet adapter Internet Explorer Version 6.0 or Netscape Navigator... -
Page 4: Introduction
Cable Modem or other WAN devices, and the other may function as a connection to create a home or small office LAN network. Enabling Nat on the DG-102SP will allow multiple clients to connect to the Internet. It can be configured and monitored via the Console, Web browser, or Telnet and also supports SNMP management. -
Page 5: Features And Benefits
Features and Benefits Designed for versatility and performance, the DG-102SP VoIP Gateway provides the following features: Two analog loop-start FXS interfaces using female RJ-11 connectors One analog POTS interface for PSTN Life Line One 10/100 Fast Ethernet WAN port for connecting to a call agent... -
Page 6: Getting Started
Power: This LED is lit when the device is receiving power; otherwise, it is unlit. Status: This LED will flash quickly when the DG-102SP is either per- forming a self test or booting up. The LED will remain lit when the system is ready for a connection with the call agent. - Page 7 Getting Started Identifying External Components 10/100M: This indicator remains unlit when there is no connection, or the port is operating at 10Mbps through a connection to a 10BASE-T device. It is lit when the port is operating at 100Mbps through a con- nection to a dual-speed or 100BASE-TX Fast Ethernet device.
- Page 8 Getting Started Identifying External Components AC Power Connector: For the included power adapter. Be sure to use only the 12V1/A power adapter included with the product. Using the wrong power adapter can damage the product and void the warranty. Diagnostic Port: An RS-232 serial port used to configure the device. Plug one end of a straight-through wired RS-232 cable to the device and the other end to a serial port of a PC running a terminal emulation pro- gram (such as Microsoft HyperTerminal) or a VT-100 terminal.
- Page 9 Getting Started Installation Do not place heavy objects on the DG-102SP at any time. Placing the DG-102SP in a well ventilated area is very important. Not doing so may cause damage to the unit. When installing the unit on a desktop or shelf, the rubber feet in- cluded with the device should be attached.
-
Page 10: Configuration
Configuration Configuring the VoIP Gateway There are two ways to configure the VoIP gateway: Using a web browser on a computer connected to the device via the WAN or LAN Ethernet connections. In the discussion below, the computer running the browser is referred to as the management station. Using a terminal or computer running terminal emulation software connected to the diagnostic port via an RS-232 cable. -
Page 11: Using Web-Based Management
Using Web-Based Management The DG-102SP VoIP Gateway offers an embedded Web-based (hypertext) in- terface allowing users to manage the device from anywhere on the network through a standard browser such as Netscape Navigator, 6.x or later, or Microsoft Internet Explorer, 6.x or later. The Web browser acts as a universal access tool and can communicate directly with the device using HTTP protocol. - Page 12 Using Web-Based Management Management NAT Configuration (NAT Configuration and Local Server Configuration) SNMP Trap Configuration, Administration Management Monitor (Ethernet Statistics, DSP Statistics, Tcid Configuration, and Cod- ing Profile) Firmware and Configuration Update Save Changes Factory Reset Restart System. Configure Device IP Address Configure Device IP Address window The items on this window are described below: Restart Settings...
-
Page 13: Device Information
Using Web-Based Management Management BOOTP: When BOOTP is selected, the VoIP will attempt to obtain its IP settings from a BOOTP server located on your LAN. DHCP: When DHCP is selected, the VoIP will attempt to obtain its IP settings from a DCHP server located on your LAN. IP Address: Enter an IP address for the VoIP gateway. - Page 14 Using Web-Based Management Device Information The items on this window are described below: Device Type: This displays the model name of this device. MAC Address: This displays the MAC address of this device. Boot PROM Version: This displays the version number of the device’s startup code.
-
Page 15: Telephony Configuration
Using Web-Based Management Telephony Configuration Telephony Configuration window Enter the desired information on the window above and then click Save. SIP Configuration - Server SIP Configuration window... - Page 16 Using Web-Based Management SIP Configuration - Server The items on this window are described below: IP Address: Enter the IP address of SIP server. Port: Enter the port number of SIP server (Default is 5060). Service Domain: This is a user-defined service domain for SIP server. URL Format: This is a user-defined URL format for SIP server.
- Page 17 Using Web-Based Management SIP Configuration - User Agent SIP Configuration – User Agent window The items on this window are described below: Same Phone Number: Enable or disable the same phone number function. Index: Choose the Phone 1 or Phone 2. Phone Number: This is a user-defined phone number for each phone port.
- Page 18 Using Web-Based Management SIP Configuration - Peer to Peer SIP Configuration – Peer to Peer window This window displays the Peer to Peer setting for non-SIP server mode. It lists the ten numbers, which support Peer to Peer communication. Click one of the ten pointer icons to access and edit the second SIP Configuration-Peer to Peer window:...
- Page 19 Using Web-Based Management SIP Configuration - Peer to Peer Second SIP Configuration – Peer to Peer window The items on this window are described below: Index: Choose the index number that you would like to edit (Form 1 to 10). Phone Number: This is a user-defined dialing phone number of the destination endpoint.
- Page 20 Using Web-Based Management Dynamic IP Assignment Dynamic IP Assignment window Use the Dynamic IP Assignment to configure the device to act as a DHCP server for the LAN. The items on this window are described below: Start IP Address: This is the base (starting) address for the IP pool of unassigned IP addresses.
- Page 21 Using Web-Based Management Dynamic IP Assignment Leased Time: This specifies the amount of time (in hours) a client can lease an IP address from the dynamically allocated IP pool. DNS Server IP: This specifies the Domain Name System server, used by the DHCP clients using leased IP addresses, to translate hostnames into IP addresses or vice-versa.
- Page 22 Using Web Based Management DHCP Configuration - Static IP Assignment The Static IP Assignment functions in the same way as the Dynamic IP As- signment. The only difference is that a particular IP address can be assigned to a particular host. The host is identified by the MAC Address of its NIC which must be entered on the next screen.
-
Page 23: Nat Configuration
Using Web-Based Management NAT Configuration NAT Configuration window After entering the desired information into the window above, enable or disable the NAT Function and then click Save. - Page 24 Using Web-Based Management Local Server Configuration First Local Server Configuration window This window allows you to view the current local server configuration settings. Click the Edit icon on the window above to access the second Local Server Configuration window:...
- Page 25 Using Web-Based Management Local Server Configuration Second Local Server Configuration Window The items on this window are described below: Index: Choose the index number that you would like to edit (From 1 to 6). Protocol: Choose either the TCP or UDP protocol. Global Port: Enter the designated TCP or UDP protocol port number for the particular protocol packet you wish to redirect.
- Page 26 Using Web-Based Management SNMP Trap Configuration SNMP Trap Configuration window The items on this window are described below: Trap Manager IP Address: The IP address of the trap receiving station. Community Name: A user-defined SNMP community name. SNMP AuthTrap: This allows you to enable or disable the SNMP trap. Click on the Save button at the bottom right of the window to save the settings.
- Page 27 Using Web-Based Management Administration Management Administration Management window To add or change a User Account, fill in the appropriate information in the User Name, Old Password (if applicable), New Password, and Confirm New Password fields. Click on the Save button to keep the settings.
- Page 28 Using Web-Based Management Ethernet Statistics Ethernet Statistics window The items on this window are described below: Rx Packets: The total number of packets received by the device. Rx Bytes: The total number of bytes contained in packets received by the device. Rx Non Ucast Packets: The number of non-unicast packets received by the device.
- Page 29 Using Web-Based Management Ethernet Statistics Rx Collision Errors: The number of collision errors. Rx Short Frames: The number of packets smaller than the 64-octet minimum. Rx CRC Errors: The number of packets received that failed the CRC checksum test. Rx Overrun Packets: The number of packets received that exceed the 1518 octet maximum length imposed on Ethernet packets.
- Page 30 Using Web-Based Management DSP Statistics DSP Statistics window This window displays a variety of DSP statistics.
- Page 31 Using Web-Based Management Tcid Configuration Tcid Configuration window This read-only window displays a variety of Tcid configuration settings.
- Page 32 Using Web-Based Management Coding Profile Coding Profile window This read-only window displays various Coding Profile settings.
- Page 33 Using Web-Based Management Firmware and Configuration Update Firmware and Configuration Update window The items on this window are described below: Software Update Mode: This specifies downloading the image file through a WAN Link. TFTP Server Address: The IP address of the TFTP server where the runtime or configuration file is located.
- Page 34 Using Web-Based Management Save Changes Save Changes window After the settings have been saved to NV-RAM, they will become the default settings for the device, and they will be used every time it is powered on, reset or rebooted. The only exception to this is a factory reset, which will clear all settings and restore them to the initial values present when the device was purchased.
- Page 35 Using Web-Based Management Factory Reset Factory Reset to Default Value window Before performing a Factory Reset, be absolutely certain that this is what you want to do. Once the reset is complete, all of the device’s settings stored in NV- RAM will be erased and restored to the values present when the device was purchased.
- Page 36 Using Web-Based Management Restart System Restart System window To perform a reboot of the device, which resets the system, click the Restart button.
-
Page 37: Configuration Using A Console
Configuration Using a Console Setting up a Console First-time configuration can be carried out through a “console,” that is, either (a) a VT100-type serial data terminal, or (b) a computer running communications software set to emulate a VT100. The console must be connected to the Diagnostics port. - Page 38 Configuration Using a Console Setting up a Console A typical console connection is illustrated below: Example of a Console Connection Configuring the VoIP Gateway Using Telnet Once you have set an IP address for your device, you can use a Telnet pro- gram (in a VT-100 compatible terminal mode) to access and configure it.
- Page 39 Configuration Using a Console Console Usage Conventions The up and down arrow keys, the left and right arrow keys, the Tab key, and the Backspace key can be used to move between selected items. It is recommended that you use the Tab key and Backspace key for moving around the console.
- Page 40 Configuration Using a Console Configuration Settings In order for the VoIP to function, you must provide the device with the following information: Where the device receives its IP settings from. IP settings – IP Address, Subnet Mask, and Default Gateway All of these settings are found in the first menu item in the Boot Menu named IP Configuration.
- Page 41 Configuration Using a Console Configure IP DNS: Entering the IP address for the closest DNS server in this field enables the DNS function. BOOTP: Use the <Space> key to select the method that the VoIP gate- way will use to obtain its IP settings once it is rebooted. Choices include: Manual: When Manual is selected, the VoIP gateway will obtain its IP settings from the fields located just below.
- Page 42 Configuration Using a Console Configuring the VoIP Gateway Using a Web Browser The VoIP gateway comes with a default IP address of 10.1.1.1. You must make sure your computer is in the same Subnet as the VoIP gateway. You can do this by changing the IP address of the computer using the screen shown below.
- Page 43 Configuration Using a Console Configuring the VoIP Gateway Using a Web Browser Click on the Login to the web-based management module button in the middle of the window. The following window will be displayed: Initially, the VoIP gateway does not have a Username or Password. To log in, simply click on the OK button.
- Page 44 Configuration Using a Console Configuring the VoIP Gateway Using a Web Browser To begin configuring the device, click on the Config IP folder on the left-hand side of the window (shown below). Next, click on Config Device IP Address. The following window will appear: Configure Device IP Address window...
- Page 45 Configuration Using a Console Configuring the VoIP Gateway Using a Web Browser The items on this window are described below: Restart Settings Get IP From: Select the method the VoIP gateway will use to obtain its IP settings once it is rebooted. Choices include: Manual: When Manual is selected, the VoIP gateway will obtain its IP settings from the fields located just below.
- Page 46 Configuration Using a Console Configuring the VoIP Gateway Using a Web Browser Next, click on the SIP Configuration item in the list at the left of the screen. Then, click on Server. The following window will appear: SIP Configuration window The items on this window are described below: IP Address: Enter the IP address of SIP server.
- Page 47 Configuration Using a Console Configuring the VoIP Gateway Using a Web Browser Session Expires: Enter the timer of Expires. Min-SE: Enter the timer of Min-SE. Session Expires Refresher: Choose the session expires refresher: uac or uas. Click on the Save button at the bottom right of the screen to save the settings. After you have finished, click on the Restart System item in the list at the left of the screen.
-
Page 48: Using The Boot Menu
Using the Boot Menu To access the Boot Menu, you must first make sure the console is connected to the Diagnostics port (an RS-232 port with a 9-socket D-shell connector and DCE-type wiring) and the appropriate cabling for the connection is being used. Please see the previous section, “Configuration,”... - Page 49 Using the Boot Menu Configuring the IP Use the arrow keys to highlight the first menu item on the Boot Menu, Configure IP, and press <Enter>. The IP Configuration screen will be displayed: Boot Menu—IP Configuration screen Each item on the IP Configuration screen is described below: DNS: Enter the IP address for the closest DNS server in this field if en- ables the DNS function.
- Page 50 Using the Boot Menu Configuring the IP After you have finished, press <Ctrl+S> to save changes to RAM. Next, press the <Esc> key to return to the Boot Menu. Position the cursor over the Save Changes item and press <Enter>. This will save the settings to NV-RAM so they will still be present after powering off or restarting the device.
- Page 51 Using the Boot Menu Device Information This screen displays various types of information about the DG-102SP as well as allowing you to enter information pertaining to name, location, and how to reach the person responsible for maintaining the device. Use the arrow keys to highlight the second menu item on the Boot Menu, De- vice Information, and press <Enter>.
- Page 52 Using the Boot Menu Device Information System Contact: This is user-defined contact information for the person or department responsible for the maintenance of this device. Serial Number: This displays the serial number of this device Country Code: This is a user-defined country code for this device. < 0:USA (Default), 1:Japan, 2:Hong Kong, 3:Sweden, 4:China >...
- Page 53 Using the Boot Menu Update Boot and Application Each item on the Update Boot and Application screen is described below: Software Update Mode: This specifies downloading the image file through a WAN Link. TFTP Server Address: The IP address of the TFTP server where the runtime or configuration file is located.
- Page 54 Using the Boot Menu Save Changes Boot Menu—Saving Settings screen After the settings have been saved to NV-RAM, they will become the default settings for the device, and they will be used every time it is powered on, reset, or rebooted. The only exception to this is a factory reset, which will clear all settings and restore them to their initial values, which were present when the device was purchased.
- Page 55 Using the Boot Menu Factory Reset Boot Menu—Factory Reset screen Restart System To perform a system reset, use the arrow keys to highlight the last menu item on the Boot Menu, Restart System, and press <Enter>. The following Reboot Device screen will be briefly displayed: Boot Menu—Restart System screen...
-
Page 56: Command Line Interface
Parameter(s): None. Example: nwdbg save changes nwdbg factory reset Definition: This command is used to set the DG-102SP back to its default settings and then restart the device. Parameter(s): None. Example: nwdbg factory reset... - Page 57 Command Line Interface General Setup Commands nwdbg un <USERNAME> Definition: This command sets the username if there is a username string, or shows the username/password if only nwdbg un is typed. Parameter(s): <USERNAME, maximum string length is 12 characters> Example: nwdbg un 123456789012 nwdbg pw <PASSWORD>...
- Page 58 Command Line Interface General Setup Commands nwdbg dtmf_relay <0|1> Definition: This command turns the Dual Tone Multiple Frequency (DTMF) relay function on or off, or shows the DTMF relay state if only nwdbg dtmf_relay is typed. Parameter(s): <0 : off, 1 : on> Example: nwdbg dtmf_relay 0 nwdbg mac <MAC ADDRESS>...
- Page 59 Command Line Interface General Setup Commands nwdbg ip <IP ADDRESS> Definition: This command sets the fixed IP address, which is used as the system’s IP address if the software boot mode is Manual mode. If only nwdbg ip is typed, this command shows the IP configuration.
- Page 60 Command Line Interface General Setup Commands nwdbg tftp <0|1> Definition: This command sets the software download link to either a WAN link or a LAN link. If only nwdbg tftp is typed, this command shows the download link. Parameter(s): <0:WAN link, 1:LAN link> Example: nwdbg tftp 0 nwdbg ca <NOTIFY ENTITY>...
- Page 61 Command Line Interface General Setup Commands nwdbg dns <disable|enable> Definition: This command turns on/off the DNS function. If only nwdbg dns is typed, this command shows the DNS IP/STATE. Parameter(s): [disable | enable] Example: nwdbg dns disable nwdbg country <code> Definition: This command provides country code setting interface to config the tone frequency for different country.
- Page 62 Command Line Interface General Setup Commands ping <DEST IP> <OPTIONS> Definition: This command lets the user ping an IP address from the device. Parameter(s): <DEST IP: The host ip address> <OPTIONS, -t : Ping the specifed host until stopped (type SPACE). -n count: Number of echo requests to send.
- Page 63 Command Line Interface TFTP Client Setup Commands tftp srvip <IP ADDRESS> Definition: This command sets the IP address of the TFTP server. The image must be resident on that TFTP server. If the IP address is invalid, the message ERROR will be displayed.
-
Page 64: Technical Specifications
Technical Specifications Call Control Protocols Compliance Voice Compression G.711 (A-law and u-law), G.723.1, G.729a Analog Voice Ports Type: Loop-Start FXS interfaces DTMF tone detection/generation V.21/V.25 Modem/Fax tone detection Echo Cancellation: G.168 Ethernet Ports WAN: NWay 10/100BASE-TX Fast Ethernet ports (MDI-II) LAN: NWay 10/100BASE-TX Fast Ethernet ports (MDI-X) IEEE 802.3 10BASE-T Ethernet compliance IEEE 802.3u 100BASE-TX Fast Ethernet compliant... - Page 65 Technical Specifications Network Management SNMP management agent base MIB II Telnet provisioning Manage functions through an intuitive web-based graphical user interface Local management console TFTP: The built–in Trivial File Transfer Protocol provides firmware upgrade Security Password Authentication Protocol/Challenge Handshake Authentication Protocol (PAP/CHAP) Administrative password through Telnet, Console, Web and SNMP LEDs...
- Page 66 Technical Specifications Number of Ports One 10/100BASE-TX Fast Ethernet port (WAN) One 10/100BASE-TX Fast Ethernet port (LAN) Two loop-start FXS RJ-11 ports One PSTN POTS RJ-11 port for Life Line One RS-232C, DB-9 Console port Power Supply AC-to-DC power adapter (provided) DC Input: 12VDC/1A Operating Temperature 0 - 50 °C...
-
Page 67: Warranty
D-Link’s sole obligation shall be to repair or replace the defective Hardware during the Warranty Period at no charge to the original owner or to refund at D-Link’s sole discretion. Such repair or replacement will be rendered by D-Link at an Authorized D-Link Service Office. The replacement Hardware need not be new or have an identical make, model or part. - Page 68 D-Link may reject or return any product that is not packaged and shipped in strict compliance with the foregoing requirements, or for which an RMA number is not visible from the outside of the package. The product owner agrees to pay D-Link’s reasonable handling and return shipping charges for any product...
- Page 69 REPAIR, REPLACEMENT OR REFUND OF THE DEFECTIVE OR NON-CONFORMING PRODUCT. THE MAXIMUM LIABILITY OF D-LINK UNDER THIS WARRANTY IS LIMITED TO THE PURCHASE PRICE OF THE PRODUCT COVERED BY THE WARRANTY. THE FOREGOING EXPRESS WRITTEN WARRANTIES AND REMEDIES ARE EXCLUSIVE AND ARE IN LIEU OF ANY OTHER WARRANTIES OR REMEDIES, EXPRESS, IMPLIED OR STATUTORY Governing Law: This Limited Warranty shall be governed by the laws of the State of California.
-
Page 70: Registration
Registration Register online your D-Link product at http://support.dlink.com/register/... -
Page 71: Contacting Technical Support
Support cal Support You can find software updates and user documentation on the D-Link website. D-Link provides free technical support for customers within the United States and within Canada for the duration of the warranty period on this product.