
Related Manuals for Grizzly G5770


Summary of Contents for Grizzly G5770
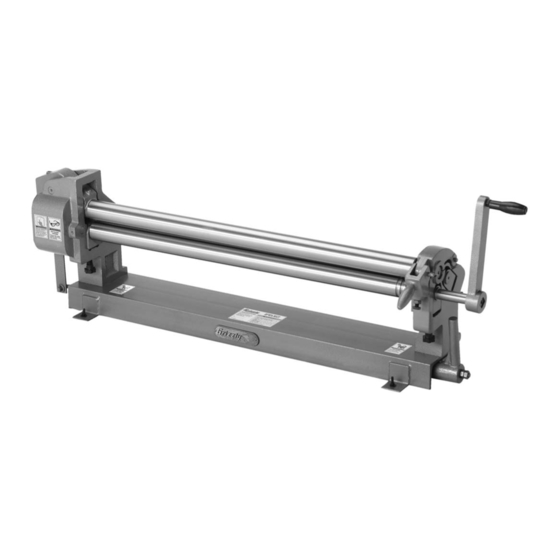
- Page 1 MODEL G5770 36" SLIP ROLL 22 GAUGE OWNER'S MANUAL WARNING: NO PORTION OF THIS MANUAL MAY BE REPRODUCED IN ANY SHAPE OR FORM WITHOUT THE WRITTEN APPROVAL OF GRIZZLY INDUSTRIAL, INC. Get other manuals https://www.bkmanuals.com...
- Page 2 Get other manuals https://www.bkmanuals.com...
-
Page 3: Table Of Contents
Table of Contents INTRODUCTION ..........................2 SECTION 1: SAFETY ........................5 SECTION 2: SETUP ......................... 8 SECTION 3: OPERATIONS ......................13 SECTION 4: ACCESSORIES ......................21 SECTION 5: MAINTENANCE......................23 SECTION 6: SERVICE ........................24 WARRANTY AND RETURNS ......................29 Get other manuals https://www.bkmanuals.com... -
Page 4: Introduction
INTRODUCTION Manual Accuracy Functional Overview your machine may not exactly match the manual www.grizzly.com Contact Info Get other manuals https://www.bkmanuals.com... - Page 5 Identification Figure 1. Identification List (Figures 1 and 2) Sample Illustration (Figure 2) Figure 2. Sample illustration. Get other manuals https://www.bkmanuals.com...
- Page 6 Machine Data Sheet MACHINE DATA SHEET Customer Service #: (570) 326-3806 • To Order Call: (800) 523-4777 • Fax #: (800) 438-5901 GRIZZLY MODEL G5770 36" SLIP ROLL Design Type ....................Bench Model Height (with Handle in Center Position) ..............13 ⁄...
-
Page 7: Section 1: Safety
Safety Instructions for Machinery Get other manuals https://www.bkmanuals.com... - Page 8 Get other manuals https://www.bkmanuals.com...
- Page 9 Additional Safety for Slip Rolls METAL EDGES CRUSHING HAZARD HAND PROTECTION 5. EXPERIENCING DIFFICULTIES. PINCHING HAZARD Like all machinery there is potential danger No list of safety guidelines can be complete. when operating this machine. Accidents are Every shop environment is different. Always frequently caused by lack of familiarity or consider safety first, as it applies to your individual working conditions.
-
Page 10: Section 2: Setup
SECTION 2: SETUP Items Needed for Setup This machine presents serious injury hazards to untrained users. Read through this entire manu- al to become familiar with the controls and opera- tions before starting the machine! Description Wear safety glasses dur- ing the entire setup pro- cess! Unpacking... - Page 11 Inventory Note: If you can't find an item on this list, check the mounting location on the machine or examine the packaging materials carefully. Occasionally we pre-install certain components for shipping purposes. Box 1: (Figure 3) Figure 3. Get other manuals https://www.bkmanuals.com...
- Page 12 Hardware Recognition Chart Get other manuals https://www.bkmanuals.com...
- Page 13 Clean Up Site Considerations Floor Load Machine Data Sheet Figure 4 For optimum performance, clean all moving parts or sliding contact surfaces. Placement Location Figure 5 Gasoline and petroleum products have low flash points and can explode or cause fire if used to clean machinery.
- Page 14 Assembly Mounting To assemble your machine: Figure 6 Figure 6. Figure 8. Figure Figure 9. Figure 7. Get other manuals https://www.bkmanuals.com...
-
Page 15: Section 3: Operations
OMMEND that you read books, trade maga- zines, or get formal training before begin- Upper Bushing Assembly: ning any projects. Regardless of the con- tent in this section, Grizzly Industrial will not be held liable for accidents caused by lack of training. Figure 10. - Page 16 Preparation Flat Rolling To prepare the slip roll for use: The main rollers of this machine present a pinch- Figure 11 ing hazard. Make sure no body part or clothing is near the area between the rollers. Failure to follow this warning may result in fin- gers, hair, or clothing being pulled into the machine,...
- Page 17 Figure 16 Figure 15. Steps 2 Note: Since the rear roller on the Model G5770 does not lower completely out of the path of the workpiece, a slight bend may be created. Flipping the workpiece between passes minimizes the bending effect.
- Page 18 Figure 17 This machine poses a crushing hazard if workpieces are not properly supported when exiting the rollers. If necessary, get assistance to support the workpiece. Make sure all helpers are wearing safety glasses, leather gloves, and steel toed footwear when assisting in the use of this machine.
- Page 19 Creating Cylinders Note: The method for creating a specific radius is a trial-and-error process. Due to the many varia- tions among metal workpieces, no single position- ing will create the same curve on all materials. We recommend using scrap pieces the same dimen- sions and material as your final workpiece until the desired curve is achieved.
- Page 20 Figure 22 Note: err on the side of making the radius too large rather than too small. It is easy to decrease the radius but very difficult Figure 23. to increase the radius later. Figures 24 Figure 22. Figure 24. Figure 23 Depending on the size and shape of your workpiece, you may need assistance to sup-...
- Page 21 Bending Wire Figure 26 To use the wire grooves: Removing Workpiece Page 20 Figure 27 Example: Figure 26. Finishing the cylinder. Removing Workpiece Page 20 Figure 27. Wire grooves. Creating Bends Page 15 Creating Cylinders Page 17 Get other manuals https://www.bkmanuals.com...
- Page 22 Removing Workpiece Figure 30 To remove cylindrical workpieces: Figure 28 Figure 30. Releasing top roller. Figure 28. Hex bolt and jam nut. Figure Figure 29 Figure 31. Securing top roller. Figure 29. Upper bushing assembly release. components this machine are very heavy and workpieces can be cumbersome and have sharp edges.
-
Page 23: Section 4: Accessories
SECTION 4: ACCESSORIES G5618—Deburring Tool with two Blades H6073—Deluxe Power Snip Figure 32 Figure 34 ® G2871—Boeshield T-9 12 oz Spray G2870—Boeshield ® T-9 4 oz Spray G5562—SLIPIT ® 1 Qt. Gel ® G5563—SLIPIT 12 oz Spray Figure 33. Figure 35. Get other manuals https://www.bkmanuals.com... - Page 24 G4956—Super Nibbler G8781—4 ⁄ " Suction Cup Figure 36 Figure 38 H5958—Sheet Metal Pliers H6131—Heavy-Duty Hand Riveter Figure 37. Figure 39 Get other manuals https://www.bkmanuals.com...
-
Page 25: Section 5: Maintenance
SECTION 5: MAINTENANCE Schedule Lubrication Daily Check: Grease Locations (Figure 40) Weekly Maintenance: Cleaning Unpainted Cast Iron Figure 40. Grease location. Oiling Bushings (Figure 41) Section 5: Accessories Page 21 Figure 41. Oil locations. Get other manuals https://www.bkmanuals.com... -
Page 26: Section 6: Service
SECTION 6: SERVICE Troubleshooting Operations Get other manuals https://www.bkmanuals.com... - Page 27 Parts Breakdown & List REF PART # DESCRIPTION REF PART # DESCRIPTION P5770101 LEFT FRAME P5770125 BUSHING 20 X 34 X 16 P5770102 RIGHT FRAME P5770126 ROLLER STAND P5770103 BASE P5770127 LEVER P5770104 ROLLER BASE P5770128 HANDLE P5770105 TOP ROLLER PSB52M CAP SCREW M8-1.25 X 10 P5770106...
- Page 28 MUST maintain the original location and readability of the labels on the machine. If any label is removed or becomes unreadable, REPLACE that label before using the machine again. Contact Grizzly at (800) 523-4777 or www.grizzly.com to order new labels. Get other manuals https://www.bkmanuals.com...
- Page 29 Get other manuals https://www.bkmanuals.com...
- Page 30 Get other manuals https://www.bkmanuals.com...
-
Page 31: Warranty And Returns
WARRANTY AND RETURNS Get other manuals https://www.bkmanuals.com... - Page 32 Get other manuals https://www.bkmanuals.com...