Advertisement
product safety
IMPORTANT SAFETY INSTRUCTIONS. READ CAREFULLY AND KEEP FOR FUTURE REFERENCE
This appliance can be used by children aged from 8 years and above and persons with reduced physical, sensory or mental capabilities or lack of experience and knowledge if they have been given supervision or instruction concerning use of the appliance in a safe way and understand the hazards involved. Children shall not play with the appliance. Cleaning and user maintenance shall not be made by children without supervision.
Always disconnect the appliance from the mains supply socket if it is left unattended and before assembling, disassembling or cleaning.
If the supply cord is damaged, it must be replaced by the manufacturer, its service agent or similarly qualified persons in order to avoid a hazard.
 Never use this appliance for anything other than its intended use. This appliance is for household use only. Do not use this appliance outdoors.
Always ensure that hands are dry before handling the plug or switching on the appliance.
Always use the appliance on a stable, secure, dry and level surface.
This appliance must not be placed on or near any potentially hot surfaces (such as a gas or electric hob).
Never immerse any part of the appliance or power cord and plug in water or any other liquid.
Never let the power cord hang over the edge of a work top, touch hot surfaces or become knotted, trapped or pinched.
Do not use the appliance if it has been dropped, if there are any visible signs of damage or if it is leaking.
Never use any accessory or attachment not recommended by the manufacturer.
Remove attachments from the appliance before washing or cleaning them.
Keep fingers, hair and clothing away from the moving parts of the appliance when it is in use.
Do not attempt to eject, fit or remove attachments until the appliance has come to a complete stop.
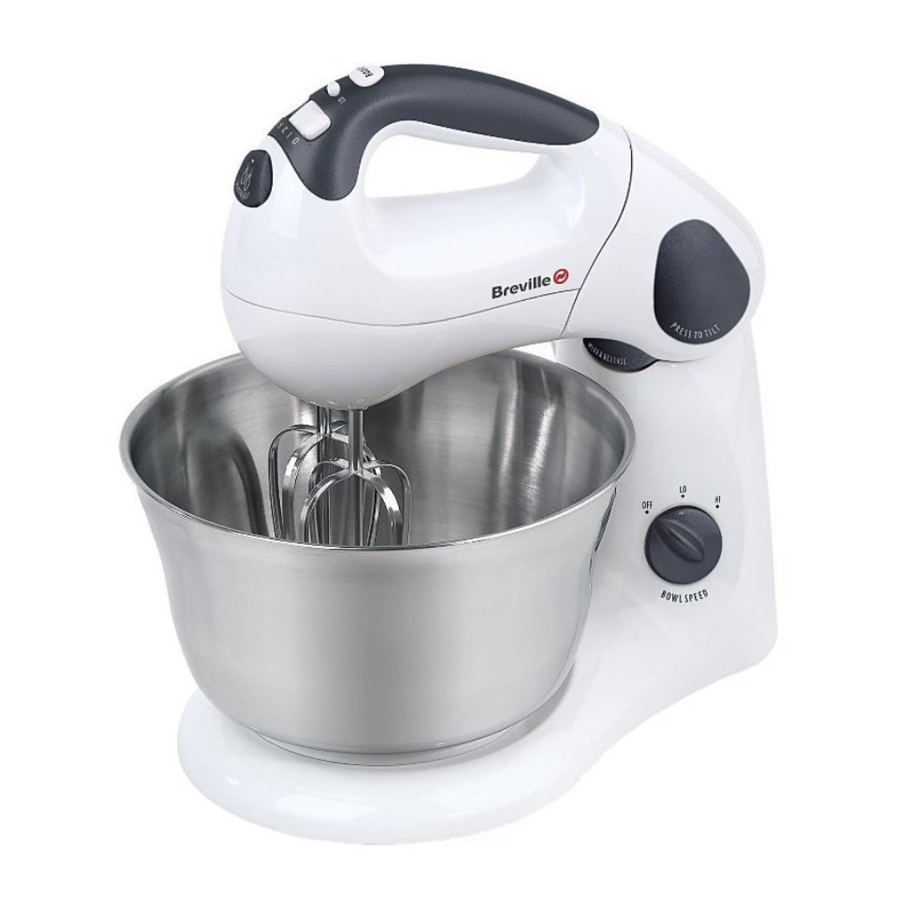
features and parts

- Mixer stand/bowl turntable
Two speed turntable provides a powerful and thorough mixing action - Stainless steel bowl
Dishwasher safe. - Detachable hand mixer
Can be detached from the stand for hand use. - Beater release button
Press the beater release button to remove the beaters or dough hooks - On/off switch and 5-way speed selector
Turns your mixer on or off and selects one of 5 speed ranges. When used in conjunction with the speed range selector switch, up to 10 speeds can be selected. - Speed range selector switch
Selects the high or low range of mixer speeds. Used in conjunction with the 5-way speed selector. - Boost button
When held down, operates your mixer at its highest speed. - Mixer head lock release button
Press to release the head lock and tilt or lower the mixer head. - Hand mixer release button
When the mixer head is in the raised position the button can be pressed to detach the hand mixer. - Bowl speed control
Selects Off, Hi or Lo speed for the mixing bowl turntable. - Dough hooks
Stainless steel dough hooks ideal for kneading dough and cookie mixes. The dough hook with the red collar must be inserted into the red recess on the mixer. Dishwasher safe. - Beaters
Suitable for making cakes, biscuits, pastry, scones, icing, fillings, etc. Dishwasher safe.
Due to our policy of continuous improvement, the actual product may differ slightly from the one illustrated in these instructions.
using your unit on the stand
Before first use
Make sure your mixer is switched off and unplugged from the mains supply socket before cleaning, detaching or fitting it to the mixer stand or before fitting or removing the beaters or dough hooks.
Before using your mixer for the first time, wash the beaters, dough hooks and stainless steel bowl in warm, soapy water. Rinse and dry thoroughly. Do not use harsh abrasives, chemicals or oven cleaners. Using a damp cloth or sponge, wipe the exterior of the hand mixer and mixer stand. Dry thoroughly.
Using
Always avoid contact with moving parts while the appliance is in operation. Keep hands, hair, clothing as well as other utensils away from the beaters/dough hooks during operation.
Never attempt to remove or replace the beaters/dough hooks whilst your food mixer is in operation, or plugged in to the mains supply.
Never attempt to make pastry with the mixer on the stand. For best results, remove the mixer and use by hand.
- Ensure that your mixer is unplugged from the supply socket and the speed selector is set to 0(off). Press the mixer head lock release button and raise the mixer stand head until it clicks.
![]()
- Position the lower rim of the stainless steel mixing bowl over the mixing bowl turntable.
![]()
- Rotate the mixing bowl in a clockwise direction until it clicks into position.
![]()
- Connect the hand mixer to the mixer stand by locating the two prongs on the stand into the two rectangular holes in the heel of the hand mixer. Press the hand mixer down until it clicks into place. Ensure that the hand mixer and mixer stand are firmly connected together.
![]()
- Insert one of the beaters into one of the recesses and push it firmly into place. Insert the remaining beater into its recess pushing it firmly into place. When correctly fitted, both beaters should be locked in place.
To use the dough hooks, insert the dough hook with the red collar into the recess that is red. Insert the other dough hook into the remaining recess. Don't use the dough hooks the other way round.
![]()
- Press the mixer head lock release button and lower the mixer head into the bowl until the head clicks. Never plug in or switch on your stand mixer before the mixer head has been lowered into the mixing bowl.
![]()
- Add the ingredients to the mixing bowl. The beaters are offset to easily allow this.
![]()
- Plug your mixer into the mains supply socket.
![]()
- Turn the on/off speed selector switch to 1 to start mixing. Adjust the speed as required (see Mixing speeds). Use the bowl speed control to select the appropriate bowl speed.
![]()


using your unit by hand
Make sure your mixer is switched off and unplugged from the mains supply socket before cleaning, detaching or fitting it to the mixer stand or before fitting or removing the beaters or dough hooks.
- Ensure that your mixer is unplugged from the supply socket and the speed selector is set to 0 (off). Press the mixer head lock release button and raise the mixer stand head until it clicks.
![]()
- Press and hold the hand mixer release button while lifting the hand mixer from the mixer stand.
![]()
- Plug your hand mixer into the mains supply socket.

- Place the beaters/dough hooks into the ingredients to be mixed. Always support the container or bowl in which you are mixing ingredients whilst operating your hand mixer. Set the on/off speed selector switch to 1 to start mixing. Adjust the speed as required (see Mixing speeds below).

- When mixing, guide the hand mixer through the centre and around the sides of the mixing bowl. When making pastry, use the mixer by hand and not on the stand. For best results always make sure that you:
![]()
- use twin beaters
- soften the butter/margarine/lard before use
- disperse fat evenly into the flour before mixing
- When you have finished mixing the ingredients, set the on/off speed selector to 0 (off). Use a spatula to scrape around the bowl to remove any remaining ingredients.

- Unplug your hand mixer from the mains supply socket.


Always avoid contact with moving parts while the appliance is in operation. Keep hands, hair, clothing as well as other utensils away from the beaters/dough hooks during operation.
Never attempt to remove or replace the beaters/dough hooks whilst your food mixer is in operation, or plugged in to the mains supply.
Mixing speeds
| Task | Speed Range Selector Switch | Recommended Speed |
| Blending and folding | LO | 1 and 2 |
| Light mixing | LO | 3 and 4 |
| Creaming and beating | HI LO | 2 and 3 5 |
| Whipping and aerating | HI | 4, 5 or Boost button |
care, cleaning and storage
Make sure your mixer is switched off and unplugged from the mains supply socket before cleaning, detaching or fitting it to the mixer stand or before fitting or removing the beaters or dough hooks.
To make cleaning easier, clean your hand mixer and the beaters/dough hooks as soon as you have finished using them.
- Set the speed selector to 0 (off) and unplug your hand mixer from the mains supply socket.

- Eject the beaters/dough hooks from your hand mixer by pressing the eject button. The beaters/dough hooks are heavy and care should be taken not to let them fall onto fragile surfaces or items when they are being ejected. The beaters/dough hooks can't be ejected unless the speed selector is set to 0 (off).
- Wash the beaters/dough hooks and the bowl in warm soapy water. Alternatively, wash them in a dishwasher.

- Rinse and dry the beaters/dough hooks before storing or using again.
- Using a dampened cloth, wipe the body of your hand mixer.


Storage
Store your hand mixer in a clean, dry place, out of the reach of children, ensuring that all the parts are dismantled.
hints and tips
- Before starting, read the recipe completely.
- Refrigerated ingredients, e.g. butter and eggs, should be at room temperature before mixing begins. Set these ingredients out ahead of time.
- Before starting your recipe, preheat the oven to the baking temperature recommended in the recipe.
- Place all the ingredients and any required utensils near the mixer.
- To eliminate the possibility of shells or deteriorated/off eggs in your recipe, break eggs into a separate container first, then add to the mixture.
- When mixing egg whites, be sure the bowls and beaters are thoroughly cleaned and dried, as even the smallest amount of oil on beaters or bowl may cause the egg whites not to aerate.
- Always start mixing at slow speeds, especially when mixing in flour or icing sugar.
Mix these ingredients slowly at first, then gradually increase the speed as required. - Do not over beat. Be careful that you only mix/blend mixtures until recommended in your recipe. Fold in dry ingredients only until just combined. Always use the low speed. At any stage of mixing, over beating can cause toughness, close texture, lack of rising or excessive shrinkage. Climatic conditions, seasonal temperature changes, temperature of ingredients and their texture variation from area to area all play a part in the required mixing time and the results achieved.
- All recipes have been kitchen tested, but should you find it necessary to vary the ingredients or size of the tin etc. allow for this in the cooking time. Always test that baked foods are done before removing them from the oven or cooking appliance.
- During mixing, ingredients may splash to the sides of the bowl. To scrape the bowl, turn the beaters and bowl control dials to the 'OFF' position and use a spatula to scrape the bowl. A light scraping after the addition of each ingredient assists in achieving efficient mixing.
- If you don't have a tin the same size as the recipe suggests here are some alternatives: two 20cm sandwich tins, one 28 x 18cm tin, one 20 x 7cm round cake tin or a standard loaf tin.
- Cooking times and temperatures are meant only as a guide. Light mixtures should spring back when lightly touched and heavy mixtures, fruit cake and the like, should be tested with a skewer towards the end of the suggested cooking time. If the skewer is clean when removed, the cake is cooked.
- When making pastry, use the mixer by hand and not on the stand. For best results always make sure that you:
- use twin beaters
- soften the butter/margarine/lard before use
- disperse fat evenly into the flour before mixing
| Symptom | Possible cause | |||
| Sponge cake shrink | Unbalanced ingredients, over beating of egg whites, sudden changes of temperature or draught when taking from the oven. | |||
| Cakes do not rise | Mostly due to gross over beating, but can also be caused by too hot an oven during the first part of cooking. | |||
| Cakes sink in the centre | Too much fat, raising agent, liquid or sugar; too little flour, under cooking or slow cooking. | |||
| Cakes run over the edges | Too much batter for size of pan, too cool an oven, too much sugar, over beating, too much raising agent. | |||
| Hard outer crust | Too much flour, too little sugar, over mixing, too hot an oven. | |||
| Moist, sticky outside | Too much sugar, over beating, under baking. | |||
| Coarse, crumbly texture | Over beating, low baking temperature. | |||
| Heavy, close texture | Too much fat or sugar, over mixing, under baking, or too hot an oven. | |||
| Fruit sinks | Mixture too soft, damp fruit, too little flour, ingredients not correctly balanced, over beating. | |||
| Oven Temperatures | ||||
| °C | °C (fan) | °F | Gas Mark | |
| Very Cool | 110 | 90 | 225 | ¼ |
| 130 | 110 | 250 | ½ | |
| Cool | 140 | 120 | 275 | 1 |
| 150 | 130 | 300 | 2 | |
| Moderate | 170 | 150 | 325 | 3 |
| 180 | 160 | 350 | 4 | |
| Moderately hot | 190 | 170 | 375 | 5 |
| 200 | 180 | 400 | 6 | |
| Hot | 220 | 200 | 425 | 7 |
| 230 | 210 | 450 | 8 | |
| Very hot | 240 | 220 | 475 | 9 |
making dough
Preparing dough
- Fit the dough hooks (don't forget to fit the hook with the red collar in the red recess).
- Place the dry ingredients into the mixer bowl. Always keep dried yeast away from the salt or your bread will fail to rise.
- Turn the speed control switch to 1 and the bowl control dial to LO.
- Begin to gradually add the liquid ingredients to the bowl.
You may find it useful to use a spatula to scrape the dry ingredients from the sides of the bowl during the kneading process. Always switch the unit off before scraping the sides of the bowl. Do not use the spatula near or directly behind the dough hooks. Use only a rubber or plastic spatula.
Never attempt to feed the dough into the dough hooks with your hands, spatula or any other utensil while the mixer is plugged into the supply socket or is in operation. - As the ingredients start to form a ball, scrape down the sides of the bowl if necessary with a spatula and remove your dough.
Always switch off and unplug the mixer first. Do not use the mixer near the edge of a work surface or table top because movement of the mixer during operation may cause it to fall off. - Depending on the recipe you may need to manually knead your dough. Place the dough onto a well floured surface and knead it until it is smooth and elastic. This should take approximately 5–10 minutes.
- After kneading place the dough into a large well greased mixing bowl. Place the bowl in a warm, draft-free area and cover the bowl with a light damp cloth until the dough doubles in size.
- Plunge your fist into the centre of the risen dough to remove the excess air. Fold the outer edges into the centre and turn the dough out onto a lightly floured surface for shaping.
- Place the dough into tins for baking, or cut and shape the dough for making buns, rolls, etc.
- For the final rising stage of the dough cover it with a light damp cloth and place it in a warm, draft-free area until doubled in size again.
Finishing touches
- Sprinkle loaves or buns with sesame, poppy or caraway seeds before baking.
- Top loaves with shredded cheese during the last few minutes of baking.
- Glazes may be brushed over the dough at any time before, during or after baking.
- For a shiny crust, brush with cream or evaporated milk before baking.
- For a matt finish, brush with melted butter or margarine after baking.
connection to the mains supply
If the plug is not suitable for the socket outlets in your home, it can be removed and replaced by a plug of the correct type.
If the fuse in a moulded plug needs to be changed, the fuse cover must be refitted. The appliance must not be used without the fuse cover fitted.
If the plug is unsuitable, it should be dismantled and removed from the supply cord and an appropriate plug fitted as detailed. If you remove the plug it must not be connected to a 13 amp socket and the plug must be disposed of immediately.
If the terminals in the plug are not marked or if you are unsure about the installation of the plug please contact a qualified electrician.

This symbol indicates that this unit is a Class II appliance and therefore an earth connection is not required.
Plug should be ASTA approved to BS1363
Fuse should be ASTA approved to BS1362

Ensure that the outer sheath of the cable is firmly held by the cord grip
after sales service
These appliances are built to the very highest of standards. There are no user serviceable parts. Follow these steps if the unit fails to operate:
- Check the instructions have been followed correctly.
- Check that the fuse has not blown.
- Check that the mains supply is functional.
If the appliance will still not operate, return the appliance to the place it was purchased for a replacement. To return the appliance to the Customer Service Department, follow the steps below:
- Pack it carefully (preferably in the original carton). Ensure the unit is clean.
- Enclose your name and address and quote the model number on all correspondence.
- Give the reason why you are returning it.
- If within the guarantee period, state when and where it was purchased and include proof of purchase (e.g. till receipt).
- Send it to our Customer Service Department at the address below:
Customer Service Department
Jarden Consumer Solutions (Europe) Limited
Middleton Road, Royton, Oldham
OL2 5LN, UK
Telephone: 0161 621 6900 Fax: 0161 626 0391
e-mail: enquiriesEurope@jardencs.com

Documents / ResourcesDownload manual
Here you can download full pdf version of manual, it may contain additional safety instructions, warranty information, FCC rules, etc.
Advertisement
Thank you! Your question has been received!


Need Assistance?
Do you have a question about the VFP026 that isn't answered in the manual? Leave your question here.