
Related Manuals for Camplux ME40


Summary of Contents for Camplux ME40
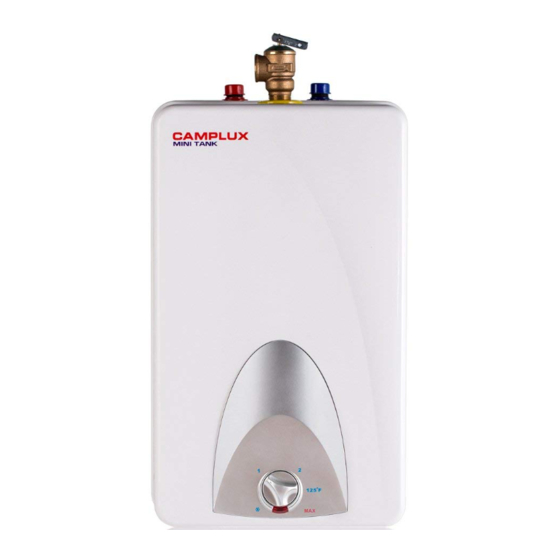
- Page 1 Electric Mini Tank – Water Heaters ME10 ME25 ME40 ME60 Installation and Operating Instruction Manual V01.2018...
-
Page 2: Table Of Contents
Table of Contents Important Safety Instructions General Information Technical Data 4 - 5 Technical Description Installation Instructions Plumbing Connections Temperature & Pressure Relief Valve Filling The Water Heater Electrical Connections Instructions For Use 10 - 11 Maintenance Instructions 11 - 14 Troubleshooting Warranty 16 - 17... -
Page 3: Important Safety Instructions
The Camplux Mini Tank water heaters can be used in most under the counter, point of use applications. Models ME10, ME25, ME40 and ME60 are designed to supply hot water for hand washing in a residential, commercial or industrial environment. The WaiWela mini tank water heaters are slow recovery, small reservoir, not intended for showers or filling tubs. -
Page 4: Technical Data
Technical Data Model ME10 ME25 ME40 ME60 Capacity Gallons Voltage 110-120 110-120 110-120 110-120 Power at 120 Vac Watts 1440 1440 1440 1440 Max. Water Pressure Weight (empty) lbs. 12 1/2 Amperage Amps Phases Assembly Figure Temperature & Water outlet... - Page 5 Dimensions Model ME10 ME25 ME40 ME60 A (inch) 12 1/2” 14 1/2” 19 1/4” 18” B (inch) 11” 11 3/4” 11 3/4” 15 3/4” C (inch) 10” 10 3/8” 10 3/8” 15 1/2” Schematic Construction Wiring Diagram Page 5...
-
Page 6: Technical Description
Technical description There are four Camplux Mini tank models, a 1.0, 2.5, a 4.0 and a 6.0 gallon model. The pressure vessel (water tank) is welded, glass lined steel and is equipped with an anode rod. The water heater is equipped with a thermostat and a high limit temperature switch. -
Page 7: Installation Instructions
Fasten the supplied mounting bracket to the wall. Use screws that are suitable for the wall material and the weight of the water heater filled to capacity (ME10 = 24 lbs ME25 = 41 lbs, ME40 = 57 lbs, ME60 = 76 lbs). -
Page 8: Temperature & Pressure Relief Valve
Temperatures and pressure relief valve: Caution Install the Temperature/Pressure Relief Valve supplied with the water heater! Install a discharge pipe from the temperature/pressure relief valve terminating at a sink or drain. Do not cap or plug the end of the discharge pipe. The discharge pipe must be unobstructed and full sized. The T/P valve is certified by a nationally recognized test lab that maintains periodic inspections of the listed equipment and meets the requirements for relief valves and automatic shut off devices for hot water supply systems ANSI 121.22-1979. -
Page 9: Filling The Water Heater
Closed system thermal expansion: Periodic discharge of the T/P relief valve or failure of the element gasket may be due to thermal expansion in a closed water supply system. The water utility supply meter may contain a check valve, back flow preventer or water pressure reducing valve which will create a closed water system. -
Page 10: Electrical Connections
The water heater is fitted with a power cord that is intended to plug into a grounded 110-120 V/AC receptacle. Adhere to all pertinent State and local codes. Install the correct size circuit breaker into the master panel. The Camplux Mini Tank water heater was manufactured and wired in accordance with UL requirements. -
Page 11: Maintenance Instructions
Setting the thermostat: The water heater is equipped with an adjustable thermostat that once set will automatically control water temperature. The red indicator lamp remains illuminated while the water is being heated. If the water in the tank is at the desired temperature the lamp will not be illuminated. The temperature adjusting knob will increase the temperature by turning the knob clockwise and decrease the water temperature by turning the knob counter clockwise. - Page 12 Maintenance instructions cont. Warning Before servicing or cleaning the water heater, disconnect the power cord from the electrical outlet. Note For most maintenance operations, the water heater will need to be drained. In all cases before draining first unplug the power cord. Draining and removing the water heater: 1.
- Page 13 Descaling the heating element cont. 3. To descale manually, let element dry and then using a non metallic brush similar to a tooth brush; brush the residue from the element. Avoid damaging the surface of the element. 4. Reinstall the element and gasket. 5.
- Page 14 Resetting the high limit switch : For various reasons the high limit safety shut off switch will occasionally shut the water heater down. This shut down will occur when water temperatures exceed 190°F. Power is automatically turned off to the heating element.
-
Page 15: Troubleshooting
Troubleshooting Problem Water does not get hot 1. Make sure the power supply is on and working. 2. If light does not come on, check that the reset button is pushed in; follow steps from previous section. 3. If the indicator light is illuminated, but water temperature does not get hot at the sink, test for a plumbing crossover as follows;... -
Page 16: Warranty
Warranty Period 1. When a failure of the inner tank of a Camplux Mini Tank water heater, installed in a single family, residential application and exposed to normal usage (not including recirculating applications), occurs within six (6) years from the date of the original installation and is supplied with potable... - Page 17 Owner should retain this document. Note Most tank water heaters eventually leak. Your Camplux water heater should be installed in such a manner that if it should leak, the resulting flow of water will not cause damage to the area in which it is installed.
-
Page 18: Schematic Disassembly & Parts List
Schematic Disassembly ME10 / ME25 / ME40 / ME60 Parts List ME10 / ME25 / ME40 / ME60 Name of Part Qty. Name of Part Qty. Tank Component Back Cover Thermostat Temp. Adjust Panel Inside Wiring Assembly Power Cord Cross Screws... - Page 19 How the owner can secure service assistance or make a warranty claim 1. Owner should contact the dealer who sold the water heater covered by this warranty or 2. Owner should submit the warranty claim directly to Junsky at the address listed below, and they will arrange for the handling of the claim.