Advertisement
Quick Links
Epson
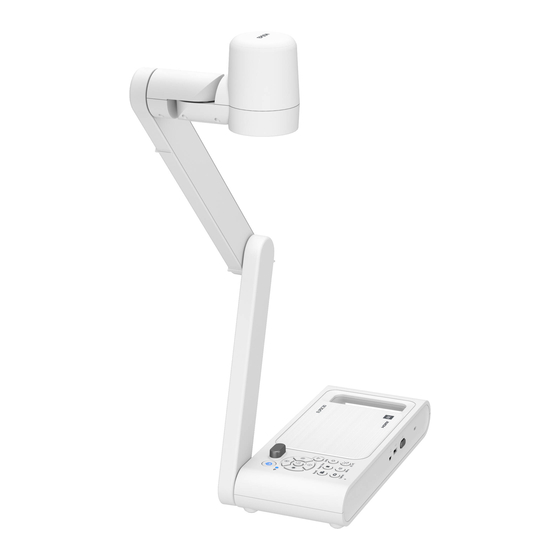
DC-30 Document Camera (ELPDC30)
®
Quick Start
IMPORTANT: Before using the product, make sure you read these instructions
and the safety instructions in the online User's Guide.
Follow these instructions to display pages from books and documents, and
three-dimensional objects. For instructions on using the microscope adapter and
other features, see the online User's Guide.
Setting up the product
1
Raise the camera arm with one hand while holding the base with your
other hand.
2
Position the camera head above the projection area.
3
Connect the document camera directly to your projector using the included
HDMI cable. Or, use the included USB cable to control your document
camera from a computer using the camera software (see "Using the
software").
Note: You can also connect to your projector wirelessly using Miracast
(see the online User's Guide for details).
4
Connect the power adapter and plug it into an electrical outlet.
5
Press the
power button to turn on the document camera.
6
Turn on your projector. Then select the source (port) on the projector that
lets you display the camera image. On the document camera, press the
DC/PC button, if necessary.
Using the product
1
Place your document on the table under the camera head. Adjust the
camera head and arm if needed.
2
Press the
Lamp button to illuminate the document.
3
Press the AF button on the document camera or remote control. Your
document is automatically focused.
4
To zoom in or out on part of the image, press the Zoom
the document camera or remote control.
Note: For more information on using the remote control, see the online
User's Guide.
5
If a computer is connected to the document camera, you can use the
DC/PC button on the document camera or remote control to switch
between the computer image and the image from the document camera.
®
When you're done using the product, turn it off and lower the camera arm
as shown.
Using the software
You can use the Easy Interactive Tools software to capture live audio and video,
as well as still images. You can also use it to make time-lapse movies, annotate
captured images, and upload your videos to popular websites.
The Epson Connect Tool for Document Camera software lets you use Miracast to
send images from the document camera to your projector. See the online User's
Guide for details.
Installing the software
Note: An Internet connection is required to obtain the product software.
1
Download and run your product's software package:
http://epson.com/support/dc30downloads (U.S.)
http://epson.ca/support/dc30downloads (Canada)
2
Follow the instructions on the screen to run the setup program.
or
button on
Advertisement

Related Manuals for Epson DC-30


Summary of Contents for Epson DC-30
- Page 1 You can also use it to make time-lapse movies, annotate captured images, and upload your videos to popular websites. The Epson Connect Tool for Document Camera software lets you use Miracast to send images from the document camera to your projector. See the online User’s Guide for details.
- Page 2 (2) this device must accept any interference received, including interference that may cause undesired operation. Trade Name: Type of Product: Switching Power Adapter Model: FSP015-DPAN3 Note: For Epson projectors, you need to select Screen Mirroring as the source to connect via Miracast.
- Page 3 2. Initial Dispute Resolution: Before submitting a claim for arbitration in accordance must accept any interference, including interference that may cause undesired operation with this Section D, you and Epson agree to try, for 60 days, to resolve any Dispute of the device.
- Page 4 ANY STATEMENTS OR REPRESENTATION MADE BY ANY OTHER PERSON OR FIRM EPSON is a registered trademark and the EPSON logo is a registered logomark of Seiko Epson Corporation. ARE VOID. SOME STATES DO NOT ALLOW LIMITATIONS ON HOW LONG IMPLIED PrivateLine is a registered trademark and Epson Connection is a service mark of Epson America, Inc.