Table of Contents
Advertisement
Quick Links
Advertisement
Table of Contents

Related Manuals for Epson ELPDC30


Summary of Contents for Epson ELPDC30
- Page 1 Document Camera User's Guide...
-
Page 2: Meaning Of Symbols In The Guide
Meaning of Symbols in the Guide • Symbols for Safety The documentation and this product use graphical symbols to show how to use this product safely. The indications and their meaning are as follows. Make sure you understand and respect these caution symbols to avoid injury to persons or property. Warning This symbol indicates information that, if ignored, could possibly result in personal injury or even death due to incorrect handling. -
Page 3: Safety Instructions
Safety Instructions Read this User's Guide and follow all safety instructions for your document camera. Keep this guide o n hand for future reference. Environmental Precautions Warning Do not use or store the document camera or remote control in a hot location, such as near a heater, in direct sunlight, or in a closed vehicle. Thermal damage, fire, or malfunction may occur. - Page 4 If water or other liquids are spilled on the device, turn off the power, unplug the AC adapter from the outlet, and contact Epson support. Continuing to use the device in this condition may cause a fire or electric shock to occur.
- Page 5 • Do not tie the power cord to other cables. If the power cord becomes damaged (the core wire is exposed, the wire is broken wire, and so on), contact Epson support. Take the following precautions when handling the plug. Failure to comply with these precautions could result in fire or electric shock: •...
- Page 6 Do not spill liquid or spray fine mist into the document camera. Liquids entering the document camera may cause malfunction, fire, or electric shock. If you spilled liquid, turn the power off, unplug the AC adapter from the electrical outlet, and contact Epson support. Using the damaged device may cause fire or electric shock.
- Page 7 Caution Use a dry cloth (or, for stubborn stains, a moist cloth that has been wrung dry) for cleaning. Do not use liquid, aerosol cleaners, or solvents such as alcohol, thinner or benzine. Water infiltration or deterioration and breakage of the product housing could result in electric shock. Be sure that the AC adapter, power plug, and power connector are unplugged from their power outlets, and that all wires are disconnected before cleaning the product.
- Page 8 Battery Precautions Caution Incorrect battery usage may cause leakage of battery fluid and battery rupture, which could result in fire, injury, or corrosion of the product. When replacing batteries, take the following precautions: • Do not use batteries of different types or mix old and new batteries. •...
-
Page 9: Table Of Contents
Image ........... . . 42 Using Epson Connect Tool for Document Camera ......25 Miracast . - Page 10 Remote Control Problems ........48 Epson Projector Contact List ....... . 49 EUROPE .
-
Page 11: Introduction
You can use this document camera to capture and project pages from books or other documents, and even three-dimensional objects. You can operate the document camera from a computer using the included Easy Interactive Tools software, or use the Epson Connect Tool for Document Camera software to connect to a... -
Page 12: Included Items
Included Items • Remote control with 2 AA batteries • Power cord and adapter • HDMI cable • USB cable • Quick Start sheet • Microscope adapter... -
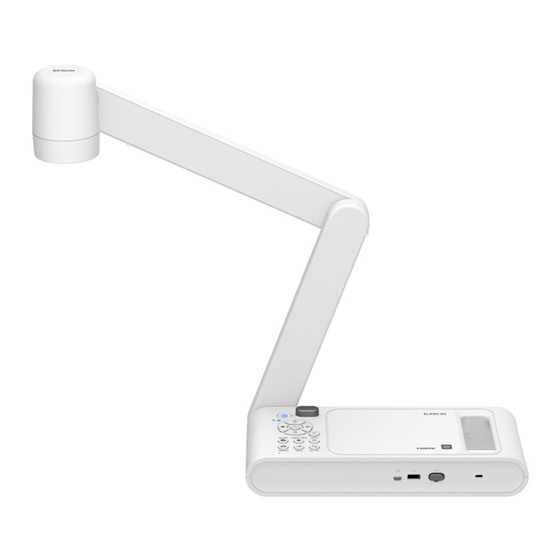
Page 13: Document Camera Parts
Document Camera Parts Top/Side/Rear Name Function s "Control Panel" Control panel p.14 Inputs image signals to a computer connected USB Mini-B port with a USB cable. USB-A port Outputs images to image devices such as projectors. Wi-Fi dongle A wireless LAN unit is connected. Security slot The security slot is compatible with the Microsaver security system manufactured by Kensington. -
Page 14: Control Panel
Document Camera Parts Control Panel Name Function Microphone Captures sound when you record a video. [Menu] button Opens and closes the menu. [DC/PC] button Lets you switch projected images between live images from the document camera and images from a connected computer. Press this during a slideshow or playback of a video to return to the camera mode. -
Page 15: Shortcut Key
Document Camera Parts Shortcut key Name Explanation Mode Lets you switch between the multiple image modes. Some functions can be selected by pressing two buttons simultaneously. Each press of the buttons switches the mode in the order shown below. Normal Motion Wide Angle Microscope... -
Page 16: Base
Document Camera Parts Base Name Function Mounting points You can attach the document camera to a table, cart, or stand with commercially available M4 bolts. You can thread them to a maximum depth of 5mm (0.35 inch). Attention Fasten the bolts securely but do not overtighten them. -
Page 17: Remote Control Buttons
Remote Control Buttons Remote Control Name Function [t] power button Turns the document camera on or off. [WiFi/USB] button Lets you switch between Wi-Fi mode and USB mode. [Capture] button Captures still images. [Freeze/Stop] button Freezes live images. Press the button again to resume projection. - Page 18 Remote Control Buttons Name Function Name Function [Default] button Resets the document camera to factory default [Resolution] button Lets you switch between the multiple resolution settings. settings. Each press of the buttons switches the mode in the Adjusts the brightness or the projected image. [Brightness] button order shown below.
-
Page 19: Led Indicators
LED Indicators Name LED Status and Meaning Power supply Lights orange: The document camera is in standby mode Flashes orange: The document camera is warming up Lights blue: Start-up of the document camera has been completed WiFi Flashes blue rapidly: The document camera is searching for a Miracast-compatible device Flashes blue slowly: The document camera is connected via Miracast... -
Page 20: Connecting
Connecting Follow the instructions in this section to set up the document camera. -
Page 21: Connecting The Document Camera To A Projector
Connecting the Document Camera to a Projector The document camera can be connected directly to a projector, external When image devices that support the HDMI CEC standard are monitor, or other video device using the HDMI cable. It can also be connected to the document camera, operations for the document connected via Miracast. -
Page 22: Connecting To A Projector Via Miracast
The connection to the selected projector is completed, and the projector will project the image from the document camera. To find out the name of the Epson projector to be connected, use the projector to display the source selection screen and select Screen Mirroring. -
Page 23: When Using A Computer
Connecting the Document Camera to a Projector When Using a Computer Images on the computer connected to the document camera are only output from the HDMI Out port. By connecting the computer to the HDMI In port and the projector to the HDMI Out port, images of PowerPoint files and other applications The p rojected i mage c an be s witched b etween t he c omputer i mages and on the computer can be projected from the projector. -
Page 24: Connecting To A Projector Using Software
Easy Download Easy Interactive Tools from the following website: Interactive Tools on the projected image. http://epson.com/support/dc30downloads (U.S.) http://epson.ca/support/dc30downloads (Canada) Connect the USB Mini-B port on the document camera to a computer using a USB cable. -
Page 25: Using Epson Connect Tool For Document Camera
Miracast. Once the connection is made, the image captured by the By using the soft ware Epson Connect Tool for Document Camera, you document camera is projected by the projector. can connect the document camera to a projector via Miracast using the computer. -
Page 26: Projecting
Projecting... -
Page 27: Positioning The Document Camera
Positioning the Document Camera Raise the camera arm with one hand while holding the base of Position the camera head above the projection area. the camera with your other hand. -
Page 28: Plugging In And Turning On
Plugging In and Turning On Connect the document camera to the projector with a cable before The power indicator flashes orange. When startup is complete, the turning on the document camera. "Connecting" p.20 power indicator stops flashing and lights blue. Startup takes approximately 20 seconds. -
Page 29: Projecting
Projecting Place your document on the table under the camera head. If necessary, you can adjust the brightness of the image using the [ ] or [ ] on the document camera or remote • The maximum document size that can be projected is control. -
Page 30: Switching The Projected Image
Projecting Switching the Projected Image Freezing an Image When a computer is connected to the document camera, you can switch To freeze the image, press the [ ] button on the document camera or the image projected from the projector using the [ ] button on the remote control. -
Page 31: Displaying Whiteboard Images
Projecting Displaying Whiteboard Images You can make an audio/video recording of your projection. The recorded images are saved in the USB flash drive. You can use the document camera to display a lecture or presentation at s "Saving Videos" p.37 the front of a room, or to capture images of a whiteboard or chalkboard. -
Page 32: Projecting Through A Microscope
Projecting Projecting Through a Microscope Projected image To display objects as seen through a microscope, use the included microscope adapter. Attach the microscope adapter to the camera head of the document camera, and rotate the adapter to fix it in place. •... - Page 33 Projecting Attach the microscope adapter to the microscope eyepiece and secure the adapter by tightening the screws.
-
Page 34: Turning Off
Turning Off Turn off the document camera after use. Press the [ ] power button on the document camera or remote control. The projected image disappears, and the power indicator shows standby state (lights orange). Disconnect the power cord and any other connected cables, and then fold down the camera arm. -
Page 35: Saving Images And Playing A Slideshow Or Video
Saving Images and Playing a Slideshow or Video You can save live images captured by the document camera to a USB flash drive. You can play a slideshow with the saved still images or play the saved videos. This section explains how to perform operations using the document camera or the remote control. You can save images using software on your computer. "Using Easy Interactive Tools"... -
Page 36: Saving Images
Saving Images You can save images captured by the document camera to a USB flash Repeat steps 2 and 3 for any additional images you want to drive as still images. save. • Images are saved in JPEG format at the resolution set in the Output Resolution setting of the document camera. -
Page 37: Saving Videos
Saving Videos You can save images and audio from the document camera to a USB • While recording, the elapsed time is displayed at the top flash drive as video. right of the screen. This is not displayed on the saved image. -
Page 38: Playing A Slideshow (Displaying Thumbnail Screen)
Playing a Slideshow (displaying thumbnail screen) You can play a slideshow with the images saved on a USB flash drive. This function is unavailable in the following situations. • When the document camera is connected to a computer with a USB cable •... -
Page 39: Displaying Saved Images Or Playing Videos
Displaying Saved Images or Playing Videos • Videos Press the [ ] button on the remote control while the live image is being projected. Press the [Enter] button to display a full-screen preview of the video you want to play, then press the [Enter] button again. Thumbnails of the images on the USB flash drive are displayed. -
Page 40: Image Adjustments And Effects
Image Adjustments and Effects The document camera provides a full range of image adjustments and effects, including freeze image, black-and-white, and the ability to change the display for color images. -
Page 41: Using The On-Screen Menu
Using the On-screen Menu select a setting. When you are done adjusting the settings, press the Press the [ ] button on the control panel or remote control to view ] button to close the menu and save your settings. the on-screen menu. -
Page 42: On-Screen Menu Table
On-Screen Menu Table Image The Image menu allows you to adjust the quality of the live video image. Setup Item Explanation Brightness The brightness level can be manually adjusted in the range of 0 to 255. To lighten the screen, select + and hold down the [Enter] button. To darken the screen, select − and hold down the [Enter] button. -
Page 43: Miracast
On-Screen Menu Table Setup Item Explanation When Manual is selected for Exposure, the exposure setting can be manually changed in the range of 0 to 99. Manual Exposure To increase the value, select + and hold down the [Enter] button. To decrease the value, select − and hold down the [Enter] button. - Page 44 On-Screen Menu Table Setup Item Explanation Output Resolution Sets the output resolution when connecting an HDMI cable to the HDMI port. You can select the maximum resolution of your output device from the following options. The highest one is the maximum resolution that the document camera can support. 3840×2160 @ 60 3840×2160 @ 30 1920×1080...
-
Page 45: Playback Mode
On-Screen Menu Table Playback Mode This menu allows you to make settings for playing back and projecting images or videos saved by the document camera. This menu is available when a commercially available USB flash drive is connected to the document camera. This menu is not available when the document camera is in the following states: •... - Page 46 Solving Problems...
-
Page 47: Problems And Solutions
] power button again, stop using the document Cannot focus on a three dimensional subject camera, contact Epson support or the nearest service center provided If the subject is a three-dimensional object, the following will make it in this guide. -
Page 48: Problems Related To Usb Flash Drive
Problems and Solutions To return all image settings to their initial values, select the Reset menu. s "Image" p.42 Problems related to USB Flash Drive Some images do not appear Check the file format when copying images to the USB flash drive from a computer. -
Page 49: Epson Projector Contact List
Epson Projector Contact List See the following contact list if any problems occur when using the http://www.mrservis.hr document camera outside Japan. CYPRUS See the Web Home Page provided with each contact for the latest contact information. If the country you are in is not provided, see the main A.T. - Page 50 Epson Projector Contact List GREECE LUXEMBURG Info Quest Technologies S.A. Epson Europe B.V. Branch office Belgium https://www.infoquest.gr https://www.epson.be HUNGARY NORTH MACEDONIA Epson Europe B.V. Digit Computer Engineering Branch Office Hungary http://www.digit.com.mk https://www.epson.hu NETHERLANDS IRELAND Epson Europe B.V. Benelux sales office Epson (UK) Ltd.
- Page 51 Indication of the manufacturer and the importer in accordance with https://aigo.rs requirements of United Kingdom directive SLOVAKIA Manufacturer: SEIKO EPSON CORPORATION Epson EUROPE B.V. Branch Office Czech Republic Address: 3-5, Owa 3-chome, Suwa-shi, Nagano-ken 392-8502 Japan Telephone: 81-266-52-3131 https://www.epson.sk http://www.epson.com/ SLOVENIA Birotehna d.o.o...
-
Page 52: Africa
NORTH, CENTRAL AMERICA & CARIBBEAN BRAZIL ISLANDS Epson do Brasil https://epson.com.br CANADA CHILE Epson Canada, Ltd. Epson Chile S.A. http://epson.ca/support https://epson.cl COSTA RICA COLOMBIA Epson Costa Rica, S.A. Epson Colombia Ltd. https://epson.co.cr https://epson.com.co MEXICO PERU Epson Mexico, S.A. de C.V. Epson Peru S.A. -
Page 53: Asia And Oceania (Country/Region)
Epson Projector Contact List https://epson.com.pe https://www.epson.jp VENEZUELA KOREA Epson Venezuela S.A. Epson Korea Co., Ltd. https://epson.com.ve http://www.epson.co.kr MALAYSIA ASIA AND OCEANIA (Country/Region) Epson Malaysia Sdn. Bhd. https://www.epson.com.my AUSTRALIA Epson Australia Pty. Ltd. NEW ZEALAND https://www.epson.com.au Epson New Zealand https://www.epson.co.nz CHINA Epson (CHINA) CO., Ltd. -
Page 54: Appendix
Appendix... -
Page 55: Specifications
Specifications General Specifications Product name ELPDC30 Open (W ^ D ^ H): 23.1 ^ 21.8 ^ 6.3 inches (586 × 554 × 159 mm) Dimensions Folded (W ^ D ^ H): 14.3 × 3.3 × 6.3 inches (362 ^ 85 ^ 159 mm) Type of sensor 1/3.2 inch CMOS sensor... - Page 56 Specifications Input port HDMI port Output port HDMI port miniUSB This can also be used as an output port Connector port 1: Wi-Fi dongle USB-A 1: USB Flash Drive *1: HDMI CEC is supported. However, the operation of all compatible devices is not guaranteed. *2: USB 2.0 is supported.
-
Page 57: List Of Supported Resolutions
Specifications List of Supported Resolutions HDMI output 4K (3840 × 2160 @ 30/60 Hz HDTV (1920 × 1080 @ 60 Hz, 1280 × 720 @ 60 Hz) XGA (1024 × 764 @ 60 Hz) miniUSB output 320 × 180 pixels 320 ×... -
Page 58: Zoom Magnification And Projection Distance By Image Mode
Specifications Zoom Magnification and Projection Distance by Image Mode Maximum optical zoom Maximum digital zoom Image Mode Shooting distance range Aspect Ratio/Frame Rate magnification magnification Normal 16:9@30 fps Motion 3.9 to 31.5 inches (10 to 80 cm) 3.2x 16:9@60 fps Wide Angle 4:3@30 fps 23.9x... -
Page 59: Optional Items
Optional Items The following options and consumables are available. Please purchase according to your application. These optional items are current as of April 2023. They are subject to change without notice. Use this case to carry the document camera. Soft carrying case ELPKS72 (V12H001K72) -
Page 60: Safety Standard Compliance Symbols And Descriptions
Safety Standard Compliance Symbols and Descriptions The following table lists the meaning of the safety symbols labeled on the Approved Symbol mark Explanation equipment. standards IEC60417 Battery, general Approved Symbol mark Explanation No.5001B On battery powered equipment. To standards identify a device for instance a cover for IEC60417 "ON"... - Page 61 Safety Standard Compliance Symbols and Descriptions Approved Approved Symbol mark Explanation Symbol mark Explanation standards standards ISO 3864 Contact prohibition ISO7010 Warning; Optical radiation To indicate injury that could occur due No.W027 To warn of optical radiation. Taking care to touching a specific part of the ISO 3864 to avoid injury to eyes and skin when in equipment.
-
Page 62: Notice
Supplier's DECLARATION of CONFORMITY According to 47CFR, Part 2 and 15 Class B Personal Computers and Peripherals; and/or CPU Boards and Power Supplies used with Class B Personal Computers Epson America, Inc. Located at: 3131 Katella Avenue, Los Alamitos, CA Tel:... - Page 63 Notice Supplier's DECLARATION of CONFORMITY According to 47CFR, Part 2 and 15 Class B external switching power supplies AVer Information, Inc. 668 Mission Ct., Fremont, CA 94539 Located at: (408) 263-3828 Tel: Declare under sole responsibility that the product identified herein, complies with 47CFR Part 2 and 15 of the FCC rules as a Class B digital device.
-
Page 64: Copyrights And Trademarks
© 2023 Epson America, Inc. photocopying, recording, or otherwise, without the prior written permission of Seiko 5/23 Epson Corporation. No patent liability is assumed with respect to the use of the information contained herein. Neither is any liability assumed for damages resulting CPD-63460 from the use of the information contained herein.