Advertisement
- 1 Installation and Connection
- 2 Parts and Controls
- 3 Listening to Music/Sound
- 4 Adjusting the Sound
- 5 Using the Speaker System by Interlocking with a TV
- 6 Saving Power Consumption
- 7 Changing the Settings
- 8 Troubleshooting
- 9 Specifications
- 10 Documents / Resources
Installation and Connection
Connecting a TV with an HDMI Cable and/or Optical Cable
Refer to Startup Guide (separate document).
Mounting the Bar Speaker on a Wall

You can mount the bar speaker on a wall.
Notes
- Prepare screws (not supplied) that are suitable for the wall material and strength. As a plasterboard wall is especially fragile, attach the screws securely in the wall beam. Install the bar speaker horizontally, hung by screws in studs in a continuous flat section of the wall.
- Have the installation done by a Sony dealer or licensed contractor and pay special attention to safety during the installation.
- If using a cable with a large plug, it may not be possible to mount the bar speaker on a wall.
- Sony shall not be held responsible for accidents or damage caused by improper installation, insufficient wall strength, improper screw installation, natural disasters, etc.
- Prepare two screws (not supplied) that are suitable for the wall mount holes on the rear of the bar speaker.

- Align the vertical line above the "
![]()
![]() TV CENTER LINE" printed on the WALL MOUNT TEMPLATE (supplied) with the center of the width of your TV.
TV CENTER LINE" printed on the WALL MOUNT TEMPLATE (supplied) with the center of the width of your TV.

- Align the "
![]()
![]() TV BOTTOM LINE" printed on the WALL MOUNT TEMPLATE with the bottom of your TV, then adhere the WALL MOUNT TEMPLATE on the wall with a commercially available adhesive tape, etc.
TV BOTTOM LINE" printed on the WALL MOUNT TEMPLATE with the bottom of your TV, then adhere the WALL MOUNT TEMPLATE on the wall with a commercially available adhesive tape, etc.

- Fasten the screws prepared in step 1 securely into the screw marks (
![]() ) on the "
) on the " ![]()
![]() SCREW LINE" printed on the WALL MOUNT TEMPLATE.
SCREW LINE" printed on the WALL MOUNT TEMPLATE.

- Remove the WALL MOUNT TEMPLATE.
- Hang the bar speaker on the screws.
Align the holes on the rear of the bar speaker with the screws, then hang the bar speaker on the two screws.


 TV CENTER LINE" printed on the WALL MOUNT TEMPLATE (supplied) with the center of the width of your TV.

 TV BOTTOM LINE" printed on the WALL MOUNT TEMPLATE with the bottom of your TV, then adhere the WALL MOUNT TEMPLATE on the wall with a commercially available adhesive tape, etc.
 ) on the "
  SCREW LINE" printed on the WALL MOUNT TEMPLATE.

Note
When sticking WALL MOUNT TEMPLATE, smooth it out fully.
Connecting the Subwoofer Manually
If you cannot connect the subwoofer to the speaker system, or you use multiple wireless products and want to specify the wireless connection to link the speaker system to the subwoofer, perform the manual connection.

- Press and hold
![]() (BLUETOOTH) and + (volume) on the bar speaker for more than 5 seconds.
(BLUETOOTH) and + (volume) on the bar speaker for more than 5 seconds.
[SECURE LINK] appears, then[LINK] flashes in the front panel display.
To cancel the manual connection, press and hold![]() (BLUETOOTH) and + (volume) on the bar speaker for more than 5 seconds again.
(BLUETOOTH) and + (volume) on the bar speaker for more than 5 seconds again. - Press LINK on the subwoofer.
The manual connection starts.
The power indicator of the subwoofer flashes in amber. - Make sure that [DONE] appears in the front panel display.
The manual connection is established and the power indicator of the subwoofer lights in amber.
Note
If [ERROR] appears in the front panel display, the connection of the subwoofer has not been established. Perform the manual connection again.
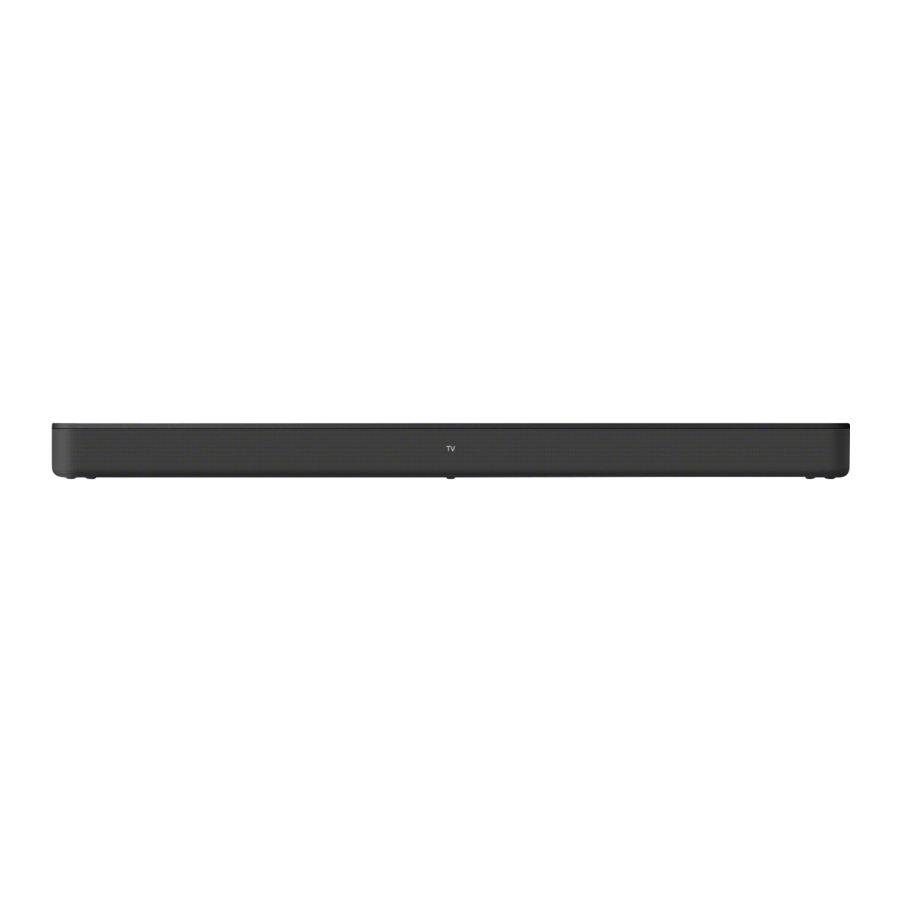
Parts and Controls
Bar Speaker
Front

![]() (power) button
(power) button
Turns on the speaker system or sets it to standby mode.![]() (TV) button
(TV) button ![]() (BLUETOOTH) button
(BLUETOOTH) button - +/– (volume) buttons
- BLUETOOTH indicator


- Flashes twice in blue: During pairing standby status
- Flashes in blue: BLUETOOTH connection is being attempted.
- Lights in blue: BLUETOOTH connection has been established.
- Front panel display
- Remote control sensor
Point the remote control at the remote control sensor to operate the speaker system.
Rear

- AC inlet
- HDMI OUT (TV (ARC)) jack
Connect a TV that has an HDMI input jack with an HDMI cable. The speaker system is compatible with Audio Return Channel (ARC).
ARC is the function that sends TV sound to an AV device such as the speaker system from the TV's HDMI jack. - TV IN (OPTICAL) jack
- IR repeater
Transmits the remote signal of the TV remote control to the TV. - UPDATE port
Connect the USB memory when updating the speaker system.
Subwoofer

- Power indicator
- Lights in green: The subwoofer is connected to the speaker system.
- Lights in red: The subwoofer is in standby mode.
- Lights in amber: The subwoofer is connected to the speaker system with the manual connection.
- Flashes slowly in green: The subwoofer is attempting to connect to the speaker system.
- Flashes slowly in amber: The subwoofer is attempting to connect to the speaker system with the manual connection.
- Flashes twice in amber: The subwoofer is in pairing standby status with the manual connection.
- Flashes quickly in amber: The software is updating.
- Turns off: The subwoofer is turned off.
![]() (power) button
(power) button
Turns on or off the subwoofer.- LINK button
- AC inlet
 (power) button
Remote Control
Some buttons function differently depending on how long the button is pressed. This section explains the functions when pressed shortly.
For details about other functions, refer to "Changing the Settings" on the back page.

- INPUT
Selects the input for playback on the speaker system.
Each time you press INPUT, the input source toggles between the TV and BLUETOOTH input. - SOUND FIELD
Turns on/off the surround effect. ![]() (volume) + */–
(volume) + */–
Adjusts the volume.- BASS +/–
Adjusts the subwoofer volume. ![]() (power)
(power)
Turns on the speaker system or sets it to standby mode.- VOICE
Turns on/off the voice mode. - NIGHT
Turns on/off the night mode. ![]() (muting)
(muting)
Mutes the sound temporarily.
 (volume) + */–
 (power)
 (muting)
* The  (volume) + button has a tactile dot. Use it as a guide during operation.
About the replacement of batteries for the remote control
When the speaker system does not respond by operating with the remote control, replace two batteries with new batteries.
Use R03 (size AAA) manganese batteries for replacement.
Listening to Music/Sound
Listening to a TV Connected with an HDMI Cable (ARC) or Optical Digital Cable

You can listen to TV sound on the speaker system.

- Press INPUT repeatedly to select [TV] in the front panel display.
- Adjust the volume.
- Adjust the volume by pressing
![]() (volume) +/– on the remote control.
(volume) +/– on the remote control. - Adjust the subwoofer volume by pressing BASS +/– on the remote control.
- Adjust the volume by pressing
 (volume) +/– on the remote control.
Note
When you connect the TV to both the HDMI OUT (TV (ARC)) and TV IN (OPTICAL) jacks, the jack for audio input is selected depending on which audio signal is input first.
Tip
You can also select the input by pressing  (TV) on the bar speaker.
Listening to Music from a Mobile Device with the BLUETOOTH Function
You can listen to music stored on a mobile device such as a smartphone or tablet via wireless connection by connecting the speaker system and the mobile device with the BLUETOOTH function. When connecting to the mobile device with the BLUETOOTH function, you can perform operations simply through the speaker system without turning the TV on.

Listening to Music by Pairing with a Mobile Device
You need to perform pairing of the speaker system and mobile device by using the BLUETOOTH function.
Pairing is the process required to mutually register the information on BLUETOOTH devices to be connected wirelessly in advance.

- Press and hold
![]() (BLUETOOTH) on the bar speaker for 2 seconds.
(BLUETOOTH) on the bar speaker for 2 seconds.

- Make sure that the BLUETOOTH indicator on the bar speaker flashes twice repeatedly in blue and [PAIRING] appears in the front panel display.
The speaker system enters the pairing mode.

- On the mobile device, search for the speaker system by performing the pairing operation.
The list of the BLUETOOTH devices that are detected appears on the screen of the mobile device.
For the operation method to pair the BLUETOOTH device to the mobile device, refer to the operating instructions of the mobile device. - Pair the speaker system and mobile device by selecting "HT-SD40" from the list on the screen of the mobile device.
If a passkey is requested, enter "0000." - Make sure that the BLUETOOTH indicator on the bar speaker lights in blue and [BT] appears in the front panel display.
A connection between the speaker system and mobile device has been established. - Start audio playback with the music app on the connected mobile device.
Sound is output from the speaker system. - Adjust the volume.
- Adjust the volume by pressing
![]() (volume) +/– on the remote control.
(volume) +/– on the remote control. - Adjust the subwoofer volume by pressing BASS +/– on the remote control.
- Adjust the volume by pressing
 (BLUETOOTH) on the bar speaker for 2 seconds.

 (volume) +/– on the remote control.
Notes
- You can pair up to 9 BLUETOOTH devices. If a 10th BLUETOOTH device is paired, the oldest connected device will be replaced by the new one.
- Perform pairing for the second and subsequent mobile devices.
Tips
- You can check the connection status of the BLUETOOTH function by checking the BLUETOOTH indicator status.
- While the BLUETOOTH input is being selected, the speaker system enters the pairing mode by pressing
![]() (BLUETOOTH) on the bar speaker shortly.
(BLUETOOTH) on the bar speaker shortly.
 (BLUETOOTH) on the bar speaker shortly.
Listening to Music from the Paired Mobile Device

- Turn the BLUETOOTH function of the mobile device on.
- Press INPUT repeatedly to select [BT] or press
![]() (BLUETOOTH) on the bar speaker shortly.
(BLUETOOTH) on the bar speaker shortly.
The BLUETOOTH indicator flashes and the speaker system automatically reconnects to the BLUETOOTH device it was most recently connected to. - Make sure that the BLUETOOTH indicator on the bar speaker lights in blue and [BT] appears in the front panel display.
A connection between the speaker system and mobile device has been established. - Start audio playback with the music app on the connected mobile device.
Sound is output from the speaker system. - Adjust the volume.
- Adjust the volume by pressing
![]() (volume) +/– on the remote control.
(volume) +/– on the remote control. - Adjust the subwoofer volume by pressing BASS +/– on the remote control.
- Adjust the volume by pressing
 (volume) +/– on the remote control.
Adjusting the Sound
Enjoying Surround Effect (SOUND FIELD)
You can turn the surround effect on or off to suit sound sources.

- Press SOUND FIELD to select the setting.
The setting appears in the front panel display.
| Setting | Explanation |
| [SF.ON] | The sound is output with the surround effect. This setting is suitable for experiencing the surround sound with presence. |
| [SF.OFF] | The sound is output without the surround effect. This setting is suitable for listening to music or news. |
Making Dialogs Clearer (VOICE)

- Press VOICE to select the setting.
The setting appears in the front panel display.
| Setting | Explanation |
| [Vo. ON] | Dialog is easily heard by enhancing dialog range. |
| [Vo. OFF] | Deactivates the voice mode function. |
Enjoying Clear Sound with Low Volume at Midnight (NIGHT)

- Press NIGHT to select the setting.
The setting appears in the front panel display.
| Setting | Explanation |
| [N.ON] | Sound is output at low volume with minimum loss of fidelity and clarity of dialog. |
| [N.OFF] | Deactivates the night mode function. |
Note
When you turn the speaker system off, this setting is set to [N.OFF] automatically.
Using the Speaker System by Interlocking with a TV
Operating the Speaker System by Interlocking with a TV (Control for HDMI Function)
Connecting a TV compatible with the Control for HDMI function using an HDMI cable enables you to interlock the speaker system operation such as power on/off or volume adjustment with a TV.
About the Control for HDMI function
The Control for HDMI function is a function that enables operation of devices connected with an HDMI (High-Definition Multimedia Interface) cable by interlocking them.
Although this function works for devices compatible with the Control for HDMI function, it may not work if connecting devices other than those manufactured by Sony.
Preparing to Operate by Interlocking with a TV
Enable the Control for HDMI function settings of the TV connected to the speaker system with an HDMI cable.
The default setting of the Control for HDMI function of the speaker system is [ON].
Tips
- When connecting a device such as a Blu-ray Disc player to a TV with an HDMI cable, enable its Control for HDMI function.
- To enable the Control for HDMI function of a TV or Blu-ray Disc player, refer to their operating instructions.
- If you enable the Control for HDMI ("BRAVIA" sync) function when using a TV manufactured by Sony, the Control for HDMI function of the speaker system is also enabled automatically. When the setting is complete, [DONE] appears in the front panel display.
Performing Power Operation or Volume Adjustment by a TV Remote Control
When turning the TV on/off or adjusting the volume using the TV remote control, the speaker system power operation or volume adjustment is interlocked.

Power interlocking
When you turn on or off the TV, the speaker system will turn on or off automatically.
Note
If you turn off the speaker system before turning off the TV, the speaker system may not turn on automatically even though you turn on the TV next time. In this case, perform the following operation.
- Select the speaker system for the sound output device in the TV menu.
- When using Sony TV, turn on the speaker system while the TV is turned on.
Volume adjustment
The sound of the TV you are watching is output from the speaker system automatically. You can adjust the speaker system volume by the TV remote control.
Tip
You can change the Control for HDMI settings by following procedure.
- Press and hold VOICE on the remote control for more than 5 seconds.
[CONTROL FOR HDMI] appears in the front panel display. - Press
![]() (volume) +/– on the remote control to display the desired setting in the front panel display.
(volume) +/– on the remote control to display the desired setting in the front panel display. - Wait until the displayed setting disappears from the front panel display.
The setting is fixed.
 (volume) +/– on the remote control to display the desired setting in the front panel display.
Operating the Speaker System by Interlocking with a TV Compatible with the BRAVIA Sync Function
"BRAVIA" Sync is an extended function developed by Sony based on the Control for HDMI function. By connecting "BRAVIA" Sync-compatible devices such as a TV using an HDMI cable, you can control the devices by interlocking them with each other.
To use "BRAVIA" Sync
"BRAVIA" Sync is enabled by enabling the Control for HDMI function of the Sony device. For the operation to enable the Control for HDMI function, see "Preparing to Operate by Interlocking with a TV."
What You Can Do with BRAVIA Sync
Control for HDMI function
- Power interlocking
- Volume adjustment
Saving Power Consumption
To use the speaker system with saving power consumption, change the following settings.
Turning the Speaker System Off by Detecting the Using State
When you set the auto standby function to on, the speaker system enters standby mode automatically when you do not operate the speaker system for about 20 minutes and the speaker system is not receiving an input signal.
- Press and hold
![]() (power) and
(power) and ![]() (TV) on the bar speaker for more than 5 seconds.
(TV) on the bar speaker for more than 5 seconds.
[AUTO STANDBY] and the current setting appear in the front panel display. - Press
![]() (volume) +/– on the remote control to display the desired setting in the front panel display.
(volume) +/– on the remote control to display the desired setting in the front panel display. - Wait until the displayed setting disappears from the front panel display.
The setting is fixed.
 (power) and
  (TV) on the bar speaker for more than 5 seconds.
 (volume) +/– on the remote control to display the desired setting in the front panel display.
Saving Power in Standby Mode
To save power consumption during the standby mode, set the BLUETOOTH standby mode and Control for HDMI function to off.
To change the BLUETOOTH standby mode setting, press and hold  (power),
  (BLUETOOTH), and – (volume) on the bar speaker for more than 5 seconds (the changed setting appears in the front panel display).
To change the Control for HDMI function setting, press and hold VOICE on the remote control for more than 5 seconds to display the setting in the front panel display, then press  (volume) +/– on the remote control to select the desired setting.
Changing the Settings
Audio Settings

BLUETOOTH Settings

Front Panel Display/Indicators Settings

Other Settings/Functions

Troubleshooting
If the speaker system does not work properly, handle it in the following order.
- Search for the cause and solution of the issue using this troubleshooting.
- Reset the speaker system.
All the settings of the speaker system return to their initial status. For details, see "Resetting the Speaker System."
Should any problems persist, consult your nearest Sony dealer.
Power
The speaker system does not power up.
- Check that the AC power cord (mains lead) is connected securely.
- Disconnect the AC power cord (mains lead) from the wall outlet (mains), and then reconnect after several minutes.
The speaker system is turned off automatically.
- The auto standby function is working. Press and hold
![]() (power) and
(power) and ![]() (TV) on the bar speaker for more than 5 seconds to display [AUTO STANDBY] in the front panel display, then press
(TV) on the bar speaker for more than 5 seconds to display [AUTO STANDBY] in the front panel display, then press ![]() (volume) +/– on the remote control to display [OFF] in the front panel display.
(volume) +/– on the remote control to display [OFF] in the front panel display.
 (power) and
  (TV) on the bar speaker for more than 5 seconds to display [AUTO STANDBY] in the front panel display, then press
  (volume) +/– on the remote control to display [OFF] in the front panel display.
The speaker system does not turn on even when the TV is turned on.
- Set the Control for HDMI function to on. Press and hold VOICE on the remote control for more than 5 seconds to display [CONTROL FOR HDMI] in the front panel display, then press
![]() (volume) +/– on the remote control to display [ON] in the front panel display.
(volume) +/– on the remote control to display [ON] in the front panel display.
The TV must support the Control for HDMI function. For details, refer to the operating instructions of your TV. - Check the speaker settings of the TV. The speaker system power syncs with the speaker settings of the TV. For details, refer to the operating instructions of your TV.
- Depending on the TV, if the sound was output from the speakers of the TV the previous time, the speaker system may not turn on by interlocking with the TV power even when the TV is turned on.
The speaker system turns off when the TV is turned off.
- Check the setting of the Control for HDMI function by pressing and holding VOICE on the remote control for more than 5 seconds to display [CONTROL FOR HDMI] in the front panel display. To change the setting, press
![]() (volume) +/– on the remote control. When the Control for HDMI function is set to on and the input of the speaker system is the TV input, the speaker system turns off automatically when you turn off the TV.
(volume) +/– on the remote control. When the Control for HDMI function is set to on and the input of the speaker system is the TV input, the speaker system turns off automatically when you turn off the TV.
The speaker system does not turn off even when the TV is turned off.
- Check the setting of the Control for HDMI function by pressing and holding VOICE on the remote control for more than 5 seconds to display [CONTROL FOR HDMI] in the front panel display. To change the setting, press
![]() (volume) +/– on the remote control. When you turn off the TV, the speaker system turns off automatically only if the input of the speaker system is the TV input. The TV must support the Control for HDMI function. For details, refer to the operating instructions of your TV.
(volume) +/– on the remote control. When you turn off the TV, the speaker system turns off automatically only if the input of the speaker system is the TV input. The TV must support the Control for HDMI function. For details, refer to the operating instructions of your TV.
Picture
There is no picture or the picture is not output correctly.
- When there is no picture while TV input is selected, select the TV channel that you want using the TV remote control.
Sound
No TV sound is output from the speaker system.
- Check the type and connection of the HDMI cable or optical digital cable that is connected to the speaker system and the TV (refer to the supplied Startup Guide).
- Disconnect the cables that are connected between the TV and the speaker system, then connect them firmly again. Disconnect the AC power cords of the TV and the speaker system from the AC outlets (mains), then connect them again.
- When the speaker system and TV are connected with an HDMI cable only, check the following.
- The HDMI jack of the connected TV is labeled with "ARC."
- The Control for HDMI function of the TV is set to on.
- On the speaker system, the Control for HDMI function is set to on. Press and hold VOICE on the remote control for more than 5 seconds to display [CONTROL FOR HDMI] in the front panel display, then press
![]() (volume) +/– on the remote control to display [ON] in the front panel display.
(volume) +/– on the remote control to display [ON] in the front panel display.
- If your TV is not compatible with ARC, connect the optical digital cable (supplied) (refer to the supplied Startup Guide). If the TV is not compatible with ARC, TV sound will not be output from the speaker system even if the speaker system is connected to the TV's HDMI IN jack.
- Select the TV input by pressing INPUT.
- Increase the volume on the TV or cancel muting.
- Depending on the order in which you turn on the TV and the speaker system, the speaker system may be muted. If this happens, turn on the TV first, then the speaker system.
- Set the speakers setting of the TV (BRAVIA) to Audio System. Refer to the operating instructions of your TV regarding how to set the TV.
- Check the sound output of the TV. Refer to the operating instructions of the TV for the TV settings.
- The speaker system supports the Dolby Digital and PCM audio formats. When you playback an unsupported format, set the digital audio out setting of the TV (BRAVIA) to "PCM." For details, refer to the operating instructions of your TV.
The sound is output from both the speaker system and the TV.
- Change the audio output setting of the TV so that the TV sound is output from the external speaker.
- Set the TV volume to minimum.
The output sound of the speaker system is not the same level as that of the TV even though the values of the volume level on the speaker system and TV are set to the same value.
- If the Control for HDMI function is set to on, the value of the volume level on the speaker system may appear on your TV as the TV volume. The output sound levels of the speaker system and TV differ even though the values of the volume level on the speaker system and TV are set to the same value. The output sound levels of the speaker system and TV differ depending on the sound processing characteristics of each, and it is not a malfunction.
The surround effect cannot be obtained.
- Depending on the input signal and the sound field setting, surround sound processing may not work effectively. The surround effect may be subtle, depending on the program or disc.
- To play multi channel audio, check the digital audio output setting on the device connected to the speaker system. For details, refer to the operating instructions of the connected device.
Subwoofer
No sound or only very low-level sound is heard from the subwoofer.
- Press BASS + on the remote control to increase the subwoofer volume.
- Make sure that the power indicator on the subwoofer is lit in green or amber.
- If the power indicator on the subwoofer does not light, try the following.
- Make sure the AC power cord (mains lead) of the subwoofer is connected properly.
- Press
![]() (power) of the subwoofer to turn on the power.
(power) of the subwoofer to turn on the power.
- If the power indicator on the subwoofer lights in red, try the following.
- Move the subwoofer to a location near the bar speaker so that the power indicator on the subwoofer lights in green or amber.
- Follow the steps in "Connecting the Subwoofer Manually."
- If the power indicator on the subwoofer flashes in red, press
![]() (power) of the subwoofer to turn off the power and check whether the ventilation holes of the subwoofer is blocked or not.
(power) of the subwoofer to turn off the power and check whether the ventilation holes of the subwoofer is blocked or not. - If the input sources contain very little bass sound components (i.e., a TV broadcast), the sound from the subwoofer may be difficult to hear. Play the built-in demonstration music by following the steps below and check that the sound is output from the subwoofer.
 (power) of the subwoofer to turn on the power.
- Press and hold
![]() (TV) on the bar speaker for 5 seconds.
(TV) on the bar speaker for 5 seconds.
The built-in demonstration music is played. - Press
![]() (TV) again.
(TV) again.
The built-in demonstration music is canceled and the speaker system returns to TV input.
 (TV) on the bar speaker for 5 seconds.
- Set the night mode to off by pressing NIGHT.
BASS +/– does not work and [NOT USE] appears in the front panel display.
- BASS +/– does not work when the subwoofer is not connected. Check the power and connection status of the subwoofer.
Mobile Device Connection
BLUETOOTH connection cannot be completed.
- Make sure that the BLUETOOTH indicator on the bar speaker is lit.
- Make sure the BLUETOOTH device to be connected is turned on and the BLUETOOTH function is enabled.
- Bring the BLUETOOTH device close to the bar speaker.
- Pair the speaker system and the BLUETOOTH device again. You may need to cancel the pairing with the speaker system using your BLUETOOTH device first.
- If the BLUETOOTH function is set to off, set it to on. To change the BLUETOOTH function setting, press and hold
![]() (power) and
(power) and ![]() (BLUETOOTH) on the bar speaker for more than 5 seconds (the changed setting appears in the front panel display).
(BLUETOOTH) on the bar speaker for more than 5 seconds (the changed setting appears in the front panel display).
 (power) and
  (BLUETOOTH) on the bar speaker for more than 5 seconds (the changed setting appears in the front panel display).
Pairing cannot be achieved.
- Bring the BLUETOOTH device close to the bar speaker.
- Make sure the speaker system is not receiving interference from a wireless LAN device, other 2.4 GHz wireless devices, or a microwave oven. If a device that generates electromagnetic radiation is nearby, move the device away from the speaker system.
- Pairing may not be possible if other BLUETOOTH devices are present around the speaker system. In this case, turn off the other BLUETOOTH devices.
Sound of the connected BLUETOOTH mobile device is not output from the speaker system.
- Make sure that the BLUETOOTH indicator on the bar speaker is lit.
- Bring the BLUETOOTH device close to the bar speaker.
- If a device that generates electromagnetic radiation, such as a wireless LAN device, other BLUETOOTH devices, or a microwave oven is nearby, move the device away from the speaker system.
- Remove any obstacle between the bar speaker and the BLUETOOTH device or move the bar speaker away from the obstacle.
- If the bar speaker is installed under the TV, move the bar speaker away from the TV.
- Reposition the connected BLUETOOTH device.
- Switch the wireless LAN frequency of any nearby wireless LAN router or PC to 5 GHz range.
- Increase the volume on the connected BLUETOOTH device.
The sound is not in sync with the image.
- When you are watching movies, you may hear the sound with a slight delay from the image.
Remote Control
The remote control of the speaker system does not function.
- Point the remote control at the remote control sensor on the bar speaker.
- Remove any obstacles in the path between the remote control and the speaker system.
- Replace both batteries in the remote control with new ones, if they are weak.
- Make sure you are pressing the correct button on the remote control.
The TV remote control does not work.
- Install the bar speaker so that it does not obstruct the remote control sensor of the TV.
- This problem might be solved by enabling the IR repeater function. Press and hold
![]() (BLUETOOTH) and – (volume) on the bar speaker for more than 5 seconds to display [IR REPEATER] in the front panel display, then press
(BLUETOOTH) and – (volume) on the bar speaker for more than 5 seconds to display [IR REPEATER] in the front panel display, then press ![]() (volume) +/– on the remote control to display [ON] in the front panel display.
(volume) +/– on the remote control to display [ON] in the front panel display.
 (BLUETOOTH) and – (volume) on the bar speaker for more than 5 seconds to display [IR REPEATER] in the front panel display, then press
  (volume) +/– on the remote control to display [ON] in the front panel display.
Others
The Control for HDMI function does not work properly.
- Check the connection with the speaker system (refer to the supplied Startup Guide).
- Enable the Control for HDMI function on the TV. For details, refer to the operating instructions of your TV.
- Wait a while, and then try again. If you unplug the speaker system, it will take a while before operations can be made. Wait for 15 seconds or longer, and then try again.
- Make sure the TV connected to the speaker system supports the Control for HDMI function.
- The type and number of devices that can be controlled by the Control for HDMI function is restricted by the HDMI CEC standard as follows:
- Recording devices (Blu-ray Disc recorder, DVD recorder, etc.): up to 3 devices
- Playback devices (Blu-ray Disc player, DVD player, etc.): up to 3 devices
- Tuner-related devices: up to 4 devices
- Audio system (receiver/headphone): up to 1 device (used by the speaker system)
[PROTECT] is scrolled in the front panel display, then the speaker system is turned off after 5 seconds.
- The protection feature is activated. Disconnect the AC power cord (mains lead) and make sure that the ventilations of the bar speaker are not covered and turn on the speaker system after a while.
Sensors of the TV do not work properly.
- The bar speaker may block some sensors (such as the brightness sensor), the remote control sensor of your TV or the emitter for 3D glasses (infrared transmission) of a 3D TV that supports the infrared 3D glass system, or wireless communication. Move the bar speaker away from the TV within a range that allows those parts to operate properly. For the locations of the sensors and remote control receiver, refer to the operating instructions of the TV.
The speaker system does not work properly.
- The speaker system may be in demo mode. To cancel demo mode, reset the speaker system. Press and hold
![]() (power) and – (volume) on the bar speaker for more than 5 seconds.
(power) and – (volume) on the bar speaker for more than 5 seconds.
 (power) and – (volume) on the bar speaker for more than 5 seconds.
The following message appears.

* This screen is an example for English.
- Select the TV program by using the TV remote control.
Resetting the Speaker System
If the speaker system does not operate properly, reset the speaker system as follows.
- Press and hold
![]() (power) and – (volume) on the bar speaker for more than 5 seconds.
(power) and – (volume) on the bar speaker for more than 5 seconds.
[RESET] appears in the front panel display, and the settings return to their initial status. - Disconnect the AC power cord (mains lead).
- Connect the AC power cord (mains lead), then press
![]() (power) to turn on the speaker system.
(power) to turn on the speaker system.
Specifications
Bar Speaker
SA-SD40
Amplifier section
U.S. models:
POWER OUTPUT AND TOTAL HARMONIC DISTORTION:
(FTC)
Front L + Front R:
With 4 ohms loads, both channels driven, from 200 - 20,000 Hz; rated 20 W per channel minimum RMS power, with no more than 1% total harmonic distortion from 250 mW to rated output.
POWER OUTPUT (reference)
Front L/Front R speaker: 100 W (per channel at 4 ohms, 1 kHz)
Canadian models:
POWER OUTPUT (rated)
Front L + Front R: 60 W + 60 W (at 4 ohms, 1 kHz, 1% THD)
POWER OUTPUT (reference)
Front L/Front R speaker: 100 W (per channel at 4 ohms, 1 kHz)
Input
TV IN (OPTICAL)
Output
HDMI OUT (TV (ARC))
HDMI section
Connector
Type A (19 pin)
USB section
UPDATE port:
Type A (For software update only)
BLUETOOTH section
Communication system
BLUETOOTH Specification version 5.0
Output
BLUETOOTH Specification Power Class 1
Maximum communication range
Line of sight approx. 25 m (82 ft) 1)
Maximum number of devices to be registered
Mobile device: 9 devices
Sony TV: 1 device
Frequency band
2.4 GHz band (2.4000 GHz - 2.4835 GHz)
Modulation method
FHSS (Freq Hopping Spread Spectrum)
Compatible BLUETOOTH profiles2)
A2DP (Advanced Audio Distribution Profile)
AVRCP (Audio Video Remote Control Profile)
Supported Codec3)
SBC4)
Transmission range (A2DP)
20 Hz - 20,000 Hz (Sampling frequency 32 kHz, 44.1 kHz, 48 kHz)
1) The actual range will vary depending on factors such as obstacles between devices, magnetic fields around a microwave oven, static electricity, cordless phone use, reception sensitivity, the operating system, software applications, etc.
2) BLUETOOTH standard profiles indicate the purpose of BLUETOOTH communication between devices.
3) Codec: Audio signal compression and conversion format
4) Abbreviation for Subband Codec
Front L/Front R speaker section
Speaker system
2 speaker system
Speaker
52 mm × 100 mm (2 1/8 in × 4 in) cone type, 4 ohms
General
Power requirements
120 V AC, 60 Hz
Power consumption
On: 35 W
Standby mode: 0.5 W or less (Power Saving mode)
(When Control for HDMI function and BLUETOOTH standby mode are set to off)
Standby mode: 2 W or less*
(When Control for HDMI function and BLUETOOTH standby mode are set to on)
* The speaker system will automatically enter Power Saving mode when there is no HDMI connection and no BLUETOOTH pairing history.
Dimensions* (approx.) (w/h/d)
900 mm × 64 mm × 88 mm (35 1/2 in × 2 5/8 in × 3 1/2 in)
* Not Including projection portion
Mass (approx.)
2.4 kg (5 lb 5 oz)
Subwoofer
SA-WSD40
POWER OUTPUT (reference)
130 W (at 4 ohms, 100 Hz)
Speaker system
Bass reflex
Speaker
160 mm (6 1/2 in) cone type, 4 ohms
Power requirements
120 V AC, 60 Hz
Power consumption
On: 20 W
Standby mode: 0.5 W or less
Dimensions* (approx.) (w/h/d)
192 mm × 387 mm × 400 mm (7 5/8 in × 15 1/4 in × 15 3/4 in)
* Not Including projection portion
Mass (approx.)
7.2 kg (15 lb 14 oz)
Wireless Transmitter/Receiver Section
Frequency band
2.4 GHz (2.404 GHz - 2.476 GHz)
Modulation method
GFSK
Supplied Accessories
- Remote control (1)
- R03 (size AAA) battery (2)
- WALL MOUNT TEMPLATE (1)
- Optical digital cable (1)
- AC power cord (mains lead) (2)
- Startup Guide
- Operating Instructions (this document)
Design and specifications are subject to change without notice.
Supported Input Audio Formats
HDMI OUT (TV (ARC)) or TV IN (OPTICAL)
Audio formats supported by this speaker system are as follows.
- Dolby Digital
- Linear PCM 2ch
On BLUETOOTH Communication
- BLUETOOTH devices should be used within approximately 10 meters (33 feet) (unobstructed distance) of each other. The effective communication range may become shorter under the following conditions.
- When a person, metal object, wall or other obstruction is between the devices with a BLUETOOTH connection
- Locations where a wireless LAN is installed
- Around microwave ovens that are in use
- Locations where other electromagnetic waves occur
- BLUETOOTH devices and wireless LAN (IEEE 802.11b/g/n) use the same frequency band (2.4 GHz). When using your BLUETOOTH device near a device with wireless LAN capability, electromagnetic interference may occur. This could result in lower data transfer rates, noise, or inability to connect. If this happens, try the following remedies:
- Use this speaker system at least 10 meters (33 feet) away from the wireless LAN device.
- Turn off the power to the wireless LAN device when using your BLUETOOTH device within 10 meters (33 feet).
- Install this speaker system and BLUETOOTH device as closer to each other as possible.
- The radio waves broadcast by this speaker system may interfere with the operation of some medical devices. Since this interference may result in malfunction, always turn off the power on this speaker system and BLUETOOTH device in the following locations:
- In hospitals, on trains, in airplanes, at gas stations, and any place where flammable gasses may be present
- Near automatic doors or fire alarms
- This speaker system supports security functions that comply with the BLUETOOTH specification to ensure secure connection during communication using BLUETOOTH technology. However, this security may be insufficient depending on the setting contents and other factors, so always be careful when performing communication using BLUETOOTH technology.
- Sony cannot be held liable in any way for damages or other loss resulting from information leaks during communication using BLUETOOTH technology.
- BLUETOOTH communication is not necessarily guaranteed with all BLUETOOTH devices that have the same profile as this speaker system.
- BLUETOOTH devices connected with this speaker system must comply with the BLUETOOTH specification prescribed by the Bluetooth SIG, Inc., and must be certified to comply. However, even when a device complies with the BLUETOOTH specification, there may be cases where the characteristics or specifications of the BLUETOOTH device make it impossible to connect, or may result in different control methods, display or operation.
- Noise may occur or the audio may cut off depending on the BLUETOOTH device connected with this speaker system, the communications environment, or surrounding conditions.
If you have any questions or problems concerning your speaker system, please consult your nearest Sony dealer.

Documents / ResourcesDownload manual
Here you can download full pdf version of manual, it may contain additional safety instructions, warranty information, FCC rules, etc.
Advertisement
Thank you! Your question has been received!


Need Assistance?
Do you have a question about the HT-SD40 that isn't answered in the manual? Leave your question here.