Epson P-4000 Basic Manual
Multimedia storage viewer
Hide thumbs
Also See for P-4000:
- User manual (80 pages) ,
- Product support bulletin (10 pages) ,
- Instructions to perform firmware update (4 pages)
Table of Contents
Advertisement
Quick Links
Download this manual
See also:
User Manual
Advertisement
Table of Contents

Related Manuals for Epson P-4000


Summary of Contents for Epson P-4000
- Page 1 P-4000 Basics...
- Page 2 Seiko Epson Corporation. The information contained herein is designed only for use with this Epson product. Epson is not responsible for any use of this information as applied to other equipment.
-
Page 3: Table Of Contents
Contents Introduction About the Software Replacement Battery Getting Started Unpacking Your P-4000 P-4000 Lights and Buttons Installing the Battery Charging the Battery Turning Your P-4000 On and Off Setting the Language, Date, and Time Conserving Battery Power Using the Home Screen Installing the Software Viewing and Playing Photos, Video, and Music... - Page 4 Creating Custom Slide Shows with Music Showing Photos and Videos on TV Solving Problems Power Problems Viewing Problems File Operation Problems Where To Get Help Appendix Important Safety Instructions FCC Compliance Statement Declaration of Conformity MPEG License Agreement Epson America, Inc. Limited Warranty Index...
-
Page 5: Introduction
Two slots for CompactFlash Digital) memory cards ◗ Hi-speed USB 2.0 interface for PC or Macintosh ◗ Direct printing to select Epson printers ◗ Lithium-ion battery and AC adapter ◗ Video output to display pictures on a TV or projector... -
Page 6: About The Software
About the Software The CD-ROM that came with your P-4000 includes the following software for Windows ◗ Your Epson P-4000 User’s Guide, which has instructions for all the features of your P-4000, including printing directly from the P-4000. ◗ A USB driver that lets you transfer files to and from your computer in Windows 98SE. -
Page 7: Getting Started
Getting Started Follow the instructions in this section to install the batteries and software and get ready to use your P-4000. Unpacking Your P-4000 Viewing stand Epson P-4000 Software CD-ROM Lithium-ion battery Carrying case USB cable Strap AC adapter and power cord... -
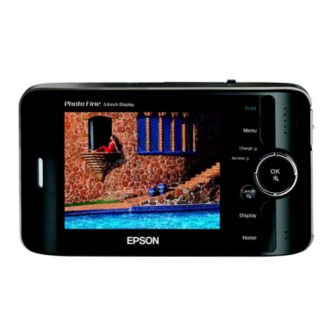
Page 8: P-4000 Lights And Buttons
P-4000 Lights and Buttons Access light Flashes orange when you turn on the P-4000 or access files. Activity light Flashes blue during power on, printing, and certain other operations. Cancel button Cancels the current operation and returns to the previous screen. Print button Displays the Print menu. -
Page 9: Installing The Battery
Installing the Battery Turn the P-4000 upside down. Slide the battery cover to the left to open it. Insert the battery into the compartment with the gold contacts going in first. -
Page 10: Charging The Battery
Close the battery cover and slide it to the right until it clicks. Charging the Battery After installing the battery, you need to charge it using the AC adapter. When the power is off, it takes about 3 hours to fully charge the battery. With the power on, it takes longer. - Page 11 To charge the battery, connect the AC adapter as shown below. Connect the other end to the power cord, and plug it in to an electrical outlet. Caution: Do not connect the AC adapter when the battery is not installed; this can damage the P-4000. Do not remove the AC adapter while you are using the P-4000.
-
Page 12: Turning Your P-4000 On And Off
Turning Your P-4000 On and Off ◗ To turn on the P-4000, slide the down and release it. The blue activity light turns on. ◗ To turn off the P-4000, make sure the is off. Then slide the P power switch down and hold it until the Access Activity... - Page 13 Press the message about setting the date. Press the screen: Press right or left on the 4-way ring to change the value for the selected item. To go to the next item, press down on the 4-way ring. Then press right or left to change that setting.
-
Page 14: Conserving Battery Power
Note: If you remove the battery, the date and time settings will be erased after about one day. The next time you turn on the P-4000, the date and time setting screen will be displayed. If you want to change the settings at any time, select Settings on the Home screen, then select Date and time. -
Page 15: Using The Home Screen
Using the Home Screen Whenever you turn on the P-4000, the Home screen appears. You can return to the Home screen at any time by pressing the Home Use the 4-way ring to highlight one of the icons, then press the button to select it. -
Page 16: Installing The Software
If you don’t have Adobe Reader on your system, click Install Adobe Reader Enter your administrator name and password if necessary. When installation is complete, click When you see the product registration screen, register your P-4000 as instructed. Agree Install User’s to select it. Exit Epson... -
Page 17: Viewing And Playing Photos, Video, And Music
Viewing and Playing Photos, Video, and Music Follow the instructions in this section to insert a memory card, copy files, and view or play them on your P-4000. Inserting and Removing Memory Cards The P-4000 has two memory card slots. slot supports the following cards: C/F Card ◗... -
Page 18: Using The Compactflash Card Slot
Caution: Never remove a memory card, or shake or drop the P-4000 while the Access light is flashing. Doing so may cause files to be lost or damaged. Do not put labels or stickers on memory cards. The sticker may peel off, preventing the card from being ejected and damaging the P-4000. - Page 19 If you are using a CompactFlash adapter, put the card into the adapter and insert the adapter into the slot. Caution: Make sure you insert memory cards in the correct orientation. Otherwise, the card and P-4000 may be damaged. To remove a card from the slot, first make sure C/F Card light is off.
-
Page 20: Using The Secure Digital Card Slot
Using the Secure Digital Card Slot Insert the memory card into the slot with the back of the Back of card card facing the LCD. Then push the memory card all the way into the slot. Caution: Make sure you insert memory cards in the correct orientation. -
Page 21: Copying Files From A Memory Card
Copying Files from a Memory Card After you insert a memory card, you can browse the files and decide what you want to do with them, or simply copy all the files on the card to the P-4000. Insert the memory card as described on page 18 or 20. - Page 22 Select what you want to do by pressing up or down on the 4-way ring. Then press the ◗ If you select copying starts and the following screen appears: Home Saved Data The files are copied to a folder that is automatically created on the P-4000.
- Page 23 Note: You should back up files stored on the P-4000 to another storage device periodically. Deleting Files After Copying You can have files automatically deleted after you copy them to the P-4000. On the Home screen, use the 4-way ring to select and press the Settings Select...
-
Page 24: Supported File Formats
Supported File Formats The P-4000 supports non-progressive JPEG files, and RAW files from the following digital SLR cameras: ◗ Epson R-D1 ◗ ® Canon EOS-D30, EOS-D60, EOS-10D, EOS-20D, Digital Rebel, Digital Rebel XT, Kiss Digital, Kiss Digital N, EOS-1D Mark II, and EOS-1Ds Mark II ◗... - Page 25 Note: RAW files do not support direct printing, rotation, zooming, or slide shows. Rotation is also not supported for JPEG files larger than 8.9 megapixels. The P-4000 supports video files in resolutions ranging from 160 × 112 pixels to 640 × 480 pixels, with file sizes up to 2GB.
-
Page 26: Browsing Files On A Memory Card
The P-4000 supports audio files with sizes up to 100MB. Audio file Audio codec extensions .m4a .aac (MPEG4) .mp3 Browsing Files on a Memory Card After you select Browse the Memory Card thumbnail images of the files on the card. To move to the next screen of thumbnail images, press and hold down the 4-way ring. - Page 27 To view an image full screen, use the 4-way ring to select the image you want, then press the Press right or left on the 4-way ring to display the next or previous image. When an image is displayed full screen, you can zoom in, view information about the image, or see a histogram, as described on page 32.
-
Page 28: Using The P-4000 Screen
Using the P-4000 Screen After you have copied files from a memory card, you can view or play them in various ways. The following illustrations and tables identify the icons that appear on the screen: Albums PC_DATA folder PC_DATA Album1 Album set as a shortcut Photo... - Page 29 See page 24 for details about supported RAW files. Press the Menu button and select Lock to protect files from deletion. P .I.F . (Print Image Framer frames to your images. Some Epson digital cameras support this feature. ™ Unsupported data file ®...
-
Page 30: Viewing Images
Viewing Images You can view images in Saved Data or Albums as thumbnails or full-screen images. To display information or instructions, press the and instructions vary depending on the screen. Home Saved Data Use the 4-way ring to select in the Home screen, then press the You see folders or albums: Saved Data 20040829\002... - Page 31 Note: On the Saved Data screen, folders are displayed for every memory card. You can change the setting to display folders by date. Select Settings on the Home screen, then select View Mode. Use the 4-way ring to select the folder or album containing the images you want to view, then press button.
-
Page 32: Zooming An Image
Use the 4-way ring to select the image you want to view, then press the is enlarged to fill the screen. Zooming an Image ◗ To zoom in on an image shown full screen, press the button. Keep pressing it to zoom in even further. ◗... -
Page 33: Displaying Information
Displaying Information To view information about a full-screen image, press the button. The following information is displayed: Display ◗ File name ◗ Camera model ◗ Date of photo ◗ Pixel size ◗ Focal length ◗ ISO speed rate Viewing a Histogram When an image is displayed full screen, press the button twice to see a histogram that shows Display... -
Page 34: Displaying Images As A Slide Show
Displaying Images as a Slide Show You can display JPEG images as a slide show. Select the folder or album you want to display as a slide show. Press the Menu Albums PC_DATA Album1 Photo Select Start Slide Show The slide show starts. Note: You can select transition effects, timing, and background music for the slide show. -
Page 35: Playing Video And Audio Files
Playing Video and Audio Files Select the video or audio file that you want to play and press the button. While playing audio, the screen turns off to conserve the battery. Press any button to turn it back on. ◗ To raise or lower the volume, press up or down on the 4-way ring. -
Page 36: Copying Files To And From Your Computer
Copying Files to and From Your Computer You can connect the P-4000 to your computer using the USB cable that came in the box, and easily copy files back and forth. You should use the AC adapter when you connect the P-4000 to your computer. Note: If your computer uses Windows 98SE, you need to install driver software before you connect the P-4000. - Page 37 Connect the USB cable to your computer. Then open the USB connector cover and connect the other end of the USB cable to the P-4000. The LCD turns off. Press any button to turn it on. Select the EPSON_PV You will see an Albums folder and a Cards folder (corresponding to Saved Data on the Home screen).
- Page 38 The PC_DATA folder is one of the default albums on the P-4000; you cannot rename or delete it or create an album thumbnail for it. Disconnecting the P-4000 From Your Windows Computer Click Unplug or Eject Hardware the bottom of the computer screen. Turn off the P-4000 and remove the USB cable from your computer.
-
Page 39: Creating Custom Albums And Slide Shows
Creating Custom Albums and Slide Shows You can save your files in albums for special purposes, such as portfolios. You can also create slide shows with custom transitions and your own background music. To share your images, slide shows, and videos with a larger audience, you can connect the P-4000 to a TV or projector. - Page 40 Press the right side of the 4-way ring. The sub-menu appears: Do one of the following, then press the ◗ If you want to copy only the selected file to an album, select ◗ If you want to copy all the files in the folder, select All.
- Page 41 If you choose displayed as thumbnails. Select Image for Album DSC00331.JPG DSC00327.JPG Press Menu to finish selection Select each file you want to copy and press the button. The selected files are displayed with a mark. After selecting all the files you want to copy, press the Do one of the following: ◗...
- Page 42 ◗ If you want to create an album with a new name, select Then continue with the next step. Select Input name on-screen keyboard appears: Select a letter using the 4-way ring, then press the button to input the selected letter. and press the and press the button.
-
Page 43: Creating An Album Shortcut
◗ To switch the letters between uppercase and lowercase, select ◗ To delete the last letter input, press the button or select press the ◗ To delete everything that was input, select on the screen and press the Cancel After you input the name, select using the 4-way ring and press the it. - Page 44 Select Set as Album Shortcut icon is displayed on the album thumbnail. Note: You can also press the Menu button to change the album name, lock, delete, or copy the album to a memory card, or sort albums. For more information, see the P-4000 User’s Guide on the CD-ROM or on your computer.
-
Page 45: Creating Custom Slide Shows With Music
Creating Custom Slide Shows with Music You can create slide shows of all the images in a folder or album. You can choose from 5 different transition effects and 5 different background music selections. You can also register up to 3 of your own music files to use for slide shows. - Page 46 Creating the Slide Show You can create a slide show from images in a folder or album in the P-4000 or on a memory card. The easiest way to select files for your slide show is to copy them to an album.
-
Page 47: Showing Photos And Videos On Tv
Press the Menu . Select one of the audio files you registered, or select from one of the 5 default music selections. Then press If you don’t want music for your slide show, select None After you press the with the transition effect, image duration, and music you selected. - Page 48 Follow these steps to connect the P-4000 to your TV: Connect the three RCA plugs to the video and audio jacks on your TV. Connect the mini-plug on the other end of the cable to the A/V Out The P-4000 LCD screen turns off. Set the TV to display video input from the P-4000.
-
Page 49: Solving Problems
Solving Problems Check this list of common problems and possible solutions. For more troubleshooting tips, check the P-4000 User’s Guide on the CD-ROM or on your computer. Power Problems The power doesn’t turn on. ◗ The P-4000 may have shut off automatically to save power. -
Page 50: File Operation Problems
Images or videos are not displayed correctly, or sound doesn’t play correctly. ◗ Make sure the file format is supported. See page 24 for details about supported image file formats. For audio and video, make sure the bit rate and audio codec of your file are supported. -
Page 51: Where To Get Help
Service Access World From the Internet, you can reach Epson Support at Wide Web http://support.epson.com. At this site, you can download drivers and other files, look at product documentation, access troubleshooting information, and receive technical advice through e-mail. - Page 52 ◗ Description of the problem You can purchase parts, manuals, and accessories from an Epson authorized reseller. To find the nearest authorized reseller, please call 800-GO-EPSON (800-463-7766). To purchase online, please visit www.epsonstore.com (U.S. sales only). In Canada, please call (800) 463-7766 for a reseller referral.
-
Page 53: Appendix
If this product emits unusual noises, odors, or smoke, cancel the current operation and turn it off immediately. Disconnect the AC adapter from the product, then unplug the AC adapter from the power outlet. Contact Epson. ◗ Do not use this product after moving it between extreme temperatures, which may cause condensation to form on electronic parts. - Page 54 If a battery is swallowed, seek medical treatment immediately. ◗ Use only an Epson Lithium-ion battery for the P-4000 according to the instructions in this manual. ◗ Use only AC adapter model A351H and P-4000 Model G941B to charge batteries.
- Page 55 ◗ Do not insert objects into any openings as they may touch dangerous voltage points or short-circuit components. ◗ Prevent the battery from coming into contact with metal objects that could short-circuit it, such as coins or keys. ◗ Do not insert the battery into power outlets or other power sources such as car cigarette lighter sockets.
- Page 56 Warning: Be sure to securely cover the end of the battery with tape to prevent combustion or explosion when disposing of it. Do not incinerate or dispose of the battery in fire. Do not dispose of batteries as ordinary refuse. Instead, dispose of them in a collection or recycle box in accordance with local laws.
-
Page 57: Using A Memory Card
◗ If you use an extension cord with this product, make sure the total amperage of all devices plugged into the extension cord does not exceed the cord’s amperage rating. ◗ Never disassemble, modify, or attempt to repair the AC adapter by yourself. - Page 58 These are normal and do not mean that your LCD panel is damaged in any way. ◗ If the LCD panel on this product is damaged, contact Epson. ◗ If the liquid crystal solution contained in the LCD panel on this product leaks out and gets onto your hands, wash them thoroughly with soap and water.
-
Page 59: Fcc Compliance Statement
WARNING: The cords included with this product contain chemicals, including lead, known to the State of California to cause birth defects or other reproductive harm. Wash hands after handling. (provided in accordance with Proposition 65 in Cal. Health & Safety Code §... -
Page 60: Declaration Of Conformity
47CFR §2.909. Operation is subject to the following two Epson America, Inc. MS 3-13 3840 Kilroy Airport Way... -
Page 61: Mpeg License Agreement
MPEG LA to provide MPEG-4 video. No license is granted or shall be implied for any other use. Additional information including that relating to promotional, internal and commercial uses and licensing may be obtained from MPEG LA, LLC. See http://www.mpegla.com. Epson Multimedia Storage Viewer G941B Epson P-4000... -
Page 62: Epson America, Inc. Limited Warranty
If the product requires repair or replacement, it is your responsibility to package it in its original container or an equivalent, along with proof of the date of original purchase and ship it to Epson. Packaging and shipping costs incurred in presenting your Epson product for warranty service are your responsibility. - Page 63 Epson product after its shipment from Epson. This warranty does not cover loss or recovery of any data or software stored on the product. Epson is not responsible for warranty service should the Epson label or logo or the...
- Page 64 This warranty gives you specific legal rights, and you may also have other rights which vary from jurisdiction to jurisdiction. Epson America, Inc., P. O. Box 93012, Long Beach, CA 90809-3012...
-
Page 65: Index
BGM, slide show Buttons Cable CompactFlash cards Computer connecting disconnecting Date and time setting Disk space Display button Epson help Store warranty File formats Files browsing copying from memory copying to computer problems card... - Page 66 Hard drive space Histogram, viewing Home screen Images copying to album displaying as slide show displaying histogram displaying information file formats problems rotating showing on TV zooming LCD safety Lights Memory card adapter copying files inserting and removing safety instructions MPEG licence agreement Music P.I.F.
- Page 67 Technical support Troubleshooting Turning P-4000 on/off TV, connecting to cable driver, installing Video file formats playing problems showing on TV Warranty Zooming images...
- Page 69 CompactFlash card slot SD card slot Eject button Power switch Reset button...
- Page 70 Speaker Battery cover Audio/Video out connector Headphone connector AC adapter connector USB connector cover USB connector...