Table of Contents
Advertisement
Quick Links
Download this manual
See also:
Quick Reference Manual
Advertisement
Table of Contents
Troubleshooting

Related Manuals for Epson P-1000


Summary of Contents for Epson P-1000
- Page 1 ® 8VHU·V *XLGH...
- Page 2 EPSON product. EPSON is not responsible for any use of this information as applied to other products. Neither SEIKO EPSON CORPORATION nor its affiliates shall be liable to the purchaser of this product or third parties for damages, losses, costs, or expenses incurred by the purchaser or third parties as a result of accident, misuse, or abuse of this product or unauthorized modifications, repairs, or alterations to this product, or (excluding the U.S.) failure to strictly comply with SEIKO EPSON CORPORATION’s operating and maintenance instructions.
-
Page 3: Table Of Contents
Unpacking Your P-1000 ......9 P-1000 Parts ........10 About the AC Adapter . - Page 4 Troubleshooting Cleaning the P-1000 ......51 Using the Printer Utilities ......51 Troubleshooting .
- Page 5 When Storing, Maintaining, or Transporting the P-1000 ....... 64 FCC Compliance Statement for United States Users..65 Warning.
-
Page 6: Features
Transfer the pictures from your memory card to the P-1000’s 10GB hard drive, and your card is ready to hold more photos. Later, you can transfer your pictures to your computer or other storage device. -
Page 7: Using The Documentation
MultiMediaCard xD-Picture Card ™ Using the Documentation This books explains how to use the P-1000. You may want to copy it to your computer; see the Quick Reference Guide for instructions. Chapter 1 covers unpacking the P-1000, charging the battery, turning it on and off, and connecting other devices. -
Page 8: Chapter 1 Getting Started
Getting Started Follow the instructions in this chapter to: Unpack the P-1000 Install and charge the battery Turn the P-1000 on and off Insert and remove a memory card Connect a computer Connect an external monitor Connect a CD-R/RW drive... -
Page 9: Unpacking Your P-1000
Unpacking Your P-1000 Make sure you have all the items shown below when you unpack your P-1000. EPSON P-1000 Viewing stand CD-ROM containing Film Factory and this online User’s Guide AC adapter and power cord Type A USB cable Carrying case... -
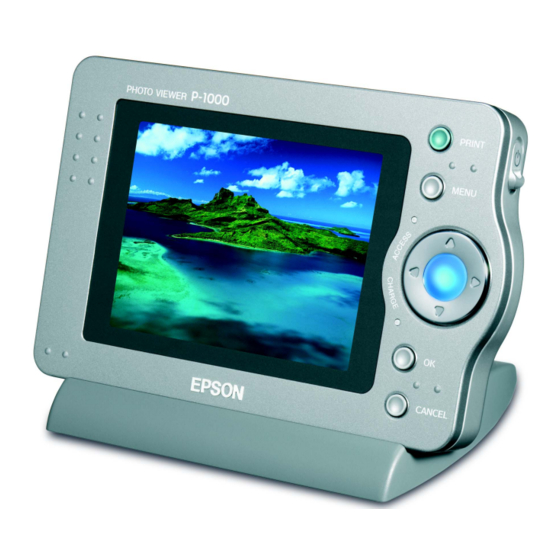
Page 10: P-1000 Parts
P-1000 Parts Eject button Memory card slot Power switch Battery cover Control panel Battery cover release Video output Connector cover connector RESET button interface connector AC adapter connector Getting Started 10... - Page 11 ACCESS light Flashes orange when you turn on the P-1000 or access data. CHARGE light Flashes green when the battery is being charged. OK button Selects a highlighted option, opens the selected folder or photo, and zooms into an image.
-
Page 12: About The Ac Adapter
About the AC Adapter The P-1000 comes with an AC adapter. Use the adapter to charge the battery and when the P-1000 is connected to a computer, CD-R/RW drive, or printer. You might also want to use it whenever possible to view your images, so you can save battery power. - Page 13 Insert the battery into the compartment, aligning the ends with those on the inside of the compartment. – Note: Place the battery on top of the clear plastic tab so the tab sticks out; this will make it easier to remove the battery later if you need to replace it.
-
Page 14: Charging The Battery
AC adapter. It takes about 3.5 hours to fully charge the battery. The battery status is displayed in the top right corner of the LCD screen when the P-1000 is on. Battery is fully charged. Battery power is about half full. -
Page 15: Conserving Battery Power
P-1000 has been powered off, you need to turn it back on with the power switch. Note: The power is also turned off if the P-1000 gets too hot. If this happens, let it cool before turning it back on. Placing the P-1000 in the Viewing... -
Page 16: Turning On The Power
ACCESS light Note: It may take 5 or 10 seconds for the power to come on. Setting the Language, Date, and Time When you turn on the P-1000 the first time, you see the language setting screen: Language Setting Language... -
Page 17: Turning Off The Power
You see the Main Menu (described on page 21). Note: If you remove the P-1000’s battery, the date and time settings will be erased after about two days; so you’ll need to check and possibly change the settings. You’ll also need to check the date and time after replacing the battery to make sure they are set correctly. -
Page 18: Inserting And Removing A Memory Card
Never remove a memory card while the ACCESS light is on; this can damage or erase data on the card or HDD. Note: If you are using a memory card in a CompactFlash adapter, remove the adapter from the P-1000; do not remove only the memory card. Getting Started 18... -
Page 19: Connecting A Computer To The P-1000
If you have an external monitor such as a TV that has a composite video-in connector, you can connect it to the P-1000 and view photos on the larger screen. Just connect the monitor to your P-1000 with the video cable that came with the P-1000. ) appears on the... -
Page 20: Connecting A Cd-R/Rw Drive
You can connect an external USB CD-R/RW drive to the P-1000 to archive photos on a CD-R/RW. You can also copy photos from a CD-R/RW to the P-1000 or a memory card. Follow these steps to connect the drive to the P-1000: Make sure the P-1000 and the CD-R/RW drive are turned off. -
Page 21: Chapter 2 Viewing And Managing Images
RAW images from some digital cameras may be supported by the P-1000. Depending on the RAW image, you may be able to copy it to the P-1000 (and from there to a memory card or computer), display it on the screen, and delete it—but you cannot perform certain operations. -
Page 22: Viewing Photos
“Adding an Album Shortcut” on page 44. Copy to the HDD Lets you copy images from a memory card to the P-1000’s Album Case or Card Case. See page 29. Slide Show Displays the images in an Album as a slide show. - Page 23 (See page 25 for more information about albums.) contains the folders that have been Card Case copied from memory cards to the P-1000. Each time you copy a memory card, a new folder of the images is created in the Card Case. Select...
-
Page 24: Zooming An Image
When you open an album or folder, you see thumbnail versions of all the photos. (The first time you view photos in an album or card case, it may take a while for the thumbnails to appear.) Note: Any unsupported file types are displayed with this icon: If you prefer to hide any incompatible files, you can change the Unsupported files setting as described on page 47. -
Page 25: Displaying Images On Your Computer Monitor
Displaying Images on Your Computer Monitor You can connect your P-1000 to a computer to display its photos on the monitor screen. First connect the computer to the P-1000 as described on page 19. The P-1000 screen goes dark and the activity light flashes blue. Then select the image you want to display. - Page 26 Memory Card memory card. Copy to HDD Copy the selected album or card folder on the CD-R/RW to the P-1000’s Card Case or Album Case. Slide Show Display the images in the selected album or card folder as a slide show.
-
Page 27: Running A Slide Show
Use the selected image as an album or card Album folder’s icon. (You cannot use an album that (or Card) has been copied to the P-1000 from another Thumbnail source such as a computer.) Select to Mark the selected album or folder to be Copy/Undo copied—or cancel the copy indicator. -
Page 28: Locking An Image, Album, Or Folder
Here is another way to run a slide show of one of your albums: In the Main Menu, select Slide Show button. Main Menu Browse Copy to the Slide Show Copy to Settings CD-R/RW Start album slide show. Press OK to continue. Select the album you want and press the start the slide show. -
Page 29: Rotating An Image
P-1000 When you copy a memory card to the P-1000, all the photos on the card are copied to a folder in the P-1000’s Card Case. Alternatively, you can select to copy the files to an album in the Album Case. - Page 30 Card Case (and in an album if you selected one). The card folder is named according to the date you copied it to the P-1000. For example, in the folder name 20040325.001 and .001 means this is the first folder copied on this day.
-
Page 31: Copying Photos From The P-1000 To A Memory Card
Follow these steps: Insert a memory card in the P-1000. If you will be copying folders, the card must be empty. Select a folder in the Card Case or a single image that you want to copy. -
Page 32: Copying Photos Between A Cd-R/Rw And The P-1000
In Windows 98, if you remove the cable from the computer without closing your program and turning off the P-1000, you may see a blue screen. To avoid this, turn the P-1000 off before removing the cable. Copying Photos Between a CD-R/RW and... - Page 33 In the Copy to CD-R/RW screen, select the location where the photos you want to copy are stored (Album Case or Card Case), and press the Copy to CD-R/RW Album Case Card Case Press OK to copy albums. Select a folder or album to archive, and press the button.
-
Page 34: Copying Photos To An Album
Main Menu and select Browse CD-R/RW To copy a folder (or album) on the CD to the P-1000’s Card Case, select the folder and press the to display the Pop-up menu. Then select To copy single images or a folder on the CD to a... - Page 35 If you select an album name that is already being used, a number is added to the end of the new album’s name; for example, Family2. (You cannot create your own name on the P-1000.) from the button. You see this screen:...
-
Page 36: Changing An Album's Name
Copying a Folder Follow these steps to copy all the photos in a folder in the Card Case, on a memory card, or on a CD-R/RW to an album: Open the folder you want to copy to the album. (You must open the folder before you can copy its photos.) Press the button to display... -
Page 37: Deleting Photos
If you select an album name that is already being used, a number is added to the new album’s name, such as Favorites2. (You cannot create your own name on the P-1000.) Deleting Photos button. There are several ways to delete a photo, folder, or album. -
Page 38: Marking Photos, Folders, Or Albums For Deletion
Note: You can select whether to display this confirmation message. See “Changing the Copy Mode Settings” on page 45. Marking Photos, Folders, or Albums for Deletion If you want to delete several photos, folders, or albums, you can mark them for deletion and then delete them all at once. Follow these steps: Select the first photo, folder, or album you want to delete. -
Page 39: Chapter 3 Direct Printing
More printers may be supported; check the EPSON web site to get the latest printer driver information: http://support.epson.com The P-1000 comes with two USB cables; choose the one that is correct for your printer. You can use the following sizes and types of paper. -
Page 40: Connecting The P-1000 To A Printer
Connecting the P-1000 to a Printer Follow these steps to connect the P-1000 to your printer: Make sure the P-1000 and the printer are turned off. Connect the small end of the USB cable to the P-1000. Note: Use the appropriate cable for your printer. -
Page 41: Selecting The Correct Printer Driver
Selecting the Correct Printer Driver The first time you print, you need to select the correct printer driver. Follow these steps: Press the button. You see the Print screen: PRINT Print Print This Photo Print All Photos Select Photos Number of Photos: Utilities Printer Settings Press OK or Print to continue. -
Page 42: Printing Your Photos
Printing Your Photos Make sure the printer is connected and paper is loaded. Connect the AC adapter to the P-1000 before you print. To print a single photo, select the image. If you want to print multiple images in a folder or album, just open the folder or album. - Page 43 Press l or r on the arrow button to choose the settings you want: Number of Select the number of copies, up to 99, Copies you want printed of the selected photo(s). Print Date Set whether to print the date the photo was taken—if the image includes date information—or the date the file was created.
-
Page 44: Chapter 4 Customizing Settings
Chapter 4 Customizing Settings You can easily change the P-1000’s settings to make it work best for you. Select in the Main Menu and press Settings button. You see this menu: Settings Album Shortcut Copy Mode Display Slide Show Sound... -
Page 45: Changing The Copy Mode Settings
The new shortcut(s) appear in the Main Menu. Changing the Copy Mode Settings Album This option lets you tell the P-1000 how to handle images on a memory card during and after copying. Copy Mode Settings Clear memory card after copying:... -
Page 46: Save Images In Album After Copying
Turn this setting if you want images from a memory card to be stored in the default album on the P-1000 automatically when you copy them from a memory card. You can choose which album is the default; see the next section. -
Page 47: Unsupported Files Setting
Unsupported files setting Select if you want to see all files and folders, Show including non-compatible file types. Select only compatible photo files and folders. Note: You can also choose whether to show unsupported files using the Pop-up menu. See page 27. Photo information setting Set whether to display the photo information when an image is displayed in full-screen format. -
Page 48: Adjusting The Lcd Brightness
Turning the Sound On or Off Select to turn on or off the beeping sound the Sound P-1000 makes when performing certain operations. Sound Setting Sound: Press OK to apply the Sound setting and return to the previous screen. Press Cancel to disregard the change. -
Page 49: Selecting The Video Out Signal
After you finish making all settings, press the Note: If you remove the P-1000’s battery, the date and time settings will be erased after about two days; so you’ll need to check and possibly change the settings. You’ll also need to check the date and time after changing the battery to make sure they are set correctly. -
Page 50: Choosing The Language
Choosing the Language Choose a language from among eight languages: Language Setting Language English Fran ais Deutsch Italiano Espanol Portugues Press OK to select and return to the previous screen. Press cancel to disregard the selection. Customizing Settings 50... -
Page 51: Troubleshooting
Chapter 5 Maintenance and Troubleshooting This chapter describes how to clean the P-1000, use the printer utilities, and solve problems. Cleaning the P-1000 Follow these guidelines when cleaning the P-1000: Turn the P-1000 off before cleaning. Use a clean, dry cloth to wipe it clean. -
Page 52: Troubleshooting
For more assistance, see “Problems and Solutions” on page 56. Error message A fatal error has occurred. Cannot continue the operation. Head Description Turn the power off and on again. If the error message appears again, contact EPSON. (See page 59.) Maintenance and Troubleshooting 52... - Page 53 An unusually high The P-1000 is too hot. Let it cool temperature was off before turning it on again. detected. Photo Viewer will turn off soon.
- Page 54 Error message Description An error occurred while Printing was not successful. Try accessing the HDD. to print the data again. Please try printing again. HDD access error has An error occurred while writing occurred. Failed to copy to to the CD-R/RW and the data the CD-R/RW.
- Page 55 Error message Description Some errors occurred Some files were skipped. The while deleting files. The memory card may be operation was canceled. write-protected. Check the memory card and try again. The media is not available. The CD-R/RW inserted in the Please insert a blank drive is full.
-
Page 56: Problems And Solutions
Power Problems The power does not turn on. Cause What to do The P-1000 is booting up. Wait a few seconds after turning on the power to see if it comes on. The battery has run out. When the the top right corner of the LCD, the battery has run out. -
Page 57: Image Display Problems
What to do The space available on the Delete unnecessary images in the HDD is not sufficient to P-1000’s HDD or reduce the copy all of the data in the number of images to copy from the memory card. memory card. -
Page 58: Printing Problems
P-1000 will be included with the download information. Resetting the P-1000 If the P-1000 locks up (stops working) or you want to restore the default values, you can reset it. Press the button with a thin object. -
Page 59: Where To Get Help
Proof of purchase (such as a store receipt) and date of purchase Description of the problem You can purchase ink cartridges, paper, manuals, and accessories from EPSON at (800) 873-7766, or visit the EPSON Store at www.epsonstore.com (U.S. sales only). In Canada, please call (800) 463-7766 for dealer referral. -
Page 60: Safety Instructions
Appendix A Notices Safety Instructions Read all these instructions before using the EPSON P-1000, and keep this guide handy for later reference. Follow all warnings and instructions marked on the P-1000 and any options. When Using the P-1000 Follow all warnings and instructions marked on this product. -
Page 61: When Using The Battery
If a battery is swallowed, seek medical treatment immediately. Use only an EPSON Lithium-ion battery for the P-1000 according to the instructions in this manual. Do not use the battery that comes with this product for other devices. -
Page 62: When Storing The Battery
When Storing the Battery When not using this device for a long period, remove the battery from this product and store it separately. Do not store batteries where the temperature or humidity is very high. Store batteries out of children’s reach. Discharge the battery completely before storing it for a long time. -
Page 63: When Using A Memory Card
Use only the power source that meets the power requirements indicated on the label attached to the product. If you are not sure of the power supply specifications in your area, contact your local power company or regulatory agency. Make sure the total amperage of all devices plugged into the power outlet does not exceed the power outlet’s ampere rating. -
Page 64: When Using The Lcd
Use only a soft, dry cloth to clean the display. Do not use liquid or chemical cleaners. When Storing, Maintaining, or Transporting the P-1000 Do not store this product outdoors. Do not store this product near water. Do not store this product in a location subject to high temperature or humidity. -
Page 65: Fcc Compliance Statement For United States Users
FCC Compliance Statement for United States Users This equipment has been tested and found to comply with the limits for a Class B digital device, pursuant to Part 15 of the FCC Rules. These limits are designed to provide reasonable protection against harmful interference in a residential installation. -
Page 66: Declaration Of Conformity
Declaration of Conformity According to 47CFR, Part 2 and 15 for Class B Personal Computers and Peripherals; and/or CPU Boards and Power Supplies used with Class B Personal Computers: EPSON AMERICA, INC. MS 3-13 Located at: 3840 Kilroy Airport Way... -
Page 67: Specifications
Specifications General CPU: TMS320DM310 LCD: 3.8 inches, EPSON VGA TFT LCD; 640 480 pixels; 262,144 colors; 212 ppi Memory: 64MB SDRAM; 4MB flash ROM HDD: 1.8 inch HDD, 10GB, FAT 32 (9GB for storage, 1GB for system information and formatting) -
Page 68: Interface
Interface USB connector: One USB (ver 1.1) interface for Host and Slave connection Video output Composite Output (NTSC/PAL) connector: Battery Type: Rechargeable Lithium-ion battery Model: B6345 Size: 1.4 2.1 0.3 inches W D) (35.2 53 7 mm) Ratings: 3.7 V, 1035mAh Temperature: Operating: 41 to 95 °F (5 to 35 °C) Non-operating: –4 to 140 °F... -
Page 69: Warranty
EPSON property. The replacement product or part may be new or refurbished to the EPSON standard of quality, and, at EPSON’s option, may be another model of like kind and quality. EPSON’s liability for replacement of the covered product will not exceed the original retail selling price of the covered product. - Page 70 EPSON Authorized Servicer. If a claimed defect cannot be identified or reproduced, you will be held responsible for costs incurred.
- Page 71 Index AC adapter , 14 connecting , 10 connector , 62 to 63 safety instructions , 66 standards unpacking , 12 using , 11, 16, 18 ACCESS light , 59 Accessories , 11 Activity light Album , 26, 34 to 36, 46 copying to , 25 customizing...
- Page 72 P-1000 , 31, 36 folder , 34 from a CD to the P-1000 from a memory card to the P-1000 from the P-1000 to a memory card , 29 to 36 photos , 32 to 34...
- Page 73 Hard disk, internal , 52 Head Alignment utility , 52 Head Cleaning utility , 59 Help, EPSON , 24, 27, 47 Hide unsupported files , 57 Image display problems Increase Number of Copies for All option , 26 Increase Number of Copies option...
- Page 74 P-1000 , 34 copying from a CD to the P-1000 copying from a memory card to the P-1000 copying from the P-1000 to a memory card , 32 to 34 copying to a CD-R/RW...
- Page 75 , 27, 36 to 37 Renaming album , 10, 58 RESET button Reset Number of Copies for All option , 58 Resetting the P-1000 , 26 Rotate option , 26, 29 Rotating a photo , 60 to 64 Safety Instructions...
- Page 76 Setting , 44 to 45 album shortcut settings , 30, 45 copy mode settings , 16 to 17, 49 date , 46 display settings , 16, 50 language , 48 LCD brightness , 48 power save settings , 47 slide show settings , 48 sound setting , 16 to 17, 49...
- Page 77 , 28 Unlocking a photo, folder, or album , 26, 28 Unlock option Unpacking the P-1000 , 24, 27, 47 Unsupported files Updating , 58 firmware , 58 printer driver , 9, 19 to 20, 39 to 40 cable , 10...