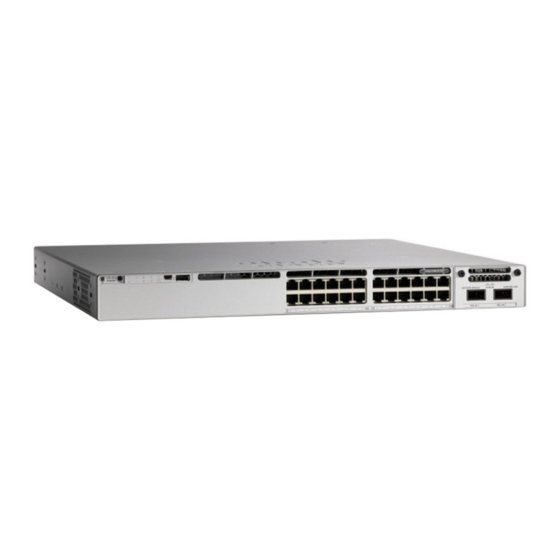
Cisco Catalyst 9300 Series Installing
Hide thumbs
Also See for Catalyst 9300 Series:
- Hardware installation manual (140 pages) ,
- Manual (15 pages) ,
- Hardware installation manual (98 pages)
Table of Contents
Advertisement
Quick Links
Installing a Switch
For initial switch setup, assigning the switch IP address, and powering on information, see the switch getting
started guide on Cisco.com.
This chapter contains these topics:
•
•
•
•
•
•
•
•
•
•
•
•
•
Shipping Box Contents
The shipping box contains the model of the switch you ordered and other components needed for installation.
Some components are optional, depending on your order.
Note
Shipping Box Contents, on page 1
Tools and Equipment, on page 3
Verifying Switch Operation, on page 3
Planning a Switch Data Stack, on page 3
Data Stack Cabling Configurations, on page 4
Planning a StackPower Stack, on page 7
StackPower Cabling Configurations, on page 8
Installing the Switch, on page 10
Connecting the StackWise Cables, on page 16
Connecting to the StackPower Ports, on page 20
Installing a Network Module in the Switch, on page 20
Connecting Devices to the Ethernet Ports, on page 20
Verify that you have received these items. If any item is missing or damaged, contact your Cisco representative
or reseller for instructions.
Installing a Switch
1
Advertisement
Table of Contents

Related Manuals for Cisco Catalyst 9300 Series


Summary of Contents for Cisco Catalyst 9300 Series
-
Page 1: Table Of Contents
The shipping box contains the model of the switch you ordered and other components needed for installation. Some components are optional, depending on your order. Note Verify that you have received these items. If any item is missing or damaged, contact your Cisco representative or reseller for instructions. Installing a Switch... - Page 2 Installing a Switch Shipping Box Contents Figure 1: Components Delivered in the Shipping Box Cisco Catalyst 9300 Series switch with Eight number-8 Phillips flat-head screws optional network module (power supply and fan modules not shown) AC power cord Cable guide Product documentation and compliance M4.0 x 20mm Phillips pan-head screw...
-
Page 3: Tools And Equipment
Warning Attach only the following Cisco external power system to the switch: Cisco XPS 2200 Statement 387 Planning a Switch Data Stack Cisco Catalyst 9300 switches can share bandwidth by using data stacking. The following table lists the... -
Page 4: Data Stack Cabling Configurations
If you do not specify the length of the StackWise cable, the 0.5 meter cable is supplied. If you need the 1 meter cable or the 3 meter cable, you can order it from your Cisco supplier. For cable part numbers, StackWise Accessories. - Page 5 Installing a Switch Data Stack Bandwidth and Partitioning Examples Data Stack Bandwidth and Partitioning Examples This section provides examples of data stack bandwidth and possible data stack partitioning. The figure shows a data stack of switches that provides full bandwidth and redundant StackWise cable connections. Figure 4: Example of a Data Stack with Full Bandwidth Connections This figure shows an example of a stack of switches with incomplete StackWise cabling connections.
- Page 6 Installing a Switch Power-On Sequence for Switch Stacks Figure 7: Example of a Partitioned Data Stack with a Failover Condition Power-On Sequence for Switch Stacks Consider these guidelines before you power on the switches in a stack: • The sequence in which the switches are first powered on might affect the switch that becomes the stack master.
-
Page 7: Planning A Stackpower Stack
Before connecting the switches in a power stack, read the following guidelines: • C9300 and C9300X switches support Cisco StackPower providing up to 1000 W of power in nominal conditions and 2400 W of power in failure conditions across a power stack. Cisco StackPower is not supported in C9300L switches. -
Page 8: Stackpower Cabling Configurations
StackPower Cable 1.5 meter Figure 8: StackPower Cable for Use with Cisco Catalyst 9300 Series Switches This figure shows a ring configuration using both of the supplied 0.3-meter StackPower cables and one 1.5-meter cable. In the examples that follow, the switches are stacked in a vertical rack or on a table. - Page 9 Installing a Switch StackPower Partitioning Examples Figure 10: StackPower Star Topology StackPower Partitioning Examples These figures show StackPower stacks of switches with failover conditions. In the following figure, the StackPower cable 2 is faulty. This is considered a broken ring and is a fault condition.
-
Page 10: Installing The Switch
Installing a Switch Installing the Switch Figure 11: Example of a StackPower Stack with a Failover Condition In the following figure, StackPower port B on the center switch has failed and the stack partitions into two stacks. The top two switches share power, and the bottom switch is now a separate stack. After initial failure of cable 2, any further failure of a port is considered a double fault, which a StackPower cannot handle. - Page 11 • If the rack is provided with stabilizing devices, install the stabilizers before mounting or servicing the unit in the rack. Statement 1006 The following figure shows the standard 19-inch brackets and other optional mounting brackets. You can order the optional brackets from your Cisco sales representative. Figure 13: Rack-Mounting Brackets Installing a Switch...
- Page 12 Installing a Switch Attaching the Rack-Mount Brackets 19-inch brackets (ACC-KIT-T1=) 23-inch brackets (RACK-KIT-T1=) Extension rails and 5 brackets for 24-inch brackets (RACK-KIT-T1=) four-point mounting, includes 19-inch brackets (4PT-KIT-T2=) ETSI brackets (RACK-KIT-T1=) Attaching the Rack-Mount Brackets Before you begin You can use the minimum recommended number of two screws for installing the rack-mount bracket to each side of the switch.
- Page 13 Installing a Switch Attaching the Rack-Mount Brackets a) Stick the labels available with CAT-A-AIRFLOW kit on to each side of the switch as shown in the following illustration. Make sure you align the holes in the labels with the screw holes in the chassis. b) Secure the brackets to the chassis using the flat head screws provided with the bracket.
- Page 14 Installing a Switch Mounting the Switch in a Rack Mounting the Switch in a Rack Procedure Step 1 Use the four supplied Phillips machine screws to attach the brackets to the rack. Step 2 Use the black Phillips machine screw to attach the cable guide to the left or right bracket. Figure 16: Front-Mounting Position Phillips machine screw, black Number-12 or number-10 Phillips machine...
- Page 15 Installing a Switch Installing the Switch on a Table or Shelf Figure 18: Rear-Mounting Position Figure 19: Four-Point Mounting Position Installing the Switch on a Table or Shelf Procedure Step 1 To install the switch on a table or shelf, locate the adhesive strip with the rubber feet in the mounting-kit envelope.
-
Page 16: Connecting The Stackwise Cables
Connecting the StackWise Cables Before connecting the StackWise cables, review the Planning a Switch Data Stack, on page 3. Always use a Cisco-approved StackWise cable to connect the switches. Connecting a StackWise-320 Cable Procedure Step 1 Remove the dust covers from the StackWise cables and store them for future use. - Page 17 Installing a Switch Connecting a StackWise-320 Cable Figure 20: Inserting the StackWise-320 Adapter StackWise-320 adapter StackWise port Step 4 Align and insert the StackWise cable connector into the StackWise adapter in the StackWise port. Push inwards until the spring latch locks into the slot. Figure 21: Installing the StackWise-320 Cable in a StackWise Port StackWise-320 adapter Stacking cable...
- Page 18 Connect the cable to the StackWise port on the switch rear panel. Align the connector and connect the StackWise cable to the StackWise port on the switch rear panel and finger-tighten the screws (clockwise direction). Make sure the Cisco logo is on the top side of the connector as shown in the figure. Installing a Switch...
- Page 19 Installing a Switch Connecting a StackWise-480/1T Cable Figure 22: Connecting the StackWise-480/1T Cable in a StackWise Port Cisco logo Connector screws Step 3 Connect the other end of the cable to the port on the other switch and finger-tighten the screws. Avoid overtightening the screws.
-
Page 20: Connecting To The Stackpower Ports
For information on network modules, see: • Installing a Network Module Installing and Removing Cisco Pluggable Transceiver Modules See these sections for information on Cisco pluggable transceiver modules (SFP, SFP, SFP28 and QSFP+ modules): • Installing a Cisco Pluggable Transceiver Module •... - Page 21 PoE inline power supports devices compliant with the IEEE 802.3af standard, as well as prestandard Cisco IP Phones and Cisco Aironet Access Points. Each port can deliver up to 15.4 W of PoE. PoE+ inline power supports devices compliant with the IEEE 802.3at standard, by delivering up to 30 W of PoE+ power per port to all switch ports.
- Page 22 Ethernet cabling (Category 5e or higher). To achieve this, it uses two Power Sourcing Equipment (PSE) controllers to power both the signal pairs and the spare pairs. Cisco UPOE+ guarantees 71.3 W of power to a class 8 Powered Device (PD). The following figure shows the architectural difference between PoE/PoE+ and Cisco UPOE/UPOE+.