
Related Manuals for AEG HG654440


Summary of Contents for AEG HG654440
- Page 1 Gebruiksaanwijzing HG654440 Kookplaat User Manual Notice d'utilisation Table de cuisson...
-
Page 2: Table Of Contents
9. TECHNISCHE INFORMATIE.................. 15 10. ENERGIEZUINIGHEID..................16 VOOR PERFECTE RESULTATEN Bedankt dat u voor dit AEG-product heeft gekozen. Dit apparaat is ontworpen om vele jaren uitstekend te presteren, met innovatieve technologieën die het leven gemakkelijker helpen maken met functies die gewone apparaten wellicht niet hebben. -
Page 3: Veiligheidsinformatie
NEDERLANDS VEILIGHEIDSINFORMATIE Lees zorgvuldig de meegeleverde instructies voor installatie en gebruik van het apparaat. De fabrikant is niet verantwoordelijk voor letsel en schade veroorzaakt door een foutieve installatie. Bewaar de instructies van het apparaat voor toekomstig gebruik. 1.1 Veiligheid van kinderen en kwetsbare mensen Dit apparaat kan worden gebruikt door kinderen van 8 •... -
Page 4: Veiligheidsvoorschriften
Probeer brand nooit met water te blussen, maar • schakel in plaats daarvan het apparaat uit en bedek de vlam, d.w.z. met een deksel of blusdeken. Bewaar geen voorwerpen op de kookplaten. • Metalen voorwerpen, zoals messen, vorken, lepels en •... - Page 5 NEDERLANDS • Als het apparaat geïnstalleerd is beschadigt. Neem contact op met boven lades zorg er dan voor dat de onze service-afdeling of een ruimte tussen de onderkant van het elektromonteur om een beschadigde apparaat en de bovenste lade hoofdkabel te vervangen. voldoende is voor luchtcirculatie.
- Page 6 2.4 Gebruik • Zet geen heet kookgerei op het bedieningspaneel. WAARSCHUWING! • Laat kookgerei niet droogkoken. Gevaar op letsel, • Laat geen voorwerpen of kookgerei brandwonden of elektrische op het apparaat vallen. Het oppervlak schokken. kan beschadigen. • Activeer de kookzones niet met lege •...
-
Page 7: Beschrijving Van Het Product
NEDERLANDS • Trek voor • Neem contact met uw plaatselijke onderhoudswerkzaamheden de overheid voor informatie m.b.t. stekker uit het stopcontact. correcte afvalverwerking van het • Gebruik geen waterstralen of stoom apparaat. om het apparaat te reinigen. • Haal de stekker uit het stopcontact. •... - Page 8 4.1 Branderoverzicht 1. Druk de bedieningsknop helemaal in en draai de knop linksom naar de maximale gastoevoerstand ( 2. Houd de bedieningsknop ongeveer 10 seconden ingedrukt. Het thermokoppel kan dan opwarmen. Als u dat niet doet, wordt de gastoevoer onderbroken.
-
Page 9: Aanwijzingen En Tips
NEDERLANDS 4.3 De brander uitschakelen De vonkontsteking kan automatisch starten wanneer Om de vlam te doven, de knop naar de u de stekker in het off-positie draaien stopcontact steekt, na de installatie of na een WAARSCHUWING! stroomonderbreking. Dat is Draai de vlam altijd lager of normaal. -
Page 10: Onderhoud En Reiniging
6. ONDERHOUD EN REINIGING WAARSCHUWING! Raadpleeg de hoofdstukken Veiligheid. 6.1 Algemene informatie • Reinig de kookplaat na elk gebruik. • Gebruik altijd pannen met een schone bodem. • Krassen of donkere vlekken op de 6.3 De kookplaat oppervlakte hebben geen invloed op schoonmaken de werking van de kookplaat. -
Page 11: Probleemoplossing
NEDERLANDS 7. PROBLEEMOPLOSSING WAARSCHUWING! Raadpleeg de hoofdstukken Veiligheid. 7.1 Wat moet u doen als… Probleem Mogelijke oorzaak Oplossing Er is geen vonk als u de De kookplaat is niet aan- Controleer of de kookplaat vonkgenerator tracht te ac- gesloten op een stopcontact goed is aangesloten op het tiveren. -
Page 12: Montage
7.3 Labels meegeleverd in de zak met accessoires Bevestig de stickers zoals hieronder weergegeven: MOD. MOD. MOD. TYPE PROD.NO. IP20 PROD.NO. PROD.NO. SER.NO. 0049 SER.NO SER.NO 03 IT DATA DATA MADE IN ITALY A) Plak het op de garantiekaart en C) Plak het op het instructieboekje. - Page 13 NEDERLANDS bewegende onderdelen, of dat ze niet • de leiding geen barsten, sneden, vastgeklemd worden. Wees ook vlekken of brandsporen vertoont op voorzichtig wanneer de kookplaat wordt de twee uiteinden en over de geplaatst op een oven. volledige lengte; • het materiaal niet gehard is, maar de Controleer of de juiste elasticiteit vertoont;...
- Page 14 8.4 Aanpassing van het • Zorg ervoor dat het netsnoer na installatie bereikbaar is. minimale niveau (alleen voor • Trek niet aan het netsnoer om het België) apparaat los te koppelen. Trek altijd aan de stekker. Het minimumniveau van de branders •...
-
Page 15: Technische Informatie
NEDERLANDS verwijderen zijn en eenvoudig toegang bieden indien technische hulp nodig is. Keukenmeubel met deur 30 mm min 20 mm 10 mm 11 mm (max 150 mm) 3 mm 11 mm 60 mm A) Verwijderbaar paneel B) Ruimte voor aansluitingen Keukenmeubel met oven Om veiligheidsredenen en om een gemakkelijke verwijdering van de oven... -
Page 16: Energiezuinigheid
Categorie apparaat: II2E+3+ (BE) I2E (LU) Gasaansluiting: R 1/2" Apparaatklasse: 9.3 Bypassdiameters BRANDER Ø BYPASS 1/100 mm Driekronenbrander Normale brander Sudderbrander 9.4 Gasbranders voor AARDGAS G20/G25 20/25 mbar (BE) - G20 20 mbar (LU) BRANDER NORMAAL VERMO- MINIMUM VERMO-... - Page 17 NEDERLANDS Type kooktoestel Ingebouwde kook- plaat Aantal gasbranders Linksachter - Normale brander 53.5% Rechtsachter - Driekro- 52.0% nenbrander Energiezuinigheid per gasbrander (EE gas burner) Rechtsvoor - sudderbrander niet van toepass- Linksvoor - Normale brander 53.5% Energiezuinigheid voor de gas- 53.0% kookplaat (EE gas hob) EN 30-2-1: Huishoudelijke kooktoestellen op gas - Deel 2-1 : Energieverbruik -...
- Page 18 10. ENERGY EFFICIENCY..................31 FOR PERFECT RESULTS Thank you for choosing this AEG product. We have created it to give you impeccable performance for many years, with innovative technologies that help make life simpler features you might not find on ordinary appliances. Please spend a few minutes reading to get the very best from it.
-
Page 19: Safety Information
ENGLISH SAFETY INFORMATION Before the installation and use of the appliance, carefully read the supplied instructions. The manufacturer is not responsible if an incorrect installation and use causes injuries and damages. Always keep the instructions with the appliance for future reference. -
Page 20: Safety Instructions
Do not store items on the cooking surfaces. • Metallic objects such as knives, forks, spoons and lids • should not be placed on the hob surface since they can get hot. Do not use a steam cleaner to clean the appliance. - Page 21 ENGLISH 2.3 Gas connection • Before carrying out any operation make sure that the appliance is • All gas connections should be made disconnected from the power supply. by a qualified person. • Make sure that the electrical • Before installation, make sure that the information on the rating plate agrees local distribution conditions (nature of with the power supply.
- Page 22 • The vapours that very hot oil releases • This appliance is for cooking can cause spontaneous combustion.
-
Page 23: Product Description
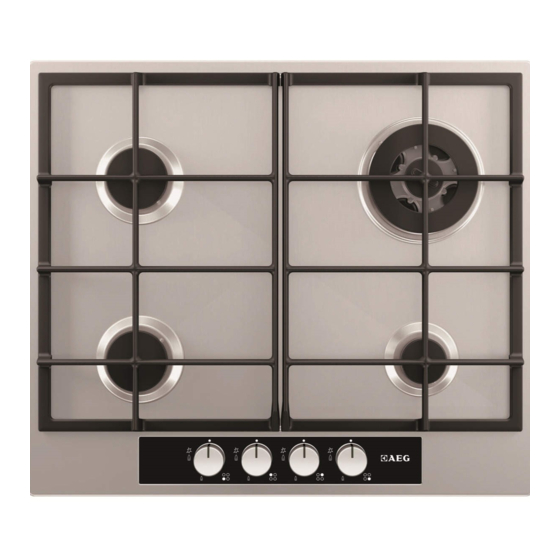
ENGLISH 3. PRODUCT DESCRIPTION 3.1 Cooking surface layout Semi-rapid burner Triple Crown burner Auxiliary burner Control knobs 3.2 Control knob Symbol Description Symbol Description ignition position / maxi- mum gas supply no gas supply / off posi- tion minimum gas supply 4. - Page 24 4.2 Ignition of the burner If the burner accidentally goes out, turn the control Always light the burner knob to the off position and before you put on the try to light the burner again cookware. after minimum 1 minute.
-
Page 25: Hints And Tips
ENGLISH 5. HINTS AND TIPS WARNING! CAUTION! Refer to Safety chapters. Make sure that pot handles are not above the front edge of the cooktop. 5.1 Cookware CAUTION! CAUTION! Make sure that the pots are Do not use cast iron pans, placed centrally on the potstones, earthenware, grill burner in order to get... -
Page 26: Troubleshooting
Clean the hob with a moist cloth and 3. After you clean the pan supports, some detergent. After cleaning, rub make sure that they are in correct the hob dry with a soft cloth. -
Page 27: Installation
ENGLISH Problem Possible cause Remedy The flame ring is uneven. Burner crown is blocked with Make sure that the injector is food residues. not blocked and the burner crown is clean. 7.2 If you cannot find a during the warranty period. The instructions about the Service Centre and solution... - Page 28 8.2 Gas Connection Liquid gas Use the rubber pipe holder for liquid WARNING! gas. Always engage the gasket. Then The following instructions continue with the gas connection. about installation, The flexible pipe is prepared for apply connection and when: maintenance must be •...
- Page 29 ENGLISH you must fit an applicable pressure • Make sure that there is an access to adjuster on the gas supply pipe. the mains plug after the installation. • Do not pull the mains cable to 8.4 Adjustment of minimum disconnect the appliance.
-
Page 30: Technical Information
8.8 Possibilities for insertion The panel installed below the hob must be easy to remove and let an easy access in case a technical assistance intervention is necessary. Kitchen unit with door 10 mm 11 mm 30 mm 3 mm... -
Page 31: Energy Efficiency
ENGLISH 9.3 Bypass diameters BURNER Ø BYPASS 1/100 mm Triple Crown Semi-rapid Auxiliary 9.4 Gas burners for NATURAL GAS G20/G25 20/25 mbar (BE) - G20 20 mbar (LU) BURNER NORMAL POWER kW MINIMUM POWER INJECTOR MARK 1/100 mm Triple Crown Semi-rapid 0,45 Auxiliary... - Page 32 EN 30-2-1: Domestic cooking appliances burning gas - Part 2-1 : Rational use of energy - General 10.2 Energy saving • Before use, make sure that the burners and pan supports are assembled correctly. • Use cookware with diameters applicable to the size of burners.
- Page 33 10. RENDEMENT ÉNERGÉTIQUE................47 POUR DES RÉSULTATS PARFAITS Merci d'avoir choisi ce produit AEG. Nous l'avons conçu pour qu'il vous offre des performances irréprochables pour longtemps, en intégrant des technologies innovantes qui vous simplifient la vie grâce à des caractéristiques que vous ne trouverez pas forcément sur des appareils ordinaires.
-
Page 34: Consignes De Sécurité
CONSIGNES DE SÉCURITÉ Avant d'installer et d'utiliser cet appareil, lisez soigneusement les instructions fournies. Le fabricant ne peut être tenu pour responsable des dommages et blessures liés à une mauvaise installation ou utilisation. Conservez toujours cette notice avec votre appareil pour vous y référer ultérieurement. -
Page 35: Instructions De Sécurité
FRANÇAIS Il peut être dangereux de laisser chauffer de la graisse • ou de l'huile sans surveillance sur une table de cuisson car cela pourrait provoquer un incendie. N'essayez jamais d'éteindre un feu avec de l'eau. • Éteignez l'appareil puis couvrez les flammes, par exemple avec un couvercle ou une couverture ignifuge. - Page 36 • Isolez les surfaces découpées à l'aide récipients brûlants lorsque vous d'un matériau d'étanchéité pour branchez l'appareil à des prises éviter que la moisissure ne provoque électriques situées à proximité. des gonflements. • N'utilisez pas d'adaptateurs • Protégez la partie inférieure de multiprises ni de rallonges.
- Page 37 FRANÇAIS • Cet appareil n'est pas raccordé à un incendie à température plus faible dispositif d'évacuation des produits que l'huile n'ayant jamais servi. de combustion. Assurez-vous de • Ne placez pas de produits brancher l'appareil selon les inflammables ou d'éléments imbibés réglementations d'installation en de produits inflammables à...
-
Page 38: Description De L'appareil
été conçu, à • Ne lavez pas les brûleurs au lave- des fins de chauffage par exemple. vaisselle. • Ne laissez pas de liquides acides, tels 2.6 Mise au rebut que du vinaigre, du jus de citron ou du produit détartrant, entrer en... -
Page 39: Utilisation Quotidienne
FRANÇAIS Symbole Description alimentation en gaz mini- male 4. UTILISATION QUOTIDIENNE 4.2 Allumage du brûleur AVERTISSEMENT! Reportez-vous aux chapitres Allumez toujours le brûleur concernant la sécurité. avant de poser un récipient dessus. 4.1 Vue d'ensemble des brûleurs AVERTISSEMENT! Faites très attention lorsque vous utilisez une flamme nue dans une cuisine. -
Page 40: Conseils
ATTENTION! Le générateur d'étincelles En cas de coupure peut s'activer d'électricité, vous pouvez automatiquement lorsque allumer le brûleur sans vous allumez l'alimentation dispositif électrique : pour secteur, après l'installation cela, approchez une flamme ou après une coupure de du brûleur, tournez la courant. -
Page 41: Entretien Et Nettoyage
FRANÇAIS 5.2 Diamètres des récipients Brûleur Diamètre du Utilisez uniquement des récipient (mm) récipients dont le diamètre correspond aux dimensions Semi-rapide (avant) 120 - 180 des brûleurs. Semi-rapide (arrière) 120 - 220 Brûleur Diamètre du Auxiliaire 80 - 180 récipient (mm) Triple couronne 180 - 260 6. -
Page 42: Cas D'anomalie De Fonctionnement
également que les orifices des en place. couronnes des brûleurs ne sont pas obstrués. 6.4 Nettoyage de la bougie 6.5 Entretien périodique d'allumage Contactez périodiquement votre service Cette fonctionnalité est obtenue grâce à après-vente pour contrôler l'état du une bougie d'allumage en céramique... -
Page 43: Installation
FRANÇAIS instructions relatives au service après- vente et aux conditions de garantie figurent dans le livret de garantie. 7.3 Étiquettes fournies dans le sachet des accessoires Collez les étiquettes adhésives comme indiqué ci-dessous : MOD. MOD. MOD. TYPE PROD.NO. IP20 PROD.NO. - Page 44 à la réglementation en vigueur Vérifiez les points suivants pour contrôler (NBN D 51.003). Si vous utilisez des le bon état du tuyau flexible : tuyaux flexibles métalliques, ils ne • il ne présente aucune fente, coupure, doivent pas entrer en contact avec des marque de brûlure sur les deux...
- Page 45 FRANÇAIS 8.4 Réglage au niveau minimal • Assurez-vous que la prise de courant est accessible une fois l'appareil (uniquement pour la Belgique) installé. • Ne tirez jamais sur le câble Pour régler le niveau minimal des d'alimentation pour débrancher brûleurs : l'appareil.
-
Page 46: Caractéristiques Techniques
8.8 Possibilités d'insertion Le panneau installé sous la table de cuisson doit être facile à retirer et facilement accessible au cas où une intervention technique serait nécessaire. Élément de cuisine avec porte 10 mm 11 mm 30 mm 3 mm... -
Page 47: Rendement Énergétique
FRANÇAIS Raccordement au gaz : R 1/2" Classe de l'appareil : 9.3 Diamètres des vis de réglage BRÛLEUR Ø VIS DE RÉGLAGE 1/100 mm Triple couronne Semi-rapide Auxiliaire 9.4 Brûleurs à gaz pour le GAZ NATUREL G20/G25 20/25 mbar (BE) - G20 20 mbar (LU) BRÛLEUR PUISSANCE NOR- PUISSANCE MINI-... - Page 48 Arrière gauche - Semi-rapide 53.5% Efficacité énergétique selon le brû- Arrière droit - Triple couronne 52.0% leur à gaz Avant droit - Auxiliaire non applicable (EE gas burner) Avant gauche - Semi-rapide 53.5% Efficacité énergétique de la table 53.0%...
- Page 49 FRANÇAIS...
- Page 50 www.aeg.com...
- Page 51 FRANÇAIS...
- Page 52 www.aeg.com/shop...