
Related Manuals for AEG FES5396XZM


Summary of Contents for AEG FES5396XZM
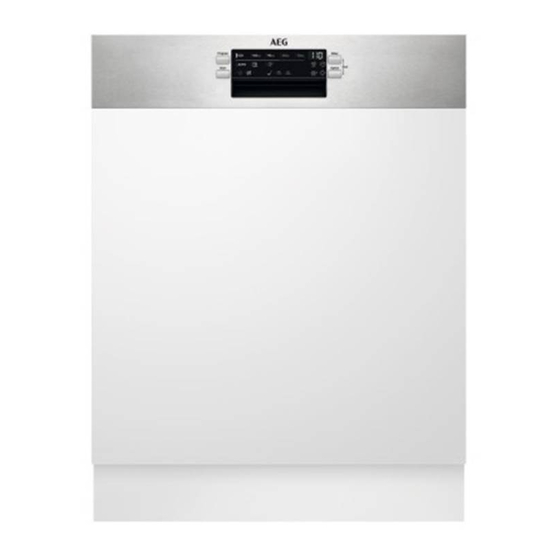
- Page 1 FES5396XZM Gebruiksaanwijzing Afwasautomaat User Manual Dishwasher USER MANUAL...
-
Page 2: Table Of Contents
14. MILIEUBESCHERMING................... 29 VOOR PERFECTE RESULTATEN Bedankt dat je voor dit AEG-product hebt gekozen. We hebben het gecreëerd om jarenlang onberispelijke prestaties te leveren, met innovatieve technologieën die het leven eenvoudiger maken – functies die je wellicht niet op gewone apparaten aantreft. -
Page 3: Veiligheidsinformatie
NEDERLANDS VEILIGHEIDSINFORMATIE Lees zorgvuldig de meegeleverde instructies voor installatie en gebruik van het apparaat. De fabrikant is niet verantwoordelijk voor verwondingen of schade die voortvloeit uit de onjuiste installatie of het onjuiste gebruik. Bewaar de instructies altijd op een veilige, toegankelijke plek voor toekomstig gebruik. -
Page 4: Veiligheidsvoorschriften
& breakfast en – andere woonomgevingen. De specificatie van dit apparaat niet wijzigen. • De waterdruk (minimaal en maximaal) moet liggen • tussen 0.5 (0.05) / 8 (0.8) bar (MPa) Volg het maximale aantal 14 plaatsen. - Page 5 NEDERLANDS • Installeer of gebruik het apparaat niet • De watertoevoerslang heeft een op een plek waar de temperatuur veiligheidsventiel en een omhulsel onder de 0 °C komt. met een hoofdkabel aan de • Installeer het apparaat op een veilige binnenkant.
-
Page 6: Productbeschrijving
• Met betrekking tot de lamp(en) in dit vervallen. product en reservelampen die • De volgende reserveonderdelen zijn afzonderlijk worden verkocht: Deze beschikbaar gedurende 7 jaar nadat lampen zijn bedoeld om bestand te... - Page 7 NEDERLANDS Plafondspuitarm Glansmiddeldoseerbakje Bovenste sproeiarm Afwasmiddeldoseerbakje Onderste sproeiarm Onderste korf Filters Bovenste korf Typeplaatje Besteklade Zoutreservoir Luchtventilatie...
-
Page 8: Bedieningspaneel
4. BEDIENINGSPANEEL Aan/uit-toets Option-toets Program-toets Controlelampjes Programma-controlelampjes Start-toets Display Delay-toets 4.1 Indicatielampjes Indicatie‐ Beschrijving lampje Indicatielampje zout. Dit is aan als het zoutreservoir bijgevuld dient te wor‐ den. Het is altijd uit als het programma in werking is. Indicatielampje glansspoelmiddel. Dit is aan als het glansspoelmiddeldo‐... -
Page 9: Programma's
NEDERLANDS Indicatie‐ Beschrijving lampje Indicatielampje ExtraPower. Indicatielampje ExtraHygiene. 5. PROGRAMMA’S De volgorde van de programma´s in de tabel geeft mogelijk hun volgorde op het bedieningspaneel niet weer. Programma Type lading Mate van be‐ Programmafasen Opties vuiling • Vaatwerk • Normaal •... - Page 10 Programma Type lading Mate van be‐ Programmafasen Opties vuiling • Vaatwerk • Fris • Wassen op 50 °C • ExtraPower • Bestek • Tussentijdse spoe‐ • GlassCare ling • ExtraHygiene • Laatste spoeling 50 °C • AirDry • Vaatwerk Het program‐...
-
Page 11: Opties
NEDERLANDS Water (l) Energieverbruik Duur (min) 1)2) Programma (kWh) 9.9 - 12.1 0.56 - 0.69 8.7 - 12.0 0.75 - 1.18 120 - 170 8.9 - 10.9 0.60 - 0.72 4.1 - 5.0 0.01 - 0.04 1) De druk en temperatuur van het water, de variaties in stroomtoevoer, de opties, de hoeveelheid vaat en mate van vervuiling kunnen de verbruikswaarden veranderen. -
Page 12: Instellingen
6.3 ExtraHygiene Het display geeft de bijgewerkte programmaduur weer. Deze optie zorgt voor meer hygiënische resultaten door de temperatuur tijdens de 6.2 ExtraPower laatste spoelfase gedurende minstens 10 Deze optie verbetert de wasresultaten minuten tussen 65 °C en 70 °C te van het geselecteerde programma. - Page 13 NEDERLANDS Waterhardheid Duitse hard‐ Franse hard‐ mmol/l Clarke- Wateronthardings‐ heid (°dH) heid (°fH) hardheid niveau 47 - 50 84 - 90 8,4 - 9,0 58 - 63 43 - 46 76 - 83 7,6 - 8,3 53 - 57 37 - 42 65 - 75 6,5 - 7,5 46 - 52...
- Page 14 7.3 De aanduiding van leeg droogfase. In dat geval verlengt de regeneratie de totale duur van een glansmiddelreservoir programma met nog eens 5 minuten. Het glansmiddel zorgt dat het Vervolgens kan het spoelen van de serviesgoed zonder vlekken of strepen waterontharder wat 5 minuten duurt, droogt.
-
Page 15: Voor Het Eerste Gebruik
NEDERLANDS LET OP! Als kinderen toegang tot het apparaat hebben, adviseren we AirDry om te deactiveren. Het automatisch openen van de deur kan een gevaar vormen. Deactiveren van AirDry Zorg dat het apparaat in de gebruikersmodus staat. 1. Druk op Delay. AirDry wordt bij alle programma's •... -
Page 16: Dagelijks Gebruik
8.2 Het Het zout wordt gebruikt om de hars in de waterontharder te herladen en voor glansspoelmiddelreservoir goede wasresultaten voor dagelijks vullen gebruik. Het zoutreservoir vullen 1. Draai de dop linksom om het zoutreservoir te openen. 2. Doe 1 liter water in het zoutreservoir (alleen de eerste keer). - Page 17 NEDERLANDS • Vul het zoutreservoir als het Raadpleeg de instructies zoutindicatielampje aan staat. van de fabrikant op de • Vul het glansmiddeldoseerbakje verpakking van het product als het glansmiddellampje brandt. voor informatie over de 3. Ruim de rekken in. dosering van het 4.
-
Page 18: Aanwijzingen En Tips
De uitgestelde start 2. Blijf op Delay drukken tot het display de uitgestelde tijd toont die u wilt annuleren tijdens het aftellen instellen (van 1 tot 24 uur). 3. Druk op Start om het aftellen te Als u de uitgestelde start annuleert, moet starten. - Page 19 NEDERLANDS gebruikershandleiding en overbelast u glansmiddel en zout voor optimale de korven niet. reinigings- en droogresultaten. • Spoel de vaat niet eerst af. Het • Vaatwasmiddeltabletten lossen bij verhoogt het water- en korte programma's niet geheel op. energieverbruik. Kies indien nodig Om te voorkomen dat een programma met voorwasfase.
-
Page 20: Onderhoud En Reinigen
10.5 Voordat u een 6. De aanduiding leeg glansmiddelreservoir activeren. programma start 10.4 De korven inruimen Zorg vóór het starten van het gekozen programma dat: • Gebruik altijd de hele ruimte van de • De filters schoon zijn en correct zijn korven. - Page 21 NEDERLANDS • Gebruik het automatische reinigingsprogramma voor optimale reinigingsresultaten. • Het regelmatig gebruiken van korte programma´s kan ophoping van vet en kalk in het apparaat tot gevolg hebben. Draai minstens tweemaal per maand lange programma´s om deze ophoping te voorkomen. 11.2 Vreemde voorwerpen verwijderen Controleer de filters en de opvangbak na...
- Page 22 LET OP! Een onjuiste plaatsing van de filters kan leiden tot slechte wasresultaten en het apparaat beschadigen. 11.5 De onderste sproeiarm reinigen We raden u aan om de onderste sproeiarm regelmatig schoon te maken, om te voorkomen dat de gaten verstopt raken met vuil.
- Page 23 NEDERLANDS 11.6 De bovenste sproeiarm 2. Beweeg de bovenmand naar het reinigen onderste niveau om beter bij de sproeiarm te kunnen. Verwijder de bovenste sproeiarm niet. 3. Draai om de sproeiarm (C) van de Als de openingen in de sproeiarm toevoerleiding (A) los te koppelen het verstopt zijn, verwijder dan de resterende bevestigingselement (B) naar links...
-
Page 24: Probleemoplossing
12. PROBLEEMOPLOSSING zonder contact op te nemen met een WAARSCHUWING! erkend servicecentrum. Onjuiste reparatie van het Zie de onderstaande tabel voor apparaat kan een gevaar informatie over mogelijke problemen. voor de veiligheid van de gebruiker vormen. Bij sommige problemen toont het display Reparaties moeten worden een alarmcode. - Page 25 NEDERLANDS Probleem en alarmcode Mogelijke oorzaak en oplossing Storing van de waspomp of • Schakel het apparaat uit en aan. de afvoerpomp. Op het display verschijnt i51 - i59 of i5A - i5F. De temperatuur van het wa‐ • Controleer of de temperatuur van het toegevoerde water ter in het apparaat is te hoog niet hoger is dan 60 °C.
- Page 26 Probleem en alarmcode Mogelijke oorzaak en oplossing Ratelende/kloppende gelui‐ • Het serviesgoed is niet juist in de korven gerangschikt. den vanuit het apparaat. Raadpleeg de folder voor het laden van de korven. • Controleer of de sproeiarmen vrij kunnen ronddraaien.
- Page 27 NEDERLANDS Probleem Mogelijke oorzaak en oplossing Slechte droogresultaten. • Serviesgoed heeft te lang in het gesloten apparaat ge‐ staan. Activeer de functie AirDry om het automatisch openen van de deur in te stellen en de droogprestatie te verbeteren. • Het glansspoelmiddel is op of de dosering van het glansspoelmiddel is niet voldoende.
-
Page 28: Technische Informatie
Probleem Mogelijke oorzaak en oplossing Geuren in het apparaat. • Raadpleeg De binnenkant reinigen. • Start het programma met een ontkalker of een rei‐ nigingsproduct bestemd voor vaatwassers. Kalkresten op het servies‐ • Het zoutniveau is laag, controleer de bijvulaanduiding. -
Page 29: Milieubescherming
NEDERLANDS 13.1 Link naar de EU-EPREL- product in de EU-EPREL-databank te vinden via de link https:// databank eprel.ec.europa.eu en de modelnaam en het productnummer kunt u vinden op het De QR-code op het energielabel dat bij typeplaatje van het apparaat. Zie het het apparaat wordt geleverd, biedt een hoofdstuk ‘Productbeschrijving’. -
Page 30: Safety Information
14. ENVIRONMENTAL CONCERNS..............54 FOR PERFECT RESULTS Thank you for choosing this AEG product. We have created it to give you impeccable performance for many years, with innovative technologies that help make life simpler – features you might not find on ordinary appliances. Please spend a few minutes reading to get the very best from it. - Page 31 ENGLISH responsible for any injuries or damage that are the result of incorrect installation or usage. Always keep the instructions in a safe and accessible location for future reference. 1.1 Children and vulnerable people safety This appliance can be used by children aged from 8 •...
-
Page 32: Safety Instructions
If the supply cord is damaged, it must be replaced by • the manufacturer, its Authorised Service Centre or similarly qualified persons in order to avoid a hazard. WARNING: Knives and other utensils with sharp • points must be loaded in the basket with their points down or placed in a horizontal position. - Page 33 ENGLISH • Do not pull the mains cable to • Do not remove the dishes from the disconnect the appliance. Always pull appliance until the programme is the mains plug. complete. Some detergent may • This appliance is fitted with a 13 A remain on the dishes.
-
Page 34: Product Description
2.6 Disposal • Cut off the mains cable and discard it. • Remove the door catch to prevent WARNING! children and pets to get closed in the Risk of injury or suffocation. appliance. • Disconnect the appliance from the mains supply. -
Page 35: Control Panel
ENGLISH 4. CONTROL PANEL On/off button Option button Program button Indicators Programme indicators Start button Display Delay button 4.1 Indicators Indicator Description Salt indicator. It is on when the salt container needs refilling. It is always off while the programme operates. Rinse aid indicator. -
Page 36: Programmes
5. PROGRAMMES The order of the programmes in the table may not reflect their sequence on the control panel. Programme Type of Degree of Programme phases Options load soil • Crockery • Normal • Prewash • ExtraPower • Cutlery •... - Page 37 ENGLISH Programme Type of Degree of Programme phases Options load soil • All types • All degrees • Prewash of loads of soil 1) This programme offers the most efficient use of water and energy consumption for crockery and cut‐ lery with normal soil.
-
Page 38: Options
6. OPTIONS in the wash temperature of the selected Desired options must be programme and reduces it to 45 °C. This activated every time before protects glassware from damaging. you start a programme. It is not possible to activate... - Page 39 ENGLISH 7.2 The water softener After activation, the appliance is in programme selection mode by default. If The water softener removes minerals not, set the programme selection mode from the water supply, which would have the following way: a negative effect on the washing results Press and hold simultaneously Delay and on the appliance.
- Page 40 All the consumption values Water softener lev‐ Amount of water mentioned in this section are determined in accordance with the currently applicable standard in laboratory conditions with water hardness 2.5mmol/L according to the 2019/2022 regulation (water softener: level 3).
-
Page 41: Before First Use
ENGLISH How to deactivate the rinse The duration of the drying phase and the door opening time vary depending on the aid empty notification selected programme and options. Make sure the appliance is in user mode. When AirDry opens the door, the display shows the remaining time of the running 1. - Page 42 8.1 The salt container 8.2 How to fill the rinse aid dispenser CAUTION! Use rough salt designed for dishwashers only. Fine salt increases the risk of corrosion. The salt is used to recharge the resin in the water softener and to assure good washing results in daily use.
-
Page 43: Daily Use
ENGLISH 9. DAILY USE 1. Open the water tap. For information about the 2. Press the on/off button to activate the detergent dosage, refer to appliance. the manufacturer's Make sure that the appliance is in instructions on the programme selection mode. packaging of the product. -
Page 44: Hints And Tips
Cancelling the delay start 2. Press Delay repeatedly until the display shows the desired delay time while the countdown (from 1 to 24 hours). operates 3. Press Start to begin the countdown. When you cancel the delay start you •... - Page 45 ENGLISH • Soak or slightly scour cookware with hardness. Refer to the instructions on firmly cooked-on or baked-on food the detergent packaging. before washing it in the appliance. • Always use the correct quantity of • Make sure that items in the baskets rinse aid.
-
Page 46: Care And Cleaning
• Put cutlery and small items in the • The arrangement of the items in the cutlery drawer. baskets is correct. • Move the upper basket upwards to • The programme is suitable to the type accommodate large items in the lower of load and the degree of soil. - Page 47 ENGLISH • Do not use abrasive products, abrasive cleaning pads or solvents. 11.4 Cleaning the filters The filter system is made of 3 parts. 5. Make sure that there are no residues of food or soil in or around the edge of the sump.
- Page 48 11.5 Cleaning the lower spray 11.6 Cleaning the upper spray arm We recommend to clean the lower spray Do not remove the upper spray arm. If arm regularly to prevent soil from the openings in the spray arm are clogging the holes.
-
Page 49: Troubleshooting
ENGLISH element (B) counterclockwise and 5. To install the spray arm (C) back, pull the spray arm downwards. insert the mounting element (B) in 4. Wash the spray arm under running the spray arm and fix it in the delivery water. - Page 50 Problem and alarm code Possible cause and solution The appliance does not fill • Make sure that the water tap is open. with water. • Make sure that the pressure of the water supply is not The display shows i10 or too low.
- Page 51 ENGLISH Problem and alarm code Possible cause and solution The displayed programme • Refer to the consumption values table in the chapter duration is different than the "Programmes". duration in the consumption values table. The remaining time in the • This is not a defect.
- Page 52 12.1 The dishwashing and drying results are not satisfactory Problem Possible cause and solution Poor washing results. • Refer to "Daily use", "Hints and tips" and the basket loading leaflet. • Use more intensive washing programme. • Activate the ExtraPower option to improve the washing results of a selected programme.
-
Page 53: Technical Information
ENGLISH Problem Possible cause and solution Odours inside the appliance. • Refer to "Internal cleaning". • Start the programme with a descaler or a cleaning product designed for dishwashers. Limescale deposits on the ta‐ • The level of salt is low, check the refill indicator. bleware, on the tub and on the •... -
Page 54: Environmental Concerns
13.1 Link to the EU EPREL EPREL database using the link https:// eprel.ec.europa.eu and the model name database and product number that you can find on the rating plate of the appliance. Refer to The QR code on the energy label the chapter "Product description". - Page 56 www.aeg.com/shop...