Table of Contents
Advertisement
Quick Links
Advertisement
Table of Contents

Related Manuals for Honeywell Notifier AM12-24


Summary of Contents for Honeywell Notifier AM12-24
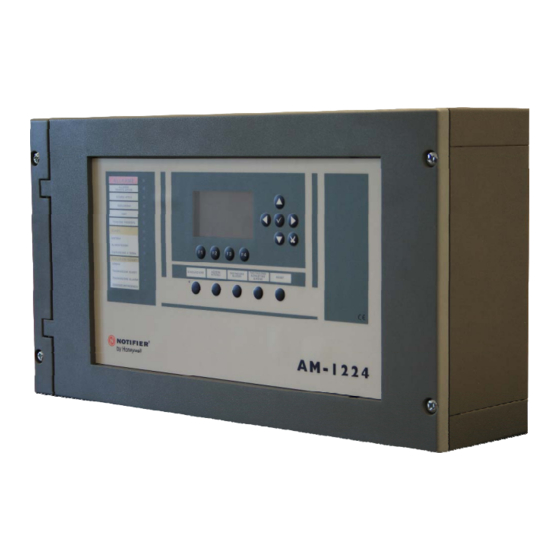
- Page 1 AM12-24 Conventional fire panel...
-
Page 2: Table Of Contents
INDICE DETECTION SYSTEM LIMITS DESCRIPTION Main features ELECTRICAL FEATURES INSTALLATION Detection lines Characteristics of relay outputs Lines connections Auxiliary Alarm devices Main Board Line expansion card (line 13 ÷ 24) 16 Outputs optional card Display board – Front Panel FRONT PANEL Front panel commands and indications Visual indication of the Front panel indications USER INTERFACE DESCRIPTION... -
Page 3: Detection System Limits
NOTE: Do not try to install the control unit and devices connected without reading this manual. DETECTION SYSTEM LIMITS An alarm or fire detection system can be very useful for the prompt warning of any dangerous event, such as fire, a robbery or a simple burglary, in some cases it can automatically manage events (transmission of messages for room evacuation, automatic fire-extinguishing, TVCC system interface, access route or door blockage, automatic warning to authorities, etc.), but in any case, it does not ensure protection against damages to propriety or damages caused by fires or robberies). -
Page 4: Description
AM1224 is a zone fire detection panel designed to comply the EN54.2 and EN54.4 European rules. The panel in the standard configuration have 12 detection lines ( zones) that can be expanded to 24 using an option card. In addition a second option card is available to provide 8 relays outputs and 8 Open Collector outputs. Each output can be activated by use of the Control by Event programming . -
Page 5: Electrical Features
Working temperature: -5°C +40°C. Relative Humidity: 10% 93% (no condensation). Storage temperature: -10°C +50°C. Weigth: 4,7Kg The internal power supply provide: 27,6 Vdc + 2 % - 10 %, 1,4 Adc with max. ripple 300 mV (summing panel power supply and outputs) ... -
Page 6: Installation
DIMENSIONS FOR WALL MOUNTING For installation in a corner it is The contol panel has to be wall necessary to have a distance of mounted in order to allow a clear 280mm to let the frontal panel visibility of the disply and an easy open. -
Page 7: Detection Lines
The power supply cable must preferably pass near the relative terminal block. The connection to the 230 V power supply shall be made through 3 conductors cable (phase, neutral, earth). The registration of the earth conductor coming from the main shall be connected to the CNAL terminal block and must be fixed to the cabinet so that it can not accidentally be teared from the terminal. -
Page 8: Characteristics Of Relay Outputs
FUNCTION Feature Max 2A resistive 30Vdc, NO-NC programmable by Jumper JALL General Alarm Max 2A resistive 30Vdc, NO-NC programmable by Jumper JGST General Fault The general Fault relay is normally energized. EN54-2 8.8 In Fault condition it will be de-energized. EN54 Fault Output ... -
Page 9: Auxiliary Alarm Devices
Through the sounder output, the control panel may drive a 24 Vdc sounder. The panel checks permanently the control line integrity (against Cut and Short-circuit). For this function the sounder shall have an end-of-line resistance. The output is protected by a 1 A fuse. Polarized Not polarized CN0-5... - Page 10 CN0 terminals Terminal # Note Description Max 2A resistive 30Vdc, ALARM Relay NO-NC Contact NO-NC selectable via JALL Jumper ALARM Relay Common Max 2A resistive 30Vdc FAULT Relay NO-NC Contact NO-NC selectable via JGST Jumper FAULT Relay Common Protected with 1A Fuse SOUNDER (–) (shown polarity, normal condition) Total current: 1A (Sounder+User )
-
Page 11: Line Expansion Card (Line 13 ÷ 24)
÷ ÷ Main board terminal terminal block block connection CN2 Terminal Terminal # Description Note Line 13 - (GND) Line 14 - (GND) Line 15 - (GND) Line 16- (GND) Line 17 - (GND) Line 18 - (GND) Line 19 - (GND) Line 20 - (GND) Line 21 - (GND) End of Line resistor... -
Page 12: Outputs Optional Card
terminal block Base board terminal block J SERIES: contact relay selection Jumper Default: N.O. CN3 terminals Description Jumper Reference to Note Program CBE Relay 1 - Com. Max 2A 30Vcc resistive load, Relay 1 - NO-NC Contact NO-NC selectable by Relay 2 - Com. -
Page 13: Display Board - Front Panel
– – Keyboard Programmation key jumper connector Default: N.O. Base board terminal block Front panel indications LEDs AM-1224 Installation and programming manual PAGINA - 11 AM-1224_manu Doc. M-124.1-AM1224-ENG Rev A.1 NOTIFIER ITALIA... -
Page 14: Front Panel
EVACUATION : It is the command to activate the sounder output. To do this procedure it is necessary to digit the password of level 2. END DELAY : This button is enabled only in case of alarm if the immediate sounder activation was disabled. -
Page 15: Visual Indication Of The Front Panel Indications
Visual indication of the Front panel ALARM (Red) : It is flashing kf at least a device is in alarm, and it has not been identified. It is fixed lighted Acceso if all the alarm status have been identifed. REMOTE ALARM (Red) : It remains lighted if the output to the transmission devices for the fire alarm has been activated. -
Page 16: User Interface Description
USER INTERFACE DESCRIPTION Functions List Functions EN.54 Level Manufactured Default Password Visualization of alarms and troubles Level 1 none Identification of alarms and troubles Level 1 none Reset of delay (dedicated push-button) Level 1 none Visualization of excluded zones/points Level 1 none Exclusion menù... -
Page 17: Stand-By Condition
Stand-by condition The following screen is visualized when the control panel is in stand-by condition. Icon for the indication of the control panel status. Without alarm and troubles the NOTIFIER logo is visualized. With Disabled points/zone an exclamation marks report them(!). With Alarms the symbol of a Flame is visualized and the backlit of display become red. -
Page 18: Recommended Sequence For Contol Panel Configuration
RECOMMENDED SEQUENCE FOR CONTOL PANEL CONFIGURATION NOTE: BEFORE ANY CONFIGURATION AT LEVEL 4 IT IS NECESSATY TO ENABLE THE SAME LEVEL 4 MOVING J1 JUMPER (HARDWARE KEY PROGR.) LOCATED ON THE DISPLAY BOARD. REACHABLE BY OPENING THE CONTROL PANEL. The following is the recommended sequence of initial configuration of the control panel, in order to prevent errors or oversights and time consuming. -
Page 19: Display In Zone Alarm Condition
Display in Zone Alarm condition In ZONE ALARM condition the display background become RED. Event Date and hour First zone in alarm Text programmed For the zone name Event Date and hour Last zone in alarm Note: each zone can be associated Text programmed up to 5 physical lines. -
Page 20: Display In System Trouble Condition
Using ENTER key user have access to the list of lines in fault condition with the name of line as follow: Line in Fault Text programmed For the Line name By pressing the key ENTER again user can toggle between the display of line name and type of fault: Line in Fault Type of Fault With escape... -
Page 21: Display In Zone Test Condition
Display in Zone Test condition The following screen is displayed when the panel is in zone alarm condition during a Zone Walk test: Alarm event from a Date & Time zone in Test mode of the event Pressing the ENTER key User can display the Zone Name (text description associated to the zone). -
Page 22: Configuration Menù
Ù Ù Pressing the function key F1 you can access the programming menu, where you have the ability to perform the initial configuration of the system and to make any changes to the programming. To access the menu you must enter the Password Level 4 (default password: 44444) end enable the hardware key on the display board (Jumper J1 in A position;... -
Page 23: Timing
In this sub menu are programmed alarm outputs delay, the delay time to check sensors alarms, silence inhibitio, etc. “Alarm output” “Sounder” delay are expressed in seconds, from a minimum of 0 sec. to a max. of 600 sec. By pressing the Enter key activates the function of editing. -
Page 24: Password
MAIN FAULT DETECTION TIME From menù “Prog\Syst\Timings” press arrow dx. key 4 to configure mains fault detection time “Main (S)” . It is the minimum time that must be missing the power supply 230Vac to have the report of mains fault. Timings are expressed in seconds, from a minimum of 0 sec. -
Page 25: Detector Line
Detector line From program menù: Program menù Detector line Selecting “Detector line” the screen of line configuration will appears, as shwn in following picture. (“Enable line”, ”Line name” , “zone assignment” and “Verification option” ) This procedure consists of 4 folders programming (to access to the folders use arrow keys 4). To enter data see the editing mode, described above in the section describing the keyboard data entry operation. -
Page 26: Auxiliary Input
Line number The control panel carries out an automatic reset of the line with verification function enabled. After this procedure, which takes about 20s if the alarm is still present, is validated Press F1 to Press F2 to configure configure previous line next line and use arrow keys to modify parameters, finally press enter key... -
Page 27: Output
Output Select "Output" and confirming the selection with the Enter key to enter the in full configuration procedure. This procedure consists of 3 folders programming (to access to the folders use the arrow keys 4). To enter data see the editing mode, described above in the section describing the keyboard data entry operation. Output folders are well described: o First folder or main folder. -
Page 28: Zone
Zone The zones are clusters of lines. Serve as starting points to identify the location of an event. A zone may contain max 32 devices. Zones can be 24 max. Each zone can be associated with 5 detection lines. _ = Zone not associated to detection line Zone number P = Zone associated to detection line. -
Page 29: Utility Menù
Ù Ù From the main menu, with the function key F2 main menu you can access the Utility menu that contains some functions that are generally used by technical support staff. To access the menu you must enter the password for Level 3 (33333 is the default password). To enter the password see the editing mode, described above in the section describing the keyboard data entry operation. -
Page 30: History Log
History log This function allows the user both the visualization of the archives content and the cancellation. The historical archive has capability of a maximum of 500 events. When the 500 events are reached, in the case of the new event the control panel erase the oldest event and stores the new event. -
Page 31: Status Reading/ Status Change
Status Reading/ Status Change This feature allows to review the status of a line, an output or a zone. . To select the next lines use the function keys. The first line status will show of default Linea number Linea name Linea status... -
Page 32: Mask Menù
. To select the next zone use the function keys. The first zone status will show of default Zone number Zona number Zone status Press F1 to Press F2 to configure configure previous zone next zone Firmaware release ... - Page 33 selecting "View" the user enters the following menu where the devices are displayed by type: Counter number of devices excluded To view the list of excluded items use arrow keys to select desired item, then press enter key to confirm the selection.
- Page 34 Output The display show the first outpu of default. When an output is excluded the control panel inhibits the activations associated. To exclude an output select it with the function keys. Once you select a line, press the Enter key and with arrow key ...
- Page 35 When immediate sounder output exclusion is enabled, LED exclusion and Delay active LEDs are on. In case of alarm the control panel active the sounder delays output for the time programmed in Prog\Syst\Timings). the programming menù ( During the delay, the delay LEDs flashes and is possible reset the delay in progress by pressing the Reset Delay key.
- Page 36 Enter the zone number (from 1 to 24) for which you want to activate the test function. (00 = test function not activated) Enable CBE Select CBE active: YES In case of alarm from devices in the test zone, CBE equation associated will be activated.
-
Page 37: Test Menu
Description auxiliary inputs Remote power supply fault input. Activation of this input will generate a system fault. Level 2 input. Input for external evacuation command. This input has the same functionality as the key "EVACUATION" on the front panel. Second auxiliary input (Level 2 input) must be active. Technological alarm input. - Page 38 “ ” – “ ” – A typical programming of the control panel i defined CONTROL-BY-EVENT EQUATION (CBE). During the programming it is necessary to associate to every point, zone or group a CBE equation. The CONTROL-BY-EVENT equation allows the configurations of a series of conditions that the control panel will value when the point, the zone or the group are actived, and it will execute the programmed actuations.
- Page 39 It is the operator which requires EACH operand to be ACTIVE. Example: the output module equation is: AND (L09 L15 L23). Only if ALL THREE operands in this equation are in alarm, the output module will be activated, that is: - IF the line L09 is in alarm, and - IF the line L15 is in alarm, and - IF the line L23 is in alarm...
-
Page 40: Appendix "A" -Control By Event Equation
Example 1: if the equation of the output 10 is DEL(00.30 01.30(L21)) then: Enter a space character - After 30 seconds from the activation of the L21 line, the output 10 will be activated and will remain active for 1 minute and 30 seconds. - Page 41 Is the user that allow to programm the output activations with periodical time limits. There are two possible formats: Enter a space Enter a space character character FORMAT Type 1 : TIM (SU MO TU WE TR FR SA 00.MM 00.MM) Days of activation Start time...
- Page 42 Via Grandi, 22 E-mail: notifier@notifier.it A Honeywell company Numero Assistenza Tecnica: 039-9301410 Every care has been taken in the preparation of this data sheet but no liability can be accepted for the use of the information therein. Design features may be changed or amended without prior notice.