Table of Contents
Advertisement
Available languages
Available languages
Advertisement
Chapters
Table of Contents

Related Manuals for Linksys RE7000


Summary of Contents for Linksys RE7000
- Page 1 User Guide AC1900 Wi -Fi Range Extender Model # RE7000...
-
Page 2: Table Of Contents
You cannot access your range extender ..................24 You have intermittent connection problems ................26 Speci cations ....................... 27 RE7000 ..............................27 Environmental ............................27... -
Page 3: Product Overview
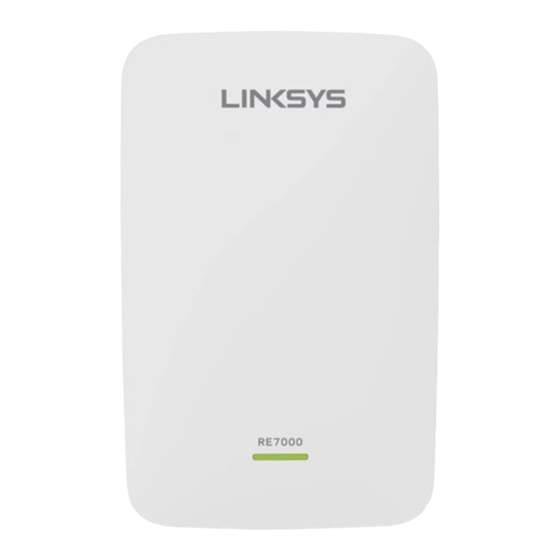
Product Overview Front view The indicator LED on the front of the range extender gives you information about power, updating and signal strength. Power Light Status/ description Blinking Green Star ting up. Resetting to factory defaults. Upgrading rmware. Solid Green Ready to use. -
Page 4: Side View
Side view WPS™ Button —Use Wi -Fi Protected Setup to automatically and securely add compatible wireless devices to your network with Push Button Connect . Refer to Using WPS on page Reset Button —Press and hold until the power light on the front of the range extender blinks to reset to factory defaults. - Page 5 Ethernet Port (blue) —Connect wired devices to your wireless network with Ethernet (network) cables. The green light turns on when an Ethernet device is connected and active on this port. The light blinks when the extender is sending or receiving data over the Ethernet port.
-
Page 6: How To Install The Range Extender
How to Install the Range Extender There are two ways to use your Linksys extender: as a wireless range extender or as a wired range extender (access point). Wireless range extenders repeat existing Wi -Fi signals. Wired range extender s (access points) create new Wi -Fi hot spots when connected to a router or access point with an Ethernet cable. - Page 7 Wait for the indicator LED on the front of your range extender to blink amber before going to step 3 . This can take up to a minute. Extend your 2.4 GHz network. Press the WPS button on your router. Within the next two minutes complete step b.
- Page 8 If it blink s amber , the connection failed. You may try again by repeating step 3 or try brow ser -based setup on page Extend your 5 GHz network. You may skip this step if your router does not have a 5 GHz network or if you don't want to extend that network.
- Page 9 Connect your Wi -Fi devices to the extended network you just created. If you have setup your range extender with a Linksys Max -Stream Router, you don’t have to do anything. Max -Stream routers support seamless roaming, and your extended Wi network shares the same network name and password.
- Page 10 Connect to range extender setu p network. On a computer, phone or tablet, connect to the Wi -Fi network: Linksys Extender Setup XXX. ( XXX are the last three digits of your range extender’s MAC address.)
- Page 11 Launch setup. http://extender.linksys.com Enter (or try http://192.168.1.1) in a browser to complete setup. Follow the on -screen instructions Welcome to setup. Secure your range extender.
- Page 12 Range extender or access point? Choose a net work to extend.
- Page 13 Enter password for main network. Your extended wireless network.
-
Page 14: Setting Up As Wired Range Extender (Access Point)
Connect your Wi -Fi devices to the extended network you just created. If you have set up your range extender with a Linksys Max -Stream router, you don’t have to do anything. Max -Stream routers support seamless roaming, and your extended Wi network shares the same net work name and password. - Page 15 Wait for the blinking indicator LED to change from green to amber. Use an Ethernet cable to connect the ran ge extender to the LAN port of your router. Connect to the Linksys Extender Setup network. On a computer, phone, or tablet, connect to the Wi -Fi network Linksys Extender Setup –...
-
Page 17: How To Access The Settings Interface
Enter into a browser http://RE7000 -X XX (Window s) or http:/ /RE7000 -X XX.local or (Mac OS X or iO S). — Note XXX are the last 3 digits of your range extender’s MAC address. You can nd the MAC address on the back of your RE 70 00. - Page 18 MAC address label. Plug it back in and make sure the LED light is solid green before accessing the URL.) If you changed your range extender’s name, you can access the settings interface by entering the new name in a browser. For example: if you named your extender MyExtender, enter http://MyExtender (Windows) or http://MyExtender.local...
-
Page 19: Using Range Extender Settings
Using Range Extender Settings Click Help on the right side of the screen for additional information on the screen’s options. Changes to settings will not be e ective until you click Save at the bottom of the screen. You also can click Cancel to clear any changes. -
Page 20: Wps
W PS WPS makes it easy to connect your extender to your network, and connect other devices to your network through the extender. Connecting the range extender to an existing access point or wireless router (see p. 6 ) Connecting devices to your network through the range extender Repeat the instructions for each client device that supports W P S. - Page 21 a) Enter the PIN from the client device in the eld on the extender’s WPS screen. b) Click Register on the extender’s WPS screen. When the connection is complete, the indicator LED on the front of the range extender will be solid green for 10 seconds c) Click OK on the extender’s WPS screen within two minutes or you will have to start over.
-
Page 22: Site Survey
-Fi Protected Setup icon is also displayed. QoS (Quality of Service) RE7000 supports WMM (Wi -Fi Multimedia), which enhances the quality of se rvice (QoS) on a network . QoS prioritiz es data packets according to four tra c classes : v oice, video , best e ort, and background. -
Page 23: Cross -Band
Cross -Band Cross -Band is the simultaneous use of both bands for high -speed data transfer and uninterrupted streaming and gaming. When in Auto Cross -Band (default), the range extender selects the appropriate band (2.4 GHz or 5 GHz) when sending data from wireless clients to the Wi -Fi router. -
Page 24: Troubleshooting
Troubleshooting Your range extender works on 2.4GHz and 5 GHz networks. You cannot get your range extender connected Check the position of your router and extender. For rst -time setup, you may need to place the extender closer to the router. After you’ve set up your extender, you can unplug it and move it to the nal location. - Page 25 If you are prompted to enter a network security key, type your password ( s ecurity k ey) into the network s ecurity key eld. Click OK . Your computer will connect to the extended network, and you sho uld be able to access the range extender’s settings interface *Depending on your version of Windows, there could be some di erences in wording or ico ns in...
-
Page 26: You Have Intermittent Connection Problems
Click the extended network name of your range extender (Damaged_Beez2.4_Ex t in the example). Type your wireless network password (Security Key) into the Password eld. Click OK You have intermittent connection problems Plug in the range extender midway between your router and the area without Wi -Fi. -
Page 27: Speci Cations
Speci cations RE 70 00 Description Dual -band Wireless -AC Range Extender Standards IEEE 802.11ac, 802.11a, 802.11n, 802.11g, 802.11b, 802.3ab Ports Gigabit Ethernet Buttons Reset, Wi -Fi Protected Setup™ LEDs Power, Wi -Fi Protected Setup, Ethernet (link, activity) Wireless Security Wi -Fi Protected Access™... - Page 28 -winning 24/7 technical support. BELKIN, LINKSYS and many product names and logos are trademarks of the Belkin group of companies. Third -party trademarks mentioned are the property of their respective owners. Licenses and notices for third party software used in this product may be viewed here: http://support.linksys.com/en...
- Page 29 Guía de usuario Extensor de red Wi AC1900 Núm. de modelo: RE7000...
- Page 30 ........ . 25 Resolución de problemas .................. No p uede conectar el extensor de red ..................No puede acceder al extensor de alcance ................... Tiene problemas de conexión intermitentes ................Especi caciones ....................RE7000 ..............................Datos físicos ............................
-
Page 31: Descripción Del Producto
Descripción del producto Vista frontal El indicador LED del frontal del extensor de red le informa sobre la alimentación, las actualizaciones y la potencia de la señal inalámbrica. Estado/descripción alimentación Parpadeando en Iniciando. verde Restaurando la con guración de fábrica. Actualizando el rmware. -
Page 32: Vista Lateral
Vista lateral Botón WPS™ : presione el botón de conexión de Wi -Fi Protected Setup para añadir automática y seguramente dispositivos inalámbricos a su red. Consulte el apartado de Utilización de WPS en la página Botón de Reset (Reinicio): presiónelo hasta que la luz de alimentación del frontal del extensor de red parpadee para restaurar la con guración de fábrica. -
Page 33: Vista Inferior
Vista inferior LED: el LED con rma que existe una conexión Ethernet con el router principal. Puerto Ethernet (azul) : conecte dispositivos con conexión por cable a su red inalámbrica con cables (de red) Ethernet. La luz verde se enciende cuando hay un dispositivo Ethernet conectado a este puerto y se está... -
Page 34: Cómo Instalar El Extensor De Red
Ethernet. En ambos casos se requiere de un router conectado a internet. Antes de comenzar de nuevo debe decidir si desea utilizar el RE7000 como un extensor de red inalámbrico o uno por cable (punto de acceso). - Page 35 Antes de ir al paso 3 espere a que el indicador LED en el frontal del extensor parpadee en color ámbar. Esto puede tardar hasta un minuto. Extienda su red de 2,4 GHz. Presione el botón de WPS en su router. Complete el paso 3b en los siguientes dos minutos .
- Page 36 Si se enciende en verde jo la conexión se ha completado con éxito. Vaya al paso 4. Si parpadea en ámbar , se ha producido un error al efectuar la conexión. Puede intentarlo de nuevo repitiendo el paso 3 o realizando la instalación por navegador web en la página Extienda su red de 5 G Puede saltarse este paso si su router no cuenta con una red de 5 GHz o si no desea...
- Page 37 -Fi a la red extendida que acaba de crear. Si ha instalado su extensor de red con un router Max -Stream de Linksys no tiene que hacer nada. Los routers Max -Stream son compatibles con la itinerancia continua y la red Wi -Fi extendida comparte el mismo nombre y contraseña de red.
- Page 38 Use este método de instalación si no cuenta con un botón WPS en el router o si no quiere utilizar WPS para instalar y con gurar el RE7000. Enchufe extensor de red. Conecte el extensor a media distancia entre el router y el área sin cobertura Wi -Fi.
- Page 39 Conecte a la red de instalación del extensor de red. Desde un ordenador, teléfono o una tablet conecte a la red Wi -Fi: Linksys Extender Setup XXX. ( XXX son los últimos tres dígitos de la dirección MAC del extensor de red).
- Page 40 Inicie la instalación. http://extender.linksys.com Introduzca (o intente http://192.168.1.1) en un explorador web para completar la instalación. Siga las instrucciones que aparecen en la pantalla: Bienven ido a la instalación. Proteja su extensor de red.
- Page 41 ¿Extensor de red o punto de acceso? Seleccione una red a extender.
- Page 42 Introduzca la contraseña de la red principal. Su red inalámbrica extendida.
- Page 43 -Fi a la red extendida que acaba de crear. Si ha instalado su extensor de red con un router Max -Stream de Linksys no tiene que hacer nada. Los routers Max -Stream son compatibles con la itinerancia continua y la red Wi -Fi extendida comparte el mismo nombre y contraseña de red.
-
Page 44: Instalación Como Un Extensor De Red (Punto De Acceso)
Asegúrese de que tiene una conexión a internet activa y un cable Ethernet lo su cientemente largo para conectar el router al extensor de red. Enchufe el extensor Linksys en una toma de corriente. Espere a que el indicador LED parpadeante cambie de color de verde a ámbar. - Page 45 Una vez que el extensor pueda acceder al router todos los dispositivos conectados al extensor tendrán acceso también.
-
Page 46: Cómo Acceder A La Interfaz De Con Guración
Si no ha cambiado el nombre predeterminado del extensor de red podrá igualmente acceder a la interfaz de con guración una vez esté conectado al router principal. Introduzca en u n explorador w eb http ://RE7000 -X XX (Windows) o http://RE7 0 0 0 -X XX.local... - Page 47 Nota: XXX son los últimos tres dígitos de la dirección MAC del extensor de red. La dirección MAC se encuentra en la parte posterior del RE6700. (es posible que tenga que desenchufar el extensor de red para poder ver la etiqueta de la dirección MAC. Vuelva a enchufa rlo y asegúrese de que la luz LED está...
-
Page 48: Utilización De La Con Guración Del Extensor De Red
Utilización de la con guración del extensor de red Haga clic en Ayuda en la parte derecha de la pantalla para obtener información adicional sobre las opciones de la pantalla. Los cambios que realice en la con guración no entrarán en vigor hasta que haga clic en Guardar en la parte inferior de la pantalla. -
Page 50: Wps
WPS facilita la conexión del extensor a la red, así como la conexión de otros dispositivos a la red a través del extensor. Conexión del extensor de red a un punto de acceso o router ya existente (ver página 6 ). Conexión de dispositivos a su red a través del extensor de red. - Page 51 a) Introduzca el PIN del dispositivo cliente en el campo de la pantalla de WPS del extensor de red. b) Haga clic en Registrar en la pantalla de WPS del extensor. Una vez que la conexión se haya completado el indicador LED del frontal del extensor de red se encenderá...
-
Page 52: Búsqueda De Redes Cercanas
á también el icono de Wi Protected Setup. QoS (calidad de servicio) RE7000 admite WMM (Wi -Fi Multimedia) que mejora la calidad del servicio (QoS) en una red. QoS prioriza los paquetes de datos según cuatro clases de trá co: voz, vídeo, mejor esfuerzo y en el fondo. -
Page 53: Cross -Band
Cross -Band La función Cross -Band (Banda cruzada) optimiza el uso simultáneo de las dos bandas para alcanzar la máxima velocidad de transferencia de datos y reproducción por streaming y juego multijugador online sin interrupciones. Cuando se utiliza la función de Auto Cross -Band (por defecto) el extensor de red selecciona la banda más adecuada (2,4 GHz o 5 GHz) mientras se envían datos desde cliente... -
Page 54: Resolución De Problemas
Resolución de problemas Su extensor de red funciona en las redes de 2,4 y 5 GHz. No puede conectar el exten sor de red Compruebe la posición del router y el extensor de red. Para la instalación inicial puede que necesite colocar el extensor cerca del router. Una vez que haya con gurado el extensor, podrá... - Page 55 Haga clic en el nombre de la red extendida. Haga clic en Conectar. En el ejemplo que se muestra a continuación, el ordenador estaba conectado a otra red inalámbrica con el nombre wraith_5GHz. Su nombre de red extendida, Damaged_Beez2.4_Ext en este ejemplo, se muestra como seleccionada.
-
Page 56: Tiene Problemas De Conexión Intermitentes
En el ejemplo que se muestra a continuación, el ordenador estaba conectado a otra red inalámbrica nombre wraith_5GHz. nombre extendida, Damaged_Beez2.4_Ext en este ejemplo, se muestra como seleccionada. Haga clic en el nombre de red extendida de su extensor de red (Damaged_Beez2.4_Ext en el ejemplo). -
Page 57: Especi Caciones
E speci caciones RE7000 Descripción Extensor de red Wi -Fi AC 1900 Estándares IEEE 802.11ac, 802.11a, 802.11n, 802.11g, 802.11b, 802.3ab Puertos Gigabit Ethernet Botones Reset (Reinicio), Wi -Fi Protected Setup™ Indicadores LED Alimentación, Wi -Fi Protected Setup, Ethernet (enlace, actividad) Seguridad inalámbrica... - Page 58 BELKIN, LINKSYS y otros nombres y logotipos de productos son marcas comerciales del grupo de empresas Belkin. Las marcas comerciales de terceros mencionadas pertenecen a sus respectivos propietarios. Licencias y notas de aviso para software de t erceros usados en este producto pueden ser consultadas aquí:...