Table of Contents
Advertisement
Advertisement
Table of Contents

Related Manuals for Linksys RE7000


Summary of Contents for Linksys RE7000
- Page 1 User Guide AC1900 Wi-Fi Range Extender Model # RE7000...
-
Page 2: Table Of Contents
Access Control ............................22 Troubleshooting ....................23 You cannot get your range extender connected ............... 23 You cannot access your range extender ..................23 You have intermittent connection problems ................25 Specifications ....................... 26 RE7000 ..............................26 Environmental ............................26... -
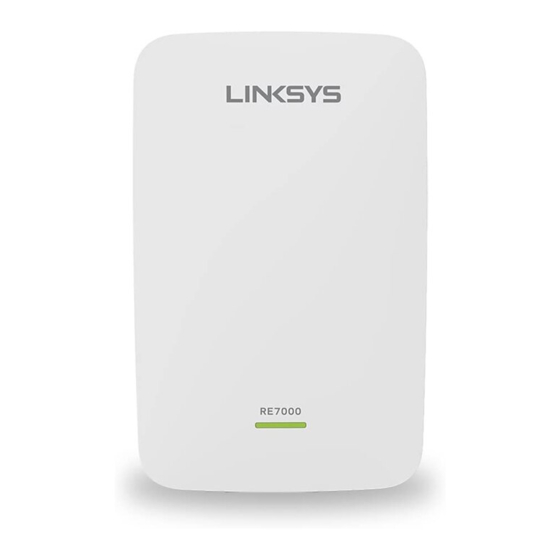
Page 3: Product Overview
Product Overview Front view The indicator LED on the front of the range extender gives you information about power, updating and signal strength. Power Light Status/ description Blinking Green Starting up. • Resetting to factory defaults. • Upgrading firmware. • Solid Green Ready to use. -
Page 4: Side View
Side view WPS™ Button—Use Wi-Fi Protected Setup to automatically and securely add compatible wireless devices to your network with Push Button Connect. Refer to Using WPS on page 6. Reset Button—Press and hold until the power light on the front of the range extender blinks to reset to factory defaults. - Page 5 Ethernet Port (blue)—Connect wired devices to your wireless network with Ethernet (network) cables. The green light turns on when an Ethernet device is connected and active on this port. The light blinks when the extender is sending or receiving data over the Ethernet port.
-
Page 6: How To Install The Range Extender
How to Install the Range Extender There are two ways to use your Linksys extender: as a wireless range extender or as a wired range extender (access point). Wireless range extenders repeat existing Wi-Fi signals. Wired range extenders (access points) create new Wi-Fi hotspots when connected to a router or access point with an Ethernet cable. - Page 7 2. Wait for the indicator LED on the front of your range extender to blink amber before going to step 3. This can take up to a minute. 3. Extend your 2.4 GHz network. a. Press the WPS button on your router. Within the next two minutes complete step b.
- Page 8 If it blinks amber , the connection failed. You may try again by repeating step 3 or try browser-based setup on page 9. 4. Extend your 5 GHz network. You may skip this step if your router does not have a 5 GHz network or if you don't want to extend that network.
- Page 9 7. Connect your Wi-Fi devices to the extended network you just created. If you have setup your range extender with a Linksys Max-Stream Router, you don’t have to do anything. Max-Stream routers support seamless roaming, and your extended Wi-Fi network shares the same network name and password.
- Page 10 This can take up to a minute 3. Connect to range extender setup network. On a computer, phone or tablet, connect to the Wi-Fi network: Linksys Extender Setup - XXX. (XXX are the last three digits of your range extender’s MAC address.)
- Page 11 4. Launch setup. http://extender.linksys.com Enter (or try http://192.168.1.1) in a browser to complete setup. Follow the on-screen instructions: Welcome to setup. Secure your range extender.
- Page 12 Range extender or access point? Choose a network to extend.
- Page 13 Enter password for main network. Your extended wireless network.
-
Page 14: Setting Up As Wired Range Extender (Access Point)
5. Connect your Wi-Fi devices to the extended network you just created. If you have set up your range extender with a Linksys Max-Stream router, you don’t have to do anything. Max-Stream routers support seamless roaming, and your extended Wi-Fi network shares the same network name and password. - Page 15 4. Use an Ethernet cable to connect the range extender to the LAN port of your router. 5. Connect to the Linksys Extender Setup network. On a computer, phone, or tablet, connect to the Wi-Fi network Linksys Extender Setup – XXX, where XXX are the last 3 digits of your range extender’s MAC address.
-
Page 17: How To Access The Settings Interface
XXX are the last 3 digits of your range extender’s MAC address. You can find the MAC address on the back of your RE7000. (You might have to unplug your range extender to see the MAC address label. Plug it back in and make sure the LED light is solid green before accessing the URL.) -
Page 18: Using Range Extender Settings
Using Range Extender Settings Click Help on the right side of the screen for additional information on the screen’s options. Changes to settings will not be effective until you click Save at the bottom of the screen. You also can click Cancel to clear any changes. -
Page 19: Wps
WPS makes it easy to connect your extender to your network, and connect other devices to your network through the extender. Connecting the range extender to an existing access point or wireless router (see p. 6) Connecting devices to your network through the range extender Repeat the instructions for each client device that supports WPS. - Page 20 a) Enter the PIN from the client device in the field on the extender’s WPS screen. b) Click Register on the extender’s WPS screen. When the connection is complete, the indicator LED on the front of the range extender will be solid green for 10 seconds.
-
Page 21: Site Survey
QoS (Quality of Service) RE7000 supports WMM (Wi-Fi Multimedia), which enhances the quality of service (QoS) on a network. QoS prioritizes data packets according to four traffic classes: voice, video, best effort, and background. We recommend keeping the default QoS settings. -
Page 22: Cross-Band
Cross-Band Cross-Band is the simultaneous use of both bands for high-speed data transfer and uninterrupted streaming and gaming. When in Auto Cross-Band (default), the range extender selects the appropriate band (2.4 GHz or 5 GHz) when sending data from wireless clients to the Wi-Fi router. Access Control All devices connected to your range extender can access your Wi-Fi network if the extender can access the router. -
Page 23: Troubleshooting
Troubleshooting Your range extender works on 2.4GHz and 5 GHz networks. You cannot get your range extender connected Check the position of your router and extender. For first-time setup, you may need to place the extender closer to the router. After you’ve •... - Page 24 3. If you are prompted to enter a network security key, type your password (security key) into the network security key field. Click OK. 4. Your computer will connect to the extended network, and you should be able to access the range extender’s settings interface.
-
Page 25: You Have Intermittent Connection Problems
3. Click the extended network name of your range extender (Damaged_Beez2.4_Ext in the example). 4. Type your wireless network password (Security Key) into the Password field. Click OK You have intermittent connection problems Plug in the range extender midway between your router and the area without Wi-Fi. Be sure you have at least 50% of your router’s Wi-Fi signal at that point on the device you used for setup. -
Page 26: Specifications
Specifications RE7000 Description Dual-band Wireless-AC Range Extender Standards IEEE 802.11ac, 802.11a, 802.11n, 802.11g, 802.11b, 802.3ab Ports Gigabit Ethernet Buttons Reset, Wi-Fi Protected Setup™ LEDs Power, Wi-Fi Protected Setup, Ethernet (link, activity) Wireless Security Wi-Fi Protected Access™ 2 (WPA2), Wi-Fi Protected Access™ (WPA), WEP... - Page 27 Visit linksys.com/support/RE7000 for award-winning 24/7 technical support. BELKIN, LINKSYS and many product names and logos are trademarks of the Belkin group of companies. Third-party trademarks mentioned are the property of their respective owners. Licenses and notices for third party software used in this product may be viewed here: http://support.linksys.com/en-us/license.