Table of Contents
Advertisement
Quick Links
Operating and Installation Instructions
Built-in Oven
Household Use
:
Model No.
HL-CK632B
Operating and Installation Instructions .................................................................................... 3 - 35
Thank you for purchasing the Panasonic product.
• This appliance is intended for household use only.
• Please read these instructions carefully before attempting to install, operate or service this product.
• For optimum performance and safety, please read these instructions carefully and follow safety precautions when
using this product.
• Before using this product please pay extra attention to "Safety Precautions" (Page 4 - 6).
Keep this Operating and Installation Instructions for future use
Advertisement
Table of Contents

Related Manuals for Panasonic HL-CK632B


Summary of Contents for Panasonic HL-CK632B
- Page 1 HL-CK632B Operating and Installation Instructions ..................3 - 35 Thank you for purchasing the Panasonic product. • This appliance is intended for household use only. • Please read these instructions carefully before attempting to install, operate or service this product.
-
Page 3: Table Of Contents
Tables of Contents Safety Precautions ..........................4 Parts Identification ..........................7 • Parts Identification ..........................7 • Accessories ............................8 • Control Panel ............................9 Using the Oven ...........................10 • Function Setting ..........................10 • Before Using the Oven ........................11 • While Using the Oven ........................12 •... -
Page 4: Safety Precautions
Also, do not handle the • The Oven door is cracked. circuit breaker or external switch Contact a Panasonic Authorised with wet hand. Service Centre immediately for This appliance is not intended maintenance/repair. - Page 5 Safety Precautions Make sure to follow these instructions WARNING During use the appliance becomes The hinges on the appliance door hot. Care should be taken to avoid move when opening and closing touching heating elements inside the door, and you may be trapped. the oven.
- Page 6 Do not allow residues of sugary food (such as jam) to set inside the oven since they might damage the enamel lining of the oven. ■ Note: • Contact the Panasonic service centre or authorised dealer for maintenance and repair.
-
Page 7: Parts Identification
Parts Identification Parts Identification 1. Control Panel 2. Oven Lamp 3. Removable Rack 4. Removable Door 5. Name Plate... -
Page 8: Accessories
Warranty Card Screw Pack a: Screw Cap (2 pcs.) b: Screw (2 pcs.) c: Spacer (2 pcs.) ■ Note: • Contact the Panasonic service centre or authorised dealer for maintenance and repair. • Use original Panasonic accessories only. -
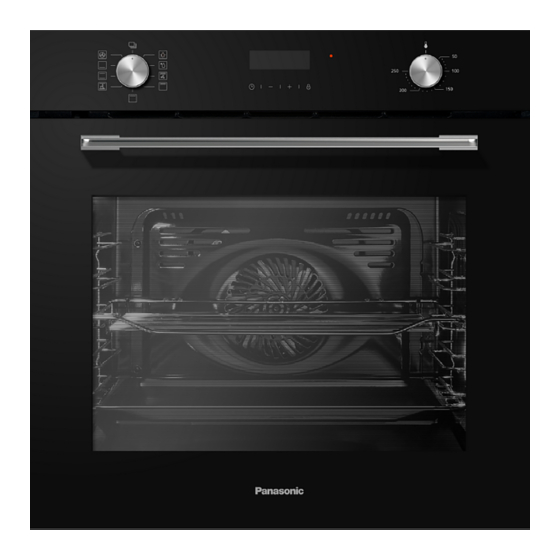
Page 9: Control Panel
Parts Identification Control Panel 2 3 4 5 6 7 1. Function Setting Knob • Turn to set the cooking function. 2. Main Display 3. Time Setting Button • Press to set clock, reminder, duration, or end time. 4. Minus Button 5. -
Page 10: Using The Oven
Using the Oven Function Setting Your appliance has various operating modes which make your appliance easier to use. To enable you to find the correct type of heating for your dish, we have explained the differences and scopes of application here. Types of heating Temperature For lightening the cavity without any heating... -
Page 11: Before Using The Oven
Using the Oven ■ Note: • To defrost big portions of food, it is possible to remove the side-racks and place the container on the cavity floor. • For warming tableware, it is beneficial to remove the side-racks and the heating modes “Conventional”... -
Page 12: While Using The Oven
Using the Oven While Using the Oven CAUTION All cooking operations must be carried out with the door fully closed. Do not cover the bottom of the oven with aluminium or tin foil sheets during cooking and do not place pans or trays on it to avoid damage to the enamel coating surface. -
Page 13: Operations
Using the Oven Operations Clock Setting After connecting the oven to the power supply, the Clock indicator and will be flashing on the display. 1. Press until the Clock Indicator ( ) flashes. 2. Within 5 seconds, press to adjust the time. (The range is 24 hrs.) •... - Page 14 Using the Oven Start/Cancel Function 1. For every cooking function, turn Function Setting knob to the cooking function as required to start operating the function. 2. Turn the Function Setting knob to the position to cancel the cooking function. Child Lock Function To Lock: Press and hold for approximately 3 seconds, beep will sound and will be...
- Page 15 Using the Oven Delay Function/End Function If the current time has been set, you can use the Delay Function/End Function. The delay/end function automatically starts and stops cooking according to the end time and duration time you set. 1. Press until the Duration Indicator ( ) flashes.
-
Page 16: Rack Placement
Using the Oven Rack Placement The cavity has five shelf positions. The shelf positions are counted from the bottom up. The accessories can be pulled out approximately halfway without tipping. ■ Note: • Ensure that you always insert the accessories into the cavity the right way round. •... -
Page 17: Cooking Advice And Instructions
Using the Oven Cooking Advice and Instructions General Advice Preheating the oven before putting the food in is recommended. Do not place food inside the oven until the temperature indicator light on the control panel lights off to confirm that the set temperature has been reached. - Page 18 Using the Oven Advice for Defrosting Positioning frozen food in a lid-less container is recommended. The food must be defrosted without its wrapping. Lay out the food in a single layer to be defrosted evenly, not overlapping. When defrosting meat, it is recommended to use the Wire Shelf positioned on the level-2 of the rack with the food on it and Baking Tray positioned on the level-1.
- Page 19 Using the Oven Typical Recipes Cooking Cake/ Weight/ Shelf Function Temp. Preheat time Cookies Quantity position setting (°C) (in minutes) Small Cake 20 pcs Convection 20-25 Small Cake 40 pcs 2 & 4 Convection 23-28 20 cm Apple pie Convection 70-75 diameter Sponge...
-
Page 20: Tips For Energy Saving
Using the Oven Tips for Energy Saving • Remove all accessories, which are not necessary during the cooking & baking process. • Do not open the door during the cooking & baking process. • If you open the door during cooking & baking, switch the mode to “Lamp” (Without change the temperature setting). -
Page 21: Cleaning And Maintenance
Cleaning and Maintenance WARNING Before performing cleaning and maintenance tasks, use isolation switch to disconnect the power supply. Children should not clean the oven or perform maintenance tasks. Area Appliance exterior Cleaning Appliance exterior Hot soapy water: Stainless steel front Clean with a dish cloth and then dry with a soft cloth. -
Page 22: Tips For Cleaning
Cleaning and Maintenance Area Appliance exterior Cleaning Accessories Hot soapy water: Soak and clean with a dish cloth or brush. If there are heavy deposits of dirt, use a stainless steel scouring pad. Rails Hot soapy water: Soak and clean with a dish cloth or brush. ■... -
Page 23: Cleaning The Oven Door
Cleaning and Maintenance Cleaning the Oven Door The glass door should always be kept throughly clean. Use absorbent kitchen roll; remove stubborn dirt with a damp sponge and an ordinary detergent. • Do not use a steam cleaner for cleaning the oven. •... - Page 24 Cleaning and Maintenance Removing the Door from Oven 1. Open the appliance door fully. 2. Fold open the two locking levers on the left and right. 3. Close the appliance door as far as the limit stop. 4. With both hands, grip the door on the left- and right-hand side, and pull it out upwards.
- Page 25 Cleaning and Maintenance Replacing the Oven Door Reattach the appliance door in the opposite sequence to removal. 1. When attaching the appliance door, ensure that both hinges are placed right onto the installing holes of the front panel of the cavity. Ensure that the hinges are inserted into the correct position.
- Page 26 Cleaning and Maintenance Removing the Door Cover Remove the appliance door like instructed above. The plastic inlay in the door cover may become discoloured. To carry out thorough cleaning, you can remove the cover. 1. Press on the right and left side of the cover. 2.
-
Page 27: Cleaning The Inside Of The Oven
Cleaning and Maintenance Cleaning the Inside of the Oven For the best oven maintenance, clean the oven regularly when it has cooled down after each cooking period. • Take out all removable parts. • For easier cleaning, the oven door can be removed. ■... - Page 28 Stop using the product when any abnormality/failure occurs and turn ‘OFF’ the isolating switch and the circuit breaker. (Risk of smoke/fire/electric shock) Contact a Panasonic Authorised Service Centre immediately for maintenance/repair. Cure Your Appliance When Needed If a fault occurs, before calling the after-sales service, please ensure that is not because of incorrect operations and refer to the fault table, attempt to correct the fault yourself.
-
Page 29: Bulb Replacement
Cleaning and Maintenance A temperature different from the recipe is The food is not sufficiently cooked in the used. Double check the temperatures. The time given by the recipe. ingredient quantities are different to the recipe. Double check the recipe. The temperature setting is too high, or the shelf level could be optimized. -
Page 30: Specifications
Glass cover If the glass cover of the halogen lamp is damaged, it must be replaced. You can obtain a new glass cover from the authorised dealer. Specifications Model HL-CK632B Voltage 220 - 240 V Wattage 2140 - 2504 W... -
Page 31: For Installer
Installation Instructions For Installer IMPORTANT If the oven is to work properly, the kitchen housing must be suitable. The panels of the kitchen unit that are next to the oven must be made of a heat resistant material. Ensure that the glues of units that are made of veneered wood can withstand temperatures of at least 120 °C. - Page 32 Installation Instructions For Installer The wires in the mains lead fitted to this oven are coloured in accordance with the following code: • Green and Yellow - Earth ( • Blue - Neutral (N) • Brown - Live (L) 220 - 240 V 16 A Proper size of flexible cord and electric wiring must be installed to avoid smoke...
-
Page 33: Positioning The Oven
Installation Instructions For Installer Positioning the Oven CAUTION Installing the oven with the help of a second person is recommended. The base on which the oven is resting must be completed as shown in below illustration. Never exert pressure on the handle during installation into the cabinet. 1. - Page 34 Installation Instructions For Installer 3. Before moving the oven for installation, check that the cabinet has following inner space dimensions. To allow adequate ventilation, the measurements and distances in below diagram must be applied when fixing the oven. Flush fit Proud fit Unit: mm Flush fit / Proud fit...
-
Page 35: Securing The Oven To A Cabinet
Installation Instructions Securing the Oven to a Cabinet Fix the oven to the cabinet with 2 pieces of provided screws and spacers as illustrated below. Attach 2 screw caps for finishing appearance. Base of kitchen cabinet Unit: mm ■ Note: •... - Page 36 Panasonic New Zealand Ltd 18 Sir Woolf Fisher Dr East Tamaki Auckland 2013 Panasonic Corporation NEW ZEALAND Website: http://www.panasonic.com/nz 2021 Printed in China P1221-0...