Table of Contents
Advertisement
Quick Links
Advertisement
Table of Contents

Related Manuals for Panasonic NP-B6M2FTNZ


Summary of Contents for Panasonic NP-B6M2FTNZ
- Page 1 Operating instructions & Installation instructions DISHWASHER (For Household Use Only) Model No. NP-B6M2FTNZ Thank you for purchasing this Panasonic product. Please read these instructions carefully before operating this product and retain them for future reference. For Domestic Use Only...
-
Page 2: Table Of Contents
Contents Contents…............………………........….. 2 Introducing the product .........…………........…….….. 4 Specifications …..........…………........…….….. 5 Safety Information and Recommendations ….…………........….….. 6 • Safety information ……..…………………………………........….…… 6 • Recommendations …...…..………………………..…………........…… 10 • Items not suitable for dishwashing …...…………..………........…… 10 Installation instructions ...……………......………...………………………….….. 11 • Positioning the machine ……...…………………………........….….…... 11 •... - Page 3 Contents Programme descriptions .…………......……………………………...…….. 26 • Programme items ……………………………………………..………………………...……… 26 The explanation of programmes ..................37 Getting familiar with your machine …........…….………...………...…… 29 Operating your machine ….................…..32 • Switching on the machine…………………………………………...….…………………..…. 32 • Programme follow-up …………………………………………………..…...………..…..…… 32 • Changing a programme ………………………………………...…….………….……..…… 33 •...
-
Page 4: Introducing The Product
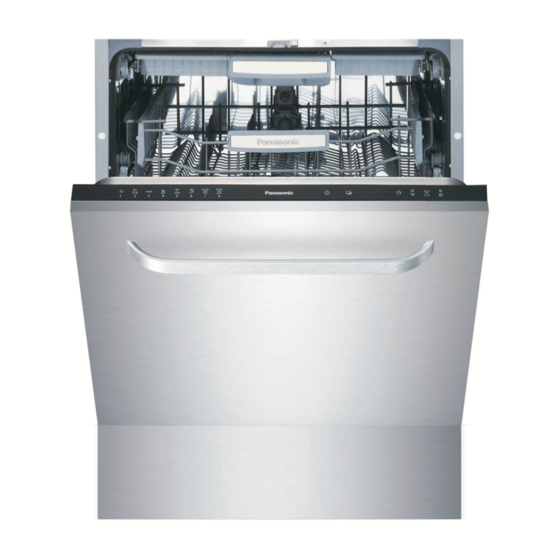
Introducing the product 1. Upper basket with racks 2. Upper spray arm 3. Lower basket 4. Lower spray arm 5. Filters 6. Rating plate 7. Control Panel 8. Detergent and rinse-aid dispenser 9. Upper basket track latch 10. Upper Cutlery Basket 11. -
Page 5: Specifications
Specifications Capacity 15 place settings Height 820 mm - 870 mm Width 598 mm Depth 550 mm Net Weight 42,8 kg Electricity input 220-240 V, 50 Hz Total Power 1900 W Heating Power 1800 W Pump Power 100 W Drain Pump Power 30 W Water supply pressure 0.03 MPa (0,3 bar)-1 MPa (10 bar) Current... -
Page 6: Safety Information And Recommendations
Safety Information and Recommendations Safety information On taking delivery of the machine • Carefully check the packaging and machine for any way damage. If the machine is in any damaged, do not use it and contact the Dealer. • Remove all packaging materials as indicated and dispose of them in accordance with local regulations. - Page 7 • Do not put any items into your machine which are not suitable for dishwashing. Also, do not fill any of the baskets above their capacity. Panasonic will not be responsible for any scratch or rust to form on the inner frame of your machine...
- Page 8 Safety Information and Recommendations • Due to the possibility of hot water flowing out of the machine, the door should not be opened under any circumstances while the machine is operating. If the door is opened, a safety device will activate to ensure that the machine stops. •...
- Page 9 Cleaning and user maintenance shall not be made by children without supervision. In case of malfunction • Refer repair of any malfunction to a Panasonic Authorised Service Centre. Any repair by any unauthorised personnel will void the manufacturer's warranty.
-
Page 10: Recommendations
Safety Information and Recommendations Recommendations • For energy and water saving, remove coarse residues from dishes before placing them into the machine. Fully load the machine before starting the programme. • Use the pre-wash programme only whenever necessary. • Place such hollow items as bowls, glasses and pots into the machine in such a way that they will face down. -
Page 11: Installation Instructions
Installation instructions There is another instruction sheet for installation. Please read that installation sheet when you install your machine too. Positioning the machine When determining a location for the machine, take care to choose a place where it is easy to load and unload dishes. Do not put your machine in any location where there is the probability for the room temperature to fall below 0°C. -
Page 12: Water Connections
Installation instructions Water connections Ensure that the indoor plumbing is suitable for installing a dishwasher. Also, we recommend that you fit a water filter at the point the mains water enters your property so as to avoid any damage to your machine because of any contamination (sand, clay, rust etc.) that might be occasionally carried in through the mains water supply or the indoor plumbing, and to reduce the occurrance of things such as yellowing and... -
Page 13: Water Outlet Hose
50 cm and at a maximum of 110 cm above the base of the unit. Warning: If a drain hose longer than 4m is used, the dishes may remain dirty. In this case, Panasonic New Zealand Limited does not accept any responsibility. -
Page 14: Electrical Connection
If there is no earthed mains socket available, have a competent electrician install an appropriate earthed mains socket for the appliance. Panasonic New Zealand Limited does not accept any responsibility for any loss or damage if the machine is used on a non-earthed system. -
Page 15: Preparing The Machine For Use
Preparing the machine for use Detergent usage Use a detergent specifically designed for use in domestic dishwashers. Powders, gels, and tablet detergents are available in the market that have been designed for use in household dishwashers. Detergent should be put into the compartment prior to starting the machine. Keep detergents in cool, dry places out of reach of children. -
Page 16: Combined Detergent
Preparing the machine for use Combined detergent Detergent manufacturers also produce combined detergents called “2 in 1”, “3 in 1” or “5 in 1” etc. When using “2 in 1” detergents which contain detergent + salt or rinse aid, make sure to check the specifications of the tablet. -
Page 17: Rinse Aid Filling And Adjustment
Preparing the machine for use Recommended usage: When using a combined detergent, add rinse agent to the machine, adjust the rinse agent settings to its lowest position and activate the tablet detergent button in order to obtain better results. It is not recommended to use combined detergents in fast programmes. - Page 18 Preparing the machine for use If the rinse aid lamp on the control panel lights, fill the rinse aid compartment with rinse aid. To add rinse aid, remove the rinse aid compartment cap by turning it. 1 Fill the rinse aid compartment with rinse aid until the rinse aid level indicator becomes dark;...
-
Page 19: Loading Your Dishwasher
Loading your dishwasher Proper loading and placement of dishes in the machine, will help to improve energy consumption, washing and drying performance. There are two separate baskets to load dishes into the machine. The lower basket can be loaded with such round and deep items as pots with long handles, pot lids, plates, salad plates, cutlery sets. -
Page 20: Upper Basket
Loading your dishwasher Upper basket Height adjustable racks These racks are designed to increase the capacity of the upper basket. You can place your glasses and cups on the racks. You can adjust the height of these racks. Thanks to this feature, you can place different sizes of glasses under these racks. -
Page 21: Lower Basket
Loading your dishwasher Upper basket height adjustment while it is full Basket height adjustment mechanism on the upper basket of the machine allows you to adjust the height of the upper basket upwards or downwards, without removing it from your machine when it is full, and create larger spaces in the top or bottom area of the machine as needed. - Page 22 Loading your dishwasher Multi-functional rack system Multi-functional rack system is located in the bottom basket of your machine. You can easily wash spare glasses or dishes like long ladles, or bread knives with the help of this accessory. To close the racks of the multi- functional rack system, move them from position to position.
-
Page 23: Upper Cutlery Basket
Loading your dishwasher Upper cutlery basket The upper cutlery basket is designed for forks, spoons and knives, long dippers and small items. 1 As the cutlery basket can be easily removed, it allows dishes to be taken out of the machine in the basket after washing. -
Page 24: Alternative Basket Loads
Loading your dishwasher Alternative basket loads Lower basket • Pots and pans should be put on lower basket. • Plates should be put on lower basket. Upper basket • Cups, glasses and bowls should be put on upper basket. - Page 25 Loading your dishwasher Poor loading • Don’ t put the bowls over the glasses. They will not be washed properly. 1 • Don’ t put the long items like spoons on the cutlery basket. They may hit the spray arm. 2 •...
-
Page 26: Programme Descriptions
Programme descriptions Programme items Programme No Soak Quick 30' Dual Wash ( reference ) Programme names (P1) 40°C( P2 ) 50°C ( P3) 60°C ( P4) and temperatures Type of food waste Pre-wash to rinse Coffee, milk, tea, cold Coffee, milk, Soups, sauces, and loosen residue meats, vegetables,... - Page 27 Programme descriptions Programme items Programme No Express 50' Hygiene Auto Auto Delicate Intensive Programme names 65°C ( P5) 60°C (P6) 30-50°C(P7) 50-70°C(P8) and temperatures Type of food waste Soups, sauces, Dishes with dense Automatically adjust the washing time pasta, eggs, pilaf, dirt waiting for a long with temperature and amount of water potato and oven...
-
Page 28: The Explanation Of Programmes
Hygiene 60°C Special Hygiene programme which is developed for Panasonic Dishwashers ensures a maximum hygiene with high temperature washing. Panasonic Dishwasher's special hygiene programme that eliminates 99.9999% of all bacteria is tested and approved by International German Test Institute of VDE. -
Page 29: Getting Familiar With Your Machine
Getting familiar with your machine (10) (6) (7) 1.) Power On/Off Touch Button After the Power On/Off touch is pressed, two dashes appear in the programme display, until touching any button. Touch the ''On/Off touch button'' with your fingertip for 1 second to turn the machine on or off. 2.) Programme Touch Button Use the Programme touch button to select a suitable programme for your dishes. - Page 30 Getting familiar with your machine 5.)Energy Save Touch Button The energy save option activates the door opening system at the end of the programme. The auto door opening system provides the required drying performance at low rinsing temperatures and reduces energy consumption. 6.)½...
- Page 31 Getting familiar with your machine Note: This option can be selected only at the beginning of the programme. Note: "When a programme that is incompatible with the Extra silent & fast option is selected, a buzzer sound is heard when the button is pressed, which indicates that the selected option is not available.
-
Page 32: Operating Your Machine
Operating your machine (10) (6) (7) Switching on the machine 1- Touch the power On/Off key. When the machine is powered on,when the On/Off touch button (1) is pressed, two dashes appear in the programme display. 2- When selecting a programme with the programme touch button (2), the programme selected ( P1,P2,etc ) appears on the programme display (3), from (P1 to P8) and the duration of the programme are displayed alternately for 3 seconds. -
Page 33: Changing A Programme
Operating your machine Changing a programme To change the programme while a wash programme is going. 1- Open the door and select a new programme by pressing the Programme touch button (2). 2- After closing the door, the newly selected programme continues from the point where the original programme reached, but with the new parameters (temperature, cycles) of the new programme. -
Page 34: Switching The Machine Off
Operating your machine (10) (6) (7) Switching the machine off After programme has finished, switch the machine off by using the Power On/Off touch button (1). Note: To improve the drying performance, after the buzzer sound indicating the end of the wash programme stops, leave the door of the machine ajar in order to hasten the drying or select an energy save option before starting a programme to speed up the drying performance. -
Page 35: Turning On The Inner Light Option
Operating your machine Turning on the Inner Light Option 1- Open the dishwasher door and press the Power On/Off touch button (1) to turn on the machine. 2- Press and hold both the ‘’Tablet/Energy Save’’and "Delayed start" (4) touch buttons simultaneously for 5 seconds 3-“IL0”... -
Page 36: Buzzer Sound Setup
Operating your machine Buzzer sound setup (10) (6) (7) Setting up the buzzer. 1- Press the Power On/Off touch button".(1) (if it is in OFF position). 2- Press and hold the “Tablet/Energy Save” (5) and "Extra Fast/Silent" (7,8) touch buttons for 3 seconds at the same time to set the volume level. 3- While pressing the “Tablet/Energy Save”... -
Page 37: Maintenance And Cleaning
Maintenance and cleaning Regular cleaning of the machine prolongs the machine’s service life. Oil and limescale may accumulate in the machine’s washing section. In case of such accumulation; • Fill the detergent compartment and, without loading any dishes into the machine, select a programme that runs at high temperature, and start the machine. -
Page 38: Filters
Maintenance and cleaning Filters Check if any food wastes remain on the coarse and fine filters. If so, remove the filters and clean them thoroughly under a tap. a. Micro Filter b. Coarse Filter c. Metal/Plastic Filter To remove and clean the filter combination, turn it counter clockwise and take it out by lifting upwards. -
Page 39: Spray Arms
Maintenance and cleaning Spray arms Check whether or not the holes for the upper and lower spray arms are clogged. If there is any clogging, remove the spray arms and clean them under water. You can remove the lower spray arm by pulling it upwards, while the upper spray arm nut can be removed by turning the nut to the left. -
Page 40: Troubleshooting
Troubleshooting Error codes & what to do ERROR CODE ERROR DESCRIPTION CONTROL • Power off your machine and close the tap. There is a water overflow • Contact an Authorised Service Centre. • Water discharge hose is clogged. • The filters of your machine might be clogged. - Page 41 Troubleshooting If the programme won’t start • Check if the plug is connected. • Check your indoor fuses. • Make sure that the water inlet tap is turned on. • Make sure that you have closed the machine door. • Make sure that you switched on the machine by pressing the Power On / Off button. •...
- Page 42 Troubleshooting If there are partial food wastes left on the dishes • Due to dishes placed incorrectly in the machine, the sprayed water did not reach the corresponding places. • Basket overloaded. • Dishes leaning against one another. • Very small amount of detergent added. •...
- Page 43 Assembly manual) • The door spring is not adjusted properly. Adjust it according to the Assembly manual. Contact your Panasonic Service Centre if the problem still persists after the controls or in case of any malfunction not described above.
-
Page 44: Practical And Useful Information
Practical and useful information 1. Whenever you will not be operating your machine • Unplug the machine and then turn the water off. • Leave the door slightly ajar in order to prevent the formation of unpleasant smells. • Keep the machine interior clean. 2. -
Page 45: Recycling
Practical and useful information Recycling • Certain components and the packaging of your machine have been produced from recyclable materials. • Plastic parts are marked with international abbreviations: (>PE< , >PS< , >POM<, >PP<, ) • Cardboard parts have been produced from recycled paper and they should be disposed of into waste paper collection containers for recycling. -
Page 46: Disposing Of Waste Electrical & Electronic Equipment
Practical and useful information Disposing of Waste Electrical & Electronic Equipment Information on disposal for users of waste electrical & electronic equipment (private households) This symbol on the products and/or accompanying documents means that used electrical and electronic products should not be mixed with general household waste. - Page 47 Note...
- Page 48 Panasonic Corporation Web Site: http://panasonic.com © Panasonic Corporation 2016 5219XXXX R23...