Table of Contents
Advertisement
Quick Links
TRANSLATION OF THE ORIGINAL INSTRUCTIONS
We advise you to read this manual carefully, which contains all the instructions for
maintaining the appliance's aesthetic and functional qualities.
For further information on the product: www.smegfoodservice.com
Contents
30
30
33
33
33
33
34
34
35
35
36
37
38
38
38
40
41
41
41
43
46
47
49
50
50
52
52
29
Advertisement
Table of Contents

Related Manuals for Smeg ALFA420H


Summary of Contents for Smeg ALFA420H
-
Page 1: Table Of Contents
Contents 1 Instructions 1.1 General safety instructions 1.2 Identification plate 1.3 Manufacturer liability 1.4 Appliance purpose 1.5 Disposal 1.6 This user manual 1.7 How to read the user manual 2 Description 2.1 General Description 2.2 Control panel 2.3 Other parts 3 Use 3.1 First use 3.2 Using the oven... -
Page 2: Instructions
Instructions 1 Instructions • Protect your hands by wearing oven gloves when moving food 1.1 General safety instructions inside the oven. • Do not touch the heating elements Risk of personal injury inside the oven. • During use the appliance and its •... - Page 3 Instructions • Do not leave the appliance • The floor next to the appliance unattended during cooking could be very slippery. Be very operations where fats or oils careful. could be released. • The terminal indicated by the • Remove all trays and racks which symbol connects components that are not required during cooking.
- Page 4 Instructions Risk of damaging the appliance • Do not cover the bottom of the oven cavity with aluminium or tin • Racks and trays have to be foil sheets. inserted into the side guides until • If you wish to use greaseproof they come to a complete stop.
-
Page 5: Identification Plate
Instructions For this appliance 1.4 Appliance purpose This appliance is intended for cooking • Do not rest any weight or sit on food in the professional catering the open door of the appliance. environment. Every other use is considered • Take care that no objects are improper. -
Page 6: This User Manual
Instructions • Deliver the appliance to the appropriate 1.7 How to read the user manual recycling centre for electrical and This user manual uses the following reading electronic equipment waste, or return it to conventions: the retailer when purchasing an Instructions equivalent product, on a one for one basis. -
Page 7: Description
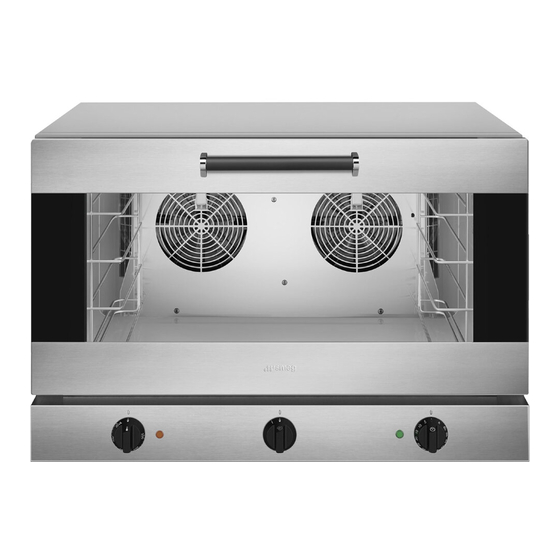
Description 2 Description 2.1 General Description Tilting door Swing door 1 Control panel 5 Fan 2 Oven light 6 Tray support frames 3 Seal 7 Water intake line 4 Door Frame shelf... -
Page 8: Control Panel
Description 2.2 Control panel 1 Temperature knob 5 Timer indicator light This knob allows you to select the cooking When off, it indicates the beginning of temperature. timed cooking. When on, it indicates that Turn the knob clockwise to the required timed cooking has finished. -
Page 9: Other Parts
Description 2.3 Other parts Safety thermostat The appliance is equipped with a safety Shelves device that triggers in case of serious The appliance features shelves to position malfunction. trays and racks at different heights. The Only for the installer/technical support: insertion heights are indicated from the 1. -
Page 10: Use
3 Use Opening and closing the door (only on swing door models) 3.1 First use The appliance is equipped with a swing 1. Remove any protective film from the door. outside or inside of the appliance, To prevent any steam in the oven from including accessories. - Page 11 2. Then turn it to the right to fully open the Cooking modes door. Defrost The movement of air at room temperature causes frozen food to defrost quickly. This type of rapid defrosting is ideal as the taste and appearance of the de-frozen food, whether previously deep-frozen or frozen in the freezer, remain unaltered.
-
Page 12: Cooking Advice
3.3 Cooking advice • The temperature and the cooking time depend on the quality and consistency General advice of the dough. • Use a fan assisted function to achieve • To check whether the dessert is cooked consistent cooking at several levels. right through: At the end of the cooking time, put a toothpick into the highest point •... -
Page 13: Cleaning And Maintenance
Cleaning and maintenance 4 Cleaning and maintenance 4.2 Cleaning the door The glass in the door should always be kept 4.1 Cleaning the appliance thoroughly clean. Use absorbent kitchen roll. In case of stubborn dirt, wash with a We recommend the use of damp sponge and an ordinary detergent. - Page 14 Cleaning and maintenance To reinstall the door proceed as follows: 6. Insert the hinges in the corresponding slots in the oven, making sure that grooved sections A are resting completely in the slots. 4. Position the retaining clips in the holes in the hinges in order to prevent the door being closed accidentally.
-
Page 15: Removing The Internal Glass Pane
Cleaning and maintenance 4.3 Removing the internal glass pane 3. Extract the retaining clips on the door frame, underneath the caps which you Tilting door models have just removed. Improper use Crushing hazard • Ensure you have locked the door hinges before removing the glass panes. - Page 16 Cleaning and maintenance 5. Remove the inner glass by pulling it 7. Once you have finished cleaning, carefully upwards. reposition the inner glass. 8. Remove the retaining clips from the 6. Clean the external glass pane and the hinges and position them in their seats on panes removed previously.
- Page 17 Cleaning and maintenance Swing door models 3. Open the internal glass pane. Cleaning the oven door is significantly facilitated as the internal glass pane can be opened. 1. Open the door 2. Pull the upper and lower caps to remove them.
-
Page 18: Cleaning The Oven Cavity
Cleaning and maintenance 5. After cleaning, close the internal glass 4.4 Cleaning the oven cavity again. Cleaning the oven cavity In order to keep your oven in the best possible condition, clean it regularly after letting it cool down. Avoid letting food residue dry inside the oven cavity, as this could damage the surfaces. -
Page 19: Extraordinary Maintenance
Cleaning and maintenance 4.5 Extraordinary maintenance Removing the tray support frames Removing the tray support frames enables Removing the door gasket the sides to be cleaned more easily. To remove the gasket: 1. Unscrew the fastening ring nuts • Pull the gasket outwards to remove it. completely. - Page 20 Cleaning and maintenance 4. Slide out and remove the light bulb. Replacing the internal light bulb Live parts Danger of electrocution • Disconnect the appliance. The oven is fitted with two 40W light bulbs. Do not touch the halogen light bulb directly with your fingers, but 1.
-
Page 21: If The Appliance Is Not Working Properly
Cleaning and maintenance 4.6 If the appliance is not working properly Problem Possible solution • The timer knob is positioned on 0. • The plug is not correctly inserted in the socket. The appliance is not working properly • The electrical system is damaged or not working properly. -
Page 22: Installation
Cleaning and maintenance 5 Installation The appliance is provided with a five-core H07RN-F cable (5 x 1.5 mm² referring to 5.1 Electrical connection the cross section of the internal conductor). Connection modes: The terminal indicated by • 220-240 V 1N~ symbol links up parts that are normally earthed. - Page 23 Installation Fixed connection Cable replacement Fit the power line with an omnipolar circuit Power voltage breaker in compliance with installation Danger of electrocution regulations. The circuit breaker should be located near • Disconnect the mains power supply. the appliance and in an easily reachable position.
-
Page 24: Water Connection
Installation 5.2 Water connection 5.3 Positioning Improper use Heavy appliance Risk of damage to the appliance Crushing hazard • If the water pipe is new or has not been • Position the appliance with the aid of a used for a long time, before making the second person. - Page 25 Installation Steam outlet pipe Depending on the model, there are exhaust flues on the back of the appliance to release the steam produced during cooking. These must be left free of any obstruction. Avoid crushing and contact with any walls. Multiple installations Weight: Kg 61 Place the appliance at a distance of at least...
- Page 26 Installation High food temperature Danger of burns • For safety reasons, DO NOT position the uppermost tray at a height above 160 cm. • If necessary, it is MANDATORY to apply the supplied adhesive label at the height indicated in the figure below.