
Related Manuals for AEG 88101K-IN


Summary of Contents for AEG 88101K-IN
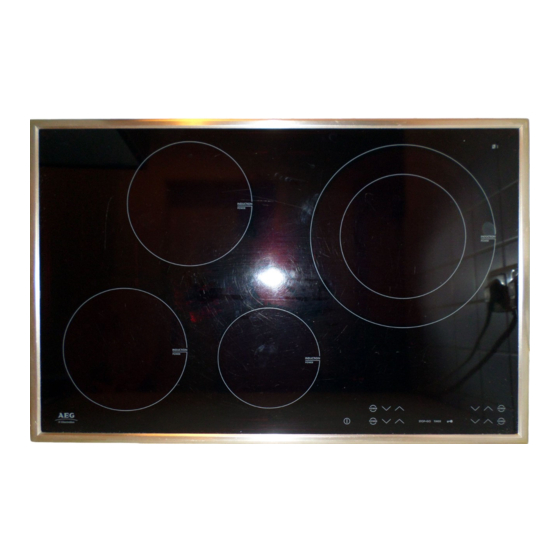
- Page 1 88101K-IN Ceramic glass induction hob Glaskeramische inductie-kookplaat Installation and Operating Instructions Montage- en gebruiksaanwijzing...
- Page 2 Dear Customer, Please read these user instructions carefully and keep them to refer to later. Please pass the user instructions on to any future owner of the appli- ance. The following symbols are used in the text: Safety instructions Warning! Information that affects your personal safety. Important! Information that prevents damage to the appliance.
-
Page 3: Table Of Contents
Contents Operating Instructions ........Safety instructions. -
Page 4: Operating Instructions
Operating Instructions 1 Safety instructions Please comply with these instructions. If you do not, any damage re- sulting is not covered by the warranty. This appliance conforms with the following EU Directives: – 73/23/EEC dated 19.02.1973 Low Voltage Directive – 89/336/EEC dated 03.05.1989 EMC Directive inclusive of Amending Directive 92/31/EEC –... - Page 5 Safety during use • Remove stickers and film from the glass ceramic. • There is the risk of burns from the appliance if used carelessly. • Cables from electrical appliances must not touch the hot surface of the appliance or hot cookware. •...
-
Page 6: Description Of The Appliance
Description of the Appliance Cooking surface layout Induction cooking zone 2400W Induction cooking zone 1850 W with power function 3200W with power function 2500 W Control Induction cooking zone 1400W Induction cooking zone 1850 W panel with power function 1800W with power function 2500 W Control panel layout Heat setting selection... -
Page 7: Touch Control Sensor Fields
Touch Control sensor fields The appliance is operated using Touch Control sensor fields. Functions are controlled by touching sensor fields and confirmed by displays and acoustic signals. Touch the sensor fields from above, without covering other sensor fields. Sensor field Function On / Off To switch the appliance on and... -
Page 8: Displays
Displays Display Description ¾ Cooking zone is switched off Keep warm setting Keep warm setting/STOP+GO function is set ¿ Ç Heat settings Heat setting is set Heating setting plus Intermediate heat setting is set decimal point Automatic warm up Automatic warm-up function is function activated Fault... -
Page 9: Operating The Appliance
Operating the appliance Use the induction cooking zones with suitable cookware. Switching the appliance on and off Control panel Display Pilot light ¾ Switch on Touch for 2 seconds lights up Switch off Touch for 1 second / none goes out After switching on, within approx. -
Page 10: Using The Automatic Warm-Up Function
Using the automatic warm-up function Step Control panel Display Ç / p Ç Setting the level Ç Place to one side for a moment touch Æ ¿ touch in order to set the de- until sired cooking setting after 3 seconds All cooking zones are equipped with an automatic warm-up function. -
Page 11: Locking/Unlocking The Control Panel
Locking/unlocking the control panel The control panel, with the exception of the “On/Off” sensor field, can be locked at any time in order to prevent the settings being changed e.g. by wiping over the panel with a cloth. Control panel Display Switch on Touch... - Page 12 Releasing the child safety device Step Control panel Display/Signal Switch on the appliance Touch until the signal sounds Acoustic signal Touch Appliance switches off. The child safety device is released. Overriding the child safety device The child safety device can be released in this way for a single cooking session;...
-
Page 13: Switching The Power Function On And Off
Switching the power function on and off The power function makes more power available to the induction cooking zones, e.g. to bring a large quantity of water to the boil quick- The power function is activated for 10 minutes. After that the induc- tion cooking zone automatically switches back to heat setting 9. -
Page 14: Using The Timer
Using the timer All cooking zones can use each use one of the two timer functions at the same time. Function Condition Outcome after the time has elapsed Automatic cut-out a heat setting is set acoustic signal flashes Cooking zone switches off Countdown timer cooking zones not in use... - Page 15 Setting the time Step Control panel field Display TIMER Select cook- Pilot light of the cooking zone select- ing zone ed flashes 00 to 99 minutes Touch the cooking zone se- lected After a few seconds the pilot light flashes more slowly. The time is set.
- Page 16 Displaying the time remaining for a cooking zone Step Control panel field Display TIMER Select cooking Pilot light of the cooking zone select- zone ed flashes faster The time remaining is displayed After a few seconds the pilot light flashes more slowly. Switching off the acoustic signal Step Control panel field...
-
Page 17: Safety Cut-Out
Safety cut-out Cooking surface • If after switching on the cooking surface, a heat setting is not set for a cooking zone within approx. 10 seconds, the cooking surface auto- matically switches itself off. • If one or more sensor fields are covered for longer than approx. 10 seconds, e.g. -
Page 18: Tips On Cooking And Frying
Tips on Cooking and Frying Information on acrylamides According to the latest scientific knowledge, intensive browning of food, especially in products containing starch, can constitute a health risk due to acrylamides. Therefore we recommend cooking at the lowest possible temperatures and not browning foods too much. Cookware for induction cooking zones Cookware made of suitable... -
Page 19: Tips On Energy Saving
Tips on energy saving Place cookware on the cooking zone before it is switched on. If possible, always place a lid on the cookware. Examples of cooking applications The information given in the following table is for guidance only. Heat Cooking- Cooking set-... - Page 20 Heat Cooking- Cooking set- suitable for Tips/Hints process time ting Hash browns, loin steaks, Heavy 5-15 mins. Turn halfway through steaks, Flädle (pancakes Frying per pan cooking for garnishing soup) Boiling Searing Boiling large quantities of water, cooking pasta, searing meat Deep (goulash, pot roast), deep frying chips frying...
-
Page 21: Cleaning And Care
Cleaning and Care Take care! Risk of burns from residual heat. Let the appliance cool down. Warning! Sharp objects and abrasive cleaning materials will damage the appliance. Clean with water and washing up liquid. Warning! Residues from cleaning agents will damage the appliance. Remove residues with water and washing up liquid. -
Page 22: What To Do If
What to do if … Problem Possible cause Remedy The cooking zones will not More than 10 seconds have Switch the appliance on switch on or are not func- passed since the appliance again. tioning was switched on The lock is switched on Switch off the lock (See the section “Locking/un- locking the control panel”) - Page 23 Problem Possible cause Remedy flashes Unsuitable cookware Use suitable cookware No cookware on the cook- Place cookware on the ing zone cooking zone The diameter of the bot- Move onto a smaller cook- tom of the cookware is too ing zone small for the cooking zone Use suitable cookware is lit...
-
Page 24: Disposal
Disposal Packaging material The packaging materials are environmentally friendly and can be recy- cled. The plastic components are identified by markings, e.g. >PE<, >PS<, etc. Please dispose of the packaging materials in the appropriate container at the community waste disposal facilities. Old appliance The symbol on the product or on its packaging indicates that this... -
Page 25: Installation Instructions
Installation Instructions Safety instructions The laws, ordinances, directives and standards in force in the country of use are to be followed (safety regulations, proper recycling in accord- ance with the regulations, etc.) Installation may only be carried out by a qualified electrician. The minimum distances to other appliances are to be observed. - Page 26 A device must be provided in the electrical installation which allows the appliance to be disconnected from the mains at all poles with a contact opening width of at least 3 mm. Suitable isolation devices include line protecting cut-outs, fuses (screw type fuses are to be removed from the holder), earth leakage trips and contactors.
-
Page 27: Service
Service In the event of technical faults, please first check whether you can remedy the problem yourself with the help of the operating instruc- tions (section “What to do if…”). If you were not able to remedy the problem yourself, please contact the Customer Care Department or one of our service partners. - Page 28 Geachte klant, Lees deze gebruiksaanwijzing zorgvuldig door en bewaar de gebruiks- aanwijzing zodat deze later kan worden geraadpleegd. Geef deze gebruiksaanwijzing door aan een eventuele volgende eige- naar van het apparaat. De volgende symbolen worden in de tekst gebruikt: Veiligheidsvoorschriften Waarschuwing! Aanwijzingen ten behoeve van uw persoonlijke veilig- heid.
- Page 29 Inhoud Gebruiksaanwijzing ........30 Veiligheidsvoorschriften .
-
Page 30: Gebruiksaanwijzing
Gebruiksaanwijzing 1 Veiligheidsvoorschriften Neem deze aanwijzingen in acht, omdat anders bij eventuele schade het recht op garantie vervalt. Dit apparaat is in overeenstemming met de volgende EG-richtlijnen: – 73/23/EEG van 19.02.1973 Laagspanningsrichtlijn – 89/336/EEG van 03.05.1989 EMC-richtlijn inclusief aangepaste richt- lijn 92/31/EEG –... - Page 31 Veiligheid tijdens het gebruik • Verwijder stickers en folies van het glaskeramiek. • Wanneer u onoplettend bent tijdens het werken met het apparaat, bestaat er risico op verbranding. • De snoeren van elektrische apparaten mogen niet tegen het hete ap- paraatoppervlak resp.
-
Page 32: Beschrijving Van Het Apparaat
Beschrijving van het apparaat Uitrusting kookplaat Inductie-kookzone 2400 W Inductie-kookzone 1850 W met Powerfunctie 3200 W met Powerfunctie 2500 W Bedie- Inductie-kookzone 1400 W Inductie-kookzone 1850 W ningsveld met Powerfunctie 1800 W met Powerfunctie 2500 W Uitrusting bedieningsveld Kookstandkeuze Kookzone-indicaties Timerfunctie Powerfunctie Timer-indicatie... -
Page 33: Touch-Control-Sensorvelden
Touch-control-sensorvelden Het apparaat wordt bediend door middel van touch-control-sensorvel- den. Functies worden door het aanraken van de sensorvelden gestuurd en door indicaties en akoestische signalen bevestigd. De sensorvelden moeten van bovenaf worden aangeraakt, zonder ande- re sensorvelden te bedekken. Sensorveld Functie Aan/uit Apparaat in- en uitschakelen... -
Page 34: Indicaties
Indicaties Indicatie Beschrijving ¾ Kookzone is uitgeschakeld Warmhoudstand Warmhoudstand/STOP+GO-func- tie is ingeschakeld ¿ Ç Kookstanden Kookstand is ingesteld Kookstanden met Tussenstand is ingeschakeld decimale punt Automatisch kooksys- Automatische kooksysteem is ac- teem tief Fout Er is een storing opgetreden Panherkenning Kookgerei is ongeschikt of te klein of er is geen kookgerei geplaatst Restwarmte... -
Page 35: Bediening Van Het Apparaat
Bediening van het apparaat Inductie-kookzone met daarvoor geschikte pannen gebruiken. Apparaat in- en uitschakelen Bedieningsveld Indicatie Controlelampje ¾ Inschakelen 2 seconden brandt aanraken Uitschakelen 1 seconde / geen gaat uit aanraken Na het inschakelen moet binnen ca. 10 seconden een kookstand of een functie worden ingesteld, anders schakelt het apparaat automatisch uit. -
Page 36: Automatisch Kooksysteem Gebruiken
Automatisch kooksysteem gebruiken Stap Bedieningsveld Indicatie Ç / p Ç / p Stap instellen Ç / p Kort uitschakelen aanraken Æ ¿ aanraken om de gewenste kookstand in te stellen na 3 seconden Alle kookzones zijn met een automatisch kooksysteem uitgevoerd. Het automatische kooksysteem stelt de kookzone voor een bepaalde tijd op vol vermogen en schakelt vervolgens automatisch op de ingestelde kookstand terug. -
Page 37: Bedieningsveld Vergrendelen / Ontgrendelen
Bedieningsveld vergrendelen / ontgrendelen Het bedieningsveld kan met uitzondering van het sensorveld ”Aan/Uit“ op ieder gewenst moment worden vergrendeld, bijv. om het wijzigen van de instellingen als gevolg van het met een lap afnemen, te voorko- men. Bedieningsveld Indicatie Inschakelen aanraken (na 5 seconden) Uitschake-... -
Page 38: Kinderbeveiliging Gebruiken
Kinderbeveiliging gebruiken De kinderbeveiliging voorkomt ongewenst gebruik van het apparaat. Kinderbeveiliging inschakelen Stap Bedieningsveld Indicatie/signaal ¾ apparaat inschakelen (geen kookstand instellen) aanraken tot het signaal akoestisch signaal klinkt aanraken Apparaat wordt uitgeschakeld. Kinderbeveiliging is ingeschakeld. Kinderbeveiliging uitschakelen Stap Bedieningsveld Indicatie/signaal apparaat inschakelen aanraken tot het signaal akoestisch signaal... -
Page 39: Powerfunctie In-En Uitschakelen
Powerfunctie in-en uitschakelen De Powerfunctie geeft extra vermogen aan de inductie-kookzones, bijv. om een extra grote hoeveelheid water snel aan het koken te bren- gen. De Powerfunctie wordt voor een periode van 10 minuten geactiveerd. Daarna schakelt de inductie-kookzone automatisch weer op kookstand 9 in. -
Page 40: Timer Gebruiken
Timer gebruiken Alle kookzones kunnen tegelijk een van de beide Timerfuncties gebrui- ken. Functie Vereisten Resultaat na verloop van de tijd Automatische uit- bij een ingestelde akoestisch signaal schakeling kookstand knippert kookzone wordt uit- geschakeld Kookwekker bij niet gebruikte akoestisch signaal kookzones knippert Als een kookzone wordt uitgeschakeld, dan wordt tevens de ingestelde... - Page 41 Als meerdere Timerfuncties zijn ingesteld, dan wordt na een aantal se- conden de kortste resterende tijd van alle Timerfuncties aangegeven en knippert het bijbehorende controlelampje. Tijd instellen Stap Bedieningsveld Indicatie TIMER kookzone se- Controlelampje van de geselecteerde lecteren kookzone knippert van de minuten geselecteerde kook-...
- Page 42 Tijd wijzigen Stap Bedieningsveld Indicatie TIMER kookzone se- Controlelampje van de geselecteerde lecteren kookzone knippert sneller Resterende tijd wordt aangegeven van de ge- minuten selecteerde kookzo- ne aanraken Na een aantal seconden knippert het controlelampje langzamer. De tijd is ingeschakeld. De tijd geeft de resterende tijd aan (loopt terug).
-
Page 43: Veiligheidsuitschakeling
Veiligheidsuitschakeling Kookplaat • Als na het inschakelen van de kookplaat niet binnen ca. 10 seconden bij een kookzone een kookstand wordt ingesteld, schakelt de kook- plaat automatisch uit. • Als een of meerdere sensorvelden langer dan ca. 10 seconden worden afgedekt, bijv. -
Page 44: Tips Voor Koken En Braden
Tips voor koken en braden Aanwijzing met betrekking tot acrylamide Volgens de laatste wetenschappelijke inzichten kan een intensieve brui- ning van levensmiddelen, met name bij zetmeelhoudende producten, een gevaar voor de gezondheid door acrylamide veroorzaken. Om die reden adviseren wij levensmiddelen zoveel mogelijk bij lage temperatu- ren te bereiden en de gerechten niet te veel te bruinen. -
Page 45: Tips Voor Energiebesparing
Tips voor energiebesparing Kookgerei vóór het inschakelen van de kookzone plaatsen. Kookgerei, indien mogelijk, altijd met een deksel afsluiten. Toepassingsvoorbeelden voor het koken De gegevens in de volgende tabel dienen slechts als richtlijn. Kook- Kook- Geschikt voor Duur Aanwijzingen/tips stand proces uit-stand Warm... - Page 46 Kook- Kook- Geschikt voor Duur Aanwijzingen/tips stand proces Aardappel koekjes, lende- Sterk 5-15 min. stukken, steaks, pannen- Tussendoor keren braden per pan koeken Aan de kook Aan de kook brengen van grotere hoeveelheden water, pasta ko- brengen ken, aanbraden van vlees (goulash, stoofvlees), frituren van pata- Aanbra tes frites Frituren...
-
Page 47: Reiniging En Onderhoud
Reiniging en onderhoud Voorzichtig! Verbrandingsgevaar door restwarmte. Laat het apparaat afkoelen. Let op! Bijtende en schurende schoonmaakmiddelen beschadigen het apparaat. Schoonmaken met water en handafwasmiddel. Let op! Resten van schoonmaakmiddelen beschadigen het apparaat. Verwijder resten met water en handafwasmiddel. Reinig het apparaat na ieder gebruik 1. -
Page 48: Wat Is Er Aan De Hand Als
Wat is er aan de hand als … Storing Mogelijke oorzaak Oplossing De kookzones kunnen niet Na het inschakelen van het Apparaat nogmaals inscha- ingeschakeld worden of apparaat zijn meer dan 10 kelen functioneren niet seconden verstreken De vergrendeling is inge- De vergrendeling uitscha- schakeld kelen (zie hoofdstuk ”Be-... - Page 49 Storing Mogelijke oorzaak Oplossing De indicatie wisselt tussen Power-Management redu- Zie hoofdstuk ”Powerfunc- twee kookstanden ceert het vermogen van tie in-/uitschakelen” deze kookzone knippert Ongeschikt kookgerei Geschikt kookgerei gebrui- Geen kookgerei op de Kookgerei plaatsen kookzone De diameter van de bodem Op een kleinere kookzone van het kookgerei is te plaatsen...
-
Page 50: Afvalverwerking
Afvalverwerking Verpakkingsmateriaal De verpakkingsmaterialen zijn niet schadelijk voor het milieu en her- bruikbaar. De kunststoffen hebben de volgende aanduidingen, bijv. >PE<, >PS<, enz. Verwijder de verpakkingsmaterialen in overeenstem- ming met de aanduiding bij de gemeentelijke inzamelplaatsen in de daarvoor bestemde containers. Oud apparaat verwijderen Het symbool op het product of op de verpakking wijst erop dat dit... - Page 51 WAARSCHUWING! Risico op verwonding door elektrische stroom. • Op de netaansluitklem staat spanning. • Netaansluitklem spanningvrij maken. • Houd u aan het aansluitschema. • Houd u aan de veiligheidsvoorschriften met betrekking tot elektro- techniek. • Garandeer de contactbescherming door vakkundige inbouw. •...
-
Page 52: Service
Service Controleer bij technische storingen eerst of u met behulp van de ge- bruiksaanwijzing (hoofdstuk ”Wat u moet doen als…“) het probleem zelf kunt oplossen. Wanneer u het probleem niet kunt oplossen, neemt u contact op met onze klantenservice of met een van onze servicepartners. Om u snel te kunnen helpen, hebben wij de volgende gegevens nodig: –... -
Page 53: Assembly
Assembly / Montage... - Page 55 Rating Plate / Typeplaatje...
- Page 56 USD 14 billion in more than 150 countries around the world. AEG Hausgeräte GmbH Postfach 1036 D-90327 Nürnberg http://www.aeg.hausgeraete.de © Copyright by AEG Subject to change without notice 822 925 189-A-110105-01 Wijzigingen voorbehouden...