Table of Contents
Advertisement
Quick Links
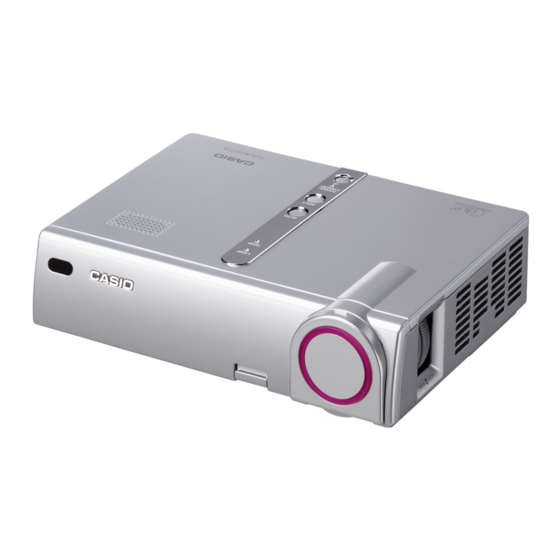
User's Guide (Basic Operations)
• Be sure to read the "Safety Precautions" on page E-2 and "Operating Precautions" on page
E-6 before trying to use this projector.
• This manual covers only basic operations, including how to set up the projector, basic projector
operations, and how to replace the lamp. For more detailed information, see the User's Guide
(UsersGuide_English.pdf) on the CD-ROM that comes with the projector.
Contents
Safety Precautions .....................................E-2
Operating Precautions ...............................E-6
Unpacking ...................................................E-9
General Guide ...........................................E-10
Remote Controller General Guide ..........E-11
Loading Remote Controller Batteries......E-12
Getting Ready ...........................................E-12
Setting Up the Projector..........................E-12
Setup Precautions ..................................E-13
• Digital Light Processing
Texas Instruments Incorporated of the United States.
• Microsoft, Windows, Windows NT, Windows XP, and the Windows logo are registered
trademarks or trademarks of Microsoft Corporation of the United States in the United States and
other countries.
• Apple and Macintosh are registered trademarks of Apple Computer, Inc. of the United States.
• Adobe and Acrobat are registered trademarks of Adobe Systems Incorporated.
• Other company and product names may be registered trademarks or trademarks of their
respective owners.
• The contents of this User's Guide are subject to change without notice.
• Copying of this manual, either in part or its entirety, is forbidden. You are allowed to use this
manual for your own personal use. Any other use is forbidden without the permission of CASIO
COMPUTER CO., LTD.
• CASIO COMPUTER CO., LTD. shall not be held liable for any lost profits or claims from third
parties arising out of the use of this product or this manual.
• CASIO COMPUTER CO., LTD. shall not be held liable for any loss or lost profits due to loss of
data caused by malfunction or maintenance of this product, or any other reason.
• The sample screens shown in this manual are for illustrative purposes only, and appear
differently from the screens actually produced by the product.
TM
TM
, DLP
, Digital Micromirror Device
E-1
English
Turning On the Projector ........................E-16
Turning Off the Projector ........................E-18
Projection Operations ..............................E-19
Keystone Correction (KEYSTONE) ........E-20
Using the Setup Menu..............................E-21
User Maintenance.....................................E-22
Cleaning the Projector ............................E-22
Reattaching the Lens Cover ...................E-22
Replacing the Lamp................................E-22
Troubleshooting .......................................E-26
Indicators and Alert Tones......................E-26
Projector Troubleshooting.......................E-28
Specifications ...........................................E-28
TM
, and DMD
TM
are trademarks of
Advertisement
Table of Contents

Related Manuals for Casio XJ XJ-360 XJ-360


Summary of Contents for Casio XJ XJ-360 XJ-360
-
Page 1: Table Of Contents
• CASIO COMPUTER CO., LTD. shall not be held liable for any loss or lost profits due to loss of data caused by malfunction or maintenance of this product, or any other reason. -
Page 2: Safety Precautions
Safety Precautions Thank you for selecting this CASIO product. Be sure to read these “Safety Precautions” before trying to use it. After reading this User’s Guide, keep it in a safe place for future reference. About safety symbols Various symbols are used in this User’s Guide and on the product itself to ensure safe use, and to protect you and others against the risk of injury and against material damage. - Page 3 Be sure to leave all internal inspection, adjustment, and repair up to your original dealer or authorized CASIO service center. G Dropping and impact Continued use of the projector after it has been damaged by dropping or other mistreatment creates the risk of fire and electric shock.
-
Page 4: Battery Precautions
• Insert the plug into the power outlet as far as it will go. • After using the projector, turn it off and allow it to cool down. Next, unplug it from the power outlet. • Unplug the projector from the power outlet if you do not plan to use it for a long time. -
Page 5: Lamp Precautions
Allowing dust to build up inside the projector for long periods without cleaning creates the risk of fire and breakdown. Contact your original dealer or authorized CASIO service center once a year about having the interior of the projector cleaned. Note that you will be... -
Page 6: Operating Precautions
When this happens, replace the lamp using the instructions provided in this User’s Guide. If the lamp continues to be used after its lamp life is reached, after 100 hours the projector will enter a cool down state and then go into standby. The projector will not turn on again until you replace the lamp. -
Page 7: Other Precautions
This projector is made of precision components. Failure to observe the following precautions can result in inability to correctly save data and malfunction. G Never use or store the projector in the following locations. Doing so creates the risk of malfunction of and damage to the projector. - Page 8 If this happens, change orientation of the projector and/or screen so it conforms as much as possible to the illustration under “Setting Up the Projector” on page E-12.
-
Page 9: Unpacking
Unpacking As you unpack the projector, check to make sure that all of the items listed below are present. DATA PROJECTOR XJ-360 AC Power Cord • Carrying Bag • CD-ROM • User’s Guide (Basic Operations) • “Read this first” Sheet •... -
Page 10: Projector Features And Main Functions
Caution! very hot, and create the risk of burn injury. Never allow the intake vents on the back or the bottom of the projector to become blocked. Blocked vents can cause heat to build up, creating the risk of fire and malfunction. -
Page 11: Remote Controller General Guide
The anti-theft lock hole is provided for connection of an anti-theft chain. Visit the Kensington Lock Website at http://www.kensington.com/ for more information. [Bottom] Elevation adjustment foot Left, right adjustment Lamp cover Intake vents feet [Back, Terminals] AUDIO input terminal RGB output terminal RGB input terminal Intake vents Remote Controller General Guide... -
Page 12: Loading Remote Controller Batteries
Getting Ready Setting Up the Projector Place the projector onto a table, desk, or stand that is level and firm, making sure you allow enough room around it. The following illustrations show how the projector should be oriented for optimum projection relative to the screen. -
Page 13: Setup Precautions
Never place the projector on top of a carpet, blanket, towel, or other soft material. Do not locate the projector where it will be exposed to direct sunlight. Avoid locations where there are large amounts of dust and moisture. -
Page 14: Adjusting The Projector Elevation Angle
Getting Ready Adjusting the Projector Elevation Angle You can change the elevation angle of the projector in a range of 0 to 8 degrees. You can also make fine adjustments to the left and right side elevation angle when necessary. -
Page 15: Connecting To A Standard Video Device
Connecting to a Standard Video Device You can use the projector to project an image from a video deck, TV, video camera, or other video device. You can also output audio from the video device through the projector’s speaker. -
Page 16: Turning On The Projector
Use the AC power cord that comes with the projector. Make sure that you use a power source with the same voltage as that specified for the projector. Do not share the outlet supplying power to the projector with other devices. If you are using an extension cord, make sure that the ampere rating of the extension cord is compatible with the power consumption value of this projector. -
Page 17: Initializing All Settings When Turning On Power
If the projector is configured for low-noise mode operation, the LAMP indicator lights green when warm up starts. If the projector is hot when you plug the AC power cord into a power outlet, it will go into a cool down state. The cool down state is indicated by the POWER/STANDBY indicator flashing orange. -
Page 18: Turning Off The Projector
When you turn off the projector, the lamp goes out and the projector goes into a cool down state. Note that you will not be able to turn the projector back on again while it is cooling down. -
Page 19: Projection Operations
CD-ROM that comes with the projector. Auto Input Source Selection When you turn on the projector, it checks the status of each input source (whether or not the input source is sending a signal) in the sequence shown below. It automatically selects the first input source it finds that is sending an input signal, and projects the applicable image. -
Page 20: Keystone Correction (Keystone
Keystone Correction (KEYSTONE) When the projector is at an angle to the screen it is projecting on, the projected image may have different length top and bottom edges. This phenomenon is called, “keystoning”. This projector comes with functions for automatic as well as manual keystone correction, which provides a regularly shaped projected image. -
Page 21: Using The Setup Menu
Pressing the [MENU] key while an image is being projected displays the setup menu on the projected image. The setup menu can be used to configure a variety of different projector settings. Use the cursor keys to select and configure settings, and the [ENTER] key to register them. -
Page 22: User Maintenance
10 seconds, and then the projector will turn off automatically. The lamp has exceeded its service life! The projector will not turn on until you replace the lamp. When this message appears, replace the lamp immediately using the procedure under “Replacing the Lamp”... - Page 23 Turn off the projector and unplug its AC power cord. Wait for about 60 minutes to allow the projector’s current lamp to cool down completely. Turn over the projector and place it on top of a desk or on some other stable surface. User Maintenance E-23...
- Page 24 Lamp cover Use the lamp cartridge handle to pull the lamp cartridge from the projector. Bracing your thumb on the projector as shown in the illustration, slowly lift the cartridge handle and pull the cartridge out of the projector.
- Page 25 If you replace the lamp when the above message appears, use the procedure under “To reset the lamp time”. The lamp has exceeded its service life! The projector will not turn on until you replace the lamp. If you replace the lamp after the above message appears, use the procedure under “To reset the lamp time after exceeding the lamp life”.
-
Page 26: Troubleshooting
Green steady Error Indicators “ ” in the “Alert” column indicates that the projector will emit four long beeps when an error occurs. “ ” in the “Alert” column indicates that the projector will emit two short beeps when an error occurs. - Page 27 If there is nothing wrong with the lamp cartridge, take it to your original dealer or authorized CASIO Service Center. Power has turned off automatically because the lamp cover is open.
-
Page 28: Projector Troubleshooting
Specifications Projector Troubleshooting Check the “Projector Troubleshooting” section in the User’s Guide (UsersGuide_English.pdf) on the bundled CD-ROM whenever you experience any problem with the projector. Specifications Model Name Projection System Size Number of Pixels Projection Lens Light Source RGB input terminal...