Table of Contents
Advertisement
Available languages
Available languages
XJ-M_Setup_US.book 1 ページ 2011年2月7日 月曜日 午後4時1分
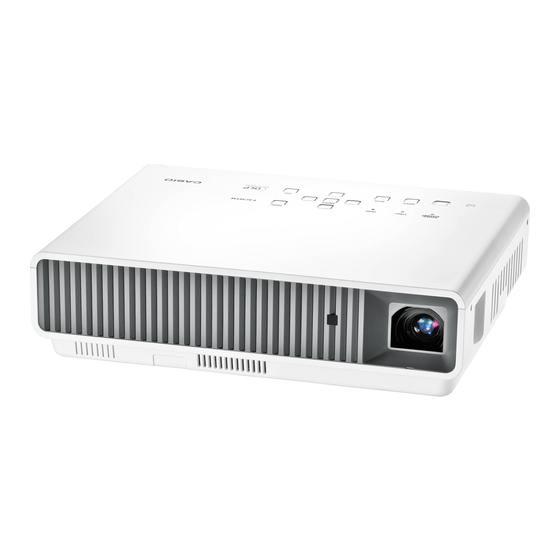
DATA PROJECTOR
DATA PROJECTOR
XJ-M140 / XJ-M145
XJ-M140 / XJ-M145
XJ-M150 / XJ-M155
XJ-M150 / XJ-M155
XJ-M240 / XJ-M245
XJ-M240 / XJ-M245
XJ-M250 / XJ-M255
XJ-M250 / XJ-M255
• Some models covered by this User's Guide may not be available
in certain geographic areas.
• Certains modèles couverts par ce mode d'emploi peuvent ne
pas être commercialisés dans certaines zones géographiques.
• Algunos modelos cubiertos por esta Guía del usuario pueden no
estar disponibles en determinadas áreas geográficas.
*
*
*
*
*
*
*
*
* USB port models
* Modèles à port USB
* Modelos con puerto USB
English
Setup Guide
Be sure to keep all user documentation
handy for future reference.
Français
Guide d'installation
Conservez la documentation à portée de
main pour toute référence future.
Español
Guía de configuración
Asegúrese de tener a mano toda la
documentación del usuario para
futuras consultas.
EFS
Advertisement
Chapters
Table of Contents
Troubleshooting

Related Manuals for Casio XJ-M140


Summary of Contents for Casio XJ-M140
- Page 1 XJ-M_Setup_US.book 1 ページ 2011年2月7日 月曜日 午後4時1分 English DATA PROJECTOR DATA PROJECTOR Setup Guide XJ-M140 / XJ-M145 XJ-M140 / XJ-M145 Be sure to keep all user documentation handy for future reference. XJ-M150 / XJ-M155 XJ-M150 / XJ-M155 Français XJ-M240 / XJ-M245 XJ-M240 / XJ-M245 Guide d’installation...
-
Page 2: Table Of Contents
CASIO COMPUTER CO., LTD. shall not be held liable for any loss or lost profits due to loss of data caused by malfunction or maintenance of this product, or any other reason. -
Page 3: Safety Precautions
XJ-M_Setup_US.book 1 ページ 2011年2月7日 月曜日 午後4時1分 Safety Precautions Thank you for selecting this CASIO product. Be sure to read these “Safety Precautions” before trying to use it. After reading this User’s Guide, keep it in a safe place for future reference. About safety symbols Various symbols are used in this User’s Guide and on the product itself to ensure safe use, and to... - Page 4 Make sure that you always observe the not covered by the warranty and are not following precautions. eligible for repair by CASIO. • Never place heavy objects on the power cord Be sure to leave all internal inspection, adjustment, and never expose it to heat.
-
Page 5: Projector Cabinet
XJ-M_Setup_US.book 3 ページ 2011年2月7日 月曜日 午後4時1分 Safety Precautions ● Disposal by burning ● Exhaust vents Never try to dispose of the projector by The exhaust vents become very hot while the burning it. Doing so can cause an projector is running. Never touch them. Doing so explosion, which creates the risk of fire creates the risk of burn injury. -
Page 6: Remote Controller
• At least once a year, unplug the power plug and adjustment, and repair up to your original use a dry cloth or vacuum cleaner to clear dust dealer or authorized CASIO service from the area around the prongs of the power center. - Page 7 Contact your original dealer or authorized CASIO service center once a year about Do not rub the eyes! Wash the eyes with clean having the interior of the projector cleaned. Note water.
- Page 8 XJ-M_Setup_US.book 6 ページ 2011年2月7日 月曜日 午後4時1分 Safety Precautions 3D Glasses The normal minimum age for viewing 3D images is six. When 3D images are being Warning watched by a small child, a competent adult should be on hand to monitor the 3D images should not be viewed by the child, to ensure that the 3D images are types of individuals described below.
-
Page 9: Operating Precautions
The failure of the light source unit to light or a noticeable drop in light source unit brightness indicates the end of the light source unit’s life. Contact your original dealer or authorized CASIO service center for replacement. Note that problems caused by unauthorized projector disassembly or modification are not covered by the warranty and are not eligible for repair by CASIO. -
Page 10: Other Precautions
XJ-M_Setup_US.book 8 ページ 2011年2月7日 月曜日 午後4時1分 Operating Precautions Other Precautions This projector is made of precision components. Failure to observe the following precautions can result in inability to correctly save data and malfunction. ● Never use or store the projector in the following locations. Doing so creates the risk of malfunction of and damage to the projector. -
Page 11: Precaution When Handling The Projector After Use
XJ-M_Setup_US.book 9 ページ 2011年2月7日 月曜日 午後4時1分 Operating Precautions ● Keystone Correction and Image Quality Performing keystone correction causes the image to be compressed before it is projected. This can result distortion of the image or a loss of image quality. If this happens, change orientation of the projector and/or screen so it conforms as much as possible to the illustration under “Setting Up the Projector”... -
Page 12: Unpacking
XJ-M_Setup_03_e.fm 10 ページ 2011年2月7日 月曜日 午後5時44分 Unpacking As you unpack the projector, check to make sure that all of the items listed below are present. DATA PROJECTOR Remote Controller Mini D-Sub Cable (YT-120) • Test Batteries (AAA-size × 2) • AC Power Cord •... -
Page 13: Getting Ready
Locate the projector on a desk, table, or stand that is firm and level. Make sure to allow sufficient space around the sides and back of the projector for proper ventilation. The following illustrations show how the projector should be oriented for optimum projection relative to the screen. XJ-M140/XJ-M145/XJ-M150/XJ-M155 XJ-M240/XJ-M245/XJ-M250/XJ-M255 Screen Screen Make sure the projector is at a right angle to the screen. -
Page 14: Setup Precautions
XJ-M_Setup_03_e.fm 12 ページ 2011年2月7日 月曜日 午後5時44分 Getting Ready Setup Precautions Use a conveniently located power outlet that you can reach easily when you need to unplug the projector. Do not allow any objects to be within the area indicated by the dashed line below, which is an area within 30cm (11.8 inches) of the projector. -
Page 15: Connecting A Computer To The Projector
XJ-M_Setup_03_e.fm 13 ページ 2011年2月7日 月曜日 午後5時44分 Getting Ready Make fine adjustments to the elevation angle of the projector by rotating the front foot. Make fine adjustments to the horizontal tile of the projector by rotating the rear feet Important! Important! Important! To retract the front foot, hold down the release button and slide the front foot back into the projector. -
Page 16: Starting And Stopping Projection
XJ-M_Setup_03_e.fm 14 ページ 2011年2月7日 月曜日 午後5時44分 Starting and Stopping Projection To start projection Use the bundled AC power cord to plug the projector into a power outlet. NOTE This product is also designed for IT power distribution system with phase-to-phase voltage 230V. Turn on the computer that is connected to the projector. -
Page 17: To Turn Off The Projector
XJ-M_Setup_03_e.fm 15 ページ 2011年2月7日 月曜日 午後5時44分 Starting and Stopping Projection To turn off the projector Press the [P] (Power) key. This causes the confirmation message to appear. If you do not turn off the projector the confirmation message will disappear automatically after about 10 seconds. The confirmation message will also disappear if you press the [ESC] key. -
Page 18: Using The Cd-Rom
UsersGuide_English.pdf USB Function Guide Explains operations when connecting USB USB_Guide_English.pdf (USB port models memory, a CASIO Multi Projection Camera only) (YC-400, YC-430), or a graphic scientific calculator to the USB port on the back of the projector. Wireless Function Explains operations when establishing a wireless WirelessGuide_English.pdf... -
Page 19: Indicators
XJ-M_Setup_03_e.fm 17 ページ 2011年2月7日 月曜日 午後5時44分 Indicators Indicators keep you informed about the current operational status of the projector. The following shows what the indicators look like when operation is normal. When the indicators It means this: appear like this: POWER/ You have just plugged the AC power cord into a power outlet. Wait until LIGHT TEMP STANDBY... -
Page 20: Troubleshooting
XJ-M_Setup_03_e.fm 18 ページ 2011年2月7日 月曜日 午後5時44分 Troubleshooting Check the following items whenever you experience any problem with the projector. Problem Cause and Recommended Action Power does not turn If the POWER/STANDBY indicator is not lit, the AC power cord is not connected correctly. Connect the AC power cord correctly. If the TEMP or LIGHT indicator remains flashing or lit, it means some type of error has occurred. -
Page 21: Troubleshooting
User’s Guide (UsersGuide_English.pdf). lit. The light source unit The light source unit has reached the end of its service life or it is does not light. malfunctioning. Contact your original dealer or authorized CASIO service center for replacement. Important! Important! Important! Try performing the following steps, which may or may not return the projector to normal operation. -
Page 22: Main Specifications
XJ-M_Setup_03_e.fm 20 ページ 2011年2月9日 水曜日 午前10時8分 Main Specifications XJ-M140/XJ-M145/ XJ-M150/XJ-M155/ Model Name XJ-M240/XJ-M245 XJ-M250/XJ-M255 Brightness 2500 3000 (ANSI Lumens) Operating Temperature: 5 to 35°C (41 to 95°F) Environment Operating Humidity: 20 to 80% (non-condensation) Operating Altitude: 0 to 3,000 meters (0 to 10,000 feet) above sea level Power Requirements 100-240V AC, 50/60Hz, 2.3A-1.0A... - Page 23 XJ-M_Setup_03_e.fm 21 ページ 2011年2月7日 月曜日 午後5時44分...
- Page 24 La copie, partielle ou complète, de ce manuel est formellement interdite. Vous pouvez utiliser ce manuel dans un but personnel. Tout autre emploi est soumis à l’autorisation de CASIO COMPUTER CO., LTD. CASIO COMPUTER CO., LTD. ne peut être tenu pour responsable des pertes de bénéfices ou des réclamations de tiers résultant de l’emploi de ce produit ou de ce manuel.
- Page 25 XJ-M_Setup_US.book 1 ページ 2011年2月7日 月曜日 午後4時1分 Consignes de sécurité Merci d’avoir choisi ce produit CASIO. Veuillez lire attentivement ces « Consignes de sécurité » avant de l’utiliser. Après avoir lu ce Mode d’emploi, conservez-le à portée de main pour toute référence future.
- Page 26 Débranchez le projecteur. rapidement, si nécessaire. Contactez votre revendeur ou un service Un cordon d’alimentation endommagé après-vente agréé CASIO. crée un risque d’incendie et de choc électrique. ● Démontage et modification Veillez à toujours prendre les précautions N’essayez jamais de démonter le...
- Page 27 XJ-M_Setup_US.book 3 ページ 2011年2月7日 月曜日 午後4時1分 Consignes de sécurité ● Incinération ● Sorties d’air N’incinérez jamais le projecteur lorsqu’il Les sorties d’air deviennent très chaudes lorsque doit être mis au rebut. Ceci peut causer le projecteur fonctionne. Ne les touchez jamais. une explosion pouvant entraîner un Vous risqueriez sinon de vous brûler.
- Page 28 • Au moins une fois dans l’année, débranchez la internes à votre revendeur ou à un fiche et enlevez la poussière accumulée autour service après-vente agréé CASIO. de ses broches avec un chiffon sec ou un Ne mouillez jamais la télécommande.
- Page 29 à long terme un risque d’incendie immédiatement les mesures suivantes. et de panne. Contactez une fois par an votre revendeur ou un service après-vente agréé CASIO Ne vous frottez pas les yeux ! Lavez-vous les pour faire nettoyer l’intérieur du projecteur. Notez yeux avec de l’eau propre.
- Page 30 XJ-M_Setup_US.book 6 ページ 2011年2月7日 月曜日 午後4時1分 Consignes de sécurité ● Vous devez utiliser les lunettes ou les Lunettes 3D lentilles que vous utilisez Avertissement normalement. Si vous portez normalement des lunettes ou des Les personnes suivantes ne devraient lentilles, vous devez aussi les porter pour regarder pas regarder d’images 3D.
-
Page 31: Précautions D'emploi
Le cas échéant, contactez votre revendeur ou un service aprèsvente agréé CASIO pour faire remplacer la lampe. Notez que les problèmes résultant des démontage ou modification non autorisés du projecteur ne seront pas couverts par la garantie et ne pourront pas être réparés par CASIO. -
Page 32: Autres Précautions
XJ-M_Setup_US.book 8 ページ 2011年2月7日 月曜日 午後4時1分 Précautions d’emploi Autres précautions Ce projecteur contient des éléments de précision. Pour sauvegarder correctement les données et éviter toute panne, prenez toujours les précautions suivantes. ● N’utilisez et ne rangez jamais le projecteur aux endroits suivants. Le projecteur risquerait de tomber en panne ou d’être endommagé. -
Page 33: Précautions À Prendre Après La Projection
XJ-M_Setup_US.book 9 ページ 2011年2月7日 月曜日 午後4時1分 Précautions d’emploi ● Correction de la distorsion en trapèze et qualité de l’image La correction de la distorsion en trapèze a pour effet de compresser l’image avant de l’afficher. Ceci peut entraîner une déformation ou une perte de qualité de l’image. Si le cas se présente, changez l’orientation du projecteur et/ou de l’écran pour que leur disposition s’approche le plus possible de l’illustration dans «... -
Page 34: Déballage
XJ-M_Setup_US.book 10 ページ 2011年2月7日 月曜日 午後4時1分 Déballage Lorsque vous déballez le projecteur, vérifiez que tous les éléments suivants se trouvent bien dans le carton. PROJECTEUR DE DONNEES Télécommande Câble Mini D-sub (YT-120) • Piles d’essai (Taille AAA × 2) • Cordon d’alimentation secteur •... -
Page 35: Préparatifs
Installez le projecteur sur un bureau, une table ou un meuble solide et horizontal. L’espace sur les côtés et à l’arrière du projecteur doit être suffisant pour faciliter la ventilation. Les illustrations suivantes montrent comment orienter le projecteur pour obtenir une image optimale sur l’écran. XJ-M140/XJ-M145/XJ-M150/XJ-M155 XJ-M240/XJ-M245/XJ-M250/XJ-M255 Ecran Ecran Le projecteur doit former un angle droit avec l’écran. -
Page 36: Précautions Concernant L'installation
XJ-M_Setup_US.book 12 ページ 2011年2月7日 月曜日 午後4時1分 Préparatifs Précautions concernant l’installation Branchez le cordon d’alimentation sur une prise d’accès facile, pour pouvoir le débrancher rapidement, si nécessaire. Ne posez aucun objet dans la zone indiquée par les pointillés ci-dessous, soit une zone d’environ 30 cm du projecteur. -
Page 37: Raccordement D'un Ordinateur Au Projecteur
XJ-M_Setup_US.book 13 ページ 2011年2月7日 月曜日 午後4時1分 Préparatifs Réglez plus précisément l’inclinaison du projecteur en tournant le pied avant. Réglez plus précisément l’horizontalité du projecteur en tournant le pied arrière 3. Important ! Important ! Important ! Pour rétracter le pied avant, maintenez le bouton de libération enfoncé et repoussez le pied avant dans le projecteur. -
Page 38: Démarrage Et Arrêt De La Projection
XJ-M_Setup_US.book 14 ページ 2011年2月7日 月曜日 午後4時1分 Démarrage et arrêt de la projection Pour démarrer la projection Raccordez le projecteur à une prise secteur avec le cordon d’alimentation secteur fourni. REMARQUE Ce produit est aussi conçu pour les systèmes de distribution d’alimentation IT à tension de 230 V, phase à... -
Page 39: Pour Mettre Le Projecteur Hors Service
XJ-M_Setup_US.book 15 ページ 2011年2月7日 月曜日 午後4時1分 Démarrage et arrêt de la projection Pour mettre le projecteur hors service Appuyez sur la touche [P] (Alimentation). Le message de confirmation apparaît. Si vous n’éteignez pas le projecteur, ce message disparaîtra automatiquement dans les 10 secondes qui suivent. Il disparaîtra aussi si vous appuyez sur la touche [ESC]. -
Page 40: Utilisation Du Cd-Rom
Contient des informations détaillées sur le UsersGuide_French.pdf projecteur. Guide des fonctions Décrit les opérations lorsqu’une mémoire USB, USB_Guide_French.pdf une caméra multifonctions CASIO (YC-400, (modèles avec port YC-430) ou une calculatrice scientifique graphique USB seulement) est raccordée au port USB à l’arrière du projecteur. -
Page 41: Témoins
XJ-M_Setup_US.book 17 ページ 2011年2月7日 月曜日 午後4時1分 Témoins Les témoins vous tiennent au courant de l’état opérationnel actuel du projecteur. Les témoins prennent l’aspect suivant quand le projecteur fonctionne normalement. Lorsque les témoins Cela signifie que : apparaissent de cette façon : POWER/ Vous venez de brancher le cordon d’alimentation secteur sur une prise LIGHT TEMP... -
Page 42: Guide De Dépannage
XJ-M_Setup_US.book 18 ページ 2011年2月7日 月曜日 午後4時1分 Guide de dépannage Vérifiez les points suivants en cas de problème avec ce projecteur. Problème Cause et mesure à prendre Le projecteur ne Si le témoin POWER/STANDBY n’est pas allumé, le cordon d’alimentation s’allume pas. secteur n’est pas raccordé correctement. Raccordez le cordon d’alimentation secteur correctement. - Page 43 éclairé. La source lumineuse La source lumineuse a atteint sa durée de vie ou fonctionne mal. Le cas ne s’éclaire pas. échéant, contactez votre revendeur ou un service après-vente agréé CASIO pour faire remplacer la lampe. Important ! Important ! Important ! Essayez d’effectuer les opérations suivantes pour remettre le projecteur en état de marche.
-
Page 44: Principales Caractéristiques Techniques
XJ-M_Setup_03_f.fm 20 ページ 2011年2月9日 水曜日 午後3時16分 Principales caractéristiques techniques XJ-M140/XJ-M145/ XJ-M150/XJ-M155/ Nom de modèle XJ-M240/XJ-M245 XJ-M250/XJ-M255 Luminosité 2500 3000 (Lumens ANSI) Température de fonctionnement : 5 à 35°C Environnement Humidité de fonctionnement : 20 à 80 % (sans condensation) Altitude de fonctionnement : 0 à 3000 mètres au-dessus du niveau de la mer... - Page 45 XJ-M_Setup_US.book 21 ページ 2011年2月7日 月曜日 午後4時1分...
- Page 46 Se prohíbe la copia, total o parcial, de este manual. Sólo se permite el uso del presente manual para uso personal. Se prohíbe cualquier otro uso sin el consentimiento de CASIO COMPUTER CO., LTD. CASIO COMPUTER CO., LTD. no será responsable por lucro cesante o reclamos de terceros que surjan del uso de este producto o del presente manual.
-
Page 47: Precauciones De Seguridad
XJ-M_Setup_US.book 1 ページ 2011年2月7日 月曜日 午後4時1分 Precauciones de seguridad Muchas gracias por la compra de este producto CASIO. Antes de utilizar el producto, asegúrese de leer las “Precauciones de seguridad”. Después de leer esta Guía del usuario, guárdela en un lugar seguro para futuras consultas. - Page 48 • No intente modificar el cable de alimentación, no mantenimiento y reparación a su distribuidor permita que se dañe ni lo doble excesivamente. original o centro de servicio autorizado CASIO. • No tuerza el cable de alimentación ni tire del mismo.
- Page 49 XJ-M_Setup_US.book 3 ページ 2011年2月7日 月曜日 午後4時1分 Precauciones de seguridad ● Descarte por incineración ● Salidas de aire Nunca intente deshacerse del proyector Las salidas de aire estarán muy calientes durante mediante incineración. El hacerlo puede el funcionamiento del proyector. No las toque. Si lo causar explosión, con el consiguiente hiciese, podría sufrir quemaduras.
-
Page 50: Control Remoto
• Por lo menos una vez al año, desenchufe el cable reparación a su distribuidor original o de alimentación y utilice un paño seco o una centro de servicio autorizado CASIO. aspiradora para eliminar el polvo acumulado No permita que el control remoto se alrededor de los conectores del enchufe de moje. - Page 51 Póngase en contacto con su distribuidor original o ¡No se frote los ojos! Lávese los ojos con agua con el centro de servicio autorizado CASIO una limpia. vez al año para que le limpien el interior del Póngase inmediatamente en contacto con un...
- Page 52 XJ-M_Setup_US.book 6 ページ 2011年2月7日 月曜日 午後4時1分 Precauciones de seguridad ● Deberá utilizar sus gafas o cualquier Gafas 3D otro elemento que utilice Advertencia habitualmente para corrección ocular. Toda persona que se encuentre en las Si normalmente usted utiliza gafas o lentes de siguientes condiciones de salud no debe contacto, llévelos puestos debajo de las gafas 3D ver imágenes en 3D.
-
Page 53: Precauciones De Funcionamiento
útil. Comuníquese con su distribuidor original o un centro de servicio autorizado CASIO para el reemplazo. Tenga presente que los problemas provocados por el desmontaje o modificación no autorizados del proyector no están cubiertos por la garantía y no califican para reparaciones por parte de CASIO. -
Page 54: Otras Precauciones
XJ-M_Setup_US.book 8 ページ 2011年2月7日 月曜日 午後4時1分 Precauciones de funcionamiento Otras precauciones El proyector está fabricado con componentes de precisión. La negligencia en la observación de las siguientes precauciones puede impedir el correcto almacenamiento de los datos y puede provocar el mal funcionamiento del producto. ●... -
Page 55: Precauciones Sobre La Manipulación Del Proyector Después Del Uso
XJ-M_Setup_US.book 9 ページ 2011年2月7日 月曜日 午後4時1分 Precauciones de funcionamiento ● Corrección trapezoidal y calidad de imagen La corrección trapezoidal hace que la imagen se comprima antes de ser proyectada. Esto puede generar distorsión o una pérdida en la calidad de la imagen. Si esto llega a suceder, cambie la orientación del proyector y/o pantalla de manera que quede en lo posible como en la ilustración de la parte titulada “Configuración del proyector”... -
Page 56: Desembalaje
XJ-M_Setup_US.book 10 ページ 2011年2月7日 月曜日 午後4時1分 Desembalaje Al desembalar el proyector, compruebe que no falta ninguno de los elementos listados a continuación. PROYECTOR DE DATOS Control remoto Cable Mini D-Sub (YT-120) • Pilas de prueba (Tamaño AAA × 2) • Cable de alimentación de CA •... -
Page 57: Preparativos
Las ilustraciones siguientes muestran cómo se debe orientar el proyector para una proyección óptima en relación a la pantalla. XJ-M140/XJ-M145/XJ-M150/XJ-M155 XJ-M240/XJ-M245/XJ-M250/XJ-M255 Pantalla Pantalla Asegúrese de que el proyector se encuentre en ángulo recto a... -
Page 58: Precauciones De Configuración
XJ-M_Setup_US.book 12 ページ 2011年2月7日 月曜日 午後4時1分 Preparativos Precauciones de configuración Utilice un tomacorriente ubicado convenientemente, que pueda ser alcanzado fácilmente siempre que necesite desenchufar el proyector. No ponga ningún objeto dentro del área indicada por la línea de trazos en la ilustración siguiente, o sea un espacio mínimo de 30 cm del proyector. -
Page 59: Conexión De Una Computadora Al Proyector
XJ-M_Setup_US.book 13 ページ 2011年2月7日 月曜日 午後4時1分 Preparativos Gire el pie delantero para realizar los ajustes precisos del ángulo de elevación del proyector. Gire el pie trasero3 para realizar los ajustes precisos de la inclinación horizontal del proyector. ¡Importante! ¡Importante! ¡Importante! Para plegar el pie delantero, mantenga presionado el botón de liberación e introdúzcalo dentro del proyector. -
Page 60: Inicio Y Detención De La Proyección
XJ-M_Setup_US.book 14 ページ 2011年2月7日 月曜日 午後4時1分 Inicio y detención de la proyección Para iniciar la proyección Utilice el cable de alimentación de CA incluido para enchufar el proyector en un tomacorriente. NOTA Este producto también está diseñado para sistema de distribución de energía IT con voltaje de fase a fase de 230V. -
Page 61: Para Apagar El Proyector
XJ-M_Setup_US.book 15 ページ 2011年2月7日 月曜日 午後4時1分 Inicio y detención de la proyección Para apagar el proyector Presione la tecla [P] (Alimentación). Aparecerá el mensaje de confirmación. Si no desactiva la alimentación del proyector, el mensaje de confirmación desaparecerá automáticamente luego de unos 10 segundos. El mensaje de confirmación también desaparecerá... -
Page 62: Uso Del Cd-Rom
Explica las operaciones que se pueden realizar USB_Guide_Spanish.pdf cuando se conecta una memoria USB, una cámara (sólo modelos con multifuncional CASIO (YC-400, YC-430) o una puerto USB) calculadora gráfica científica al puerto USB en el respaldo del proyector. Guía de funciones Explica las operaciones cuando se establece una WirelessGuide_Spanish.pdf... -
Page 63: Indicadores
XJ-M_Setup_US.book 17 ページ 2011年2月7日 月曜日 午後4時1分 Indicadores Los indicadores le mantienen informado sobre el estado actual de funcionamiento del proyector. A continuación se muestra cómo aparecen los indicadores en condiciones normales de funcionamiento. Cuando los indicadores Significa que: aparecen así: POWER/ Recién acaba de enchufar el cable de alimentación de CA en el LIGHT TEMP STANDBY... -
Page 64: Solución De Problemas
XJ-M_Setup_US.book 18 ページ 2011年2月7日 月曜日 午後4時1分 Solución de problemas Siempre que experimente cualquier problema con el proyector, verifique los siguientes puntos. Problema Causa y acción recomendada La unidad no se Si el indicador POWER/STANDBY no se ilumina, el cable de alimentación enciende. de CA podría estar mal conectado. - Page 65 2. Conecte otra vez el cable de alimentación y vuelva a encender el proyector. Si la operación normal no se reanuda después de realizar los pasos anteriores, lleve el proyector a su distribuidor o un centro de servicio autorizado CASIO. S-19...
-
Page 66: Especificaciones Principales
XJ-M_Setup_03_s.fm 20 ページ 2011年2月9日 水曜日 午前10時38分 Especificaciones principales XJ-M140/XJ-M145/ XJ-M150/XJ-M155/ Nombre del modelo XJ-M240/XJ-M245 XJ-M250/XJ-M255 Luminosidad 2500 3000 (ANSI Lúmenes) Temperatura de funcionamiento: 5 a 35 °C Entorno de Humedad de funcionamiento: 20 a 80 % (sin condensación) funcionamiento Altitud de funcionamiento: 0 a 3.000 metros sobre el nivel del mar Requisitos de alimentación 100-240 V CA, 50/60 Hz, 2,3 A-1,0 A... - Page 67 XJ-M_Setup_US.book 1 ページ 2011年2月7日 月曜日 午後4時1分 MEMO...
- Page 68 XJ-M_Setup_US.book 2 ページ 2011年2月7日 月曜日 午後4時1分 MEMO...
-
Page 69: Fcc Warning
FCC emission limits. Connector cable..XJ-M140/XJ-M145/XJ-M150/XJ-M155/XJ-M240/XJ-M245/XJ-M250/XJ-M255 unit to Declaration of Conformity Model Number: XJ-M140/XJ-M145/XJ-M150/XJ-M155/XJ-M240/XJ-M245/XJ-M250/XJ-M255 Trade Name: CASIO COMPUTER CO., LTD. Responsible party: CASIO AMERICA, INC. Address: 570 MT. PLEASANT AVENUE, DOVER, NEW JERSEY 07801 Telephone number: 973-361-5400 This device complies with Part 15 of the FCC Rules, Operation is subject to the following two conditions: (1) This device may not cause harmful interference, and (2) this device must accept any interference received, including interference that may cause undesired operation. -
Page 70: Fcc Information
XJ-M_Setup_US.book 4 ページ 2011年2月7日 月曜日 午後4時1分 FCC Information This device, IEEE 802.11g Wireless LAN USB Adapter, complies with Part 15 of the FCC Rules. Operation is subject to the following two conditions: (1) this device may not cause harmful interference, and (2) this device must accept any interference received;... - Page 71 XJ-M_Setup_US.book 5 ページ 2011年2月7日 月曜日 午後4時1分...
- Page 72 XJ-M_Setup_US.book 6 ページ 2011年2月7日 月曜日 午後4時1分 Printed in China Imprimé au Chine RJA524095-002 MA1102-A...