
Related Manuals for Philips BG1025


Summary of Contents for Philips BG1025
- Page 1 Always here to help you Register your product and get support at www.philips.com/welcome BG1025 BG1024 BG105...
- Page 2 3 mm 0.5 mm –...
- Page 3 ENGLISH 4...
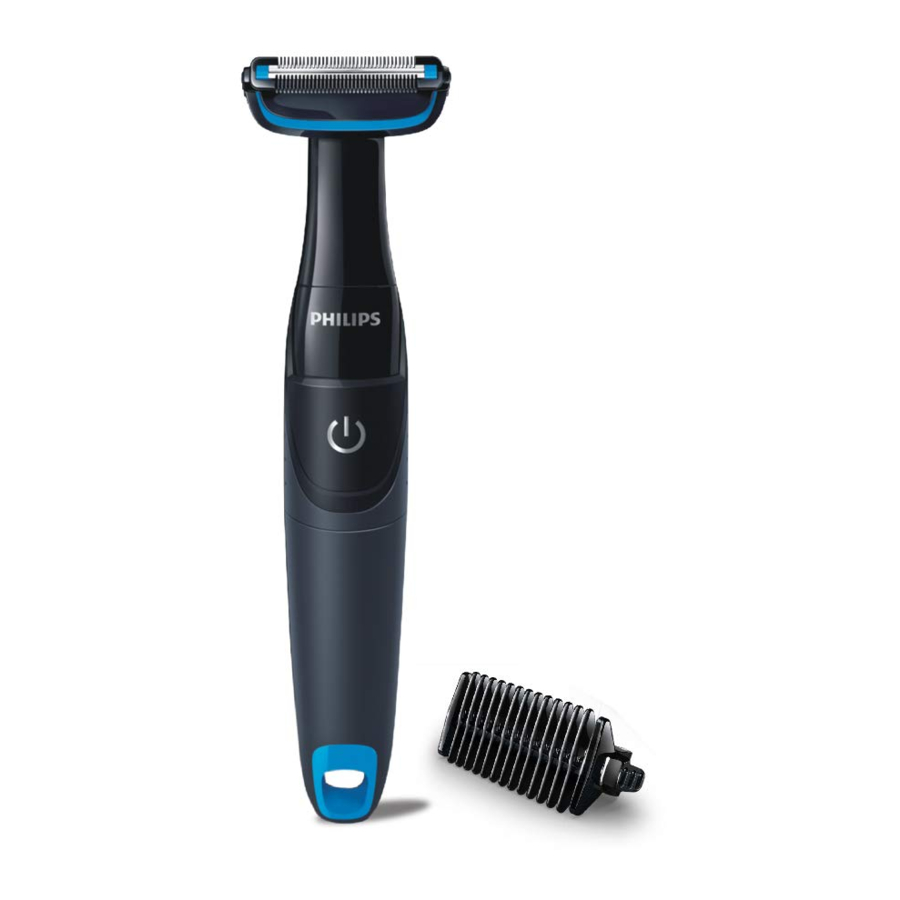
- Page 4 ENGLISH Introduction Congratulations on your purchase and welcome to Philips! at www.philips.com/welcome. General description (Fig. 1) Trimming head Locked position of the trimming head On/off slide Shower strap slot Shower strap 3mm trimming comb Cleaning brush 10 AA alkaline battery...
- Page 5 Use and store the appliance at a temperature between Compliance with standards This appliance is waterproof and complies with the internationally This Philips appliance complies with all applicable standards and Preparing for use Placing the batteries To remove the battery compartment cover, turn it clockwise until it is in the unlocked position.
- Page 6 Put the battery in the battery compartment. Note: The appliance runs on one R6 AA 1.5-volt battery (included). Preferably use Philips alkaline batteries. A new AA alkaline battery has an operating time of up to 90 minutes. Slide the battery compartment cover back onto the handle.
- Page 7 ENGLISH The appliance comes with two trimming combs that allow you to cut Comb Hair length after trimming 3mm trimming comb Snap the trimming comb into place. Make sure that the indication on the comb is aligned with the indication on the trimming head. Push the on/off slide upwards to switch on the appliance.
- Page 8 ENGLISH Cleaning Never use compressed air, scouring pads, abrasive cleaning agents or aggressive liquids such as petrol or acetone to clean the appliance. Push the on/off slide downwards to switch off the appliance. Remove the 3mm trimming comb or 0.5mm skin protector if it is still attached.
- Page 9 ENGLISH Inform yourself about the local separate collection system for electrical Guarantee and support www.philips.com/ support...
- Page 10 ENGLISH This chapter summarises the most common problems you could www.philips.com/support for a list of Problem Cause Solution The appliance does not Take the appliance to your dealer or to The appliance makes more noise and/or perhaps because you dropped...
- Page 11 www.philips.com/welcome.
- Page 14 45º...
- Page 16 www.philips.bg/support...
- Page 17 www.philips.bg/support...
- Page 18 Všeobecný popis (Obr. 1) Popruh do sprchy...
- Page 19 Soulad s normami...
- Page 21 45º...
- Page 22 aceton.
- Page 23 support...
- Page 24 www.philips.com/support...
- Page 25 Piirlipea Piirlipea lukustatud asend 3 mm piirlikamm 10 AA-leelispatarei Hoiatus...
- Page 26 Patareide paigaldamine Patareipesa katte eemaldamiseks keerake seda päripäeva, kuni see on avatud asendis.
- Page 27 Pange patarei patareipessa. Eelistatav on kasutada Philipsi leelispatareisid. Uue AA-leelispatarei tööaeg on kuni 90 minutit. Libistage patareipesa kate tagasi käepidemele. Keerake patareipesa katet vastupäeva, kuni see on lukustatud asendis. Ettevaatust: Ärge kasutage seadet ilma 0,5 mm naha kaitsesüsteemi või 3 mm piirlikammita.
- Page 28 Piiramine Kammotsak Karvade pikkus pärast piiramist 3 mm piirlikamm Lükake piirlikamm oma kohale. Veenduge, et kammil olev märgis on Liigutage seadet alati vastupidiselt karvakasvu suunale. 45º...
- Page 29 Puhastamine Ärge kunagi kasutage seadme puhastamiseks suruõhku, küürimiskäsna, abrasiivseid puhastusvahendeid ega ka sööbivaid vedelikke nagu bensiin või atsetoon. Eemaldage 3 mm piirlikamm või 0,5 mm naha kaitsesüsteem, Kasutage 3 mm piirlikammi või 0,5 mm naha kaitsesüsteemi Kasutage piirlipea sisemuse puhastamiseks kaasasolevat Loputage piirlipea sisemust kraani all.
- Page 30 www.philips.com/support...
- Page 31 Veaotsing www.philips.com/support Probleem Lahendus Seade tekitab rohkem Te ei ole piirlikammi...
- Page 32 www.philips.com/welcome.
- Page 35 45º...
- Page 37 www.philips.com/support...
- Page 38 Problem Ako se aparat koristi...
- Page 39 www.philips.com/welcome...
- Page 40 kerül.
- Page 42 3 mm 45º...
- Page 44 www.philips.com/support...
- Page 45 a...
- Page 46 www.philips.com/welcome...
- Page 49 45º...
- Page 52 www.philips.com/support...
- Page 53 www.philips.com/welcome...
- Page 56 Šukos 45º Pastaba. Nespauskite per stipriai.
- Page 57 acetono. vandeniu.
- Page 58 Perdirbimas www.philips.com/ support...
- Page 59 Problema Sprendimas Nenaudokite prietaiso profesionaliai skusdami...
- Page 60 www.philips.com/welcome...
- Page 63 45º...
- Page 64 vai acetonu.
- Page 65 www.philips.com/support...
- Page 66 Iemesls...
- Page 67 Nasadka do przycinania 3 mm Szczoteczka do czyszczenia 10 Bateria alkaliczna AA...
- Page 70 Nasadka do przycinania 3 mm 3 mm 45º...
- Page 72 www.philips.com/support...
- Page 73 Problem zamieszczonymi w rozdziale...
- Page 74 Introducere www.philips.com/welcome. Cap de tundere Comutator de pornire/oprire Pieptene pentru tuns 3 mm Important...
- Page 75 Conformitatea cu standardele Montarea bateriilor...
- Page 76 0,5 mm sau pieptenele de tuns la 3 mm.
- Page 77 Pieptene Pieptene pentru tuns 3 mm 45º...
- Page 78 capului de tundere.
- Page 79 Reciclarea www.philips.com/support...
- Page 80 Depanare www.philips.com/support pentru o Aparatul nu Una sau mai multe componente Aparatul face mai mult tundere...
- Page 81 www.philips.com/welcome.
- Page 85 45º...
- Page 87 www.philips.com/support...
- Page 88 Výstraha...
- Page 91 3 mm 45º...
- Page 93 www.philips.com/support...
- Page 94 www.philips.com/support...
- Page 95 Splošni opis (Sl. 1) Pomembno...
- Page 98 Glavnik 3 mm 45º...
- Page 100 support...
- Page 101 aparata...
- Page 102 Opšti opis (Sl. 1) Opomena...
- Page 103 Pre upotrebe...
- Page 105 prema gore. 45º...
- Page 106 nadole.
- Page 107 support...
- Page 108 Problem...
- Page 109 www.philips.com/welcome...
- Page 112 45º...
- Page 114 www.philips.com/support...
- Page 115 www.philips.com/support...
- Page 116 8888.002.9997.1...