Table of Contents
Advertisement
Specifi cations
Specifi cations
Specifi cations
Specifi cations
Rated voltage
220 - 240 V
Rated frequency
50 Hz
Maximum power
Washing: 1660 - 2000 W
consumption
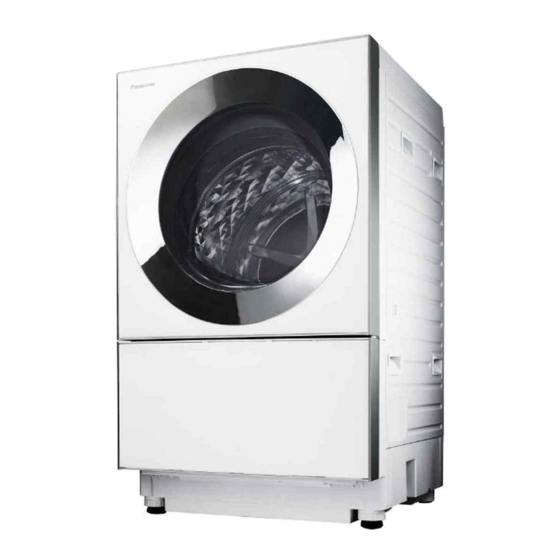
Dimensions
600 (W) × 665 (D) × 998 (H) (mm)
Product weight
74 kg
Maximum wash capacity
10.0 kg
Maximum spin capacity
10.0 kg
Maximum dry capacity
6.0 kg
Water pressure
0.03 - 1 MPa
Water consumption
Washing: 78 L ("ECONAVI" program)
Panasonic Corporation
http://www.panasonic.com
© Panasonic Corporation 2017-2019
AWW9901A3YA0
AWW9901A3YA0-0A5
Thank you for purchasing this product.
- Read these instructions carefully for optimum performance and safety before use.
- Keep this manual for future reference.
Printed in Japan
07-2019
S0719-0
D106X1WS3
D106X1WM3
Operating & Installation Instructions
Washer Dryer
(Domestic Use)
Model No.
NA-D106X1 WS3
NA-D106X1 WM3
It is essential to read these
instructions.
Advertisement
Table of Contents

Related Manuals for Panasonic NA-D106X1 WS3


Summary of Contents for Panasonic NA-D106X1 WS3
- Page 1 It is essential to read these instructions. AWW9901A3YA0 Panasonic Corporation http://www.panasonic.com © Panasonic Corporation 2017-2019 AWW9901A3YA0-0A5 Thank you for purchasing this product. - Read these instructions carefully for optimum performance and safety before use. - Keep this manual for future reference.
-
Page 2: Table Of Contents
Contents Read before Use How to Use When Necessary Safety Precautions Everyday Washing Changing the Settings • Cotton/ECONAVI Part Names Washing Options Any problem? Door Lock/Accessories • Hand Wash • Bedding For Better Results • Opening the door during operation •... - Page 3 Safety Precautions Observe fully. To prevent the risk of danger to humans or property damage, make sure to follow the precautions described below. WARNING The descriptions are classifi ed according to the degree of harm or damage caused by misuse. WARNING CAUTION May cause serious...
-
Page 4: Part Names
Part Names Door Lock/Accessories Opening the door during operation Provide adequate Detergent case (P.20) ventilation! The door is locked if is displayed during operation. The door Dry fi lter does not open. Provide adequate ventilation while water temperature is high drying and after the operation, <To open the door>... - Page 5 Touch Panel Operating buttons/Screen panel (Touch panel) All indicators are lightening to facilitate explanation. Display window (Shows wash time, rinse cycles, spin time, time for dry using “Timer”, etc.) This indicator shows the current process of the program Press to Start/Pause operation (Wash/Rinse/Spin/Dry) The preset timer is being set.
- Page 6 Laundry Procedure *1 For manual setting (P.26) *2 Not set as default *3 Performs the detangle operation after the last spin. After every drying operation Raise the water tempera- ture for “Wash” cycle (P.18) For “Rinse”, water is not warm.
- Page 7 Laundry Check and Preparations To prevent darkening of colour and colour transfer Cannot Wash or Dry Due to less water used for drum type washing machines, stain or dye concentration may become high, resulting in noticeable darkening or colour transfer of clothes. Other items Items other than ...
- Page 8 Laundry Check and Preparations (continued) Bedding program (Blanket) Washable/Dryable How to put in the blanket Do not wash items without care labels, wa- terproof sheets or cover. Blanket (Mayer, Tuft and woven) with any of • Fold the blanket. the indications on the label ...
- Page 9 Laundry Check and Preparations (continued) Hand Wash program Warm wash program By softly shaking the drum, this program gently washes delicate clothes, etc. that could not have been washed by Note when checking the laundry Cotton (30 °C) washing machine. Check symbols on care labels to prevent damage of ...
-
Page 10: Hand Wash
Selecting the Program Additional Maximum According to the type of Drying method of this appliance Operation laundry and stain capacity functions Auto Tub Water This appliance dries clothes with the Program Dry mode Check the care labels or material labels warm air which is slightly higher than the temperature * Clean... - Page 11 How to Put in Detergent and Softener Timing to put in detergent, etc. Always use low suds detergent or the detergent designed for front loading washing machines. Put in the laundry Put in the detergent Powdered detergent and close the door. according to the (Low suds or for front loading washing machines) indication.
- Page 12 Everyday Washing Preparation (1) Prepare your laundry. (2) Turn on the water faucet. (3) Put the laundry in the drum and close the door. You can add your preferred setting. Turn the Select the Select the Start. Put in the The operation is complete with buzzer.
-
Page 13: Hand Wash
Washing Options Preparation Turn the Select Select the Put in the Start. The operation is (1) Prepare your laundry. complete with buzzer. power program. detergent. (Take out the laundry.) (2) Turn on the water faucet. operation. (3) Put the laundry in the drum and close the door. - Page 14 Washing Options (continued) Preparation Turn the Select Select the program and Start. Put in the The operation is complete (1) Prepare your laundry. with buzzer. power water temperature. detergent (Take out the laundry.) (2) Turn on the water faucet. operation. according to the (3) Put the laundry in the indication.
-
Page 15: Selecting The Program
Drying Preparation Note For clothes that cannot be dried (P.12) (1) Prepare your Laundry. (2) Put the laundry in the drum and To prevent creases and shrinkage close the door. caused by drying (P.13) Turn the Select the operation. Select the program. - Page 16 Maintenance Drain fi lter/Dry fi lter Attention Drain fi lter Do not use gritty cleanser, thinner, benzine, alcohol, kerosene, etc. If detergent or softener is attached to the main unit (especially door, operation Remove dust. panel and touch panel), immediately wipe it off with a wrung-out towel, etc. Before maintenance, (Peeling of print, damage to resin, metal corrosion or malfunction may occur.) be sure to turn the power off...
- Page 17 Maintenance Drum/Main unit, etc. (continued) Drum Preparation Turn Select Select Start. When water sup- Close the door ply fi nishes, press “Tub and start. Turn on the water faucet. the Pause button. power operation. Clean”. Do not put in clothes. Directly put in bleach in the drum.
-
Page 18: Econavi
Changing the Settings Change the settings for easier use. Changed settings are stored in memory even after the power is turned off . Before setting With the power turned off , while Select in step Adjusting the Cancelling the Adjust the level of spin pressing and holding level of spin... -
Page 19: For Better Results
For Better Results Symptoms Tips for nice fi nish Symptoms Tips for nice fi nish Depending on the material, weaving method, thickness and type, some clothes Use correct amount of detergent. (P.21) (Using too small amount of detergent may ... -
Page 20: Faq
Operation sound Clothes are not well dried The following sound is normal. Drying method of this appliance Amount of clothes and the condition (This is not a malfunction.) This appliance dries clothes with the Too many clothes. warm air which is slightly higher than the →Put in clothes of the upper limit amount or less room temperature. -
Page 21: Troubleshooting
Troubleshooting Check the following items before requesting service. In the case of abnormality, contact the sales dealer immediately where you have purchased the appliance. Symptoms Check the following. Symptoms Check the following. The powder detergent is directly put in the drum or liquid detergent compartment. The powder detergent was directly put in the drum. - Page 22 Troubleshooting (continued) Check the following items before requesting service. In the case of abnormality, contact the sales dealer immediately where you have purchased the appliance. Symptoms Check the following. Symptoms Check the following. If “Rinse” or “Rinse/Spin” is selected, the operation starts with water discharge if After start, pressing “Pause”...
-
Page 23: Error Messages
Troubleshooting Troubleshooting Error Messages Error Messages (continued) (continued) Check the following items before requesting service. If the buzzer beeps and “U” and “number” are alternately displayed, check the following. In the case of abnormality, contact the sales dealer immediately where you have purchased the appliance. By pressing “Start”, the operation will resume (Except for U04, U17 and U18). -
Page 24: Program Details
Program Details Required operation time may become longer depending on the type of clothes and how the clothes are distributed. “Preset Timer” setting range Auto setting Switching range Capacity Required time Program Operation Operation Program Setting range (or less) (approx.) Wash Rinse... -
Page 25: Installation
fi nished. If the installation is not carried out following these installation instructions, Panasonic will not be liable for any accident or damage that may occur. Attach the included Please keep these installation instructions with “Operating Instructions” in a To customer cover with the screw. - Page 26 Installation (continued) 3. Preparation before installation 4. Connect the hoses Check the installation When installing in an enclosed area, Connect the hoses properly to prevent water leak. keep the front open and secure gaps Maximum connection distance of hoses and power cord location.
- Page 27 Installation (continued) Connect the water supply hose Water tap adaptor and water supply hose 5. Levelling the appliance to the water inlet. Mains water pressure and water fl ow Attach the end of the hose to the water inlet of ...
- Page 28 Installation (continued) 6. Checking after installation After installation, check the following items, and perform test run. Then, be sure to put your signature and explain Perform Test Run! to the customer that installation has completed. (Otherwise, water leak may occur.) ...