
Related Manuals for AEG Protect A Series


Summary of Contents for AEG Protect A Series
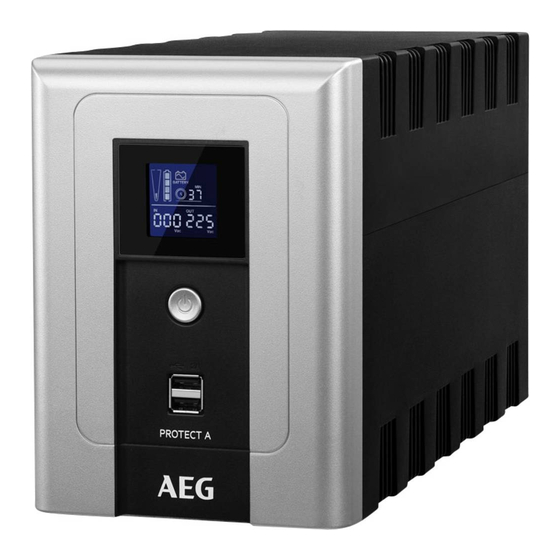
- Page 1 Protect A 500 LCD PROTECT A Protect A 700 LCD Protect A 1200 LCD Protect A 1600 LCD User Manual...
- Page 2 REVISION Status Status Status Status Change Change Change Change Date Date Date Date Name Name Name Name Created 29.01.2019 Gortan...
- Page 3 Thank you for purchasing the AEG PS UPS Protect A LCD from AEG Power Solutions. Safety information and operating instructions are included in this manual. To ensure correct use of the UPS, please read this manual thoroughly before operating it. Use this manual properly.
- Page 4 Warranty & Service Warranty & Service Information: Information: Warranty Warranty & Service & Service Information: Information: Thanks for buying this UPS product. Please follow the instructions in the product manual and if applicable the software installation manual, to have the maximum use of your product.
-
Page 5: Table Of Contents
CONTENTS NOTES ON THESE OPERATING ................6 1.1 Duty to Provide Information ................6 1.2 Please Read These Instructions Carefully Prior to Commissioning!......................6 1.3 Validity........................... 6 1.4 Warranty and Liability..................... 6 1.5 Handling ..........................7 1.6 Copyright ..........................7 SYSTEM OVERVIEW ...................... -
Page 6: Notes On These Operating
The warranty does not apply for damage caused by noncompliance with these instructions (such damage also includes damage to the warranty seal). AEG will accept no liability for consequential damage. AEG will rescind all obligations such as warranty agreements, service contracts, etc. -
Page 7: Handling
AEG parts or spare parts purchased from AEG. Handling Protect A is designed and constructed so that all necessary steps for start-up and operation can be performed without any internal manipulation of the unit. Maintenance and repair work may only be performed by trained and qualified personnel. -
Page 8: System Overview
Protect A is an u u u u ninterruptible p p p p ower s s s s upply (UPS) for essential loads such as PCs, workstations, relatively small-scale telecommunication equipment and similar devices. The Protect A series is a compact, interactively operating step wave UPS available with nominal power output ratings 500, 700, 1200 and 1600 VA. -
Page 9: Principle Of Operation
Compact design / without fan on all units except Protect A 1600 • LCD which has a fan on the back of the unit Fully compliant with generator input • Principle of Operation The UPS is connected to a shockproof socket between the public utility’s mains and the loads to be protected. - Page 10 Protect A supplies voltage until the battery is discharged or your IT system has been shut down and switched off properly. The standby time mainly depends on the connected loads. If the mains power supply is back to normal values, the UPS will automatically switch back the loads to mains supply.
-
Page 11: Safety
3. SAFETY 3.1 General Safety Instructions Read these operating instructions carefully prior to commissioning of Protect A UPS and observe the safety instructions! Only use the unit if it is in a technically perfect condition and always in accordance with its intended purpose, while being aware of safety and danger aspects, and in accordance with the operating instructions! Immediately eliminate any faults that could be detrimental to safety. - Page 12 For health and safety reasons, the unit must be earthed correctly! Protect A may only be operated with or connected to a 220 / 230 / 240 VAC mains with protective grounding using a mains connection cable with PE conductor (included in the delivery) that has been tested in accordance with German standards (VDE).
- Page 13 Do not block the air vents of the unit! Make sure, for example, that • children do not insert any objects in the ventilation openings! Do not connect household appliances such as hairdryers to the UPS! • The mains connection should be near the unit and easily accessible •...
-
Page 14: Technical Data
3.3 Technical Data Type rating Type rating Type rating Type rating Protect A 500 LCD 500 VA / 300 W Protect A 700 LCD 700 VA / 420 W Protect A 1200 LCD 1200 VA / 720 W Protect A 1600 LCD 1600 VA / 960 W UPS input UPS input... - Page 15 Battery Battery Battery Battery Autonomy time at nominal load 1 min Exhaustive discharge protection/ protection against excess load Charging time (to 90% of rated capacity) Type Sealed,maintenance-free Battery size and quantity 12V / 7Ah x 1 (Protect A 500 LCD) 12V / 9Ah x 1 (Protect A 700 LCD) 12V / 7Ah x 2 (Protect A...
- Page 16 Cooling type Increase natural cooling with additional fan for Protect A 1600 LCD Storage temperature range -15 °C to +50 °C (UPS electronics) UPS with integrated battery 0 °C to +40 °C Conformity Directives Directives Directives Directives Protect A product line meets the product standard EN 62040-3 : 2011. The CE mark on the unit confirms compliance with the EC outline directives for 2014 / 30 / EU EMC guideline and 2014 / 35 / EU Low voltage guideline and in conformity with related standards EN...
-
Page 17: Set-Up
AEG representative or dealer within eight days of delivery. Check the content is complete:... -
Page 18: Installation Site
4.2 Installation Site Protect A is designed to be installed in a protected environment. When installing the unit, pay attention to such factors as sufficient ventilation and suitable ambient conditions. Protect A is air/fan-cooled. Do not obstruct the air vents! The UPS should preferably be operated at room temperature (between 15 °C and 25 °C). -
Page 19: Back Panel
4.4 Back Panel USB Port RJ45 LAN/modem/ phone line protection RS232 AC Input Bypass & Surge(Protect A 500/700) 2* Bypass & Surge(Protect A 1200/1600) 3* IEC outlet (Protect A 500/700) 4* IEC outlet (Protect A 1200/1600) Protect A 500 LCD / Protect A 700 LCD Protect A 1200 LCD Protect A 1600 LCD... -
Page 20: Display
4.5 Display When LCD starts to work, it will When in normal mode, it will display all information for 3 display as below. seconds. When in battery mode, it will When in AVR mode, it will display as below. display as below. And the mark will flicker every 1 And the mark will flicker every 1 second. - Page 21 When in off charging mode, it When in off charging mode, it will display as: will display as: Note: the output voltage always is displayed 4.5.1 4.5.1 4.5.1 4.5.1 Load capacity lev Load capacity level display Load capacity lev Load capacity lev el display el display el display...
- Page 22 4.5.3 4.5.3 4.5.3 4.5.3 Overload indication Overload indication Overload indication Overload indication Indicate overload. When there is overload on the UPS, mark flickers every 1 second. 4.5.4 4.5.4 Battery low indication Battery low indication 4.5.4 4.5.4 Battery low indication Battery low indication Indicate low battery.
-
Page 23: Installation And Initial Setup
5. INSTALLATION AND INITIAL SETUP 5.1 Check Remove the UPS from its transport packaging and check that it has not been damaged in transit. If you find any damage, pack the unit up again and send it back to where you purchased it. 5.2 Placement and Storage Conditions Install the UPS in a protected area that is free of excessive dust and... -
Page 24: Connect The Loads
The battery is charged irrespectable of the settings on the UPS 5.4 Connect the Loads Plug in the loads to output receptacles on the rear panel of the UPS. Simply turn on the power switch of UPS unit, and devices connected to the UPS will be protected by UPS unit. -
Page 25: Connect 1000Mb Ethernet For Surge Protection
Connect 1000Mb Ethernet for Surge Protection Connect for example a single modem line into surge-protected outlet on the back panel of the UPS unit. Connect from another outlet to the computer with another line cable. Connect USB Cable To monitor the UPS status, such as unattended UPS shutdown and start-up, by using bundled software, please connect the UPS and PC with USB cable included. -
Page 26: Software Installation On Your Pc
6. SOFTWARE INSTALLATION ON YOUR Connected by USB to a PC or notebook, the Software enables communication between the UPS and the computer. The UPS software monitors the status of the UPS, shuts down the system before the UPS is exhausted and can remotely observe the UPS via the Network (enabling users to manage their system more effectively). -
Page 27: Smart Battery Function
7. SMART BATTERY FUNCTION When UPS connects to Windows PC with USB cable, it will show a battery icon located in the system tray, near the clock. You can get some basic information (e.g. Charging/Discharging, battery remaining capacity) by clicking the battery icon. on charging status on discharging status You can set PC’s Operating System (OS) to Sleep/Hibernate/... -
Page 28: Troubleshooting
8. TROUBLESHOOTING Symptom Symptom Possible Cause Possible Cause Remedy Remedy Symptom Symptom Possible Cause Possible Cause Remedy Remedy Battery weak Charge battery up to 8 hours Battery defect Replace with No LED display same type of on the front panel battery Power switch is Press the... -
Page 29: Maintenance
9. MAINTENANCE Protect A consists of state-of-the-art, non-wearing components. We do, however, recommend regular visual checks of the unit to maintain its continuous availability and operational reliability. Check whether: there is any mechanical damage or foreign bodies can be found •... - Page 30 If the replacement battery kit is damaged in any way or shows • any signs of leaking, please contact your dealer immediately. Recycle or dispose of the used battery appropriately. • Never dispose of batteries by burning. The batteries might •...
-
Page 31: Storage And Disposal
10. STORAGE AND DISPOSAL Long storage times without charging or discharging the battery at regular intervals may lead to permanent damage of the battery. If the battery is stored at room temperature (20 °C to 30 °C) it will automatically discharge at a rate of 3-6% per month due to internal reactions. - Page 32 Electrical and electronics waste Electrical and electronics waste must only be Electrical and electronics waste Electrical and electronics waste disposed of in compliance with local legislation and regulations. Never dispose of used batteries or battery material batteries or battery material batteries or battery material batteries or battery material with refuse.
- Page 33 AEG PS – Technical data in this document does not contain any binding guarantees or warranties. Content only serves for information purposes and can be modified at any time. We will make binding commitments only upon receipt of concrete enquiries and customer notification of the relevant conditions. Due to the non-binding nature of these terms, we assume liability neither for the accuracy nor completeness of the data provided here.