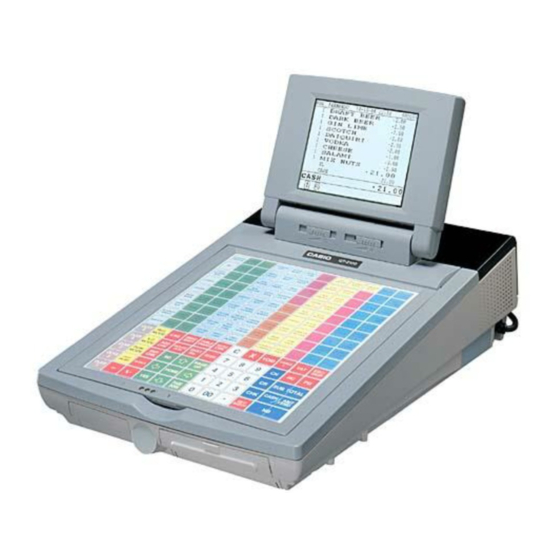
Casio QT2000 User Manual
Hide thumbs
Also See for QT2000:
- Service manual (127 pages) ,
- User manual (22 pages) ,
- User manual (3 pages)
Advertisement
Quick Links
Advertisement

Related Manuals for Casio QT2000


Summary of Contents for Casio QT2000
- Page 1 All manuals and user guides at all-guides.com Casio QT2000 Cash Register Manual USERS MANUAL...
- Page 2 All manuals and user guides at all-guides.com Casio QT2000 Cash Register Operating Instructions A. Opening Tables B. Printing Out Table Accounts C. Cashing Table Off D. Transfer Table E. Table Add F. Pay by Item G. Split Payment H. Printing Open Tables Report I.
- Page 3 All manuals and user guides at all-guides.com A. Opening Tables ENTER Table Number (1 to 9999) PRESS TABLE# button ENTER Items to be charged PRESS Table Charge Printing Out Table Accounts ENTER Table Number (1 to 9999) PRESS GUEST RECEIPT button C.
- Page 4 All manuals and user guides at all-guides.com Table Add This allows for two tables to be added together. ENTER Table number you wish to add to PRESS Table# button ENTER Table number you wish to add to the current open table PRESS Table Add button PRESS...
-
Page 5: Split Payment
All manuals and user guides at all-guides.com G. Split Payment To pay by multiple methods for one Tab e.g. $80 Tab, to be paid $20 CASH and $60 on C/C – once table is open: PRESS 2000 PRESS CASH PRESS 6000 PRESS CREDIT CARD... - Page 6 All manuals and user guides at all-guides.com Busy/Reset To Unlock Busy Table PRESS X/Z button twice SELECT Option 4 (Busy Reset) ENTER Table # then Arrow down and press YES PRESS REG button to return to Register mode K. Field Clear (to clear locked terminal) TURN power off at terminal (either at wall or switch under machine)
- Page 7 All manuals and user guides at all-guides.com Casio QT2000 Cash Register Reports End of Day – Single Cash Register End of Week – Single Cash Register End of Month – Single Cash Register End of Day – Consolidation Report 2 or more registers End of Week –...
- Page 8 All manuals and user guides at all-guides.com A. End of Day – Single Cash Register If Managers Code required for reports: 1. PRESS 2. PRESS Sign On (Clerk) 3. ENTER Managers Code 4. PRESS Sign On (Clerk) If no Managers Code required, begin from here: 5.
- Page 9 All manuals and user guides at all-guides.com C. End of Month – Single Cash Register If Managers Code required for reports: 1. PRESS 2. PRESS Sign On (Clerk) 3. ENTER Managers Code 4. PRESS Sign On (Clerk) If no Managers Code required, begin from here: 5.
- Page 10 All manuals and user guides at all-guides.com End of Week – Consolidation Report 2 or more cash registers If Managers Code required for reports: 1. PRESS 2. PRESS Sign On (Clerk) 3. ENTER Managers Code 4. PRESS Sign On (Clerk) If no Managers Code required, begin from here: 5.
- Page 11 All manuals and user guides at all-guides.com G. Open Table Balances Report PRESS X/Z mode PRESS Daily X SELECT Table Check SELECT WAIT Until report finishes printing PRESS ESC ESC ESC ESC PRESS REG mode to return to register operation...
- Page 12 All manuals and user guides at all-guides.com H. Journal Reports Print J-MEMO without resetting PRESS X/Z button PRESS Yes (option 1. Daily X) ARROW Down to option 4. J-MEMO PRESS WAIT Until report finishes printing PRESS ESC ESC PRESS REG mode to return to register operation Print J-MEMO and reset PRESS X/Z button...
- Page 13 All manuals and user guides at all-guides.com Casio QT2000 Cash Register Program Instructions A. PLU Price Changes B. PLU Description Changes/Additions C. Adding Item to a Pulldown Group D. Creating New Pulldown Groups E. Changing Clerk Names...
- Page 14 All manuals and user guides at all-guides.com PLU Price Changes PRESS PGM button PRESS Yes (1. Unit Price/Qty) PRESS Yes (1. PLU) PRESS Arrow Down or Page Down to reach desired PLU item PRESS Yes to select PLU item ENTER Price (no decimal point required) PRESS Yes to confirm...
- Page 15 All manuals and user guides at all-guides.com PLU Description Changes/Additions This is the best way to make multiple changes or review your items as you can change/add prices, groups, departments and print instructions here. PRESS PGM button ENTER PRESS PGM button (PGM-3 menu on display) Arrow Down to No.
- Page 16 All manuals and user guides at all-guides.com optional – Linking Item to a Cooking or Preparation Instruction Arrow Down to “Order Char Link” PRESS PRESS PRESS Arrow Down to select Cooking Instruction Link PRESS PRESS ESC ESC ESC to return to PGM 3 screen PRESS REG mode to return to register operation EXAMPLE ORDER PRINT SETUP...
- Page 17 All manuals and user guides at all-guides.com Adding Item to a Pulldown Group PRESS PGM button ENTER PRESS PGM button (PGM-3 menu on display) Arrow Down to No. 3 option – Key Feature PRESS PRESS Yes (3. Key Feature) PRESS Yes (1.
- Page 18 All manuals and user guides at all-guides.com optional – Enabling/Disabling Kitchen Printing Arrow Down to “Order Print # 1” PRESS PRESS Yes to turn on printing to kitchen No to turn off printing to kitchen optional – Linking Item to a Cooking or Preparation Instruction Arrow Down to “List Link # 1”...
- Page 19 All manuals and user guides at all-guides.com D. Creating Pulldown Groups (pop-up lists) - Adding a Pulldown Group - Changing a button from a normal one-touch PLU item to a Pulldown Group Step 1: Assigning the Pulldown Group to the Keyboard PRESS PGM Mode PRESS...
- Page 20 All manuals and user guides at all-guides.com Arrow Down to “Group Link” PRESS PRESS Yes to select PRESS Arrow Down to select Group Link for PLU item PRESS Yes to select PRESS Yes to select Department Link PRESS Arrow Down to select Department Link for PLU item optional –...
- Page 21 All manuals and user guides at all-guides.com Step 3: Creating the Pulldown List PRESS Yes (1.Machine Feature) PRESS Yes (1. Pulldown Group) PRESS Arrow Down to next available blank number PRESS PRESS Yes to enter Pulldown Group description TYPE Description using alphabetical keysheet PRESS Down to “YES”...
- Page 22 All manuals and user guides at all-guides.com E. Changing Clerk Names PRESS PGM button ENTER PRESS PGM button (PGM-3 menu on display) Arrow Down to No. 2 option – Clerk PRESS PRESS PRESS Arrow Down to Clerk number to edit PRESS PRESS Yes to confirm Clerk Descriptor...