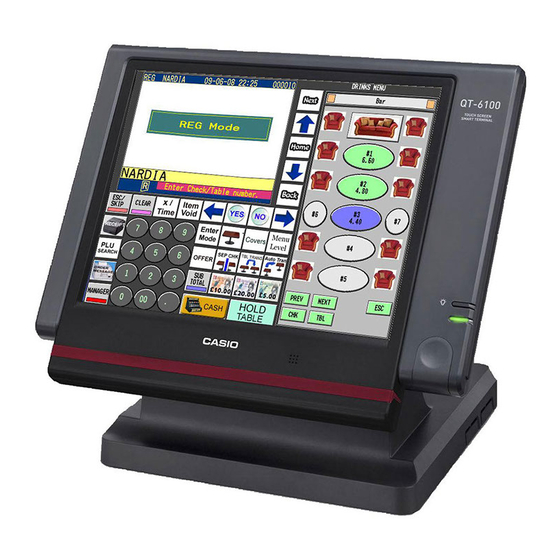
Casio QT6100 Operation Manual
Hide thumbs
Also See for QT6100:
- Service manual (140 pages) ,
- User manual (6 pages) ,
- Reference manual (6 pages)
Advertisement
Quick Links
Advertisement

Summary of Contents for Casio QT6100
- Page 1 QT6100 OPERATION MANUAL...
- Page 2 A. Making Sales B. Tables C. Errors and Refunds D. Reports Keys Troubleshooting + Misc...
- Page 3 A. Making Sales Ensure register is in REG mode. Sign on by pressing your Cashier button MAKING A SALE: 1. To sell a food item, select the item directly on the first menu. To sell an item that is on a different menu choose that menu on the screen and then choose the items you wish to sell.
- Page 4 B. Tables Charging Items to new or existing Tables ENTER Table Number (1 to 9999) PRESS OPEN TABLE button PRESS OPEN TABLE (This will show all current open tables) ENTER Items to be charged PRESS CLOSE TABLE Printing Out Table Accounts ENTER Table Number (1 to 9999) PRESS...
- Page 5 Transfer Table This has two uses: A. To transfer an existing check from one table to an open table or to a new table number: ENTER Table Number (1 to 9999) PRESS OPEN TABLE button PRESS OPEN TABLE (This will show all current open tables) ENTER New Table Number to transfer details to PRESS...
- Page 6 C. ERRORS AND REFUNDS Making Corrections to a Transaction: 1. To clear the last item (before the subtotal key is entered), press the ITEM VOID key. 2. To clear earlier items, use the arrow keys to highlight the item you wish to delete, then press the ITEM VOID key.
- Page 7 D. Reports End of Day Cash up 1. Press FUNCT to bring up the Function menu 2. Press REPORTS to bring up the report screen 3. Press DAILY Z to print your end of day totals End of Week Totals 1.
- Page 8 Journal Reports Print J-MEMO without resetting PRESS MODE PRESS X/Z button PRESS Yes (option 1. Daily X) ARROW Down to option 4. J-MEMO PRESS SELECT 1. All WAIT Until report finishes printing PRESS ESC ESC PRESS MODE PRESS REG to return to register operation Print J-MEMO and reset PRESS MODE...
- Page 9 E. Programming Keys PLU Description Changes/Additions This is the best way to make multiple changes or review your items as you can change/add prices, descriptions and departments here PRESS MODE Button PRESS PGM1 button (PGM-1 menu on display) PRESS Yes on 1. Unit Price/Qty PRESS Arrow down to 11.
- Page 10 Adding PLU’s to the keyboard To add this item to the keyboard: (where you know the PLU number x) PRESS Mode and then PGM4 PRESS Yes on 1. Keyboard PRESS Yes on 1. Key Assign ENTER x063 where x is the PLU number (ie. PLU 101 would be 101063) PRESS The space where you want to add this key...
- Page 11 Adding Item to an existing Pulldown Group Please Note: When we originally setup your terminal we programmed it in a logical fashion to assist with your programming. The first 50 items correspond to menu 1 of your terminal. The second 50 correspond to the 2 menu etc.
- Page 12 WRITE Down PLU number added to the Pulldown List PRESS ESC ESC PRESS Yes (1.Machine Feature) PRESS Yes (1. Pulldown Group) PRESS Arrow Down to desired Pulldown Group PRESS Arrow Down to “YES” PRESS PRESS PRESS Arrow Down to next available blank number PRESS PRESS YES (1.PLU)
- Page 13 PRESS PRESS PGM Mode PRESS Yes (1. Keyboard) PRESS Yes (1. Key Assign) ENTER Number written down in step 10 ENTER 1 3 6 (e.g. 91136 for steps 16 and 17 where 91 is number written down in step 10 ) PRESS Button on screen to be assigned PRESS...
- Page 14 No to turn off printing to kitchen optional – Linking Item to a Cooking or Preparation Instruction Arrow Down to “List Link # 1” PRESS PRESS PRESS Arrow Down to select Cooking Instruction Link PRESS REPEAT Steps 39-42 as required (List Link # 2, 3, 4) PRESS PRESS Arrow Down to access next available blank...
- Page 15 At any time you can print an up to date PLU list as below: PRESS PGM Mode PRESS PRESS PGM Mode PRESS PRESS PRESS ENTER PRESS ENTER 1400 PRESS F. Changing the text on a Key SIGN IN as a Manager PRESS Mode PRESS...
- Page 16 H. Making changes to existing Pulldown groups SIGN IN as manager PRESS Mode PRESS PGM3 PRESS Yes to 1. Machine Features PRESS Yes to 1. Pulldown Group CHOOSE the pulldown group you wish to change PRESS ARROW DOWN to Yes and press Yes To change the Shape of a key CHOOSE 3.
- Page 17 F. Troubleshooting Before calling for service please check the following points. A. No power Check the light on the lower right hand front of the screen if it is off press the button above. The main power switch is located left hand side of the terminal behind a small flap check that it is Power adaptors, check that all adaptors and plugged in both at the machine, adaptor and socket, remember that plugs can work lose but still look like they are plugged in.
- Page 18 D. Kitchen Printing If you system has a kitchen printer then it will also have a backup printer which will normally be your main receipt printer. In the event of your kitchen printer losing power, running out of paper or malfunctioning the dockets will print to your receipt printer, you will also be notified via a error message on the terminal.


