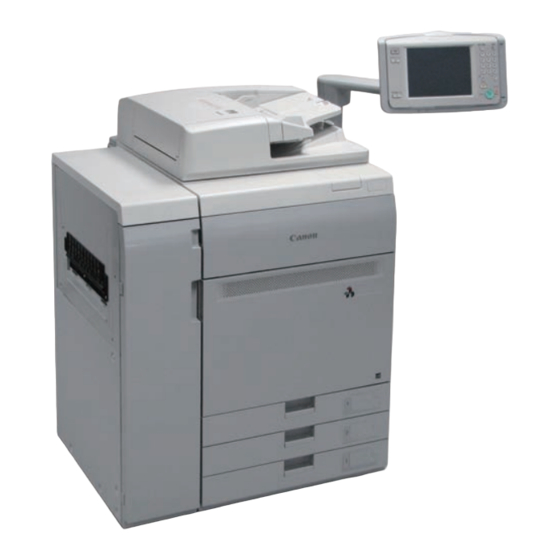
Canon imagePRESS C800 Series Operator's Maintenance Manual
Hide thumbs
Also See for imagePRESS C800 Series:
- Operation manual (315 pages) ,
- Quick manual (312 pages) ,
- Troubleshooting manual (256 pages)

Related Manuals for Canon imagePRESS C800 Series


Summary of Contents for Canon imagePRESS C800 Series
- Page 1 February 23, 2015 Revision 1 imagePRESS C800/C700/C60 Series Operator Maintenance Manual Initial Setup Procedure of Replacement/Cleaning...
- Page 2 This manual is copyrighted with all rights reserved. Under the copyright laws, this manual may changes in the contents of this manual over a long or short period, Canon will issue a new not be copied, reproduced or translated into another language, in whole or in part, without the edition of this manual.
- Page 3 Explanation of Symbols Symbols Explanation Symbols Explanation The following symbols are used throughout this Service Manual. Symbols Explanation Symbols Explanation Cleaning is needed. Measurement is needed. Check. Remove the claw. The following rules apply throughout this Service Manual: Check visually. Insert the claw.
-
Page 4: Table Of Contents
Contents Initial Setup Moving to Replacement/Cleaning Mode ---------------------------------------------1-15 Terminating Replacement/Cleaning Mode ------------------------------------------1-16 Basic Operation ---------------------------------------------------------------1-2 Adjustments/Settings ------------------------------------------------------- 1-17 Operator Maintenance Mode and Replacement/Cleaning Mode ------ 1-2 Adjustment/Maintenance Menu screen -------------------------------------1-17 Login to Operator Maintenance Mode ---------------------------------------- 1-3 Automatic Gradation Adjustment ------------------------------------------------------1-18 Moving to Operator Maintenance Mode ---------------------------------------------- 1-3 Shading Correction ------------------------------------------------------------------------1-28 Terminating Operator Maintenance mode -------------------------------------------- 1-4... -
Page 5: Initial Setup
Initial Setup ■ Basic Operation ■ Adjustments/Settings Initial Setup... -
Page 6: Operator Maintenance Mode And Replacement/Cleaning Mode
Initial Setup > Basic Operation > Operator Maintenance Mode and Replacement/Cleaning Mode Basic Operation Operator Maintenance Mode and Replacement/ Cleaning Mode To use the functions provided in Operator Maintenance mode, log in (enter the password) to move to Operator Maintenance mode. When replacing/cleaning the parts, move to Replacement/Cleaning mode in Operator Maintenance mode. -
Page 7: Login To Operator Maintenance Mode
Initial Setup > Basic Operation > Login to Operator Maintenance Mode > Moving to Operator Maintenance Mode Login to Operator Maintenance Mode -> Password input screen is shown. 3) Enter the password and press [OK]. ■ Moving to Operator Maintenance Mode To use the functions provided in Operator Maintenance mode, enter the password to move to Operator Maintenance mode. -
Page 8: Terminating Operator Maintenance Mode
Initial Setup > Basic Operation > Login to Operator Maintenance Mode > Auto-timeout Notification ■ Terminating Operator Maintenance mode ■ Auto-timeout Notification When all operator maintenance works are completed, terminate Operator Maintenance mode. When no operation is made for certain duration in Operator Maintenance mode, the password screen is redisplayed. -
Page 9: Operator Maintenance Basic Screen
Initial Setup > Basic Operation > Operator Maintenance Basic Screen > Control Keys Operator Maintenance Basic Screen ■ Display Items Contents When moving to Operator Maintenance mode, operator maintenance basic screen is shown. Warning "Warning List Screen in Operator Maintenance Mode"(page 1-6). This is the basic screen to perform operator maintenance works. -
Page 10: Warning List Screen In Operator Maintenance Mode
Initial Setup > Basic Operation > Warning List Screen in Operator Maintenance Mode > Control keys Warning List Screen in Operator Maintenance Mode ■ Display Items Contents When moving to Operator Maintenance mode, the warning list is shown on operator Item No. -
Page 11: Maintenance Log List Screen In Operator Maintenance Mode
Initial Setup > Basic Operation > Maintenance Log List Screen in Operator Maintenance Mode > Control Keys Maintenance Log List Screen in Operator Maintenance ■ Display Mode Items Contents Item No. 8 digits in characters and numbers (format XXX-XXXX) Press [Maintenance Log] in operator maintenance basic screen to show the maintenance log Replacement/ Replacement icon Cleaning Icons... -
Page 12: Replaceable Parts List Screen In Operator Maintenance Mode
Initial Setup > Basic Operation > Replaceable Parts List Screen in Operator Maintenance Mode > Control Keys Replaceable Parts List Screen in Operator Maintenance ■ Display Mode Items Contents Item No. 8 digit characters and/or numbers (format XXX-XXXX) Press [Replaceable Parts] on operator maintenance basic screen to show the replaceable Replacement Icon parts list. -
Page 13: Cleanable Parts List Screen In Operator Maintenance Mode
Initial Setup > Basic Operation > Cleanable Parts List Screen in Operator Maintenance Mode > Control Keys Cleanable Parts List Screen in Operator Maintenance ■ Display Mode Items Contents Item No. Non-display (format --------) Press [Cleanable Parts] in operator maintenance basic screen to show the cleanable parts Cleaning Icon list. -
Page 14: Detailed Information Screen
Initial Setup > Basic Operation > Detailed Information Screen > Control Keys 1-10 Detailed Information Screen ■ Display Displayed items are in common on both replacement and cleanable detailed display. In the warning list / replacement parts list / cleaning parts list shown on operator maintenance basic screen, select a parts and press [Details] to display the detailed information screen for Items Contents... - Page 15 Initial Setup > Basic Operation > Counter Operation Screen > Control key 1-11 Counter Operation Screen ■ Control key Items Contents When pressing [Counter Operation] after selecting the parts of the Fixing Assembly in the Up to 10 IDs can be displayed. IDs are registered by the service technician. Warning or Replaceable Parts screen, the Counter Operation screen of Fixing Assembly may IDs of Fixing Assemblies that are currently used are not displayed.
-
Page 16: Clearing The Counter
Initial Setup > Basic Operation > Clearing the Counter > Procedure for Clearing the Counter of the Fixing Assembly 1-12 Clearing the Counter ■ Detailed Information Screen On the Counter Operation screen, select an ID, and press the [Details]. The screen showing The counter of the part which has been replaced/cleaned needs to be cleared after replacing/ the details of the selected Fixing Assembly will appear. - Page 17 Initial Setup > Basic Operation > Clearing the Counter > Procedure for Clearing the Counter of the Fixing Assembly 1-13 2) On the warning list screen or the replaceable parts list screen, select the part of the Fixing -> The confirmation screen for clearing the counter will appear. Assembly which has triggered the warning, and press [Counter Operation].
-
Page 18: Procedure For Clearing The Counter Of The Secondary Transfer Outer Roller / Fixing Refresh Roller
Initial Setup > Basic Operation > Clearing the Counter > Procedure for Clearing the Counter of the Secondary Transfer Outer Roller / Fixing Refresh Roller 1-14 ■ Procedure for Clearing the Counter of the Secondary Transfer -> The confirmation screen for clearing the counter will appear. Outer Roller / Fixing Refresh Roller 2) Press [Yes]. -
Page 19: Replacement/Cleaning Mode
Initial Setup > Basic Operation > Replacement/Cleaning Mode > Moving to Replacement/Cleaning Mode 1-15 Replacement/Cleaning Mode 2) Press [Yes]. ■ Moving to Replacement/Cleaning Mode To replace or clean the parts, move from Operator Maintenance mode to Replacement/ Cleaning Mode. 1) Press [To Rplcmt./Cleaning] in operator maintenance basic screen. F-1-30 ->... -
Page 20: Terminating Replacement/Cleaning Mode
Initial Setup > Basic Operation > Replacement/Cleaning Mode > Terminating Replacement/Cleaning Mode 1-16 ■ Terminating Replacement/Cleaning Mode -> Close Replacement/Cleaning mode to return to Operator Maintenance mode. Then the operator maintenance basic screen is shown. After the replacement or cleaning of the target parts is finished, clear the counters, exit Replacement/Cleaning mode, and then return to Operator Maintenance mode. -
Page 21: Adjustments/Settings
Initial Setup > Adjustments/Settings > Adjustment/Maintenance Menu screen 1-17 Adjustments/Settings 2) In adjustment maintenance menu screen, select adjustment or maintenance items needed and press the key. -> The screen for executing item selected is displayed. Adjustment/Maintenance Menu screen 3) Execute adjustment/maintenance by following the indication on the each screen. Display adjustment/maintenance menu screen when executing parts adjustment or cleaning. -
Page 22: Automatic Gradation Adjustment
Initial Setup > Adjustments/Settings > Adjustment/Maintenance Menu screen > Automatic Gradation Adjustment 1-18 ■ Automatic Gradation Adjustment ● Quick Adjustment 1) In Adjustment/Maintenance menu screen, press [Auto Adjust Gradation]. You can recalibrate the machine when you notice irregularities in the color of the copies or prints, such as when copies or prints turn out to be different from the original in gradation, density, or color. - Page 23 Initial Setup > Adjustments/Settings > Adjustment/Maintenance Menu screen > Automatic Gradation Adjustment 1-19 3) In quick adjustment screen, press [Start]. ● Full Adjustment You can select the following two types of procedure for automatic gradation adjustment (Full Adjustment): • Use the Duplex Color Image Reader Unit-H1 In this procedure, you need to scan the printed test pages 3 times.
- Page 24 Initial Setup > Adjustments/Settings > Adjustment/Maintenance Menu screen > Automatic Gradation Adjustment 1-20 NOTE: NOTE: If both the Duplex Color Image Reader Unit-H1 and the Auto Gradation Sensor-A1 are Confirm that the following size and type of paper is set in the paper source before attached, select the automatic gradation adjustment method you use in [Select Method] starting this procedure.
- Page 25 Initial Setup > Adjustments/Settings > Adjustment/Maintenance Menu screen > Automatic Gradation Adjustment 1-21 1) In Adjustment/Maintenance menu screen, press [Auto Adjust Gradation]. NOTE: To improve the precision of the full adjustment, press [Number of Sheets to Output for Test Page] and increase the number of sheets to output for test page. F-1-41 ->...
- Page 26 Initial Setup > Adjustments/Settings > Adjustment/Maintenance Menu screen > Automatic Gradation Adjustment 1-22 3) Select the paper and press [OK]. 5) Place the first test page on the platen glass -> press [Start Scanning]. Place the first test page face down on the platen glass, with the black bar along the left edge of the platen glass.
- Page 27 Initial Setup > Adjustments/Settings > Adjustment/Maintenance Menu screen > Automatic Gradation Adjustment 1-23 ● Registering Paper for Calibration CAUTION: If you perform automatic gradation adjustment for a custom paper type, registering a custom Confirm that both paper to use as a basis and a custom paper type to register to adjust, paper type for calibration is required beforehand.
- Page 28 Initial Setup > Adjustments/Settings > Adjustment/Maintenance Menu screen > Automatic Gradation Adjustment 1-24 1) In Adjustment/Maintenance menu screen, press [Auto Adjust Gradation]. 5) Select the paper source contains the type of paper to use as a basis -> press [Next]. CAUTION: This machine adjusts the toner and print speed according to the paper type.
- Page 29 Initial Setup > Adjustments/Settings > Adjustment/Maintenance Menu screen > Automatic Gradation Adjustment 1-25 ● Selecting Paper for Calibration 2) Press [Select Paper to Adjust] -> select the type of paper to adjust -> press [OK]. You can select the type of paper for calibration. CAUTION: To perform the procedure described in this section, you must log in to this machine as an administrator.
- Page 30 Initial Setup > Adjustments/Settings > Adjustment/Maintenance Menu screen > Automatic Gradation Adjustment 1-26 ● Changing Adjustment Level 2) Press [Adjustment Level] -> select the adjustment level -> press [OK]. You can change the adjustment level for auto gradation adjustment. CAUTION: To perform the procedure described in this section, you must log in to this machine as an administrator.
- Page 31 Initial Setup > Adjustments/Settings > Adjustment/Maintenance Menu screen > Automatic Gradation Adjustment 1-27 ● Initializing Standard Values for Calibration 2) Press [Initialize When Using Full Adjust] -> [On] -> [OK]. If you perform automatic gradation adjustment but cannot adjust gradation, density, or color correctly, or scanned error message appears for the test page, set [Initialize When Using Full Adjust] to 'On', and then perform [Full Adjust].
-
Page 32: Shading Correction
Initial Setup > Adjustments/Settings > Adjustment/Maintenance Menu screen > Shading Correction 1-28 ■ Shading Correction ● Densitometer Correction 1) In Adjustment/Maintenance menu screen, press [Correct Shading]. This mode enables you to correct the slightly uneven densities that occur in the halftone density area of a printed image. - Page 33 Initial Setup > Adjustments/Settings > Adjustment/Maintenance Menu screen > Shading Correction 1-29 2) Press [Densitometer Correction] -> [Start Printing]. 5) Select the number -> enter the gauged density value from the test page -> press [OK]. NOTE: • The density adjustment is performed based on all the density values of marks from 0 to 8.
- Page 34 Initial Setup > Adjustments/Settings > Adjustment/Maintenance Menu screen > Shading Correction 1-30 ● Visual Correction 2) Press [Visual Correction] -> [Output Test Page] -> [Start Printing]. 1) In Adjustment/Maintenance menu screen, press [Correct Shading]. F-1-55 -> Shading correction screen is displayed. F-1-56 ->...
-
Page 35: Automatic Color Tone Correction
Initial Setup > Adjustments/Settings > Adjustment/Maintenance Menu screen > Automatic Color Tone Correction 1-31 3) View the output test page -> press [Fine Adjust] of the color you want to adjust. ■ Automatic Color Tone Correction The hue of the image is automatically corrected by outputting a test page and reading it with 4) Select the number to adjust ->... - Page 36 Initial Setup > Adjustments/Settings > Adjustment/Maintenance Menu screen > Automatic Color Tone Correction 1-32 ● Automatic Color Tone Correction 3) Press [Yes]. 1) In Adjustment/Maintenance menu screen, press [Auto Correct Color Tone Settings]. F-1-59 F-1-57 NOTE: Press [No] to perform automatic gradation adjustment. ->...
- Page 37 Initial Setup > Adjustments/Settings > Adjustment/Maintenance Menu screen > Automatic Color Tone Correction 1-33 5) Select the paper source that contains Hammermill Color Copy Digital (28lb. (105 g/m )) or ● Registering Correction Pattern paper to adjust -> press [OK]. You can create and register correction patterns for desired paper type.
- Page 38 Initial Setup > Adjustments/Settings > Adjustment/Maintenance Menu screen > Automatic Color Tone Correction 1-34 -> A screen for checking whether or not auto gradation adjustment (full adjustment) has CAUTION: been performed will appear. • You can use the following paper size and paper type other than Hammermill Color 3) Press [Yes].
-
Page 39: Output Test Page
Initial Setup > Adjustments/Settings > Adjustment/Maintenance Menu screen > Output Test Page 1-35 ● Job Type to Apply ■ Output Test Page When performing [Auto Correct Color Tone], corrections of color tone are applied to copy/ Execute the output test page with the following procedure. print jobs. - Page 40 Initial Setup > Adjustments/Settings > Adjustment/Maintenance Menu screen > Output Test Page 1-36 3) Select a paper and press [OK]. F-1-67 NOTE: • Paper sizes to be used for test printing are A3, 11x17, 305 x 457 mm, 320 x 450 mm, 330 x 483 mm.
-
Page 41: Management Setting Menu Screen
Initial Setup > Adjustments/Settings > Management Setting Menu Screen 1-37 Management Setting Menu Screen 3) Change the settings by following the instruction on each screen. -> When the setting change completes, it returns to Management Setting Menu screen. In order to change the password for the Operator Maintenance mode or the auto time-out conditions, display Management Setting Menu screen first. -
Page 42: Changing Password
Initial Setup > Adjustments/Settings > Management Setting Menu Screen > Initialization of the Password 1-38 ■ Changing Password ■ Initialization of the Password The password to enter Operator Maintenance Mode can be changed. It is possible to initialize the password for entering operator maintenance mode. 1) Press [Change Password] on Management Setting Menu screen. -
Page 43: Settings Of Auto-Timeout Conditions
Initial Setup > Adjustments/Settings > Management Setting Menu Screen > Settings of Auto-Timeout Conditions 1-39 3) Press [Yes]. ■ Settings of Auto-Timeout Conditions The auto-timeout time of the Operator Maintenance mode can be changed. Assignable values: 0 = Off, 5 mins, 10 mins, 20 mins, 30 mins, 1 hour, 90 mins, 2 hours 1) Press [Operator Maintenance Timeout] on the screen of control settings menu. -
Page 44: Display Log Menu Screen
Initial Setup > Adjustments/Settings > Display Log Menu Screen 1-40 Display Log Menu Screen -> The display log menu screen is displayed. Selects a target of the log to be displayed. The log of jam (JAM), error (ERR) and alarm (ALARM-2) can be displayed. -
Page 45: Display Of Log Of Jam
Initial Setup > Adjustments/Settings > Display Log Menu Screen > Display of Log of JAM 1-41 ■ Display of Log of JAM 2) Confirm the log of jam (JAM). The log of jam (JAM) is displayed. 3) After confirming the log, press [OK]. NOTE: ●... -
Page 46: Display Of Log Of Err
Initial Setup > Adjustments/Settings > Display Log Menu Screen > Display of Log of ERR 1-42 ■ Display of Log of ERR 2) Confirm the log of error (ERR). The log of error (ERR) is displayed. 3) After confirming the log, press [OK]. NOTE: ●... -
Page 47: Display Of Log Of Alarm-2
Initial Setup > Adjustments/Settings > Display Log Menu Screen > Display of Log of ALARM-2 1-43 ■ Display of Log of ALARM-2 2) Confirm the log of alarm (ALARM-2). The log of alarm (ALARM-2) is displayed. 3) After confirming the log, press [OK]. NOTE: ●... -
Page 48: Procedure Of Replacement/Cleaning
Procedure of Replacement/ Cleaning ■ List of Operator Replaceable/Cleanable Parts ■ Transfer area ■ Fixing area ■ Cleaning Procedure of Replacement/Cleaning... -
Page 49: Replaceable Parts
Procedure of Replacement/Cleaning > List of Operator Replaceable/Cleanable Parts > Cleanable Parts List of Operator Replaceable/Cleanable Parts The parts that need to be replaced/cleaned after a certain period of use, their estimated life (number of sheets) and the cleaning interval (number of seconds) are shown in the following table. Be sure to replace or clean the part in order to maintain the performance and functions of the host machine. -
Page 50: Transfer Area
Procedure of Replacement/Cleaning > Transfer area > Replacing the Secondary Transfer Unit > Replacement procedure Transfer area 1) Open the Front Cover. 2) Turn over the lever [1] and pull out the Fixing Feed Unit [2]. Replacing the Secondary Transfer Unit F-2-1 ■... - Page 51 Procedure of Replacement/Cleaning > Transfer area > Replacing the Secondary Transfer Unit > Replacement procedure 3) Press the 2 Release Springs [1] at both sides of the rail to release the locks, and further CAUTION: pull out the Fixing Feed Unit [2] until it stops. Do not release the locks of the 2 Release Springs [3] at the rear on the rails of both sides.
- Page 52 Procedure of Replacement/Cleaning > Transfer area > Replacing the Secondary Transfer Unit > Replacement procedure 4) Remove the Fixing Feed Sub Cover [1]. 5) Remove the Secondary Transfer Unit [1]. • 1 Screw [2] (to loosen) • 2 Connectors [2] •...
- Page 53 Procedure of Replacement/Cleaning > Transfer area > Replacing the Secondary Transfer Unit > Replacement procedure 6) From the Adjustment/Maintenance menu, execute [Automatic Gradation Adjustment]. CAUTION: (Refer to page 1-18) When installing the Secondary Transfer Unit to the Fixing Feed Unit, be sure to do so 7) From the Adjustment/Maintenance menu, execute [Shading Correction].
-
Page 54: Fixing Area
Procedure of Replacement/Cleaning > Fixing area > Replacing the Fixing Assembly > Replacement procedure Fixing area 1) Open the Front Cover. 2) Turn over the lever [1] and pull out the Fixing Feed Unit [2]. Replacing the Fixing Assembly F-2-10 ■... - Page 55 Procedure of Replacement/Cleaning > Fixing area > Replacing the Fixing Assembly > Replacement procedure 3) Press the 2 Release Springs [1] at both sides of the rail to release the locks, and further CAUTION: pull out the Fixing Feed Unit [2] until it stops. Do not release the locks of the 2 Release Springs [3] at the rear on the rails of both sides.
- Page 56 Procedure of Replacement/Cleaning > Fixing area > Replacing the Fixing Assembly > Replacement procedure 4) Remove the Fixing Upper Cover [1]. CAUTION: • 1 Screw [2] • 2 Hooks [3] Be sure to check that the 2 hooks [3] are hooked when installing the Fixing Upper Cover [1].
- Page 57 Procedure of Replacement/Cleaning > Fixing area > Replacing the Fixing Assembly > Replacement procedure 2-10 5) Disconnect the 4 connectors [1]. 6) Loosen the screw [1], and remove 2 screws [2]. F-2-18 F-2-19 2-10 Procedure of Replacement/Cleaning > Fixing area > Replacing the Fixing Assembly > Replacement procedure...
- Page 58 Procedure of Replacement/Cleaning > Fixing area > Replacing the Fixing Assembly > Replacement procedure 2-11 7) Hold the handle [1] and lift the front side of the Fixing Assembly [2], and place the CAUTION: connector [3] on the Feed Guide [4]. 8) Lift the rear side, and remove the Fixing Assembly [2] while keeping the unit in a horizontal •...
- Page 59 Procedure of Replacement/Cleaning > Fixing area > Replacing the Fixing Assembly > Replacement procedure 2-12 NOTE: How to install the Fixing Assembly Be sure to hold the Fixing Assembly [1] horizontally and align the 2 holes [A] with the 2 Positioning Protrusions [B] of the Fixing Feed Unit to install the assembly.
-
Page 60: Cleaning
Procedure of Replacement/Cleaning > Cleaning > Cleaning the Fixing Refresh Roller > Cleaning Procedure 2-13 Cleaning 1) Open the Front Cover. 2) Turn over the lever [1] and pull out the Fixing Feed Unit [2]. Cleaning the Fixing Refresh Roller ■... - Page 61 Procedure of Replacement/Cleaning > Cleaning > Cleaning the Fixing Refresh Roller > Cleaning Procedure 2-14 3) Press the 2 Release Springs [1] at both sides of the rail to release the locks, and further CAUTION: pull out the Fixing Feed Unit [2] until it stops. Do not release the locks of the 2 Release Springs [3] at the rear on the rails of both sides.
- Page 62 Procedure of Replacement/Cleaning > Cleaning > Cleaning the Fixing Refresh Roller > Cleaning Procedure 2-15 4) Remove the Fixing Upper Cover [1]. CAUTION: • 1 Screw [2] • 2 Hooks [3] Be sure to check that the 2 hooks [3] are hooked when installing the Fixing Upper Cover [1].
- Page 63 Procedure of Replacement/Cleaning > Cleaning > Cleaning the Fixing Refresh Roller > Cleaning Procedure 2-16 5) Hold the handle [1], and open the Inner Delivery Unit [2]. 6) By rotating the Fixing Refresh Roller while holding its edge [A] ( the area 1 cm from the two ends of the roller ), clean its surface [B] with lint-free paper [1] moistened with alcohol.
- Page 64 Procedure of Replacement/Cleaning > Cleaning > Cleaning the Fixing Refresh Roller > Cleaning Procedure 2-17 7) From the Adjustment/Maintenance menu, execute [Automatic Gradation Adjustment]. (Refer to page 1-18) 8) From the Adjustment/Maintenance menu, execute [Shading Correction]. (Refer to page 1-28) 9) From the Adjustment/Maintenance menu, execute [Automatic Color Tone Correction].