
Related Manuals for X-lite X-801


Summary of Contents for X-lite X-801
- Page 1 ISTRUZIONI PER L’USO OPERATING INSTRUCTIONS GEBRAUCHS ANLEITUNGEN INSTRUCTIONS D’UTILIS ATION INSTRUCCIONES DE U TILIZACIÓN...
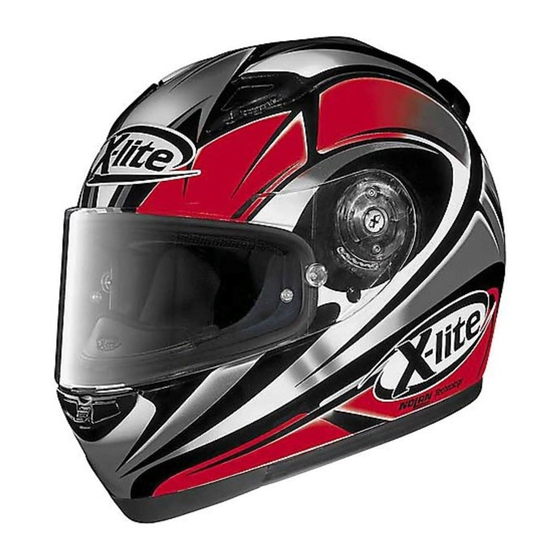
- Page 2 ATTENZIONE! Conserva questo manuale e gli altri allegati al prodotto perché contengono importanti informazioni per il migliore utilizzo di questo casco. Leggili attentamente prima di utilizzare il tuo nuovo casco. A - Calotta esterna Sviluppata in tre misure, con caratteristiche qualitative e di leggerezza superiori, grazie all’elevata specializzazione delle tec- nologie applicate al procedimento di stampaggio Bag Moulding, unitamente all’utilizzo di pregiate fibre hi-tech (carbonio,...
- Page 3 serie su alcune versioni - che all’occorrenza può essere facilmente 1. Scratch Resistant Racing Visor: visiera piana a spessore costante in LEXAN ® antigraffio e velocemente assemblato (vedi cartellino specifico allegato). F - Sistemi di ritenzione con cinturino imbottito in tessuto Apertura anallergico trattato Far ruotare la visiera verso l’alto utilizzando l’apposita linguetta...
- Page 4 1.4.3 Far scorrere la visiera facendo scattare il sistema di bloc- posizione della dentatura di riferimento superiore A1 ed co visiera. inferiore A2 si trova il meccanismo. 1.5.2 Allentare le due viti B1 e B2 presenti nel meccanismo 1.4.4 Ripetere le precedenti operazioni dall’altro lato del casco. visiera utilizzando una chiave a brugola di 2.5 mm.
- Page 5 Manutenzione e pulizia 2.1.3 Afferrare l’imbottitura verso la parte alta della mentoniera tirare verso l’interno per sganciare il secondo bottone. PER LE OPERAZIONI DI PULIZIA UTILIZZARE SOLO ACQUA, SAPONE NEUTRO E ASCIUGARE AIUTANDOSI CON ARIA 2.1.4 Scendere verso la parte bassa della mentoniera, afferrare COMPRESSA.
- Page 6 sganciare il secondo ed il terzo gancio. Montaggio cuffia (solo per alcune versioni - fig. 5) 2.2.3 Togliere completamente la cuffia dal casco. 2.3.1 Inserire nella cavità del casco la cuffia facendola adagia- re bene sul fondo in modo simmetrico. 2.3.2 Controllare che tutti i punti di aggancio corrispondano tra loro e verificato il tutto agganciare prima la zona frontale e poi la zona posteriore della cuffia.
-
Page 7: Sistema Di Ventilazione
Pulizia gliando l’aria esterna direttamente sulla superficie interna della Imbottitura interna in tessuto: visiera. Per chiudere le prese d’aria anteriori far scorrere il curso- re centrale verso il basso. - Lavare delicatamente a mano ed utilizzare solo sapone neutro e acqua a 30° C max. - Risciacquare in acqua fredda ed asciugare a temperatura ambiente al riparo dal sole. - Page 8 IMPORTANT! Keep this manual and the attached product Attenzione! leaflets. They contain important information for getting the Per le operazioni di pulizia del meccanismo utilizzare solo acqua, best use from this helmet. Read them carefully before using sapone neutro e asciugare aiutandosi con aria compressa. your new helmet for the first time.
- Page 9 some versions - that can be assembled easily and quickly if 1. Scratch Resistant Racing Visor: Flat visor with needed (see attached leaflet). uniform thickness made of scratch resistant Lexan® F - Retention system with padded chin strap made of non- Pulling up the visor allergenic treated fabric:...
- Page 10 1.4.3 Slide the visor until the visor locks into place. 1.5.2 Loosen the two screws B1 and B2 (Fig. 4) on the visor mechanism using a 2.5 mm Allen screw wrench. 1.4.4 Repeat the steps above on the other side of the helmet. 1.5.3 Lift the mechanism from its support and move it forward Important! or backward according to the adjustment to be made.
- Page 11 Maintenance and cleaning inwards to unhook the second button. USE ONLY NEUTRAL SOAP AND WATER FOR CLEANING AND 2.1.4 Hold then the bottom padding of the chin guard and pull it COMPRESSED AIR AS A DRYING AID. inwards to unhook the third button. 2.1.5 Hold the cheek padding towards the nape of the neck and Scratch Resistant Racing Visor pull inwards to unhook the fourth button.
- Page 12 second and third hook. Assembly of the liner (some versions only - fig. 5) 2.2.3 Completely remove the liner from the helmet. 2.3.1 Insert the liner into the shell of the helmet and fit it well against the base. 2.3.2 Make sure that all couplings match. Hook the front por- tion, then the rear of the liner.
-
Page 13: Ventilation System
Cleaning move the central slider upwards. The side ports will open out- wards at the same time channeling external air directly onto the Inner fabric padding: inner surface of the visor. To close the front air intakes, move the - Delicately hand wash and use only neutral soap and water central slider downwards. - Page 14 WICHTIG! Bewahren Sie dieses Handbuch und die anderen Important! beigefügten Informationen gemeinsam mit dem Produkt auf, Use only water and neutral soap to clean the mechanism and denn sie enthalten wichtige Informationen für den sach- compressed air as a drying aid. gemäßen Gebrauch des Helms.
- Page 15 Innenvisier – bei einigen Modellen serienmäßig mitgeliefert - und 1. Scratch Resistant Racing Visor: Zylindrisches den entsprechenden Befestigungszapfen, welche im Bedarfsfall Visier mit gleichmäßiger Wandstärke aus kratzfest ein einfaches und schnelles Anbringen ermöglichen (siehe beilie- beschichtetem LEXAN® gendes Spezialinfoblatt). Öffnen F - Rückhaltesystem mit gepolstertem Kinnriemen aus Das Visier an der Griffleiste fassen und nach oben schwenken.
- Page 16 1.4.4 Die beschriebenen Schritte auf der anderen Helmseite Visiermechanik mit einem 2,5mm-Inbusschlüssels lösen. wiederholen. 1.5.3 Die Mechanik aus der Halterung nehmen und sie nach Bedarf weiter vorne oder hinten einsetzen; anschließend Achtung! die Mechanik so auf die Halterung setzen, dass sich die Überprüfen Sie durch mehrmaliges Öffnen und Schließen des Regulierungshäkchen A1 oben und A2 unten A2 in der Visiers, ob die Mechanik korrekt funktioniert.
- Page 17 Wartung und Reinigung 2.1.4 Das Polster im unteren Bereich des Kinnteils nehmen und nach innen ziehen bis sich der dritte Knopf löst. BENUTZEN SIE ZUR REINIGUNG NUR WASSER UND NEUTRA- LE SEIFE UND TROCKNEN SIE DEN HELM, FALLS ERFORDER- 2.1.5 Das Polster im Nackenbereich ins Helminnere ziehen, um LICH, MIT DRUCKLUFT.
- Page 18 2.3.2 Kontrollieren, dass alle Befestigungspunkte aufeinander abgestimmt sind und anschließend zunächst den Stirnbereich und dann den hinteren Teil der Polsterung befestigen. 2.3.3 Die Polsterung anpassen und darauf achten, dass sie gut an der Innenschale anliegt. Wangenpolster einbauen (abb. 4) 2.4.1 Die Kunststofflasche zwischen Wangenpolster und Schale aufsetzen, ohne sie ganz einzulegen.
- Page 19 Reinigung öffnen sich auch die Seitenklappen nach außen und leiten Luft von dort zur Innenseite des Visiers. Zum Schließen der vorderen Innere Stoffpolsterung: Einlassöffnungen den mittleren Schieber nach unten bewegen. - Vorsichtig mit der Hand waschen, nur neutrale Seife benutzen, Wassertemperatur nicht höher als 30°...
- Page 20 ATTENTION ! Garder ce manuel et les autres pièces jointes Achtung! au produit parce qu'ils contiennent des informations impor- Zur Reinigung der Mechanik ausschließlich Wasser und neutrale tantes pour la bonne utilisation de ce casque. Lire attentive- Seife benutzen und, falls erforderlich, mit Druckluft trocknen. ment ce manuel avant d'utiliser le casque.
- Page 21 avec certaines versions), qui en cas de nécessité peut être ins- 1. B - Scratch Resistant Racing Visor : Écran plan à tallé facilement et rapidement (V. la fiche spécifique en annexe). épaisseur constante en Lexan® anti-rayures. F - Système d’attache de jugulaire renforcé d’une protection en Ouverture tissu anallergique traité...
- Page 22 1.4.3 Faire coulisser l’écran en déclenchant le système de blo- mécanisme de l’écran en utilisant une clé mâle six pans cage de l’écran. de 2,5 mm. 1.4.4 Répéter les opérations précédentes sur l'autre côté du 1.5.3 Soulever le mécanisme de son support et le déplacer en casque.
- Page 23 Entretien et nettoyage 2.1.2 Saisir la partie supérieure de la mousse du coussin de joue et tirer vers l'intérieur afin de décrocher le premier bouton. POUR LES OPERATIONS DE NETTOYAGE UTILISER UNIQUE- MENT DE L'EAU, ET UN SAVON NEUTRE ET SECHER A L'AIDE 2.1.3 Saisir la partie supérieure de la mousse de la mentonnière et D'UN JET D'AIR COMPRIME.
- Page 24 l'angle de gauche de la lunette postérieure, afin de décro- - Ne modifier d'aucune manière les composants internes du cher le deuxième et le troisième bouton. casque. - N'utiliser aucun type d'outil pour effectuer les opérations ci- 2.2.2 Saisir la coiffe dans la zone frontale latérale et tirer douce- dessus.
-
Page 25: Système De Ventilation
Nettoyage simultanément vers l'extérieur en canalisant l'air externe directe- ment sur la surface interne de l’écran. Pour fermer les prises Mousse intérieure en tissu : d'air antérieures, faire glisser le curseur central vers le haut . - Laver délicatement à la main et utiliser uniquement du savon neutre et de l'eau à... - Page 26 ¡ATENCIÓN! Guarde este manual y los demás anexos al pro- Attention ! ducto ya que contienen información importante para utilizar Pour les opérations de nettoyage, utiliser uniquement de l'eau et este casco de la mejor manera. Lea detenidamente el manual un savon neutre, sécher ensuite à...
- Page 27 serie en algunas versiones - que a ser necesario se puede montar 1. Scratch Resistant Racing Visor: pantalla plana de fácil y rápidamente (ver cartulina de instrucciones adjunta). Lexan antirrayas y de espesor constante. F - Sistemas de cierre con correa acolchada en tejido antia- Apertura lérgico tratado Levantar la pantalla utilizando la lengüeta prevista situada en la...
- Page 28 1.4.3 Deslizar la pantalla accionando el sistema de bloqueo 1.5.2 Aflojar los dos tornillos B1 y B2 (Fig. 4), presentes en el pantalla. mecanismo de la pantalla, utilizando una llave Allen de 1.4.4 Repetir las operaciones anteriores en el otro lado del 2.5 mm.
- Page 29 Mantenimiento y limpieza 2.1.3 Agarrar el acolchado hacia la parte alta de la mentonera y tirar hacia el interior para desabrochar el segundo botón. PARA LAS OPERACIONES DE LIMPIEZA UTILIZAR SÓLO AGUA Y JABÓN NEUTRO Y PARA EL SECADO SE PUEDE UTILIZAR 2.1.4 Bajar hacia la parte baja de la mentonera, agarrar el acol- AIRE COMPRIMIDO.
- Page 30 gancho; luego seguir hacia el centro y el otro extremo Montaje del acolchado interior (sólo para algunas ver- frontal para sacar el segundo y el tercero. siones) 2.3.1 Introducir en el hueco del casco el acolchado interior 2.2.3 Quitar completamente el acolchado interior del casco. apoyándolo bien sobre el fondo de manera simétrica.
-
Page 31: Sistema De Ventilación
Limpieza táneamente hacia el exterior, enviando el aire exterior directa- mente sobre la superficie interna de la pantalla. Para cerrar las Acolchado interno en tejido: tomas de aire delanteras deslizar el cierre central hacia abajo. - Lavar delicadamente a mano utilizando exclusivamente jabón neutro y agua a 30°... - Page 32 ¡Atención! Para las operaciones de limpieza del mecanismo, utilizar sólo agua y jabón neutro y para el secado se puede utilizar aire comprimido. Deflector de nariz y de barbilla extraíbles Estos accesorios permiten mejorar las prestaciones del casco en determinadas condiciones de uso. El deflector de nariz (Breath Deflector) reduce la formación de vaho en la pantalla, desviando el flujo de aire hacia abajo El deflector de barbilla (Wind Protector) evita molestas infiltracio-...
- Page 33 info@x-lite.it...