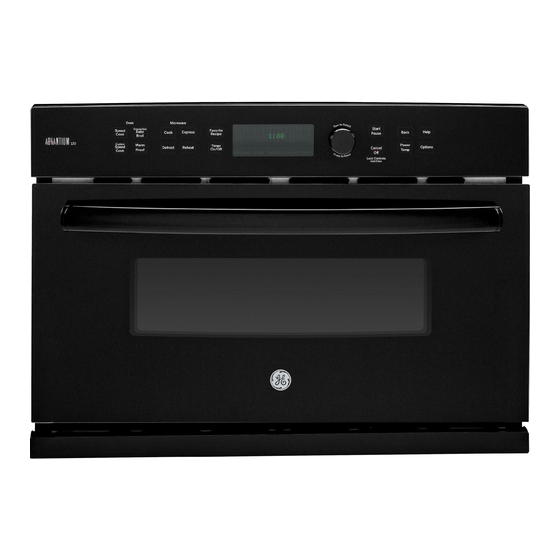
GE Advantium PSB9100DF Installation Instructions Manual
120v built-in speedcook ovens
Hide thumbs
Also See for Advantium PSB9100DF:
- Installation instructions manual (16 pages) ,
- Dimension manual (2 pages) ,
- Installation instructions manual (16 pages)
Table of Contents
Advertisement
Available languages
Available languages
Quick Links
49-40689-3
MFL59060924
07-20 GEA
GE is a trademark of the General Electric Company. Manufactured under trademark license.
Installation
Instructions
Español
For a Spanish version of this manual, visit
our Website at GEAppliances.com.
Para consultar una version en español de
este manual de instrucciones, visite nuestro
sitio de internet GEAppliances.com.
Advantium
®
120V Built-In
SpeedCook Ovens
PSB9100DF
PSB9100SF
PSB9100BL
PSB9100EF
Advertisement
Chapters
Table of Contents

Summary of Contents for GE Advantium PSB9100DF
- Page 1 For a Spanish version of this manual, visit our Website at GEAppliances.com. Para consultar una version en español de este manual de instrucciones, visite nuestro 49-40689-3 sitio de internet GEAppliances.com. MFL59060924 07-20 GEA GE is a trademark of the General Electric Company. Manufactured under trademark license.
-
Page 2: Table Of Contents
Safety Information CONTENTS BEFORE YOU BEGIN Design Information Read these instructions completely and Models Available ..........2 carefully. Product Dimensions and Clearances ....4 IMPORTANT Save these — Tools Required ..........4 instructions for local inspector’s use. Parts Supplied ..........4 IMPORTANT Advance Planning ........... - Page 3 Información de seguridad ANTES DE COMENZAR Lea estas instrucciones por completo y con detenimiento. IMPORTANTE — Guarde estas instrucciones para el uso de inspectores locales. IMPORTANTE — Cumpla con todos los códigos y ordenanzas vigentes. Nota al instalador • — Asegúrese de dejar estas instrucciones con el Consumidor.
-
Page 4: Product Dimensions And Clearances
• The front surface of the oven will be nearly flush drawers, etc. with surrounding cabinetry doors. • Cabinets installed adjacent to wall ovens must • This oven can be installed over any GE have Appliances single electric built-in oven or a an adhesion spec of at least 194ºF temperature warming drawer or both. -
Page 5: Installation Preparation
Installation Preparation ELECTRICAL REQUIREMENTS Single Advantium 120 Installation: This product requires a 120-volt, 60 Hz, 15-amp circuit and draws 1.8 kilowatts. This product must be connected to a supply circuit of the proper voltage and frequency. • Wire size must conform to the requirements of the National Electrical Code or the prevailing local code for this kilowatt rating. -
Page 6: Prepare The Opening
Installation Preparation PREPARE THE OPENING PREPARE THE OPENING (CONT.) The Advantium 120 can be installed in Installation over a Warming Drawer: combination with other Built-In appliances. 23-1/2” Construct 27” Always follow each product’s Installation Solid Bottom Instructions to complete the installation. Min. -
Page 7: Remove The Packaging
Installation Preparation PREPARE THE OPENING PREPARE THE OPENING (CONT.) (CONT.) Installation over a Wall Oven: Installation over a Wall Oven and Warming Drawer: Construct 23-1/2” 27” Construct Solid Bottom Solid Bottom 27” 23-1/2” Min. 3/8” Min. 3/8” Plywood Plywood Supported by Supported by 2 x 4 or 1 x 2 2 x 4 or 1 x 2... -
Page 8: Step 1, Slide The Oven Into The Cutout
Installation SLIDE THE OVEN INTO THE INSTALL BOTTOM TRIM CUTOUT • Align bottom trim tabs to slots in the bottom CAUTION of the oven. Two people are required to lift the oven into the opening. Grasp the bottom at the front and rear. DO NOT USE THE HANDLE TO LIFT THE OVEN. - Page 9 Notes Printed in Korea...
- Page 10 Español For a Spanish version of this manual, visit our Website at GEAppliances.com. Para consultar una version en español de este manual de instrucciones, visite nuestro sitio de internet GEAppliances.com. 49-40689 Rev.3 07-20 GEA Printed in Korea...
- Page 11 Instrucciones instalación Hornos de cocción rápida empotrados de 120V Advantium ® PSB9100DF PSB9100SF PSB9100BL PSB9100EF 49-40689-3 MFL59060924 07-20 GEA GE es una marca de la Empresa General Electric. Fabricado bajo licencia de la marca registrada.
- Page 12 Información de seguridad ANTES DE COMENZAR CONTENIDOS Lea estas instrucciones por completo y con Información sobre el diseño detenimiento. Modelos disponibles ........2 IMPORTANTE Dimensiones del producto y espacio libre ..3 — Guarde estas Herramientas necesarias ......3 instrucciones para el uso de inspectores locales. Partes incluidas ..........
-
Page 13: Dimensiones Del Producto Y Espacio Libre
• Este horno puede instalarse sobre cualquier adhesión de potencia de temperatura de por lo horno empotrado individual GE Appliances o menos 194°F. sobre un cajón calentador, o ambos. El horno debe instalarse en forma segura en una IMPORTANTE: Este horno no está... -
Page 14: Preparación Para La Instalación
Preparación para la instalación REQUISITOS ELÉCTRICOS Instalación única del Advantium 120: Este producto requiere un circuito de 120 voltios, 60 Hz, 15 amp y toma 1.8 kilovatios. Este producto debe conectarse a un circuito de alimentación del voltaje y la frecuencia adecuados. •... - Page 15 Preparación para la instalación PREPARE LA ABERTURA PREPARE LA ABERTURA (CONT.) El Advantium 120 se podrá instalar junto con Instalación sobre un cajón calentador: otros electrodomésticos empotrables. Siempre siga las indicaciones de instalación de cada Construya una producto para realizar la instalación. base inferior sólida Instalación única del Advantium 120:...
-
Page 16: Prepare La Abertura
Preparación para la instalación PREPARE LA ABERTURA PREPARE LA ABERTURA (CONT.) (CONT.) Instalación sobre un Horno de Pared: Instalación sobre un Horno de Pared y un Cajón de Pared: Construya Construya una base una base 23-1/2” 27” inferior sólida inferior sólida 27”... -
Page 17: Instalación
Instalación DESLICE EL HORNO DENTRO INSTALE EL RECORTE INFERIOR DEL CORTE • Alinee las lengüetas del recorte inferior PRECAUCIÓN Se requieren dos personas con las ranuras de la parte inferior del horno. para levantar el horno e introducirlo en la abertura. - Page 18 Instalación INSTALE LOS TORNILLOS DE MONTAJE • Realice orificios piloto con el taladro en los salientes laterales, 2 de cada lado. • Coloque los tornillos de color combinado en el saliente lateral. FINALICE LA INSTALACIÓN • Conecte la energía en la fuente. La luz interior se encenderá...


