
Related Manuals for AEG FFB52600ZW


Summary of Contents for AEG FFB52600ZW
- Page 1 FFB52600ZW Gebruiksaanwijzing Afwasautomaat User Manual Dishwasher Manual de instrucciones Lavavajillas USER MANUAL...
-
Page 2: Table Of Contents
14. EXTRA TECHNISCHE INFORMATIE..............23 VOOR PERFECTE RESULTATEN Bedankt dat u voor dit AEG-product heeft gekozen. Dit apparaat is ontworpen om vele jaren uitstekend te presteren, met innovatieve technologieën die het leven gemakkelijker helpen maken met functies die gewone apparaten wellicht niet hebben. -
Page 3: Veiligheidsinformatie
NEDERLANDS VEILIGHEIDSINFORMATIE Lees zorgvuldig de meegeleverde instructies voor installatie en gebruik van het apparaat. De fabrikant is niet verantwoordelijk voor verwondingen of schade die voortvloeit uit de onjuiste installatie of het onjuiste gebruik. Bewaar de instructies altijd op een veilige, toegankelijke plek voor toekomstig gebruik. -
Page 4: Veiligheidsvoorschriften
– andere woonomgevingen. De specificatie van dit apparaat niet wijzigen. • De waterdruk (minimaal en maximaal) moet liggen • tussen 0.5 (0.05) / 8 (0.8) bar (MPa) Volg het maximale aantal 13 plaatsen. - Page 5 NEDERLANDS • Dit apparaat moet worden aangesloten op een geaard stopcontact. • Zorg ervoor dat de parameters op het vermogensplaatje overeenkomen met elektrische vermogen van de netstroom. • Gebruik altijd een juist geïnstalleerd schokbestendig stopcontact. • Gebruik geen meerwegstekkers en verlengsnoeren.
-
Page 6: Productbeschrijving
• Haal de stekker uit het stopcontact. huisdieren opgesloten raken in het • Snij het netsnoer van het apparaat af apparaat. en gooi dit weg. • Verwijder de deurgreep om te voorkomen dat kinderen en 3. PRODUCTBESCHRIJVING Aanrecht Glansmiddeldoseerbakje... -
Page 7: Bedieningspaneel
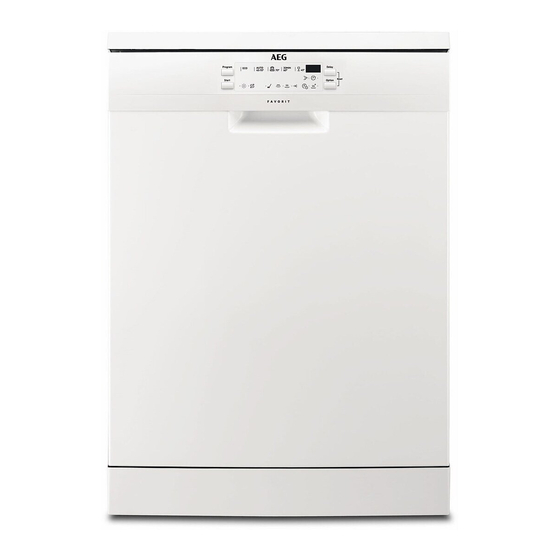
NEDERLANDS 4. BEDIENINGSPANEEL Aan/uit-toets Option-toets Program-toets Indicatielampjes Programma-indicatielampjes Start-toets Weergave Delay-toets 4.1 Indicatielampjes Aanduiding Beschrijving Wasfase. Gaat aan wanneer de wasfase loopt. Spoelfase. Gaat aan wanneer de spoelfase loopt. Droogfase. Gaat aan wanneer de droogfase loopt. Einde-indicatielampje. TimeSaver-indicatielampje. XtraDry-indicatielampje. Glansmiddelindicatielampje. Dit indicatielampje is altijd uit als het pro- gramma in werking is. -
Page 8: Programma´s
Aanduiding Beschrijving Delay-indicatielampje. Deur-indicatielampje. Gaat aan als de deur niet goed is geopend of ge- sloten. 5. PROGRAMMA´S De volgorde van de programma´s in de tabel geven mogelijk hun volgorde op het bedieningspaneel niet weer. Programma Mate van vervui-... -
Page 9: Instellingen
NEDERLANDS 5.1 Verbruiksgegevens Water Energie Programmaduur Programma (kWh) (min.) 0.920 6 - 12 0.6 - 1.5 44 - 160 14 - 15 1.5 - 1.7 155 - 171 13 - 14 1.0 - 1.1 75 - 85 1) De druk en temperatuur van het water, de variaties in stroomtoevoer, de opties en de hoeveelheid vaat kan de verbruikswaarden veranderen. - Page 10 Uw waterleidingbedrijf gaan kan u informeren over de hardheid van knipperen en het display blanco is. het water in uw woonplaats. Het is belangrijk om het correcte niveau voor 6.2 De waterontharder de waterontharder in te stellen voor goede wasresultaten.
- Page 11 NEDERLANDS 6.4 AirDry • Het display toont de huidige instelling: bijv. = niveau 5. AirDry biedt goede droogresultaten met 2. Druk herhaaldelijk op Program om minder energieverbruik. de instelling te wijzigen. 3. Druk op de knop aan/uit om de instelling te bevestigen. 6.3 De aanduiding van leeg glansmiddelreservoir Met glansmiddel wordt het serviesgoed...
-
Page 12: Opties
• Het display toont de huidige 3. Druk op aan/uit om de instelling te bevestigen. instelling: = AirDry ingeschakeld. 2. Druk op Delay om de instelling te wijzigen: = AirDry uitgeschakeld. 7. OPTIES temperatuur van de laatste spoeling De gewenste opties moeten worden beïnvloed. -
Page 13: Voor Het Eerste Gebruik
NEDERLANDS 8. VOOR HET EERSTE GEBRUIK 1. Controleer of het ingestelde stand 4. Schud de trechter voorzichtig bij het van de waterontharder juist is voor handvat om de laatste korrels erin te de waterhardheid in uw omgeving. krijgen. Indien niet, stel dan de stand van 5. -
Page 14: Dagelijks Gebruik
2. Vul het glansmiddeldoseerbakje (A) niet verder dan de aanduiding ''MAX''. 3. Verwijder gemorst glansmiddel met een absorberend doekje om te voorkomen dat er te veel schuim ontstaat. 4. Sluit het deksel. Zorg ervoor dat het ontgrendelknopje op zijn plaats dichtklikt. - Page 15 NEDERLANDS 9.2 Een programma instellen De deur openen als het en starten apparaat in werking is Als u de deur opent terwijl een De Auto Off-functie programma loopt, stopt het apparaat. Dit kan het energieverbruik en de Deze functie verlaagt het energieverbruik programmaduur beïnvloeden.
-
Page 16: Aanwijzingen En Tips
1. Druk op de aan/uit-toets of wacht Als u de deur opent voor de totdat de Auto Off-functie het activering van Auto Off, wordt het apparaat automatisch heeft apparaat automatisch uitgeschakeld. uitgeschakeld. 2. Draai de waterkraan dicht. 10. AANWIJZINGEN EN TIPS 10.1 Algemene... -
Page 17: Onderhoud En Reiniging
NEDERLANDS • Zorg dat serviesgoed en bestek niet • Er regenereerzout en glansmiddel is in elkaar schuiven. Meng lepels met toegevoegd (tenzij u gecombineerde ander bestek. afwastabletten gebruikt). • Zorg er voor dat glazen andere glazen • De positie van de items in de mandjes niet aanraken. - Page 18 8. Plaats de filter (B) terug in de platte filter (A). Rechtsom draaien tot het vastzit. 2. Verwijder de filter (C) uit de filter (B). 3. Verwijder de platte filter (A). LET OP! Een onjuiste plaatsing van de filters kan leiden tot 4.
-
Page 19: Probleemoplossing
NEDERLANDS schoonmaakproduct voor de instructies op de verpakking van vaatwasmachines te gebruiken. Volg de producten zorgvuldig op. 12. PROBLEEMOPLOSSING Als het apparaat niet start of stopt Bij sommige problemen wordt er op tijdens de bediening, kijk dan of u het de display een alarmcode probleem zelf kunt oplossen met behulp weergegeven. - Page 20 Probleem en alarmcode Mogelijke oorzaak en oplossing De anti-overstromingsbevei- • Draai de waterkraan dicht en neem contact op met de liging is ingeschakeld. service-afdeling. Op het display verschijnt Het apparaat stopt en start • Dat is normaal. Het voorziet in optimale reinigingsresul- meerdere keren tijdens de taten en energiebesparing.
- Page 21 NEDERLANDS 12.1 De was- en droogresultaten zijn niet naar tevredenheid Probleem Mogelijke oorzaak en oplossing Slechte wasresultaten. • Raadpleeg "Dagelijks gebruik", "Aanwijzingen en tips" en de folder voor het laden van de korf. • Gebruik intensievere wasprogramma´s. • Maak de inspuiters van de sproeiarm en het filter schoon.
-
Page 22: Productinformatieblad
• Laad de korf voorzichtig in en uit. Raadpleeg de folder voor het laden van de korven. • Leg tere voorwerpen in de bovenkorf. Raadpleeg "Voor het eerste gebruik", "Dagelijks gebruik" of "Aanwijzingen en tips" voor mogelijke andere oorzaken. 13. PRODUCTINFORMATIEBLAD Handelsmerk Model FFB52600ZW 911514008 Nominale capaciteit (standaardcouverts) -
Page 23: Extra Technische Informatie
NEDERLANDS Energie-efficiëntieklasse Energieverbruik in kWh per jaar, gebaseerd op 280 standaardcycli met toevoer van koud water en het ver- bruik in de energiebesparende standen. Het werkelijke energieverbruik wordt bepaald door de wijze waarop het apparaat wordt gebruikt. Energieverbruik van standaard reinigingscyclus (kWh) 0.920 Het elektriciteitsverbruik in de uit-stand (W) 0.50... - Page 24 15. MILIEUBESCHERMING Recycleer de materialen met het apparaten gemarkeerd met het symbool niet weg met het huishoudelijk afval. symbool . Gooi de verpakking in een Breng het product naar het milieustation geschikte afvalcontainer om het te bij u in de buurt of neem contact op met recycleren.
-
Page 25: Safety Information
14. ADDITIONAL TECHNICAL INFORMATION............46 FOR PERFECT RESULTS Thank you for choosing this AEG product. We have created it to give you impeccable performance for many years, with innovative technologies that help make life simpler - features you might not find on ordinary appliances. Please spend a few minutes reading to get the very best from it. - Page 26 Always keep the instructions in a safe and accessible location for future reference. 1.1 Children and vulnerable people safety This appliance can be used by children aged from 8 •...
-
Page 27: Safety Instructions
ENGLISH If the supply cord is damaged, it must be replaced by • the manufacturer, its Authorised Service Centre or similarly qualified persons in order to avoid a hazard. Put the cutlery in the cutlery basket with the sharp • ends pointing down or put them in the cutlery drawer in a horizontal position with the sharp edges down. - Page 28 • Do not pull the mains cable to mains socket. Contact the Authorised disconnect the appliance. Always pull Service Centre to replace the water the mains plug. inlet hose. • This appliance is fitted with a 13 A 2.4 Use mains plug.
-
Page 29: Product Description
ENGLISH 3. PRODUCT DESCRIPTION Worktop Rinse aid dispenser Upper spray arm Detergent dispenser Lower spray arm Cutlery basket Filters Lower basket Rating plate Upper basket Salt container Air vent... -
Page 30: Control Panel
4. CONTROL PANEL On/off button Option button Program button Indicators Programme indicators Start button Display Delay button 4.1 Indicators Indicator Description Washing phase. It comes on when the washing phase operates. Rinsing phase. It comes on when the rinsing phase operates. -
Page 31: Programmes
ENGLISH Indicator Description Delay indicator. Door indicator. It comes on when the appliance door is open or is not cor- rectly closed. 5. PROGRAMMES The order of the programmes in the table may not reflect their sequence on the control panel. Programme Degree of soil Programme phases... -
Page 32: Settings
5.1 Consumption values Water Energy Duration Programme (kWh) (min) 0.920 6 - 12 0.6 - 1.5 44 - 160 14 - 15 1.5 - 1.7 155 - 171 13 - 14 1.0 - 1.1 75 - 85 1) The pressure and the temperature of the water, the variations of the mains supply, the options and the quantity of dishes can change the values. - Page 33 ENGLISH The higher the content of these minerals, Softening hard water the harder your water is. Water hardness increases the consumption is measured in equivalent scales. of water and energy as well The water softener should be adjusted as the programme duration. according to the hardness of the water in The higher the level of water your area.
- Page 34 During the drying phase, the notification for refilling rinse aid. door opens automatically However, for best drying performance, and remains ajar. always use rinse aid. If standard detergent or multi-tablets CAUTION! without rinse aid are used, activate the...
-
Page 35: Options
ENGLISH 7. OPTIONS In the other programmes the setting of Desired options must be XtraDry is permanent and it is activated every time before automatically used in next cycles. This you start a programme. configuration can be changed at any It is not possible to activate time. - Page 36 CAUTION! the baskets. Water and salt can come out After starting the programme, the of the salt container when appliance recharges the resin in the you fill it. After you fill the water softener for up to 5 minutes.
-
Page 37: Daily Use
ENGLISH You can turn the selector of the released quantity (B) between position 1 (lowest quantity) and position 4 or 6 (highest quantity). 9. DAILY USE 1. Open the water tap. CAUTION! 2. Press the on/off button to activate Only use detergent the appliance. - Page 38 Cancelling the delay start while • The indicator of the running phase is on. the countdown operates • The programme duration starts to decrease with steps of 1 minute. When you cancel the delay start you have to set the programme and options Starting a programme with again.
-
Page 39: Hints And Tips
ENGLISH 10. HINTS AND TIPS 10.1 General 10.3 What to do if you want to stop using multi-tablets Follow the hints below to ensure optimal cleaning and drying results in daily use Before you start to use separately and to help you protect the environment. detergent, salt and rinse aid do the following procedure. -
Page 40: Care And Cleaning
10.5 Before starting a • The correct quantity of detergent is used. programme 10.6 Unloading the baskets Before you start the selected programme, make sure that: 1. Let the tableware cool down before • The filters are clean and correctly you remove it from the appliance. -
Page 41: Troubleshooting
ENGLISH CAUTION! An incorrect position of the filters can cause bad washing results and damage to the appliance. 11.2 Cleaning the spray arms Do not remove the spray arms. If the holes in the spray arms are clogged, remove remaining parts of soil with a thin pointed object. - Page 42 With some problems, the display help of the information in the table or shows an alarm code. contact an Authorised Service Centre. The majority of problems that can occur can be solved without the need...
- Page 43 ENGLISH Problem and alarm code Possible cause and solution The remaining time in the • This is not a defect. The appliance is working correctly. display increases and skips nearly to the end of program time. Small leak from the appli- •...
- Page 44 Problem Possible cause and solution Poor drying results. • Tableware has been left for too long inside a closed appliance. • There is no rinse aid or the dosage of rinse aid is not enough. Set the rinse aid dispenser to a higher level.
-
Page 45: Product Information Sheet
13. PRODUCT INFORMATION SHEET Trade Mark Model FFB52600ZW 911514008 Rated capacity (standard place settings) Energy efficiency class Energy consumption in kWh per year, based on 280 standard cleaning cycles using cold water fill and the consumption of the low power modes. -
Page 46: Additional Technical Information
The ‘standard programme’ is the standard cleaning cy- cle to which the information in the label and the fiche relates. This programme is suitable to clean normally soiled tableware and is the most efficient programme in terms of combined energy and water consumption. It is indicated as "Eco"... - Page 47 14. INFORMACIÓN TÉCNICA ADICIONAL............... 69 PARA OBTENER RESULTADOS PERFECTOS Gracias por escoger este producto AEG. Este artículo ha sido creado para ofrecer un rendimiento impecable durante muchos años, con innovadoras tecnologías que facilitarán su vida y prestaciones que probablemente no encuentre en electrodomésticos corrientes.
-
Page 48: Información Sobre Seguridad
INFORMACIÓN SOBRE SEGURIDAD Antes de instalar y utilizar el aparato, lea atentamente las instrucciones facilitadas. El fabricante no se hace responsable de lesiones o daños producidos como resultado de una instalación o un uso incorrectos. Conserve siempre estas instrucciones en lugar seguro y accesible para futuras consultas. -
Page 49: Instrucciones De Seguridad
ESPAÑOL por clientes en hoteles, moteles, pensiones y otros – entornos de tipo residencial. No cambie las especificaciones de este aparato. • La presión de agua de funcionamiento (mínima y • máxima) debe estar entre 0.5 (0.05) / 8 (0.8) bares (MPa) Siga el máximo número de ajustes de 13 cubiertos. - Page 50 • El aparato debe conectarse a tierra. • Asegúrese de que los parámetros de la placa de características son compatibles con los valores eléctricos del suministro eléctrico. • Utilice siempre una toma con aislamiento de conexión a tierra correctamente instalada.
-
Page 51: Descripción Del Producto
ESPAÑOL • Desconecte el aparato de la red. • Retire el pestillo de la puerta para • Corte el cable de conexión a la red y evitar que los niños y las mascotas deséchelo. queden encerrados en el aparato. 3. DESCRIPCIÓN DEL PRODUCTO Encimera Dosificador de abrillantador Brazo aspersor superior... -
Page 52: Panel De Control
4. PANEL DE CONTROL Botón de encendido/apagado Tecla Option Tecla Program Indicadores Indicadores de programa Tecla Start Pantalla Tecla Delay 4.1 Indicadores Indicador Descripción Fase de lavado. Se enciende durante la fase de lavado. Fase de aclarado. Se enciende durante la fase de aclarado. -
Page 53: Programas
ESPAÑOL Indicador Descripción Indicador Delay. Indicador de la puerta. Se enciende cuando la puerta del aparato está abierta o mal cerrada. 5. PROGRAMAS El orden de los programas en la tabla puede no reflejar su secuencia en el panel de control. Programa Grado de suciedad Fases del programa... -
Page 54: Ajustes
5.1 Valores de consumo Agua Energía Duración Programa (kWh) (min) 0.920 6 - 12 0.6 - 1.5 44 - 160 14 - 15 1.5 - 1.7 155 - 171 13 - 14 1.0 - 1.1 75 - 85 1) La presión y temperatura del agua, las variaciones del suministro de energía, las opciones y la canti- dad de platos pueden alterar los valores. - Page 55 ESPAÑOL Cómo acceder al modo de La dureza del agua se mide en escalas equivalentes. usuario El descalcificador de agua debe Asegúrese de que el aparato se ajustarse en función de la dureza que encuentra en modo de selección de presente el agua de su zona.
- Page 56 Cómo ajustar el nivel del – = notificación del descalcificador de agua abrillantador activada. – = notificación del Asegúrese de que el aparato se abrillantador desactivada. encuentra en modo de usuario. 2. Pulse Start para cambiar el ajuste. 1. Pulse Program.
-
Page 57: Opciones
ESPAÑOL Cómo desactivar AirDry • La pantalla muestra el ajuste actual: = AirDry activado. Asegúrese de que el aparato se 2. Pulse Delay para cambiar el ajuste: encuentra en modo de usuario. = AirDry desactivado. 1. Pulse Delay. 3. Pulse encendido/apagado para •... -
Page 58: Antes Del Primer Uso
Cómo activar TimeSaver La pantalla muestra la duración del programa actualizada. Pulse Option hasta que se encienda el indicador 8. ANTES DEL PRIMER USO 1. Asegúrese de que el nivel actual del descalcificador coincide con la dureza de su suministro de agua. -
Page 59: Uso Diario
ESPAÑOL 8.2 Cómo llenar el dosificador PRECAUCIÓN! de abrillantador Utilice exclusivamente abrillantador diseñado específicamente para lavavajillas. 1. Pulse la tecla de apertura (D) para abrir la tapa (C). 2. Llene el dosificador (A) hasta que el abrillantador llegue a la marca "MAX". - Page 60 2. Pulse Program varias veces hasta que se encienda el indicador del programa que desea. En la pantalla se muestra la duración del programa. 3. Ajuste las opciones aplicables. 4. Pulse Start para iniciar el programa. • El indicador de la fase en curso se enciende.
-
Page 61: Consejos
ESPAÑOL encuentre en el modo de selección de No intente cerrar la puerta programa. del aparato durante 2 Compruebe que hay detergente en el minutos después de que dosificador antes de iniciar un nuevo AirDry la abra programa. automáticamente, porque puede causar daños en el Fin del programa aparato. - Page 62 • Asegúrese de que los vasos no detergente con los programas largos. chocan entre sí. • No utilice más cantidad de • Coloque los objetos pequeños en el detergente de la recomendada. cesto de cubiertos.
-
Page 63: Mantenimiento Y Limpieza
ESPAÑOL 11. MANTENIMIENTO Y LIMPIEZA 2. Extraiga el filtro (C) del filtro (B). ADVERTENCIA! 3. Retire el filtro plano (A). Antes de proceder con el mantenimiento, apague el aparato y desconecte el enchufe de la red. Los filtros sucios y los brazos aspersores obstruidos reducen la calidad del lavado. -
Page 64: Solución De Problemas
11.3 Limpieza del exterior • Limpie el aparato con un paño suave humedecido. • Utilice solo detergentes neutros. • No utilice productos abrasivos, estropajos duros ni disolventes. 11.4 Limpieza del interior • Limpie cuidadosamente el aparato, incluida la junta de goma de la puerta, con un paño húmedo. - Page 65 ESPAÑOL Problema y código de alar- Causa y soluciones posibles El programa no se pone en • Asegúrese de que la puerta del aparato esté cerrada. • Pulse Start. marcha. • Si se ha ajustado el inicio diferido, cancele el ajuste o espere hasta el final de la cuenta atrás.
- Page 66 Problema y código de alar- Causa y soluciones posibles Cuesta cerrar la puerta del • El aparato no está nivelado. Afloje o apriete las patas aparato. ajustables (en su caso). • Hay partes de la vajilla que sobresalen de los cestos.
- Page 67 ESPAÑOL Problema Causa y soluciones posibles Hay manchas y gotas de agua • La dosificación del abrillantador es insuficiente. Ajuste en vajilla y cristalería. más alto el nivel de abrillantador. • La calidad del abrillantador podría ser la causa. La vajilla está mojada. •...
-
Page 68: Ficha De Información Del Producto
"Consejos". 13. FICHA DE INFORMACIÓN DEL PRODUCTO Marca registrada Modelo FFB52600ZW 911514008 Capacidad asignada (número de cubiertos tipo) Clase de eficiencia energética Consumo de energía en kWh al año, basado en 280 ci- clos de lavado normal, utilizando agua fría y el consu- mo de los modos de bajo consumo. -
Page 69: Información Técnica Adicional
ESPAÑOL Clase de eficiencia de secado en una escala de G (me- nos eficiente) a A (más eficiente) El «programa normal» es el ciclo de lavado normal a que se refiere la información de la etiqueta y de la fi- cha. - Page 70 www.aeg.com...
- Page 71 ESPAÑOL...
- Page 72 www.aeg.com/shop...