Table of Contents
Advertisement
Quick Links
Advertisement
Table of Contents

Related Manuals for Motorola 300IP-6P


Summary of Contents for Motorola 300IP-6P
- Page 1 User Manual 300IP-6P Smart VoIP Phone User Manual Motorola...
-
Page 2: Table Of Contents
3.7 Keypad Setting.........................23 3.7.1 Language Setting.........................23 3.7.2 Message..........................23 3.7.3 Time & Date...........................24 3.7.4 Ring Tone and Volume Setting...................24 3.7.5 Searching Phone Book......................25 3.7.6 Cannot Set the Features with Keypad................25 4. WEB User Interface............25 4.1 Network.............................27 5 SIP Account.............33 5.1Basic............................33 5.2 Advanced...........................35 Motorola... - Page 3 9.5 Log 61 9.5 Local Log...........................62 Check the log file on the local......................62 9.6 Default Settings........................62 9.7 Reboot............................62 10 Security..............62 10.1 Password.............62 10.2 Trusted Certificates.......................63 10.3 IP Strategy..........................63 11 WEB Other Settings or Information - Appendix......63 11.1 Logout............................63 11.2 Note Tips..........................64 Motorola...
-
Page 4: Getting Started
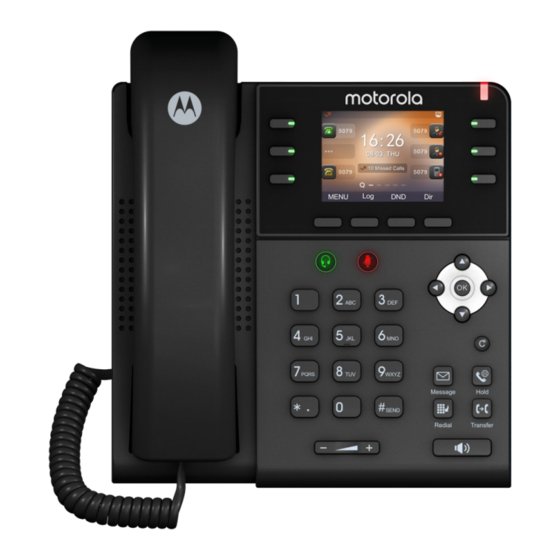
1. Getting Started 1.1 About Motorola 300IP-6P is a feature-added IP Phone.Using 2.8’ 320x240 pixel color backlight screen and except normal features of a 6 lines. it also has HD Sound Quality, unique art design, and friendly user interface to satisfy user's communication needs. - Page 5 1*Ethernet Cable 1*Quick Operation Guide 1*Power Adapter 1*Bracket Motorola...
- Page 6 This section introduces how to install the phone with the components in the packing list: Adjust the Bracket Connect the Handset and optional Headset Connect the Network and Power Adjust the Bracket Pls follow the following picture to let the bracket adjust to safety Motorola...
- Page 7 Connect the Handset and optional Headset Connect the Network and Power You have two options for power supply. Your system administrator will advise you which Motorola...
-
Page 8: Phone User Interface
Note: If inline power (PoE:Power over Ethernet) is provided, you don’t need to connect the power adapter. Make sure the Ethernet cable and hub/switch are PoE compliant. 3. Phone User Interface 3.1 Hardware Component Instructions The main hardware components of the 300IP-6P IP Phone are the LCD screen and the keypad. Motorola... - Page 9 Hardware component instructions of the 300IP-6P IP Phone are: ITEM DESCRIPTION LCD Screen Displayed information about calls, messages, soft keys, time, date and other relevant data: • Call information — caller ID, call duration • Icons (e.g. • Missed calls or second incoming caller's information •Time and date...
-
Page 10: Phone Screen Display Features
If the phone has successfully started up and after using, the idle LCD display will show information as below: ITEM DESCRIPTION TIME & DATE TIME & DATE display in the middle of the screen. Auto-Answer Enable this feature, it will display "AA" at the top right corner. icon Motorola... -
Page 11: Basic Network Settings
Press OK or MENU> System Settings> Advanced Settings> Password(Default is Empty)> Network> IP Setting Press IP Setting to login in to the menu Select "DHCP" mode Press "Enter" key Set the DNS\web port\telnet port Press "Save" key to make it work Motorola... -
Page 12: Sip Account Settings
Tips "Network is changed, press OK reboot " 3.4 SIP Account Settings 300IP-6P IP phone makes calls based on sip accounts, It can support Single account or Multi-account, Each account can be configured to the different SIP server. If you want to…... -
Page 13: Basic Features
-or wait 5s (default), then it send the number automatically. Place call Press Speaker button using speakerphone Place call Put on your headset, using a headset active Headset button so that the status light is Red, and then do as using speakerphone Motorola... -
Page 14: Anonymous Call
- or press Navigation button (in Standby interface) > select "All Calls"(up) “Missed calls”(down), “Received calls”(left) and “Dialed numbers” (right) --2) Then press Dial button. NOTE: You also can press the "log" to login this menu when in the idle. Motorola... -
Page 15: Making Calls To Contact
Auto-Answer --1) Enable the Auto-Answer feature. Coming Call --2) Auto-Answer mode you can set in the MENU>Function Setting> Auto Answer >Device Speaker Handset Headset When you use the Handset mode, at this time you need to Motorola... -
Page 16: Ending A Call
Hold a line and switch to Press another Line button for the appropriate line another line Resume call --Press Line button, current line Release call Select the line want to release hold, press the line, so different line recovery; Motorola... -
Page 17: Transferring Calls
Toggle Mute on Press button, then the screen top and left will have a MUTE icon Toggle Mute off Press button again, then the button light off Motorola... -
Page 18: Do Not Disturb
--3) After connected the third party, press "CONF" soft key a active call again establish --1) when one phone line is holding on and the other line is conference with held busy; --2) Press "CONF" Soft key line Motorola... -
Page 19: Voice Mail
-or press "MENU" or "OK" button > “Phone book”>“Enterprise from Enterprise Phone Book”, Phone Book --2) Select “Enterprise Phone Book”, press "OK" button; --3) Press "Find" and input the name who you want to search. --4) When you search the person, you can dial it. Motorola... - Page 20 --3) Use the navigation keys to select content, press OK button to set and modify: -Group name: name of the group --4) Press "Save "soft key to complete Modify group --1) Press "DIR" soft key, -or press "MENU" button > “Phone book”>“Personal phone book>View All”, Motorola...
- Page 21 --3) Press "Find" and input the name or number who you want to find from the LDAP server. --4) When you search the person, you can dial it. Black List Add the Contacts --1) Press "DIR" in the idle, Motorola...
-
Page 22: Using Call Logs
When all of the phone accounts were disable or not register. it will be show this mode in the idle. It can use by when the new workstation isn't have SIP server. Peer-to-Peer Disable all of accounts or not register. Make Call with --1 ) Press OK or MENU button> System Setting> Advanced Motorola... -
Page 23: Keypad Setting
English\French\Italian\Polish\Protuguese\Runssian\Spanish\ Turkish\Chinese --3) After you finish select, press Save to make it work. 3.7.2 Message 300IP-6P have Message feature. It will display in the LCD when it has a New Message. Create --1)Press OK or MENU button; --2)Select "Messaging" Message --3)Voice Message: Setting the Voice Message code in here. -
Page 24: Time & Date
--2 ) Press OK or MENU button> System Setting> Phone Setting> Setting Volume Setting --3)Volume Setting: Handset\Speaker\Headset\Ring volume --4) Press Enter to adjust the volume and press Save to make it work NOTES: For the Custom Ring Type you need to upload it from website. Motorola... -
Page 25: Searching Phone Book
To obtain the IP address, press the C key on the phone. Enter the IP address (e.g. HTTP://192.168.0.10 or 192.168.0.10) in the address bar of web browser on your PC. The default user name is admin (case-sensitive) and the password is admin (case-sensitive). Motorola... - Page 26 The status with LAN, MAC, LAN IP, Net mask, Gateway, Primary DNS, Secondary DNS, VPN IP, PC IP, PC Net mask, Device Type, DHCP Server. System Information The status with Phone Model, Software Version, Hardware Version, Hardware ID, Kernel Version, Auto-Provision Server Motorola...
-
Page 27: Network
URL, TFTP Server IP. 4.1 Network 4.1.1 LAN Port ITEM DESCRIPTION Network Connection Network Connection Mode has DHCP, Static IP, PPPoE Mode DNS Settings Select the DNS mode that you want. Motorola... - Page 28 AS Router Router feature is for the phone PC Port. You must input IP address (it’s equivalent to a gateway) and Net mask.If you want to use DHCP function, please turn it on, input start IP and end IP. Motorola...
- Page 29 Choose the appropriate type of VPN. VPN Server Addr VPN server's IP. VPN User Name VPN user's name VPN Password A password be used for authentication OPEN VPN Upload the *.ovpn file to the phone Upload VPN cfg Select the VPN configuration to upload Motorola...
- Page 30 Port Management Settings HTTP Port The default web port is 80,if you want to change it(for example change it to88), You must input IP and Web port to login the web page(for example HTTP://192.168.0.200:88). It will take effect on next reboot. Motorola...
- Page 31 The range is 0~63,default is 26 Voice QoS The range is 0~63,default is 46 Network Packet Mirroring Network Packet When select on, then you can capture the phone’s packet use Mirroring notebook which connect to pc port of the phone Motorola...
- Page 32 MD5 Password You can setting the MD5 Password here. CA Certificates You can upload the CA Certificates here. LLDP ITEM DECSRIPTIO LLDP Enable/Disable the LLDP feature. LLDP Packet Interval You can setting the LLDP packet Interval here. Default is 60s. Motorola...
- Page 33 Paging Setting Paging Setting(NOTE: This feature priority is followed the serial number, In other words, "paging 1" is the highest priority) Paging1 Enable/Disable Paging feature. Group IP and Port Group IP and Port with Paging. Motorola...
-
Page 34: Sip Account
Choose one Account, you will find the following parameters: ITEM DECSRIPTIO Account Select the Account Number what you want to set. Enable You can choose on/off to enable/disable the line. Account Mode VOIP mode Number Of Lines The line key of account used, default is 1. Motorola... - Page 35 Defines the STUN server will be active or not STUN Server Session traversal utilities for NAT. Register Expiration IP phone automatically registered every time Time SIP Transport There are UDP/TCP/TLS three options Ring Type Select this account ringing type. Motorola...
-
Page 36: Advanced
5.2 Advanced Motorola... - Page 37 ITEM DECSRIPTIO Motorola...
- Page 38 The encryption algorithm at this time we only have RC4. Encryption Key The key with encryption. Voice Enable or disable voice encryption(SRTP). Encryption(SRTP) EP+ Outcode Switch Enable or disable EP+ Outcode feature OutCode Setting the EP+ Outcode OutCode Length Setting the EP+ Outcode Length Motorola...
-
Page 39: Dss Keys
The key amount depend on the lines, and support 4 page. 24=4*6; Mode Support Speed Dial,Speed Dial Prefix, DTMF, BLF, Paging, Call Park, Intercom, Pickup, XML Browser, Broadsoft BLF, BLA. Account Select account to make it work Name The name of the key Number The number of the key Motorola... -
Page 40: Line Keys
6.2 Line Keys 300IP-6P have 6 line keys: ITEMS DESCRIBES Line The default value. Speed Dial You can use this key feature to speed up dialing the numbers often used or hard to remember. Speed Dial You can use this key feature to speed up dial a call with a specified Prefix prefix number. -
Page 41: Soft Key
Soft Keys: Soft key is the key with below display in the LCD. You can change it for your mind to the other features in many all kinds of status. As below example, when you dialing with someone, the LCD display soft key is Send \Del \Empty\End, Empty means nothing in it. Motorola... -
Page 42: Settings
The LCD backlight, default is 60s. Ring type The incoming call’s ring, default has ring1~8. Upload ring tone Please upload a ring tone with G.711A(*.wav) audio coding, maximum is 10 rings and the total size must be less than 150KB. Motorola... -
Page 43: Features
7.2 Features Motorola... - Page 44 Call Waiting Tone Set tone for prompting a new call during a call. Auto Redial Enable or disable auto redial feature Auto Redial Interval Setting the auto redial interval (1~300s) Auto Redial Times Setting the auto redial times (1~300) Motorola...
- Page 45 Set return message for Do Not Disturb. Hook Setting the hook mode Flash hook time Setting the Flash hook time (<800ms) Called No Answer Setting the Called No Answer Times (Min:20, Max:1800) Times Caller No Setting the Caller No AnswerTimes (Min:90, Max:1800) AnswerTimes Motorola...
-
Page 46: Time Settings
Headset Mode default is Normal, or you can select Seat Mode Ring type in Seat Ring type in Seat Mode default is Headset, or you can select Mode Speaker BLF Light Enable or disable BLF light 7.3 Time Settings Motorola... -
Page 47: Keyboard Lock
Time Zone-GMT You can select different time zone for the phone Manual Setting Setting time manually. 7.4 Keyboard Lock Keyboard Lock Enable/Disable keyboard lock, you can lock: MENU Key, FUNCTION Key., ALL Keys, LOCK all keys but auto Answer. Motorola... -
Page 48: Voip Call Forwarding
You can specify a URL that triggers a get request when a specified event occurs. Action URL can only be triggered by the pre-defined events(e.g. Incoming Call). The valid URL format is: http(s)://IP address of the server/help.xml?. Motorola... -
Page 49: Audio
Handset MIC Volume The handset MIC volume default is Lv3, the range is 1~7. Speaker Phone MIC The speaker MIC volume default is Lv3, the range is 1~7 Volume Headset MIC Volume The headset MIC volume default is Lv3, the range is 1~7 Motorola... -
Page 50: Ring
Internal ringer text: This Internal ringer text enables the server to distinguish between internal and external rings. The trace head-info must include "Alert-Info: ;info=". Internal ringer file: According to the defined Internal ring text, play the corresponding Internal Ring File. Motorola... -
Page 51: Dial Plan
7.10 Dial Plan If you want to setup a dial plan, you can click "Dial Plan" Motorola... - Page 52 Setting the Port with this dial rule, default is 5060. Prefix The number which you need to press actually if you want to call the phone Called Insert Number There have two option, Enable or Disable. Position Which position you want insert the number Motorola...
-
Page 53: Blf Setting
Called Delete Number There have two option, Enable or Disable. NOTES: If you want to know more detail about Dial Rule, pls find it in the official website to download the specific document. 7.11 BLF Setting Create the BLF groups and members of group. Motorola... -
Page 54: Tr069
The phone book including Group, Contact, LDAP and Ban list, please review the following for more details: 8.1 Contact You can add, edit and delete contact in a phone book on this web page . The phonebook can storage 300 contacts entry Motorola... -
Page 55: Group
You can download and save this contact to PC after you select 8.2 Group You can add, edit and delete group in a phone book on this web page. If you want to add a Group, you just ought to click ‘Add Group’ . Motorola... -
Page 56: Ldap
NOTES: If you want to know more detail about LDAP, pls find it in the office website to download the specific document. As below figure is an example. e.g. LDAP Name Filter:(sn=%s) LDAP Number Filter:(telephoneNumber=%s) Server Address:192.168.0.65 BASE:DC=ldap,DC=Motorola,DC=com User Name:bb@ldap.Motorola.com Pass Word:Motorola_2012 LDAP Name Attributes 1:sn LDAP Name Attributes 2:cn LDAP Number Attributes 1:telephoneNumber Motorola... -
Page 57: Blacklist
8.4 Blacklist You can add, edit and delete contact in a Ban List on this web page . Motorola... -
Page 58: Phone Call Info
’Delete All Ban List’. You can edit or move this contact to Contact after you select 8.5 Phone Call Info You can remote or local control the IP phone to make a call by WEB. Motorola... -
Page 59: Maintenance
Downloading all contacts in the Vcard mode, but upload only support one by one. EXT Module Used for updating/backup the expansion of the phone [NOTES:The mode doesn't support this feature] Used for the administrator to find out or making sure the problem with this equipment. Motorola... -
Page 60: Ftp Upgrade
Used for updating/backup the expansion of the phone [NOTES:The mode doesn't support this feature] NOTES: It's not necessary to input filename when doing backup Configuration, Phone Book, EXT Module. 9.3 TFTP Upgrade You can upgrade the software, kernel and configure files by TFTP. Motorola... -
Page 61: Auto Provisioning
When you open this auto provision feature, the phone will do auto provision after it detect a different software or kernel (Higher or Lower) which are putted on the TFTP,HTTP,HTTPS,FTP, server. For the detailed information about auto provision, you can find it in the official website. Motorola... - Page 62 PNP Interval(minutes) Setting the PNP interval. Auto Provision You can enable/disable auto provision by select on/off Protocol Used for auto provision, it includes TFTP/HTTP/FTP Software Server URL The server address of the auto provision Username Providing by provision server Motorola...
-
Page 63: Log
Auto Provision Now Used for doing auto provision immediately 9.5 Log This feature is use for the administrator to managing the equipment, like debugging, SIP etc,. If you need to catch a debugging Level, you need to setup on this interface. Motorola... -
Page 64: Local Log
You can load the phone to the factory default setting in default setting option. Press the ‘Reset to Factory Setting’ option, the phone will load to factory default setting on next reboot. 9.7 Reboot You can use reboot option to reboot the phone. Motorola... -
Page 65: Security
If you login as an administrator, you can modify both the user's and admin's passwords. 10.2 Trusted Certificates 10.3 IP Strategy You can use IP Strategy feature to make a list which can be set to only allow the incoming call on the list. Motorola... -
Page 66: Web Other Settings Or Information - Appendix
Appendix 11.1 Logout Logout the IP Phone web management. 11.2 Note Tips In the right middle of the website page, there is a Note tips in every function page. Hope it can help you to know something about that. Motorola... - Page 67 Motorola...