AEG IPE64551FB User Manual
Hide thumbs
Also See for IPE64551FB:
- User manual (20 pages) ,
- User manual (25 pages) ,
- User manual (112 pages)
Table of Contents
Advertisement
Quick Links
Advertisement
Table of Contents

Related Manuals for AEG IPE64551FB


Summary of Contents for AEG IPE64551FB
- Page 1 IPE64551FB User Manual USER MANUAL...
-
Page 2: Table Of Contents
10. ENERGY EFFICIENCY..................... 19 FOR PERFECT RESULTS Thank you for choosing this AEG product. We have created it to give you impeccable performance for many years, with innovative technologies that help make life simpler features you might not find on ordinary appliances. Please spend a few minutes reading to get the very best from it. - Page 3 ENGLISH usage. Always keep the instructions in a safe and accessible location for future reference. 1.1 Children and vulnerable people safety This appliance can be used by children aged from 8 • years and above and persons with reduced physical, sensory or mental capabilities or lack of experience and knowledge if they have been given supervision or instruction concerning the use of the appliance in a...
-
Page 4: Safety Instructions
NEVER try to extinguish a fire with water, but switch • off the appliance and then cover flame e.g. with a lid or a fire blanket. CAUTION: The cooking process has to be supervised. • A short term cooking process has to be supervised continuously. - Page 5 ENGLISH • Follow the installation instructions • Do not let the electricity mains cable supplied with the appliance. tangle. • Keep the minimum distance from • Make sure that a shock protection is other appliances and units. installed. • Always take care when moving the •...
- Page 6 • Make sure that the ventilation • Do not activate the cooking zones openings are not blocked. with empty cookware or without • Do not let the appliance stay cookware. unattended during operation. • Do not put aluminium foil on the •...
-
Page 7: Installation
ENGLISH 3. INSTALLATION WARNING! Refer to Safety chapters. 3.1 Before the installation Before you install the hob, write down the information bellow from the rating plate. The rating plate is on the bottom of the hob. Serial number ......3.2 Built-in hobs Only use the built-in hobs after you assemble the hob into correct built-in min. -
Page 8: Product Description
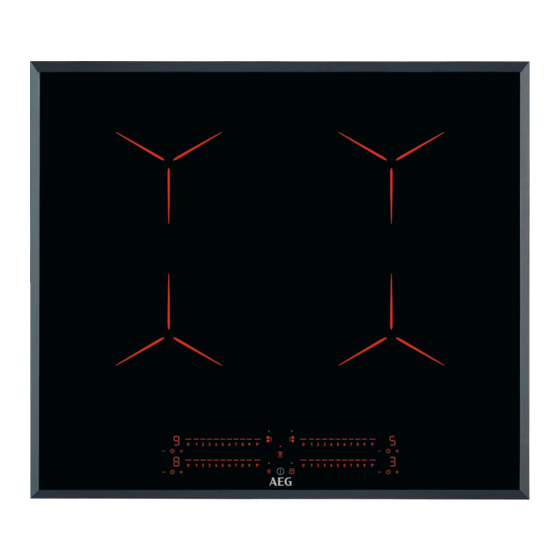
4. PRODUCT DESCRIPTION 4.1 Cooking surface layout Induction cooking zone Control panel 4.2 Control panel layout To see the control panel and the zone positions activate the appliance with Use the sensor fields to operate the appliance. The displays, indicators and sounds tell which functions operate. -
Page 9: Daily Use
ENGLISH Sensor Function Comment field Bridge To activate and deactivate the function. Control bar To set a heat setting. PowerBoost To activate the function. Lock / Child Safety Device To lock / unlock the control panel. 4.3 OptiHeat Control (3 step The induction cooking zones produce the heat necessary for the cooking Residual heat indicator) - Page 10 Heat setting The hob deacti- vates after 4 hours 6 - 9 1.5 hours Once you place a pot on the cooking zone and set the heat setting, it remains 5.3 Using the cooking zones the same for 50 seconds after you remove the pot.
- Page 11 ENGLISH 5.8 Timer Count Down Timer Use this function to specify how long a cooking zone should operate during a single cooking session. Set the heat setting for the appropriate cooking zone and then set the function. 1. Touch to activate the function or change the time.
- Page 12 To deactivate the function: touch . The comes on. Touch until signal sounds and the indicator comes off. The indicators light up. Use control bar appears. Set the heat setting to set on the display. within 50 seconds.You can operate the hob.
- Page 13 ENGLISH Automatic modes For most of the hoods, the remote system is originally Auto- deactivated. Activate it Boiling Frying matic before you use the function. light For more information refer to the hood user manual. Mode H0 Operating the function automatically Mode H1 To operate the function automatically set the automatic mode to H1 - H6.
-
Page 14: Hints And Tips
Operating the fan speed When you press , you raise the fan manually speed by one. When you reach an intensive level and press again, you You can also operate the fan from the set the fan speed to 0 which deactivates hob manually. - Page 15 ENGLISH is not linear. When you increase the heat The data in the table is for setting, it is not proportional to the guidance only. increase of the consumption of power. It means that a cooking zone with the medium heat setting uses less than a half of its power.
-
Page 16: Care And Cleaning
Cooker hoods with the Hob²Hood function To find the full range of cooker hoods which work with this function refer to our consumer website. The AEG cooker hoods that work with this function must have the symbol 7. CARE AND CLEANING... - Page 17 ENGLISH Problem Possible cause Remedy The fuse is blown. Make sure that the fuse is the cause of the malfunction. If the fuse is blown again and again, contact a quali- fied electrician. You do not set the heat set- Activate the hob again and ting for 50 seconds.
-
Page 18: Technical Data
Make sure, you operated the hob correctly. If not the 9. TECHNICAL DATA 9.1 Rating plate Model IPE64551FB PNC 949 597 524 00 Typ 62 B4A 22 AA 220 - 240 V / 400 V 2N 50 - 60 Hz Induction 7.35 kW... -
Page 19: Energy Efficiency
140 x 280 210 x 330 10. ENERGY EFFICIENCY 10.1 Product information according to EU 66/2014 valid for EU market only Model identification IPE64551FB Type of hob Built-In Hob Number of cooking zones Heating technology Induction Diameter of circular cook- Left front 21.0 cm... - Page 20 • When you heat up water, use only the • Put the cookware directly in the amount you need. centre of the cooking zone. • If it is possible, always put the lids on • Use the residual heat to keep the the cookware.
- Page 21 ENGLISH...
- Page 22 www.aeg.com...
- Page 23 ENGLISH...
- Page 24 www.aeg.com/shop...