Advertisement
Quick Links
115VIF-3
115 VAC Input Interface Board
Instruction Manual
For Crane & Hoist Pendant Applications
NOTE: REFER ALSO TO SJ200 OR SJ700 SERIES INSTRUCTION MANUAL
Manual Number: HAL1055C
August 2009
• SJ200 Series
• SJ700 Series
Hitachi America, Ltd.
After reading this manual,
keep it handy for future reference.
Advertisement

Related Manuals for Hitachi 115VIF-3


Summary of Contents for Hitachi 115VIF-3
- Page 1 For Crane & Hoist Pendant Applications • SJ200 Series • SJ700 Series NOTE: REFER ALSO TO SJ200 OR SJ700 SERIES INSTRUCTION MANUAL Manual Number: HAL1055C After reading this manual, August 2009 keep it handy for future reference. Hitachi America, Ltd.
-
Page 2: Table Of Contents
Table of Contents Table of Contents Table of Contents........................2 Chapter 1 – General Description ..................3 Chapter 2 – Installation and Wiring..................5 Chapter 3 – Configuring the Inverter ................... 9 Chapter 4 – Operation ......................13 Index ............................. 15 Document History Rev A, March 2009 –... -
Page 3: Chapter 1 - General Description
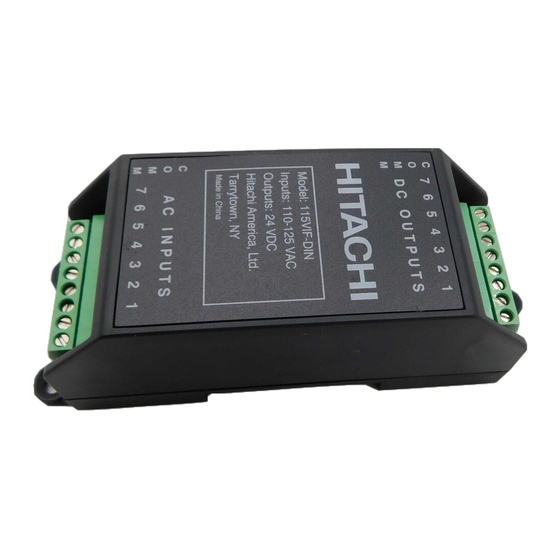
Chapter 1 Chapter 1 – General Description The 115VIF-3 interface board is used to translate 115 VAC control signals – from crane and hoist operator pendant stations – to the 24 VDC logical input signals required by the SJ200 or SJ700 series of Hitachi inverters. - Page 4 When removing the front cover for maintenance or inspection, confirm that incoming power for alarm connection is completely disconnected. WARNING: Do not touch the surface or terminals of the 115VIF-3 interface board while the inverter or external control circuit is energized; otherwise there is the danger of electric shock.
-
Page 5: Chapter 2 - Installation And Wiring
The boards 115 VAC-side wiring (from the pendant) and the corresponding AC input functions are the same, regardless of which inverter series you are using. Note: In the standard version of the 115VIF-3, no connections are made to the terminals marked IN and GND, or to terminal AC6. - Page 6 AC Input Wiring – Connecting the Pendant to the 115VIF-3 Interface Board Connect the pendant 115 VAC input wiring to the terminals marked AC1 through AC5 on the 115VIF-3, with NEU (neutral of the pendant control signals) as their common terminal. AC1 thru AC5 are connected to the HOT side of the pendant control signals, coming from the pendant’s pushbutton contacts.
- Page 7 SJ200 The eight “fingers” on the 115VIF-3, as shown at the bottom of Figure 2-1, are designed to mate directly with the input terminal strip of the SJ200 series inverter. It is best to remove the terminal strip from the inverter first.
- Page 8 1, which is configured for [MI1] function. Refer to parameter tables in Chapter 3. inking/Sourcing Input Set-up On the SJ700, the factory default setting for the intelligent inputs is for sinking logic. The 115VIF-3 interface requires the inputs be set for sourcing logic for proper operatio n.
-
Page 9: Chapter 3 - Configuring The Inverter
Chapter 3 Chapter 3 – Configuring the Inverter The configuration of inverter parameters will depend on the specific functionality and performance required for your application. The basic functionality of the board is designed to interface with a two pushbutton, two-position (two-speed) momentary contact type pendant commonly used for crane and hoist applications. This is the basis for the descriptions of the functions of the board presented in this manual. - Page 10 The SR/SK DIP switch next to the input terminal strip must be in the default “SR” position for proper operation of the 115VIF-3 interface board. Verify that it is in the correct position. Confirm the correct setting of B091 for load-brake vs.
- Page 11 Some pendant stations utilize 3-position pushbuttons for the hoist control. This is what is traditionally called “three-step control.” This is simple to implement with the 115VIF-3 and inverter. No programming changes are required in the inverter. The jumper from AC4 to HOT that would be used in normal 2-step operation is not needed in this case.
- Page 12 Chapter 3 Three-Step Control Wiring 115VAC HOT Hoist Up (AC1) Hoist Down (AC2) Hold Speed (AC4) Hoist Increase Speed (AC3) Figure 3-1 Page 12 of 16...
-
Page 13: Chapter 4 - Operation
Chapter 4 Chapter 4 – Operation Normal Operation Once the inverter parameters are set as described in Chapter 3, you are ready to verify proper operation. It is recommended to first test the system with the motor mechanically disconnected from the crane or hoist, to ensure that any unexpected behavior will not damage the equipment or risk injury. - Page 14 Chapter 4 Software State Diagram Ver. 3.7 Version 3.6 Page 14 of 16...
-
Page 15: Index
Index Index AC Input Wiring · 6 MIN speed · 6, 9, 13 Closed-loop · 8 Open-loop · 8 Configuration, inverter · 9 Operation · 13 Contents, carton · 3 Pendant · 9, 13 DIP switch · 10 Reset, fault · 13 Electrical Specifications ·... - Page 16 Hitachi America, Ltd. Tarrytown, NY 10591 © 2009 http://www.hitachi-america.us/inverters August 2009 HAL1055C...