Advertisement
Quick Links
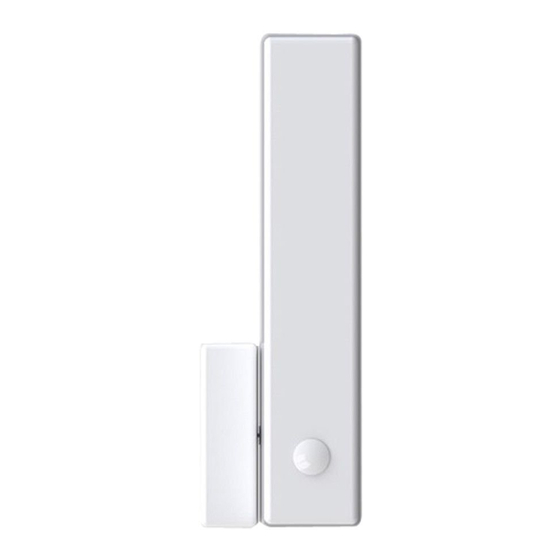
Wireless Magnetic Contact & Shock Sensor
Partcode: MC1/SHOCK-WE
RINS1638
Document SAP: 102014992-11
EN50131-2-6:2008
Security Grade (SG) 2
EN50131-5-3:2005+A1:2008
Environmental Class (EC) II
PD6662:2017
Installation notes
It is recommended the device is learned at the control panel. A signal strength test
should then be performed to select the most suitable location, ensuring optimum
wireless range.
Installation Surfaces
Please note: The device can be mounted on typical building materials; such as wood,
PVC, brick or metal etc. If you do encounter any problems with di erent surfaces, please
contact customer.support@pyronix.com
References
A. Learn wireless devices / wireless device control
B. Diagnostics
C. Positioning the arrow
When tting the device, the arrow on the inertia barrel must be installed one 'notch' to
negative from directly vertical (as shown) and should not be altered unless instructed to
by Technical Support. Once a xed in position, a 'shock sensor calibration' procedure
should be performed to ensure optimal performance (as in section D).
Please note: If the sensitivity should require altering again, repeat the 'shock sensor
calibration' procedure, do not change the orientation of the inertia barrel.
D. Shock sensor calibration
To calibrate the activation force on the shock sensor, a link must be tted to the
calibration header as shown. If the link is connected, but an activation force is not
applied before disconnecting it, the device will be set to the highest sensitivity. If an
activation force is applied with the link tted (e.g. hitting your hand against the window
frame), the Shock will be calibrated at this custom sensitivity as soon as the link is
removed.
E. Magnetic contact installation
F. Program / change zones
G. External zone wiring
Speci cation
Battery
Colour and Casing
Type: 3.0V CR123A Lithium Battery. Threshold:
White. 2mm ABS
2.2V +/- 5% at 25°C. Life: Up to 2 Years
Battery (type C according to EN 50131-6):
Tamper protection
Current: 5 A (quiescent)/ 65mA (transmitting)
Front and rear case tamper with 1 external zone
tamper (normally closed).
Wireless Transmission Frequency
868MHz FM Transceiver Narrow Band
Temperature
Storage: -20°C to 50°C
Transmission Method
Certi ed: -10°C to 40°C
Fully encrypted rolling code
Nominal: -10°C to 50°C
LED Indication
Dimensions and weight (W x H x D)
Green=MC. Red=Shock.
Device: 130 x 30 x 35mm
(Signal,Battery,Alarm,Tamper).
Magnet: 56 x 17 x 12.7mm
Weight: 89g
Compatible with the Enforcer, PCX/EURO control panels with wireless expander, and UR2. Please see
the control panel user, programming and quick set manuals for further information.
Important note
For operation of both the shock sensor and the magnetic contact, the software version of the control
panel must be >V9.0 (UK), >V9.26(EXPORT) and hub V2.23 or greater. For use with wireless ZEM (V2.36
or greater). Older software versions will only allow the shock zone to be learnt. HomeContol+ V2.00 &
V2.10 are also compatible.
Please note: Both shock and contact must be learnt to the same wireless hub (both to the control
panel or both to the ZEM, not one to each or across multiple ZEMs).
Battery information
The batteries supplied have been chosen to provide long service life whilst, for safety reasons, having limited
output current.
The battery is protected on purchase by a piece of plastic that must be removed for operation. When disposing
of the product, the battery must be removed and disposed of separately in accordance with local regulations.
Warranty
This product is sold subject to our standard warranty conditions and is warranted against defects in workmanship for a
period of two years (battery excluded). In the interest of continuing care and design, Pyronix Ltd reserves the right to
amend speci cations, without giving prior notice. Visit www.pyronix.com/warranty for more information.
Product warning information
For electrical products sold within the European Community. At the end of the electrical products life, it should not be
disposed of with household waste. Please recycle where facilities exist. Check with your Local Authority or retailer for
recycling advice in your country.To prevent possible damage to components, any static charge on your body needs to
be eliminated before touching the inside of the unit. This can be accomplished by touching some grounded/earthed
metallic conductor such as a radiator/pipework immediately before replacing the batteries.
Z+
Y
Spacers available if required MC1S/SPACER and MC1S/SPACERRB
START
1
2
MAGNET
If replacing
battery, insert
in direction
shown
Remove
Battery
Tab
LEARN WIRELESS
+
DEVICE?
Learn Inputs?
-
Learn Devices?
Input 01
Available
[01]
Learning...
TAMPER
No. 8 RSCW140
USE SUPPLIED
No 8
countersunk
self tapping
screw
Connect this jumper to
Strike surface to simulate minimum impacts you want the
1
2
enter calibration mode
sensor to detect. Ensure the LEDs go red and then green.
1
Ensure that the magnetic
2
Unclip the magnet cover
contact is enabled
and use the correct screws
X+
No. 6.
Pan Head
Screw
Z-
X-
3
Input Learnt!
WIRELESS DEVICE
CONTROL?
Control Inputs?
PRESS
Learn Devices?
>5s
HOLD
Input 01
Available
[01]
Learning...
RELEASE
Very carefully remove
3
the jumper connection
RED =
GREEN =
ANY IMPACT
1s
CALIBRATED
FORCE
IMPACT
DISPLAY BLUE ALARM LED?
3
Ensure that the magnet is aligned
with the detector using the arrows.
SHOCK
.... . .
Input 02
Available
[02]
Learning...
Input Learnt!
PRESS
>5s
HOLD
RELEASE
The Shock will now be in 'Test Mode' for
If the sensitivity needs adjustment
4
5
10mins & the LEDs will indicate the following:
wait 2 seconds & go back to step D1
....10m
PROGRAM INPUTS?
CHANGE INPUTS?
LEDs
Input
[01]
Input
Input 01
Input 02
Input Type [07]
Input Type [06]
Intruder
Intruder
Input Areas
Input Areas
LEDs
[ABCD]
Input Areas
Input Areas
Any
[0]
Any
5s
DIAGNOSTICS?
DIAGNOSTICS?
Wireless Range &
View Wireless
Battery Status?
Device Status?
Signal Strength?
Signal Strength?
Wireless Inputs?
Inputs?
Please Wait
Please Wait
299
299
≤300s
≤300s
33--------------
33--------------
----------------
----------------
After the 10min calibration period all
activations illuminate the blue LED
....10m
....10m
....10m
(Input
types
shown are
just
examples)
[01]
TAMPER
ALARM
ENABLED
[ABCD]
DISABLED
[0]
Advertisement

Related Manuals for HIKVISION Pyronix MC1/SHOCK-WE


Summary of Contents for HIKVISION Pyronix MC1/SHOCK-WE
- Page 1 Wireless Magnetic Contact & Shock Sensor START SHOCK MAGNET ..If replacing Input 02 Partcode: MC1/SHOCK-WE RINS1638 battery, insert Available [02] Document SAP: 102014992-11 in direction shown EN50131-2-6:2008 Security Grade (SG) 2 Remove Learning... EN50131-5-3:2005+A1:2008 Environmental Class (EC) II Battery DIAGNOSTICS? Input Learnt!
- Page 2 SHOCK-WE SHOCK-WE SHOCK-WE SHOCK-WE Drahtloser 2-Wege-Schocksensor und -Magnetkontakt Draadloze schoksensor in twee richtingen & magnetisch contact Capteur de chocs bidirectionnel sans l et contact magnétique Contatto magnetico e sensore vibrazioni wireless bidirezionale Sicherheitsstufe (SG) 2 Beveiligingsniveau (SG) 2 Classe de sécurité (SG) 2 Grado di sicurezza (SG) 2 EN50131-2-6:2008 EN50131-2-6:2008...
- Page 3 SHOCK-WE SHOCK-WE SHOCK-WE SHOCK-WE Contacto magnético y sensor de golpes inalámbrico bidireccional Contacto magnético e sensor de impactos sem os bidirecional Dwukierunkowy bezprzewodowy czujnik uderzenia i styk magnetyczny Certificado Grado (SG) 2 Grau de segurança (SG) 2 Класс безопасности (SG) 2 Stopień...