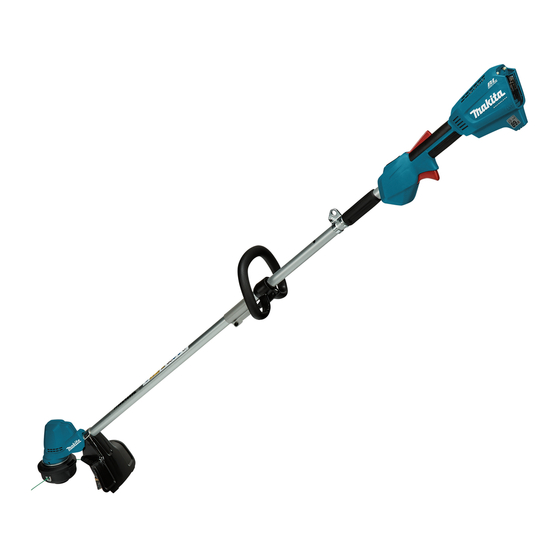
Makita DUR192L Instruction Manual
Cordless grass trimmer
Hide thumbs
Also See for DUR192L:
- Instruction manual (129 pages) ,
- Instruction manual (129 pages) ,
- Instruction manual (53 pages)
Table of Contents
Advertisement
Advertisement
Table of Contents

Related Manuals for Makita DUR192L


Summary of Contents for Makita DUR192L
- Page 1 INSTRUCTION MANUAL Cordless Grass Trimmer DUR192L Read before use.
-
Page 2: Specifications
SPECIFICATIONS Model: DUR192L Type of handle Loop handle No load speed 2: 0 - 6,000 min 1: 0 - 4,500 min Overall length 1,670 mm (without cutting tool) Nylon cord diameter 2.0 mm Applicable cutting tool and Nylon cutting head... -
Page 3: Safety Warnings
Vibration Cutting tool Left hand Right hand Applicable standard (m/s Uncertainty K (m/s Uncertainty K (m/s (m/s Nylon cutting head ISO22867 (ISO11806-1) NOTE: The declared vibration total value(s) has been measured in accordance with a standard test method and may be used for comparing one tool with another. NOTE: The declared vibration total value(s) may also be used in a preliminary assessment of exposure. - Page 4 When operating a power tool outdoors, use an extension cord suitable for outdoor use. Use of a cord suitable for outdoor use reduces the risk of electric shock. If operating a power tool in a damp location is unavoidable, use a residual current device (RCD) protected supply.
-
Page 5: Intended Use
General instructions Battery tool use and care Recharge only with the charger specified by Never allow people unfamiliar with these the manufacturer. A charger that is suitable for instructions, people (including children) with one type of battery pack may create a risk of fire reduced physical, sensory or mental capabil- when used with another battery pack. -
Page 6: Putting Into Operation
Putting into operation Never operate the tool while people, especially children, or pets are nearby. Before assembling or adjusting the tool, Before operation, examine the work area for remove the battery cartridge. stones or other solid objects. They can be Before installing the battery cartridge, inspect thrown and result in serious injury and/or property the tool for damages, loose screws/nuts or... -
Page 7: Cutting Tools
Cutting tools When you leave the tool, even if it is a short time, always remove the battery cartridge. The Do not use a cutting tool which is not recom- unattended tool with the battery cartridge installed mended by us. may be used by unauthorized person and cause Use an applicable cutting attachment for the serious accident. -
Page 8: First Aid
Avoid storing battery cartridge in a con- also void the Makita warranty for the Makita tool and tainer with other metal objects such as charger. nails, coins, etc. -
Page 9: Parts Description
Tips for maintaining maximum Charge the battery cartridge with room tem- perature at 10 °C - 40 °C (50 °F - 104 °F). Let battery life a hot battery cartridge cool down before charging it. Charge the battery cartridge before completely discharged. -
Page 10: Functional Description
Tool / battery protection system FUNCTIONAL DESCRIPTION The tool is equipped with a tool/battery protection sys- tem. This system automatically cuts off power to the motor to extend tool and battery life. The tool will auto- WARNING: matically stop during operation and the indicator lamps Always be sure that the tool is light up if the tool is placed under one of the following switched off and the battery cartridge is removed conditions:... -
Page 11: Overdischarge Protection
Overheat protection for tool or battery Main power switch When the tool or battery cartridge is overheated, the Tap the main power button to turn on the tool. tool stops automatically and the indicator lamp lights To turn off the tool, press and hold the main power up in red. Let the tool and/or battery cool down before button until the indicator lamps go off. -
Page 12: Electronic Function
To prevent the switch trigger from being accidentally pulled, a lock- Electronic function off lever is provided. To start the tool, depress the lock-off lever and pull the switch trigger. The tool speed increases by increasing Constant speed control pressure on the switch trigger. Release the switch trigger to stop. The speed control function provides the constant rota- tion speed regardless of load conditions. - Page 13 Insert the upper pipe into the joint while holding Cut the cable tie (nylon fastener), and remove it down the stopper pin. Make sure that the pin pops up from the tool. through the stopper hole and securely locks the lower pipe. ► 1 . Cable tie Handle Loosen the hex socket head bolt on the handle.
- Page 14 Set the angle and position of the handle as shown Loosen the hex socket head bolt on the hanger. in the figure, and then tighten the bolt. Move the hanger to a comfortable working position and then tighten the bolt. ► 1 . Hanger 2. Hex socket head bolt Installing the protector WARNING: Never use the tool without the...
-
Page 15: Operation
NOTE: Turn the tool upside down so that you can replace the cutting tool easily. Nylon cutting head NOTICE: Be sure to use genuine Makita nylon cutting head. Insert the hex wrench through the hole in the motor housing to lock the spindle. Rotate the spindle ► 1 . - Page 16 Wear the shoulder harness on your left shoulder. The shoulder harness features a means of quick release. Simply squeeze the sides of the buckle to release the tool from the shoulder harness. Clasp the hook on the shoulder strap to tool's hanger.
-
Page 17: Maintenance
Discoloration, deformation or cracks may result. To maintain product SAFETY and RELIABILITY, repairs, any other maintenance or adjustment should be performed by Makita Authorized or Factory Service Centers, always using Makita replacement parts. Cleaning the tool Clean the tool by wiping off dust, dirt, or cut off grass with a dry cloth or one dipped in soapy water and wrung out. - Page 18 95-M10L 100 mm 80 mm 18 ENGLISH...
- Page 19 96-M10L 100 mm 19 ENGLISH...
-
Page 20: Troubleshooting
TROUBLESHOOTING Before asking for repairs, conduct your own inspection first. If you find a problem that is not explained in the manual, do not attempt to dismantle the tool. Instead, ask Makita Authorized Service Centers, always using Makita replace- ment parts for repairs. State of abnormality Probable cause (malfunction) Remedy Motor does not run. Battery cartridge is not installed. Install the battery cartridge. - Page 24 Makita Europe N.V. Jan-Baptist Vinkstraat 2, 3070 Kortenberg, Belgium Makita Corporation 3-11-8, Sumiyoshi-cho, Anjo, Aichi 446-8502 Japan 885822-223 www.makita.com 20200805...