
Related Manuals for Makita XSH04


Summary of Contents for Makita XSH04
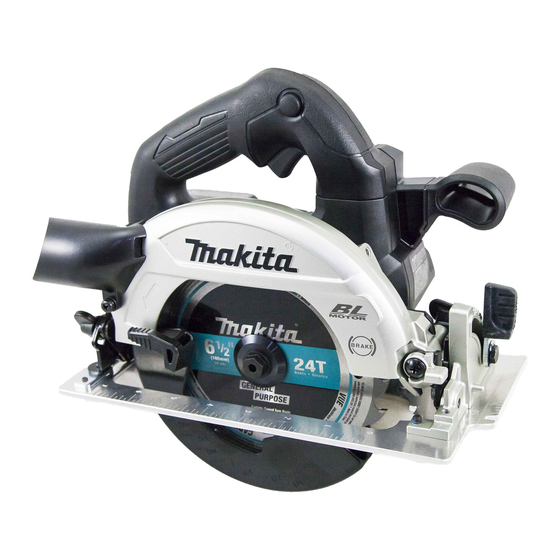
- Page 1 INSTRUCTION MANUAL MANUAL DE INSTRUCCIONES Cordless Circular Saw Sierra Circular Inalámbrica XSH04 XSH05 IMPORTANT: Read Before Using. IMPORTANTE: Lea antes de usar.
-
Page 2: Specifications
ENGLISH (Original instructions) SPECIFICATIONS Model: XSH04 XSH05 Blade diameter 165 mm (6-1/2″) Max. Cutting depth at 0° 57 mm (2-1/4″) at 45° bevel 41 mm (1-5/8″) at 50° bevel 37 mm (1-7/16″) No load speed 5,000/min Overall length 270 mm (10-5/8″) Rated voltage D.C. - Page 3 Personal Safety Maintain power tools and accessories. Check for misalignment or binding of moving parts, break- Stay alert, watch what you are doing and use age of parts and any other condition that may common sense when operating a power tool. affect the power tool’s operation.
- Page 4 Kickback is the result of saw misuse and/or incorrect Cordless circular saw safety warnings operating procedures or conditions and can be avoided by taking proper precautions as given below. Cutting procedures Maintain a firm grip with both hands on the DANGER: Keep hands away from cutting area saw and position your arms to resist kickback and the blade.
- Page 5 Use extra caution when sawing into existing Use extra caution when cutting damp wood, pres- walls or other blind areas. The protruding blade sure treated lumber, or wood containing knots. may cut objects that can cause kickback. Maintain smooth advancement of tool without decrease in blade speed to avoid overheating the blade tips.
- Page 6 It will also void the Makita warranty for the Makita tool and charger. no load speed Tips for maintaining maximum revolutions or reciprocation per minute...
-
Page 7: Functional Description
24. When storing the wireless unit, keep it in the not being inserted correctly. supplied case or a static-free container. 25. Do not insert any devices other than Makita Tool / battery protection system wireless unit into the slot on the tool. -
Page 8: Overload Protection
Overload protection The remaining battery capacity is shown as the following table. Battery indicator status Remaining When the tool/battery is operated in a manner that battery causes it to draw an abnormally high current, the tool capacity automatically stops. In this situation, turn the tool off Blinking and stop the application that caused the tool to become overloaded. -
Page 9: Adjusting Depth Of Cut
The mode indicator stops personal injury. Return tool to a Makita service center blinking and then lights up or turns off if you reduce the for proper repairs BEFORE further usage. -
Page 10: Bevel Cutting
You can read the cut depth with the scale on the lower Sighting guard. For straight cuts, align the 0° position on the front of the base with your cutting line. For 45° bevel cuts, align the 45° position with it. ►... -
Page 11: Electric Brake
This tool is equipped with an electric blade brake. If the tool consistently fails to quickly stop blade after switch CAUTION: Always remove the battery when lever release, have tool serviced at a Makita service hanging the tool with the hook. center. CAUTION:... - Page 12 CAUTION: Use only the Makita wrench to install or remove the circular saw blade. To remove the circular saw blade, press the shaft lock fully so that the circular saw blade cannot revolve and use the hex wrench to loosen the hex bolt.
-
Page 13: Operation
Connecting a vacuum cleaner When you wish to perform clean cutting operation, connect a Makita vacuum cleaner to your tool. Connect a hose of the vacuum cleaner to the dust nozzle as shown in the figure. - Page 14 16. In the event the tool is dropped, it must be tagged and removed from service, and should be inspected by a Makita Factory or Authorized Service Center. ► 1. Rip fence (Guide rule) 2. Clamping screw The handy rip fence allows you to do extra-accurate straight cuts.
- Page 15 Tool registration for the vacuum cleaner NOTE: A Makita vacuum cleaner supporting the wireless activation function is required for the tool registration. NOTE: Finish installing the wireless unit to the tool before starting the tool registration.
- Page 16 Set the stand-by switch on the vacuum cleaner to "AUTO". Starting the wireless activation function NOTE: Finish the tool registration for the vacuum cleaner prior to the wireless activation. NOTE: Refer to the instruction manual of the vacuum cleaner, too. After registering a tool to the vacuum cleaner, the vacuum cleaner will automatically runs along with the switch operation of the tool.
- Page 17 Pull the switch trigger of the tool. Check if the NOTE: The wireless activation lamp on the tool will vacuum cleaner runs while the switch trigger is being stop blinking in blue when there is no operation for pulled. 2 hours. In this case, set the stand-by switch on the To stop the wireless activation of the vacuum cleaner, vacuum cleaner to "AUTO"...
- Page 18 If the cancellation is performed successfully, the wire- Cancelling tool registration for the less activation lamps will light up in red for 2 seconds vacuum cleaner and start blinking in blue. NOTE: The wireless activation lamps finish blinking in Perform the following procedure when cancelling the red after 20 seconds elapsed.
- Page 19 Before asking for repairs, conduct your own inspection first. If you find a problem that is not explained in the manual, do not attempt to dismantle the tool. Instead, ask Makita Authorized Service Centers, always using Makita replace- ment parts for repairs.
-
Page 20: Maintenance
To maintain product SAFETY and RELIABILITY, repairs, any other maintenance or adjustment should Adjusting the parallelism be performed by Makita Authorized or Factory Service Centers, always using Makita replacement parts. This adjustment has been made at the factory. But if it is off, you can adjust it as the following procedure. -
Page 21: Optional Accessories
OPTIONAL ACCESSORIES CAUTION: These accessories or attachments are recommended for use with your Makita tool specified in this manual. The use of any other accessories or attachments might present a risk of injury to persons. Only use accessory or attachment for its stated purpose. -
Page 22: Especificaciones
ESPAÑOL (Instrucciones originales) ESPECIFICACIONES Modelo: XSH04 XSH05 Diámetro del disco 165 mm (6-1/2″) Profundidad de corte máxima a 0° 57 mm (2-1/4″) bisel a 45° 41 mm (1-5/8″) bisel a 50° 37 mm (1-7/16″) Velocidad sin carga 5 000 r/min Longitud total 270 mm (10-5/8″) - Page 23 No maltrate el cable. Nunca utilice el cable No permita que la familiaridad adquirida debido para transportar, jalar o desconectar la herra- al uso frecuente de las herramientas haga que se mienta eléctrica. Mantenga el cable alejado del sienta confiado e ignore los principios de seguri- calor, aceite, objetos cortantes o piezas móvi- dad de las herramientas.
- Page 24 Uso y cuidado de la herramienta a batería Ajuste la profundidad de corte al grosor de la pieza de trabajo. Debe verse menos de un diente Recargue sólo con el cargador especificado completo por debajo de la pieza de trabajo. por el fabricante.
- Page 25 Sujete la sierra firmemente con las dos manos Las palancas de fijación de los ajustes de pro- y coloque sus brazos de forma que ofrezcan fundidad y de bisel del disco deben ser apreta- resistencia a la fuerza del retroceso brusco. das y aseguradas antes de realizar el corte.
- Page 26 Antes de dejar la sierra en el banco o en el Antes de depositar la herramienta tras realizar suelo, observe siempre que el protector inferior un corte, asegúrese de que el protector esté esté cubriendo el disco. Un disco desprotegido, cerrado y de que el disco se haya detenido por girando por inercia, hará...
- Page 27 Asimismo, esto inva- lidará la garantía de Makita para la herramienta y el cargador Makita. Antes de utilizar el cartucho de batería, lea todas las instrucciones e indicaciones de precaución...
-
Page 28: Descripción Del Funcionamiento
Introduzca siempre com- 25. No inserte ningún otro dispositivo que no sea pletamente el cartucho de batería hasta que la unidad inalámbrica de Makita en la ranura de el indicador rojo no pueda verse. Si no, podría la herramienta. accidentalmente salirse de la herramienta y caer al 26. -
Page 29: Protección Contra Sobrecarga
Sistema de protección para la Indicación de capacidad restante de la batería herramienta/batería Si jala el gatillo interruptor, el indicador de batería mos- trará la capacidad restante de la batería. La herramienta está equipada con un sistema de pro- tección para la herramienta/batería. Este sistema corta en forma automática el suministro de energía al motor para prolongar la vida útil de la herramienta y la batería. - Page 30 El indicador de modo se encenderá en verde cuando una operación accidental y lesiones personales graves. la herramienta esté funcionando en “modo de alta Lleve la herramienta a un centro de servicio Makita para torsión”. las reparaciones apropiadas ANTES de continuar su uso.
-
Page 31: Ajuste De La Profundidad De Corte
Afloje la palanca y el tornillo de fijación. Ajuste el ángulo Ajuste de la profundidad de corte deseado inclinando según corresponda, después apriete la palanca y el tornillo de fijación firmemente. PRECAUCIÓN: Después de ajustar la pro- fundidad de corte, siempre apriete la palanca firmemente. - Page 32 Makita para que le den servicio. PRECAUCIÓN: No jale la herramienta hacia abajo cuando esté colgada.
-
Page 33: Montaje
PRECAUCIÓN: Utilice solamente la llave Makita para instalar o extraer el disco de la sierra circular. Para extraer el disco de la sierra circular, presione el bloqueo del eje por completo de forma que el disco de la sierra circular no pueda girar y use la llave hexagonal para aflojar el perno hexagonal. -
Page 34: Operación
Para la herramienta sin anillo Conexión de una aspiradora Cuando desee realizar una operación de corte limpia, conecte una aspiradora Makita a su herramienta. Conecte la manguera de la aspiradora a la boquilla para polvo tal como se muestra en la figura. - Page 35 ► 1. Tope lateral de corte (regla guía) 2. Tornillo de fijación servicio autorizado Makita. El útil tope lateral de corte le permite hacer cortes rec- tos extra precisos. Simplemente deslice el tope lateral de corte para que quede ceñidamente ajustado contra...
- Page 36 Registro de la herramienta para la aspiradora Inicio de la función de activación inalámbrica Instalación de la unidad inalámbrica Accesorio opcional PRECAUCIÓN: Coloque la herramienta sobre una superficie plana y estable cuando vaya a instalar la unidad inalámbrica. AVISO: Limpie el polvo y la suciedad en la herra- mienta antes de instalar la unidad inalámbrica.
- Page 37 Registro de la herramienta para la aspiradora NOTA: Para el registro de la herramienta, se requiere una aspiradora Makita compatible con la función de activación inalámbrica. NOTA: Termine de instalar la unidad inalámbrica en la herramienta antes de comenzar con el registro de la herramienta.
- Page 38 Oprima el botón de activación inalámbrica en la NOTA: Las luces indicadoras de activación inalám- herramienta durante un lapso breve. La luz indicadora brica terminarán parpadeando en verde después de de activación inalámbrica parpadeará en azul. un lapso de 20 segundos. Oprima el botón de acti- vación inalámbrica en la herramienta mientras la luz indicadora de activación inalámbrica en la aspiradora esté...
- Page 39 Descripción del estado de la luz indicadora de activación inalámbrica ► 1. Luz indicadora de activación inalámbrica La luz indicadora de activación inalámbrica muestra el estado de la función de activación inalámbrica. Consulte la tabla a continuación para ver qué significa el estado de la luz indicadora. Estado Luz indicadora de activación inalámbrica Descripción...
- Page 40 Oprima el botón de activación inalámbrica en la aspiradora durante 6 segundos. La luz indicadora de activación inalámbrica parpadeará en verde y luego se pondrá en rojo. Después de eso, oprima el botón de activación inalámbrica en la herramienta de la misma manera.
- Page 41 Antes de solicitar alguna reparación, primero realice una inspección por su cuenta. Si detecta algún problema que no esté explicado en el manual, no intente desensamblar la herramienta. En vez de esto, solicite la reparación a un centro de servicio autorizado de Makita, usando siempre piezas de repuesto Makita. Estado de la anomalía Causa probable (avería)
-
Page 42: Mantenimiento
Para mantener la SEGURIDAD y FIABILIDAD del pro- ducto, las reparaciones, y cualquier otra tarea de man- tenimiento o ajuste deberán ser realizadas en centros de servicio autorizados o de fábrica Makita, empleando ► 1. Tope siempre repuestos Makita. 42 ESPAÑOL... -
Page 43: Accesorios Opcionales
PRECAUCIÓN: Estos accesorios o aditamen- tos están recomendados para utilizarse con su herramienta Makita especificada en este manual. El empleo de cualquier otro accesorio o aditamento puede conllevar el riesgo de lesiones personales. Utilice los accesorios o aditamentos solamente para ►... - Page 44 Para reducir la exposición a estos productos químicos: trabaje en un área bien ventilada y póngase el equipo de seguridad indicado, tal como las máscaras contra polvo que están especialmente diseñadas para filtrar partículas microscópicas. Makita Corporation 3-11-8, Sumiyoshi-cho, Anjo, Aichi 446-8502 Japan 885646-948...