
Related Manuals for Makita XUX02


Summary of Contents for Makita XUX02
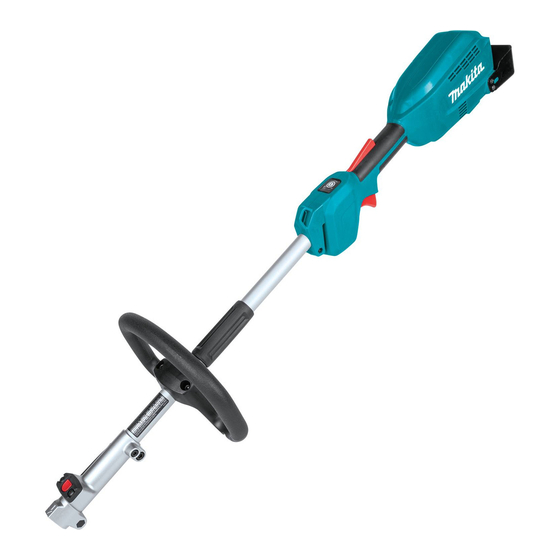
- Page 1 INSTRUCTION MANUAL MANUAL DE INSTRUCCIONES Cordless Multi Function Power Head Herramienta Multifuncional Inalámbrica XUX02 IMPORTANT: Read Before Using. IMPORTANTE: Lea antes de usar.
-
Page 2: Specifications
ENGLISH (Original instructions) SPECIFICATIONS Model: XUX02 No load speed 0 - 6,800/min (without attachment) High 0 - 9,700/min Overall length 977 mm (38-1/2″) Rated voltage D.C. 18 V Net weight 4.0 kg - 10.3 kg (8.8 lbs - 22.7 lbs) •... -
Page 3: Intended Use
Approved attachment Type Model Grass trimmer attachment EM409MP Hedge trimmer attachment EN401MP, EN410MP Ground trimmer attachment EN420MP Pole saw attachment EY401MP Cultivator attachment KR400MP, KR401MP Edger attachment EE400MP Coffee harvester attachment EJ400MP Shaft extension attachment LE400MP Power brush attachment BR400MP Power sweep attachment SW400MP Avoid body contact with earthed or grounded Intended use... -
Page 4: Additional Safety Instructions
Do not overreach. Keep proper footing and Battery tool use and care balance at all times. This enables better control Recharge only with the charger specified by of the power tool in unexpected situations. the manufacturer. A charger that is suitable for Dress properly. -
Page 5: Personal Protective Equipment
When using cutting blades, avoid kickback 27. Do not open or mutilate the battery(ies). and always prepare for an accidental kickback. Released electrolyte is corrosive and may cause See the section for Kickback. damage to the eyes or skin. It may be toxic if swallowed. When you leave the tool, even if it is a short time, always remove the battery cartridge. - Page 6 Follow your local regulations relating to disposal of battery. 12. Use the batteries only with the products specified by Makita. Installing the batteries to non-compliant products may result in a fire, exces- sive heat, explosion, or leak of electrolyte. 6 ENGLISH...
-
Page 7: Parts Description
(more than six months). 18. Keep the battery away from children. SAVE THESE INSTRUCTIONS. CAUTION: Only use genuine Makita batteries. Use of non-genuine Makita batteries, or batteries that have been altered, may result in the battery bursting causing fires, personal injury and damage. It will also void the Makita warranty for the Makita tool and charger. PARTS DESCRIPTION... -
Page 8: Functional Description
Tool / battery protection system FUNCTIONAL DESCRIPTION The tool is equipped with a tool/battery protection sys- tem. This system automatically cuts off power to the motor to extend tool and battery life. The tool will auto- WARNING: matically stop during operation and the indicator lamps Always be sure that the tool is light up if the tool is placed under one of the following switched off and the battery cartridge is removed conditions: before adjusting or checking function on the tool. -
Page 9: Overdischarge Protection
Overheat protection for tool or battery Main power switch When the tool or battery cartridge is overheated, the tool stops automatically and the indicator lamp lights WARNING: Always turn off the main power up in red. Let the tool and/or battery cool down before switch when not in use. turning the tool on again. Press the main power button to turn on the tool. To turn Overdischarge protection off the tool, press and hold the main power button until the indicator lamps go off. -
Page 10: Mounting The Handle
To prevent the switch trigger from being accidentally Electronic torque control function pulled, a lock-off lever is provided. The tool electronically detects a sudden drop in the rotation speed which may cause a kickback. In this situation, the tool automatically stops to prevent further rotation of cutting tool. To restart the tool, release the switch trigger. Clear the cause of sudden drop in the rotation speed and then turn the tool on. NOTE: This function is not a preventive measure for kickbacks. ASSEMBLY WARNING: Always be sure that the tool is switched off... -
Page 11: Adjusting The Handle Position
Make sure that the surface of the lever is parallel to the Mounting the attachment pipe pipe. To remove the pipe, turn the lever toward the attach- CAUTION: Always check that the attachment ment side and pull the pipe out while pressing down the pipe is secured after installation. - Page 12 Makita. If you put on the shoulder harness included in the tool package and the shoulder harness of the back-...
-
Page 13: Cleaning The Tool
NOTICE: Never use gasoline, benzine, thinner, alcohol or the like. Discoloration, deformation or cracks may result. To maintain product SAFETY and RELIABILITY, repairs, any other maintenance or adjustment should be performed by Makita Authorized or Factory Service Centers, always using Makita replacement parts. 13 ENGLISH... -
Page 14: Troubleshooting
ACCESSORIES Please refer to the annexed warranty sheet for the most current warranty terms applicable to this product. If annexed warranty sheet is not available, refer to the CAUTION: warranty details set forth at below website for your These accessories or attachments respective country. are recommended for use with your Makita tool specified in this manual. The use of any other United States of America: www.makitatools.com accessories or attachments might present a risk of Canada: www.makita.ca injury to persons. Only use accessory or attachment Other countries: www.makita.com for its stated purpose. If you need any assistance for more details regard- ing these accessories, ask your local Makita Service Center. -
Page 15: Especificaciones
ESPAÑOL (Instrucciones originales) ESPECIFICACIONES Modelo: XUX02 Velocidad sin carga Baja 0 r/min - 6 800 r/min (sin el accesorio) Alta 0 r/min - 9 700 r/min Longitud total 977 mm (38-1/2″) Tensión nominal 18 V c.c. Peso neto 4,0 kg - 10,3 kg (8,8 lbs - 22,7 lbs) •... -
Page 16: Uso Pretendido
Accesorio aprobado Tipo Modelo Accesorio de Desbrozadora EM409MP Accesorio para Cortasetos EN401MP, EN410MP Accesorio de Corte a Ras de Piso EN420MP Accesorio para Sierra de Extensión EY401MP Accesorio para Cultivador KR400MP, KR401MP Accesorio Rebordeador EE400MP Accesorio para Cosecha de Café EJ400MP Extensión del Eje LE400MP... - Page 17 Use equipo de protección personal. Póngase Guarde la herramienta eléctrica que no use siempre protección para los ojos. El equipo fuera del alcance de los niños y no permita que las personas que no están familiarizadas protector tal como máscara contra el polvo, zapa- con ella o con las instrucciones la operen. Las tos de seguridad antiderrapantes, casco rígido y protección para oídos utilizado en las condiciones herramientas eléctricas son peligrosas en manos...
- Page 18 No exponga la herramienta ni la batería al Cuando toque la cuchilla de corte, póngase guan- fuego ni a una temperatura excesiva. La expo- tes protectores. Las cuchillas de corte podrían pro- sición al fuego o a una temperatura superior a los vocar cortaduras graves en las manos descubiertas. 130 °C podría causar una explosión.
-
Page 19: Equipo De Protección Personal
Equipo de protección personal Para evitar un retroceso brusco: Coloque el segmento de la cuchilla en un ángulo que en un reloj estaría represen- tado entre las 8 y las 11 en punto. Nunca coloque el segmento entre el ángulo que en un reloj estaría represen- tado entre las 12 y las 2 en punto. - Page 20 12. Utilice las baterías únicamente con los pro- Instrucciones importantes de ductos especificados por Makita. Instalar las seguridad para el cartucho de baterías en productos que no cumplan con los batería requisitos podría ocasionar un incendio, un calen- tamiento excesivo, una explosión o una fuga de electrolito. Antes de utilizar el cartucho de batería, lea 13.
-
Page 21: Descripción De Las Piezas
DESCRIPCIÓN DE LAS PIEZAS Cartucho de batería Palanca de desbloqueo Gatillo interruptor Colgador Mango Botón de liberación Traba Luces indicadoras Botón de encendido principal Arnés para hombro DESCRIPCIÓN DEL FUNCIONAMIENTO ADVERTENCIA: Asegúrese siempre de que la herramienta esté apagada y que el cartucho de batería haya sido extraído antes de realizar cualquier ajuste o revisión del funcionamiento de la herramienta. -
Page 22: Protección Contra Sobrecarga
Protección contra el Sistema de protección para la sobrecalentamiento de la herramienta/batería herramienta o la batería La herramienta está equipada con un sistema de Cuando la herramienta o el cartucho de batería se protección de la herramienta/batería. Este sistema sobrecalientan, la herramienta se detendrá automá- corta automáticamente la alimentación al motor para ticamente y la luz indicadora se ilumina en color rojo. prolongar la vida de la herramienta y la batería. La Permita que la herramienta o la batería se enfríen antes herramienta se detendrá automáticamente durante la de volver a encender la herramienta. operación y las luces indicadoras se encenderán si la herramienta se somete a alguna de las siguientes Protección en caso de sobredescarga condiciones: Cuando la capacidad de la batería se reduce, la herra-... -
Page 23: Ajuste De Velocidad
NOTA: Dependiendo de las condiciones de uso y PRECAUCIÓN: Antes de insertar el cartucho la temperatura ambiente, la indicación podrá diferir de batería en la herramienta, compruebe siem- ligeramente de la capacidad real. pre y cerciórese de que el gatillo interruptor se NOTA: La primera luz indicadora (extrema izquierda) acciona debidamente y que vuelve a la posición parpadeará cuando el sistema de protección de “OFF”... -
Page 24: Montaje
Luces indicadoras Modo Alta Baja Freno eléctrico Esta herramienta está equipada con un freno eléctrico. ► 1 . Abrazadera 2. Perno de cabeza hueca hexagonal Si de manera consistente la herramienta no logra dete- 3. Mango 4. Marca de flecha 5. Separador nerse rápidamente después de soltar el gatillo interrup- tor, lleve la herramienta a nuestro centro de servicio para que le den mantenimiento. - Page 25 Makita. Para extraer el tubo, gire la palanca hacia el lado del Si se pone el arnés para hombro incluido en el accesorio y jale el tubo hacia afuera mientras presiona paquete de la herramienta y el arnés para hombro...
- Page 26 Colóquese el arnés para hombro en su hombro El arnés para hombro cuenta con un medio de libera- izquierdo. ción rápida. Simplemente apriete los lados de la hebilla para liberar la herramienta del arnés para hombro. Abroche el gancho en la correa para hombro en el colgador de la herramienta.
-
Page 27: Mantenimiento
Antes de solicitar alguna reparación, primero realice una inspección por su cuenta. Si detecta algún problema que no esté explicado en el manual, no intente desensamblar la herramienta. En vez de esto, solicite la reparación a un centro de servicio autorizado de Makita, usando siempre piezas de repuesto Makita. Estado de la anomalía Causa probable (avería) -
Page 28: Accesorios Opcionales
PRECAUCIÓN: Estos accesorios o aditamen- tos están recomendados para utilizarse con su herramienta Makita especificada en este manual. El empleo de cualquier otro accesorio o aditamento puede conllevar el riesgo de lesiones personales. Utilice los accesorios o aditamentos solamente para su fin establecido. - Page 32 Para reducir la exposición a estos productos químicos: trabaje en un área bien ventilada y póngase el equipo de seguridad indicado, tal como las máscaras contra polvo que están especialmente diseñadas para filtrar partículas microscópicas. Makita Corporation 3-11-8, Sumiyoshi-cho, Anjo, Aichi 446-8502 Japan 885829A940...