
Related Manuals for NETGEAR WNDAP620


Summary of Contents for NETGEAR WNDAP620
- Page 1 ProSafe 3x3 Single Radio Dual Band Wireless-N Access Point WNDAP620 Contents English Deutsch Français Русский NETGEAR, Inc. 350 East Plumeria Drive San Jose, CA 95135 version 1.0...
- Page 2 Set Up the Access Point Follow these instructions to set up your wireless access point. Before proceeding with the WNDAP620 installation, familiarize yourself with the contents of the Resource CD. See the Reference Manual for instructions on advanced configuration options.
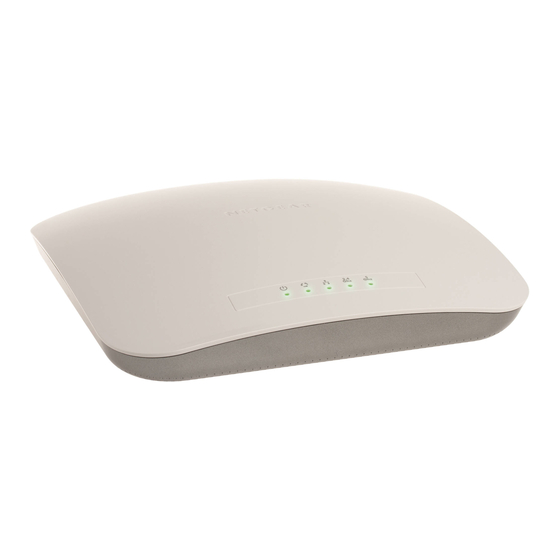
- Page 3 English c. Securely insert the other end of the cable into an access point Ethernet port (point B in the illustration). NETGEAR Cable d. Connect the power adapter to the access point. Verify the Ethernet following: port The Power LED blinks when the access point is first turned on.
- Page 4 English e. If you use DHCP, reserve an IP address (based on the access point’s MAC address) on the DHCP server. You can then use that address to log in to the access point. f. Select Configuration > Wireless > Basic > Wireless Settings and select the Turn Radio On setting.
- Page 5 Make sure the power cord is connected to the wireless access point and plugged in to a working power outlet or power strip. • Make sure you are using the correct NETGEAR power adapter supplied with your wireless access point. •...
- Page 6 • Log in to the access point and verify that the radio is turned on. • Contact NETGEAR if the Wireless LAN LED remains off. I cannot configure the access point from a browser. Check these items: •...
- Page 7 Statement of Conditions In the interest of improving internal design, operational function, and/operability, NETGEAR reserves the right to make changes to the product described in this document without notice. NETGEAR does not assume any liability that may occur due to the use or application of the product(s) or circuit layout(s) described herein.
- Page 8 ProSafe 3x3 Single Radio Dual Band Wireless-N Access Point WNDAP620 Lieferumfang Folgendes muss im Karton enthalten sein: • ProSafe 3x3 Single Radio Dual Band Wireless-N Access Point WNDAP620 • Netzwerkkabel (Cat 5) • Netzteil und -kabel (12 V, 1,5 A) •...
- Page 9 Die Power-LED blinkt beim Einschalten des Access Points. Nach ein paar Sekunden sollte sie konstant grün leuchten. Falls WNDAP620 diese LED nach 30 Sekunden nicht leuchtet oder immer noch blinkt, überprüfen Sie die Anschlüsse und außerdem die Stellung eines eventuell vorhandenen Steckdosenschalters.
- Page 10 Deutsch c. Wählen Sie im Menü Configuration (Konfiguration) > System > Basic (Grundeinstellungen) > General (Allgemein) aus. Füllen Sie das Feld Access Point Name aus, und wählen Sie Ihr(e) Land/Region aus der Dropdown- Liste aus. d. Wählen Sie im Menü die Optionen Configuration (Konfiguration) > IP > IP Settings (IP-Einstellungen) aus, und konfigurieren Sie die IP-Einstellungen für Ihr Netzwerk.
- Page 11 Deutsch Deckenmontage Wandmontage Tipp: Der Access Point unterstützt PoE (Power Over Ethernet). Wenn Ihr Switch PoE unterstützt, benötigen Sie für den Access Point kein Netzteil. Das ist besonders nützlich, wenn der Access Point an einer schwer erreichbaren Stelle installiert ist. Überprüfen der drahtlosen Verbindung Überprüfen Sie auf einem Computer mit 802.11b/g/n-Wireless-Adapter die Verbindung: Öffnen Sie einen Browser und rufen Sie eine Website im Internet auf,...
- Page 12 Melden Sie sich am Access Point an und überprüfen Sie, ob die Funkverbindung aktiviert ist (Kontrollkästchen Radio). • Wenn die WLAN-LED immer noch nicht leuchtet, setzen Sie sich mit NETGEAR in Verbindung. Der Access Point lässt sich nicht über einen Browser einrichten.
- Page 13 Nutzungsbedingungen Zur Verbesserung des internen Designs, des Betriebs und der Funktionsfähigkeit behält NETGEAR sich das Recht vor, das in diesem Dokument beschriebene Produkt ohne vorherige Ankündigung zu ändern. NETGEAR lehnt im Zusammenhang mit dem Einsatz oder der Anwendung der hier beschriebenen Produkte oder Schaltpläne jegliche Haftung ab.
- Page 14 Configuration du point d'accès Suivez ces instructions pour configurer votre point d'accès sans fil. Avant de procéder à l'installation du WNDAP620, familiarisez-vous avec le contenu du CD. Consultez le Manuel de référence pour en savoir plus sur les options de configuration avancée.
- Page 15 Français c. Insérez correctement l'autre extrémité du câble dans l'un des ports Ethernet du point d'accès (point B sur l'illustration). Câble NETGEAR d. Connectez l'adaptateur secteur au point d'accès. Vérifiez les points suivants : Port Le voyant d'alimentation Ethernet clignote quand le point d'accès est allumé.
- Page 16 Français d. Sélectionnez Configuration > IP > Settings (Paramètres) dans le menu et configurez les paramètres IP de votre réseau. e. Si vous utilisez un client DHCP, réservez une adresse IP (basée sur l'adresse MAC du point d'accès) sur le serveur DHCP. Vous pouvez ensuite utiliser cette adresse pour vous connecter au point d'accès.
- Page 17 Assurez-vous que le cordon d'alimentation est connecté au point d'accès sans fil et branché à une prise ou une rallonge électrique qui fonctionne. • Vérifiez que vous utilisez bien l'adaptateur secteur NETGEAR fourni avec votre point d'accès sans fil. •...
- Page 18 • Connectez-vous au point d'accès et vérifiez que la radio est allumée. • Contactez NETGEAR si le voyant WLAN ne s'allume toujours pas. Je n'arrive pas à configurer le point d'accès à partir du navigateur. Dans ce cas, vérifiez les points suivants : •...
- Page 19 Conditions Afin d'améliorer la conception interne, les fonctions opérationnelles et/ou le fonctionnement, NETGEAR se réserve le droit d'apporter des modifications au produit décrit dans ce document sans préavis. NETGEAR décline toute responsabilité quant aux conséquences de l'utilisation des produits ou des configurations de circuits décrits dans le présent document.
- Page 20 Двухдиапазонная беспроводная точка доступа ProSafe 3x3 Wireless-N WNDAP620 Комплектация Откройте упаковку и проверьте ее содержимое: • Двухдиапазонная беспроводная точка доступа ProSafe 3x3 Wireless-N WNDAP620 • Кабель Ethernet с прямыми соединениями категории 5 • Адаптер и шнур питания (12 В, 1,5 А) •...
- Page 21 Русский c. Другой конец кабеля надежно подключите к порту Ethernet точки А доступа (точка Б на рисунке). Кабель NETGEAR d. Подключите адаптер (блок) питания к точке доступа. Проверьте следующее: Порт Б При первом включении точки Ethernet доступа индикатор питания мигает. Через несколько секунд он...
- Page 22 Русский c. Выберите Configuration > System > Basic > General (Конфигурация > Система > Основные > Общие) в меню. Укажите имя точки доступа в поле Access Point Name (Имя точки доступа) и выберите в раскрывающемся списке Country/Region (Страна/Регион) страну или регион, в котором будет работать...
- Page 23 Русский Монтаж на потолке Настенный монтаж Совет. Точка доступа поддерживает подачу питания через Ethernet-порт по технологии Power over Ethernet (PoE). Если имеется коммутатор, обеспечивающий функцию PoE, использовать адаптер питания для точки доступа не требуется. Это может быть особенно удобно, если точка...
- Page 24 • Убедитесь, что кабель питания подсоединен к беспроводной точке доступа и к исправной электрической розетке или удлинителю. • Убедитесь, что используется адаптер питания NETGEAR, который поставляется с точкой доступа. • В случае использования функции PoE убедитесь, что коммутатор PoE подает...
- Page 25 NETGEAR оставляет за собой право без уведомления модифицировать описанные в настоящем документе продукты в целях усовершенствования внутренней конструкции, расширения функциональных возможностей и повышения удобства использования. NETGEAR не несет никакой ответственности за все, что связано с использованием продуктов или электрических схем, описанных в этом документе. Техническая поддержка...
- Page 28 NETGEAR, the NETGEAR logo, and Connect with Innovation are trademarks and/or registered trademarks of NETGEAR, Inc. and/or its subsidiaries in the United States and/or other countries. Information is subject to change without notice. Other brand and product names are registered trademarks or trademarks of their respective holders.