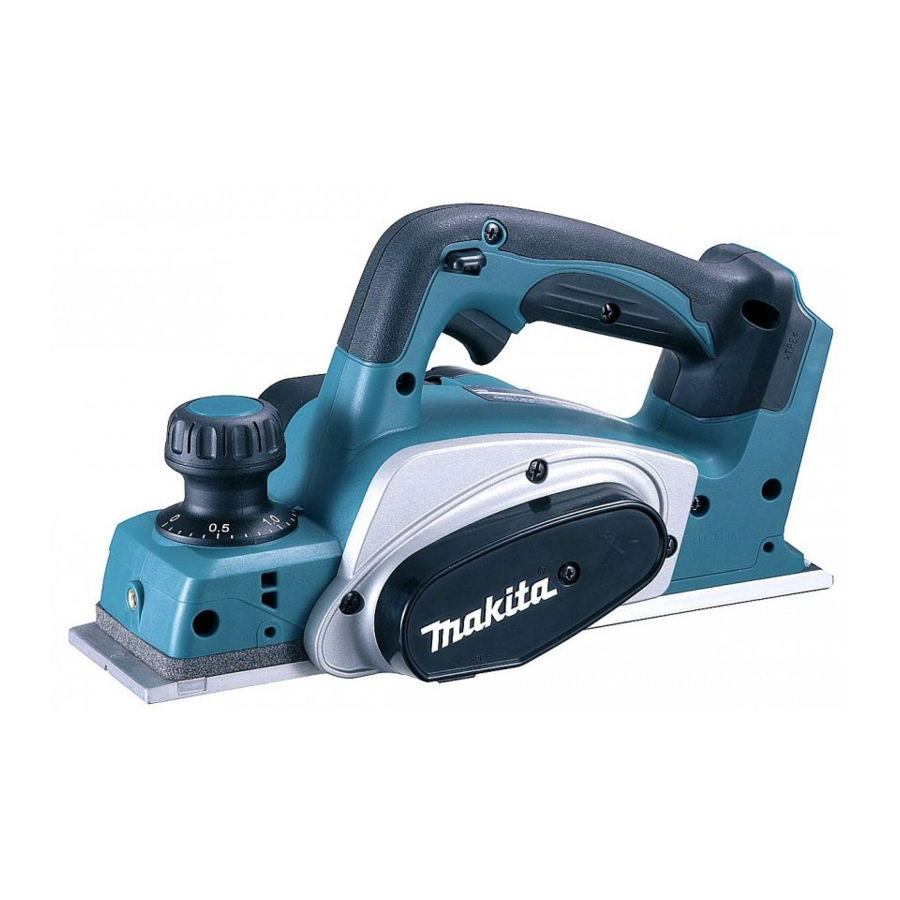
Makita DKP140 Instruction Manual
Cordless planer
Hide thumbs
Also See for DKP140:
- Instruction manual (69 pages) ,
- Instruction manual (17 pages) ,
- Instruction manual (73 pages)

Related Manuals for Makita DKP140


Summary of Contents for Makita DKP140
- Page 1 INSTRUCTION MANUAL Cordless Planer DKP140 DKP180 011751 IMPORTANT: Read Before Using.
-
Page 2: Specifications
(tri-axial vector sum) determined according to EN60745: ・ Only for EU countries Ni-MH Model DKP140 Do not dispose of electric equipment or Li-ion battery pack together with household Work mode : planing softwood waste material! Vibration emission (a ) : 3.5 m/s... -
Page 3: Ec Declaration Of Conformity
(grounded) power Makita Corporation responsible tools. Unmodified plugs and matching outlets will manufacturer declare that the following Makita reduce risk of electric shock. machine(s): Avoid body contact with earthed or grounded Designation of Machine: surfaces such as pipes, radiators, ranges and Cordless Planer refrigerators. - Page 4 27. Under abusive conditions, liquid may be 16. Use only Makita blades specified in this ejected from the battery; avoid contact. If manual.
- Page 5 17. Always use the correct dust mask/respirator SAVE THESE INSTRUCTIONS. for the material and application you are working with. Tips for maintaining maximum battery life Charge the battery cartridge before completely SAVE THESE INSTRUCTIONS. discharged. Always stop tool operation and charge the WARNING: battery cartridge when you notice less tool DO NOT let comfort or familiarity with product...
-
Page 6: Functional Description
When the tool is overloaded: • FUNCTIONAL DESCRIPTION At this time, release the switch trigger, remove the battery cartridge and remove causes of overload and then pull the switch CAUTION: trigger again to restart. Always be sure that the tool is switched off and the •... - Page 7 Use only the Makita wrench provided to remove or the adjusting plate. Now slip the heel of the adjusting •...
- Page 8 For tool with mini planer blades 1. Mini planer blade 2. Groove 1. Socket wrench 3. Set plate 2. Bolt 4. Hex. flange head 3. Loosen bolts 4. Tighten 5. Drum cover 6. Drum 7. Adjusting plate 002566 Set the drum cover over the adjusting plate/set 011740 Remove the existing blade, if the tool has been in plate and screw in the three hex flange head bolts...
- Page 9 NOTE: coming off during operation. If you connect a Makita vacuum cleaner to this tool, • For tool with nozzle more efficient and cleaner operations can be Attach the dust bag onto the nozzle.
-
Page 10: Operation
011757 For tool without nozzle When you wish to perform clean planing operation, connect a Makita vacuum cleaner to your tool. Before connecting the vacuum cleaner, remove the chip cover from the tool. Then connect a hose of the vacuum... -
Page 11: Maintenance
Draw a cutting line on the workpiece. Insert the edge fence into the hole in the front of the tool. Align the blade edge with the cutting line. 1. Screw 2. Edge fence (optional accessory) 011748 To make a chamfering cut as shown in the figure, align the "V"... -
Page 12: Replacing Carbon Brushes
If you need any assistance for more details regarding the carbon brushes clean and free to slip in the holders. these accessories, ask your local Makita Service Center. Both carbon brushes should be replaced at the same High-speed steel Planer blade •... - Page 16 Makita Corporation Anjo, Aichi, Japan www.makita.com 885273A220...