Table of Contents
Advertisement
Quick Links
Quick guide
THANK YOU FOR BUYING A WHIRLPOOL PRODUCT
In order to receive a more complete assistance, please
register your product on
PRODUCT DESCRIPTION
1
2
3
5
4
3
4
2
1
5
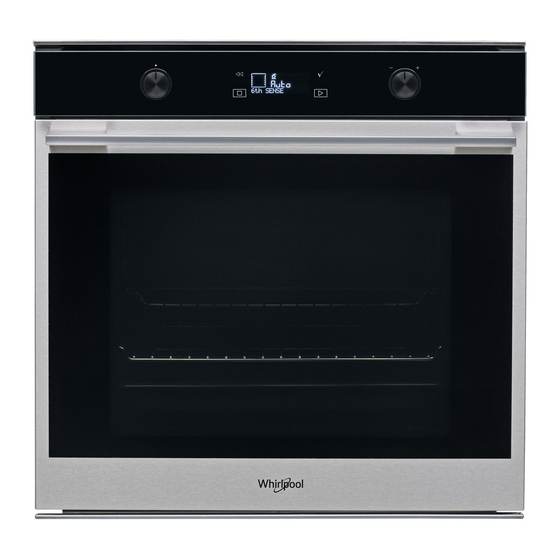
CONTROL PANEL DESCRIPTION
1
1. SELECTION KNOB
For switching the oven on by
selecting a function. Turn to the "0"
position to switch the oven off.
2. BACK
For returning to the previous
screen.
During cooking, allows settings to
be changed.
www . whirlpool . eu/ register
2
3
3. STOP
For stopping the function that is
currently active.
4. DISPLAY
5. START
For immediately starting a
function.
Before using the appliance carefully read the Safety
Instruction.
6
7
5
4
3
8
2
1
9
4
5
1. Control panel
2. Fan
3. Circular heating element
(not visible)
4. Shelf guides
(the level is indicated on the
front of the oven)
5. Door
6. Upper heating element/grill
7. Lamp
8. Identification plate
(do not remove)
9. Lower heating element
(not visible)
6
6. CONFIRM
For confirming a selected function
or a set value.
7. ADJUSTMENT KNOB
For scrolling through the menus
and applying or changing settings.
Please note: The knobs are retractable.
Press the knobs in the middle and they
pop up.
EN
7
1
Advertisement
Table of Contents

Related Manuals for Whirlpool W7 OM5 4 H


Summary of Contents for Whirlpool W7 OM5 4 H
- Page 1 Quick guide THANK YOU FOR BUYING A WHIRLPOOL PRODUCT Before using the appliance carefully read the Safety In order to receive a more complete assistance, please Instruction. register your product on www . whirlpool . eu/ register PRODUCT DESCRIPTION 1. Control panel 2.
- Page 2 ACCESSORIES WIRE SHELF DRIP TRAY BAKING TRAY SLIDING RUNNERS * Use to cook food or as a Use as an oven tray for Use for cooking all bread and To facilitate inserting or support for pans, cake tins cooking meat, fish, pastry products, but also for removing accessories.
- Page 3 FUNCTIONS • MAXI COOKING To switch off the oven. For cooking large joints of meat(above 2.5 kg). It is advisable to turn the meat over during cooking, to SENSE obtain even browning on both sides. It is best to These allow a fully automatic cooking for all baste the meat every now and again to prevent it types of food (Lasagna, Meat, Fish, Vegetables, Cakes from drying out.
-
Page 4: First Time Use
FIRST TIME USE 1. SELECT THE LANGUAGE 3. SET THE TIME You will need to set the language and the time After selecting the power, you will need to set the when you switch on the appliance for the first time: current time: The two digits for the hour will flash on “English”... - Page 5 END TIME (START DELAY) During the delay phase, press to skip this phase and start the function immediately. In many functions, once you have set a cooking time you can delay starting the function by programming Please note: Once cooking has started, the display will its end time.
-
Page 6: Add Favorite
6. END OF COOKING . SMART CLEAN FUNCTION An audible signal will sound and the display will Turn the function knob to to show “Smart Clean” on indicate that cooking is complete. the display. Smart clean Turn the adjustment knob to extend the cooking time Press to activate the function: the display will by setting a new duration. -
Page 7: Cooking Table
COOKING TABLE TURN OR STIR FOOD CATEGORIES SUGGESTED QUANTITY LEVEL AND ACCESSORIES (OF COOK TIME) LASAGNA 0.5 - 3 kg Roast (doneness 0) 0.6 - 2 kg Beef-roasted Hamburgers (doneness 0) 1.5 - 3 cm Roast 0.6 - 2.5 kg Pork-roasted Sausages &... - Page 8 COOKING TABLE SHELF AND RECIPE FUNCTION PREHEAT TEMPERATURE (°C) DURATION (MIN.) ACCESSORIES 30 - 50 Leavened cakes / Sponge cakes 30 - 50 30 - 50 160 – 200 30 - 85 Filled cakes (cheesecake, strudel, apple pie) 160 – 200 35 - 90 20 - 40 30 - 50...
- Page 9 SHELF AND RECIPE FUNCTION PREHEAT TEMPERATURE (°C) DURATION (MIN.) ACCESSORIES Lasagna / Flans / Baked pasta / 190 - 200 45 - 65 Cannelloni Lamb / Veal / Beef / Pork 1 kg 190 - 200 80 - 110 Roast pork with crackling 2 kg —...
-
Page 10: Cleaning And Maintenance
CLEANING AND MAINTENANCE Make sure that the oven has Do not use wire wool, abrasive Wear protective gloves. cooled down before carrying out scourers or abrasive/corrosive The oven must be disconnected any maintenance or cleaning. cleaning agents, as these could from the mains before carrying damage the surfaces of the Do not use steam cleaners. - Page 11 REMOVING AND REFITTING THE DOOR 1. To remove the door, open it fully and lower the 3. Refit the door by moving it towards the oven, catches until they are in the unlock position. aligning the hooks of the hinges with their seating and securing the upper part onto its seating.
-
Page 12: Troubleshooting
3 kW. If no, decrease the power to 13 Ampere. Access “POWER” from “SETTINGS” and select “LOW”. You can download the Safety Instructions, User Manual, Product Fiche and Energy data by: • Visiting our website docs . whirlpool . eu • Using QR Code contact our After-sales Service •...