Table of Contents
Advertisement
Available languages
Available languages
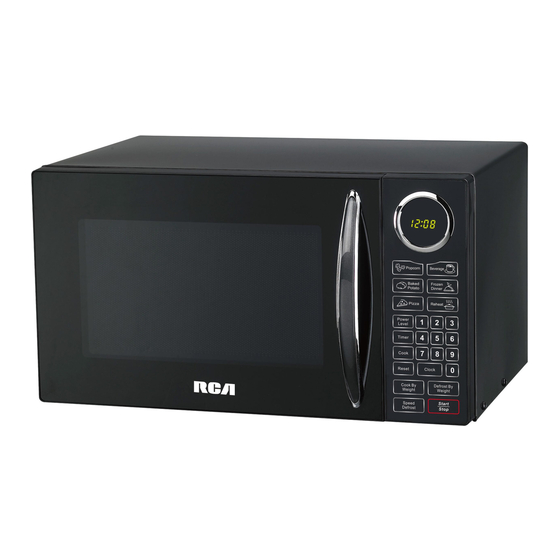
Microwave Oven
RMW953-BLACK
RMW953-WHITE
RMW953-RED
Microwave Oven
Please read these instructions carefully before installing and operating the oven.
Record in the space below the SERIAL NO. found on the nameplate on your oven and
retain this information for future reference.
SERIAL NO.
THIS MICROWAVE OVEN SHOULD NOT BE
USED WITHOUT THE GLASS TURNTABLE
User's manual
Advertisement
Chapters
Table of Contents

Related Manuals for RCA RMW953-BLACK


Summary of Contents for RCA RMW953-BLACK
- Page 1 Microwave Oven RMW953-BLACK RMW953-WHITE RMW953-RED Microwave Oven User's manual Please read these instructions carefully before installing and operating the oven. Record in the space below the SERIAL NO. found on the nameplate on your oven and retain this information for future reference.
-
Page 2: Table Of Contents
PRECAUTIONS TO AVOID POSSIBLE EXPOSURE TO EXCESSIVE MICROWAVE ENERGY 1. Do not attempt to operate this oven with the door-open since open-door operation can result in harmful exposure to microwave energy. It is important not to defeat or tamper with the safety interlocks. 2. -
Page 3: Energy
IMPORTANT SAFETY INSTRUCTIONS When using electrical appliances, basic attend appliance when paper, plastic, safety precautions should be followed, or other combustible materials are including the following: placed inside the oven to facilitate WARNING - To reduce the risk of burns, cooking. - Page 4 time before removing the container. appliance. 20. Be certain the glass tray and Use extreme care when inserting a roller rings are in place when you spoon or other utensil into the container. 10. Do not heat oil or fat for deep-frying. operate the oven 21.
-
Page 5: Installation Guide
INSTALLATION GUIDE 1. Make sure that all the packing materials are removed from the inside of the door. 2. Check the oven for any damage, such as misaligned or bent door, damaged door seals and sealing surface, broken or loose door hinges and latches and dents inside the cavity or on the door. -
Page 6: Grounding Instructions
60 Hz, AC only, 20 amp. It is recommended a qualified electrician or service person. that a separate circuit serving only the oven 2. Neither RCA the dealer can accept any be provided. The oven is equipped with a liability for damage to the oven or personal 3-prong grounding plug. -
Page 7: Cooking Techniques
Limited Use too thin to be used in a microwave. It can · Aluminum foil — Use narrow strips of foil shatter and cause damage and injury. to prevent overcooking of exposed areas. · Paper bags — These are a fire hazard, Using too much foil can damage your except for popcorn bags that are oven, so be careful. -
Page 8: Before You Call For Service
BEFORE YOU CALL FOR SERVICE If the oven fails to operate: C) Check to ensure that the control panel is A) Check to ensure that the oven is plugged programmed correctly and the timer is in securely. If it is not, remove the plug set. -
Page 9: Control Panel
CONTROL PANEL MENU ACTION SCREEN Cooking time, power, indicators and present time are displayed. QUICK COOK BUTTONS Instant settings to cook popular foods NUMBER PADS(0-9) Touch to set time or amount. POWER LEVEL Use to set power levels other than high. TIMER Timer functions independently, even while a cooking program is in process. -
Page 10: Operation Instructions
OPERATION INSTRUCTIONS SIGNALS DURING OVEN SETTINGS ONE SIGNAL: Oven accepts the entry. TWO SIGNALS: Oven does not accept the entry, check and try again. SETTING THE CLOCK Touch CLOCK pad. Use the number pads to enter the correct time. Touch CLOCK pad again. NOTE: ·This is a 12 hour clock. -
Page 11: Speed Defrost
Number pad Cooking power 1、0 100% NOTE: During cooking, you can press POWER LEVEL to check the cooking power. B. Two-stage Cooking Some recipes require different stages of cooking at different temperatures. SET STAGE 1: Follow steps 1 and 2 in “One-stage Cooking”. DO NOT TOUCH START/STOP SET STAGE 2: Touch COOK then enter proper cooking time and (lower) power level. -
Page 12: Cook By Weight
·For Speed Defrost and one stage cooking, follow steps above. Before touching START/STOP, touch COOK, enter time and power level. Then touch START/STOP. ·For Speed Defrost and two stage cooking, follow steps above. Before touching START/STOP, enter two-stage cooking programs. During defrosting program, the oven will pause to remind you to turn food over ·... -
Page 13: Defrost By Weight
and sound to remind user to turn During cooking, the system will pause automatically · food over, after that touch START/STOP to resume cooking. After total cooking time, signals sound and END appears in display. Touch any pad or · open oven door to clear END before starting another cooking function. - Page 14 Touch START/STOP. NOTE: ·To change the preset POPCORN time: Touch POPCORN twice. ENTER TIME appears in display. Touch number pads to enter minutes and seconds. Touch START/STOP. The longest cooking time is 99 min, 99 sec. This new cooking time will be set as the default one until you change it or next power on.
-
Page 15: Cleaning And Care
For 1 entree, touch the number pad “1”. For 2 entrees, touch the number pad “2”. Touch START/STOP pad. Microwaving one large (10~12 oz.) frozen dinner: Touch FROZEN DINNER twice. For 1 entree, touch the number pad “1”. For 2 entrees, touch the number pad “2”. Touch START/STOP. - Page 16 This can be placed under the 1-800-968-9853 contact line. Model No. Date Purchased Serial No. “RCA”, “NIPPER & CHIPPER” ARE TRADEMARKS OF RCA TRADEMARK MANAGEMENT USED UNDER LICENSE TO: CURTIS INTERNATIONAL LTD. ©Curtis International Ltd. 7045 BECKETT DRIVE, UNIT 15, MISSISSAUGA, ON, L5S 2A3 www.curtisint.com...
- Page 17 FOUR À MICRO ONDES RMW953-BLACK RMW953-WHITE RMW953-RED 1. Veuillez LIRE ces instructions attentivement avant d’installer et de faire fonctionner le four à micro-ondes. 2. Veuillez inscrire le NUMÉRO DE SÉRIE dans l’espace prévu à cet effet ci-dessous. Vous trouverez le numéro de série sur la plaque signalétique sur votre four et conservez ce numéro pour référence ultérieure.
- Page 18 MESURES PRÉVENTIVES À SUIRE POUR ÉVITER TOUTE SUREXPOSITION AUX MICRO-ONDES (a) Ne faites jamais fonctionner le four à micro-ondes lorsque la porte est ouverte car vous pourriez être exposé (e) à des ondes néfastes. Il est important de ne pas tenter d’altérer ni d’annuler le système de verrouillage du four.
-
Page 19: Surexposition Aux Micro-Ondes
Mesures préventives importantes Lorsque vous utilisez un appareil électrique,des consignes de sécurité élémentaires doivent touljours êtreobservées, y compris les suivantes : AVERTISSEMENT : Pour réduire les risques de brulure, de choc électrique,de blessure et d'exposition à un excès d'énergie a micro-ondes: 1. - Page 20 PLONGÉ DANSLE LIQUIDE Pour éviter Les risques de bLessure : a.Ne pas surchauffer les liquides. b.Mélanger le liquide avant de le chauffer et à la mi-temps également. c.Ne pas utiliser des récipients droits ou à goulot étroit. d.Après avoir chauffé un liquide, laisser le récipient reposer dans le four à micro-ondes un petit moment avant de le retirer.
-
Page 21: Guide D'installation
Réorienter ou de déplacer l'antenne réceptrice. Accroître la séparation entre le matériel et le récepteur. Raccorder l'équipement dans un débouché sur un circuit différent de celui à qui le receveur est connecté. Consulter le dealer ou un technicien radio / tv expérimentés pour aider. CONSERVEZ CES INSTRUCTIONS GUIDE D'INSTALLATION 1. -
Page 22: Guide Des Ustensiles
1. Pour toutes questions se rapportant à la mise à la terre ou au branchement électrique de votre four à micro-ondes, consulte z à un électricien qualifié. 2. RCA ou le marchand qui vous a vendu l’appareil ne pourront être tenus responsable des dommages ou blessures qui pourraient survenir suite à une mauvaise installation électrique de l’appareil. -
Page 23: Techniques De Cuisson
Les sacs de papier, constituent un risque d’incendie et ne sont pas recommandés pour la cuisson au four à micro-ondes, à l’exception des sacs pour le maïs soufflé qui sont conçus à cet effet. Les assiettes et tasses en styromousse, celles-ci peuvent fondre et laisser un résidu toxique sur les aliments. -
Page 24: Avant De Placer Un Appel De Service
Avant de placer un appel de service Si le four s’avère défectueux : A) Vérifiez s’il est bien branché et si sa fiche, enfoncée complètement. Si tel n’est pas le cas, retirez la fiche de la prise de courant, attendez 10 secondes et rebranchez-la jusqu’au fond. B) Vérifiez si un fusible n’est pas sauté... -
Page 25: Panneau Des Contrôle
Panneau de contrôle CUISSON PAR MENU : LES TOUCHES "BAKED POTATO" (POMME DE TERRE AU FOUR), "POPCORN" (MAÏS SOUFFLÉ), "PIZZA", "BEVERAGE" (BREUVAGE), "FROZEN DINNER" (REPAS SOURGELÉ), "REHEAT" (RÉCHAUFFER). Vous permettez de réchauffer ou de cuire automatiquement les aliments, sans avoir à entrer le niveau de puissance ou le temps. -
Page 26: Instructions De Fonctionnement
Appuyez sur cette touche pour régler la durée de décongélation et le fou à micro-ondes divisera la durée de décongélation en périodes de r décongélation/repos permettant une décongélation uniforme. TOUCHE DE DÉPART/ARRÊT "START/STOP" Appuyez sur cette touche pour débuter ou arrêter la cuisson. Instructions de fonctionnement ÉMET DES BIPS EN RÉGLANT LE FOUR UN BIP. - Page 27 durée supérieure à une minute, vous devez entrer les chiffres pour les minutes et les secondes. Par exemple : pour régler 20 minutes, entrez 2, 0, 0,0. Si vous désirez régler un niveau de puissance autre que 100%, appuyez sur la touche "POWER LEVEL"...
- Page 28 À l’aide des touches numériques, entrez la durée de décongélation. La minuterie numérique règle les secondes et les minutes de gauche à droit un seul chiffre ou un total de 4 chiffres peuvent être entrés (5 pour 5 secondes) ou (2405 pour 24 minutes 5 secondes). Appuyez sur la touche "START/STOP".
-
Page 29: À Propos Des Réglages De Cuisson Rapide
REMARQUE : Le poids doit être entrée en livres et en onces. Les onces de moins de 10 doivent être précédées d’un 0. Si seulement les livres sont inscrites sur l’emballage, modifiez le poids en once à l’aide de la charte ci-dessus. Retournez les aliments lorsque vous entendrez deux bips. - Page 30 RÉGLAGE DE LA CUISSON DU MAÏS SOUFFLÉ "POPCORN" Appuyez sur la touche “POPCORN”. Appuyez sur la touche “START/STOP”. REMARQUE : • Pour changer la durée préréglée pour le “POPCORN” : appuyez deux fois sur la touche “POPCORN.” L’inscription ENTRER LA DURÉE apparaîtra à l’affichage. Utilisez les touches numériques pour entrer les minutes et les secondes.
-
Page 31: Nettoyage Et Entretien
Appuyez une fois sur la touche “FROZEN DINNER”. Appuyez sur la touche 1 pour une portion, et appuyez sur la touche START/STOP; pour deux entrées, utilisez la touche numérique 2 et appuyez sur la touche “START/STOP”. Réchauffage d’un repas surgelé de (10 à 12 oz) : Appuyez deux fois sur la touche “FROZEN DINNER”. - Page 32 Cela peut être obtenue an composant 1-800-968-9853. Modèle Date Acheté Numéro Série « RCA » , “NIPPER & CHIPPER” SONT DES MARQUES DE RCA TRADEMARK MANAGEMENT UTILISEE SOUS LICENCE PAR CURTIS INTERNATIONAL LTD ©Curtis International Ltd. 7045 BECKETT DRIVE, UNIT 15, MISSISSAUGA, ON, L5S 2A3...