
Related Manuals for Buffalo CY265

Summary of Contents for Buffalo CY265
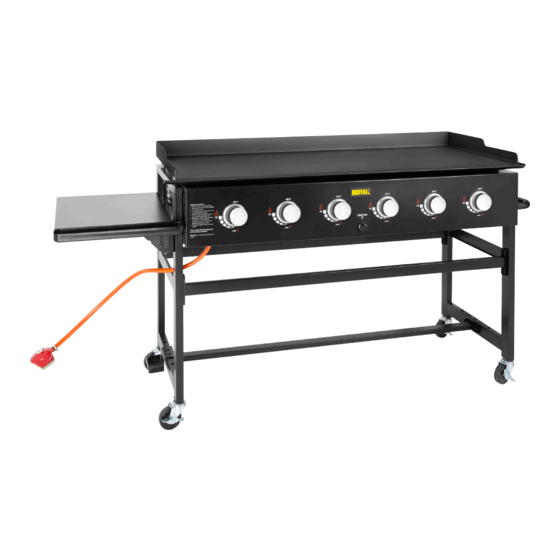
- Page 1 Buffalo BBQ Griddle Instruction manual Model: CY265 CY265_UK_A5_v1_20191121.indb 1 2019/11/21 15:19...
-
Page 2: Safety Tips
Safety tips • Read all instructions before use and retain for future reference. • Follow all warning notices on the appliance. • Never allow children to operate this appliance. • For outdoor use only. • Position on a flat, stable surface. •... - Page 3 • The appliance must not have any overhead obstruction, e.g. trees, shrubs, lean-to roofs. Ensure a clearance of at least 1m around the appliance for ample ventilation. • Do not store or use gasoline or Methylated Fuels or any other flammable vapours and liquids in the vicinity of this or any other appliance.
- Page 4 Gas, regulator and hose • For use with LPG bottled gas only. A suitable regulator must be used for butane, propane or mixes. • LP gas cylinders should rest on a stable, flat surface. • Do not place the gas bottle directly underneath the barbecue. •...
-
Page 5: Installation
Please take a few minutes to carefully read through this manual. Correct maintenance and operation of this appliance will provide the best possible performance from your BUFFALO product. • BUFFALO prides itself on quality and service, ensuring that at the time of unpacking the contents are supplied fully functional and free of damage. •... -
Page 6: Gas Leak Testing
1. Plug the hose head to the connector (if you have 4. Ensure the black sealing washer is fitted inside trouble to connect the hose, soak the hose head the cylinder valve. into water for 5 minutes). Tighten the metal clip 5. -
Page 7: Operation
Disconnecting a gas cylinder 4. Press the electric igniter and hold for 3-5 seconds to light the burner (Fig. 5). • Except for twin-cylinder installations with a changeover valve, turn off the gas tap if fitted to the appliance. Wait until the burner and pilot light have gone out. -
Page 8: Start Cooking
Start cooking 1. After ignition, pre-heat the gas griddle for 10-15 minutes with HI setting. This should be done before each cooking session. 2. After pre-heating, turn the control switch to suit requirements. 3. Place your food on the griddle plate. The plate is suitable for frying steaks, sausages, etc. for even cooking. -
Page 9: Cleaning, Care And Maintenance
Cleaning, care & maintenance Warning! • Regularly clean your barbecue between uses, especially after extended periods of storage. • Ensure the barbecue and its components are sufficiently cool before cleaning and storage. Never douse the barbecue surfaces with water while still hot. •... -
Page 10: Troubleshooting
Troubleshooting Fault Probable Cause Solution Gas leaking from Damaged hose Turn off gas at LP bottle. If hose is cut or cracked/cut/burned cracked, replace hose. See LP bottle lead test and hose connection regulator to the LP bottle Gas leaking from LP Mechanical failure due to Turn off LP bottle valve bottle... - Page 11 Fault Probable Cause Solution Burner will not light Electrical issues using igniter Electrode cracked or broken; Replace electrode “sparks at crack” Electrode tip not in proper Tip of electrode should be pointing toward port position hole in burner. The distance should be 1/8” to 3/16”.
-
Page 12: Technical Specifications
All rights reserved. No part of these instructions may be produced or transmitted in any form or by any means, electronic, mechanical, photocopying, recording or otherwise, without the prior written permission of BUFFALO. Every effort is made to ensure all details are correct at the time of going to press, however, BUFFALO reserve the right to change specifications without notice. -
Page 13: Exploded View
Assembly instructions Exploded view Long fence rail (x 3) Side Shelf (x 1) Leg (x 2) Oil Cup (x 1) Castor (x 4) Front Bracket (x 1) Body (x 1) Griddle (x 1) Hose support hook (x 1) Rear Triangle Bracket (x 1) Cylinder Support (x 1) Front Triangle Bracket (x 1) Side Handle (x 1) -
Page 14: Parts List
Parts list Hardware List Bolt M6*15 (x 38) Bolt M6*60 (x 2) Nut M6 (x 2) Bolt M6 (x 4) AA Battery (x 1) Nut M6 (x 4) Griddle pin Note: • Specifications subject to change without prior notice. • Whilst every care is taken in the manufacture of this product, care must be taken during assembly in case sharp edges are present. -
Page 15: Assembly Steps
Assembly steps Step 1: • Mount the long fence rails (1) on the legs (2) with bolts (A). Step 2: • Mount the castors (3) on the legs. • Reverse the leg frame and set the castor brakes to lock frame in place. - Page 16 Assembly steps Step 4: Caution: When installing this part two people are recommended • Align and place the body (4) on the legs. • Mount the body (4) on the legs with bolts (A). Step 5: • Continue to fix the body (4) on legs with bolts (A).
- Page 17 Assembly steps Step 7: • Mount the side handle (7) with bolts (A). Step 8: • Mount the brackets (10, 14) on legs with bolts (A). Step 9: • Mount the triangle brackets (12, 13) on the side shelf (8) with bolts (A).
- Page 18 Assembly steps Step 10: • Mount the side shelf (8) on the body with bolts (D). Step 11: • Hang the oil cup (9) on the edge of the side shelf. Step 12: • Screw the pins (G) into the pin sockets on the griddle bottom.
- Page 19 Assembly steps Step 11: • Install the battery (E) correctly. • Now the appliance is fully assembled. Caution: Ensure a clearance of at least 100cm around the appliance for ample ventilation. CY265_UK_A5_v1_20191121.indb 19 2019/11/21 15:19...
- Page 20 0800 – 29 1 29 040 – 2628080 0800 - 29 2 29 01 60 34 28 80 0800 – 1860806 901-100 133 vendas@nisbets.pt 42 North Point Business Park, New Mallow Road, Cork, Ireland http://www.buffalo-appliances.com/ CY265_UK_A5_v1_20191121 CY265_UK_A5_v1_20191121.indb 20 2019/11/21 15:19...