Table of Contents
Advertisement
Advertisement
Table of Contents

Related Manuals for HIKVISION AE-DI5042-G4


Summary of Contents for HIKVISION AE-DI5042-G4
- Page 1 Mobile Video Recorder (G4) Installation Guide and Platform Settings...
- Page 2 "Hikauto"), and it cannot be reproduced, changed, translated, or distributed, partially or wholly, by any means, without the prior written permission of Hikvision. Unless otherwise expressly stated herein, Hikauto does not make any warranties, guarantees or representations, express or implied, regarding to the Manual, any information contained herein.
- Page 3 G4 Mobile Recorder• Installation Guide and Platform Settings Symbol Convention The symbols that may be found in this document are defined as follows. Symbol Description Provides additional information to emphasize or supplement important points of the main text. Indicates a potentially hazardous situation, which if not avoided, could result in equipment damage, data loss, performance degradation, or unexpected results.
-
Page 4: Table Of Contents
G4 Mobile Recorder• Installation Guide and Platform Settings TABLE OF CONTENTS Chapter 1 Preparation ........................1 Construction Preparation ..................... 1 1.1.1 Requirements for Technicians ..................1 1.1.2 Construction Site ......................1 1.1.3 Vehicle Electrical Information Confirmation ..............1 Tools ............................ 1 Device Preparation ...................... - Page 5 G4 Mobile Recorder• Installation Guide and Platform Settings 4.2.10 Search History Alarm Record on Client ..............35 4.2.11 Upgrade G4 Device Remotely .................. 36 4.2.12 Set the G4 Device Remotely ..................37 4.2.13 Set Two-Way Audio for G4 Device ................38 4.2.14 Set TTS (Text to Speech) for G4 Device ..............
-
Page 6: Chapter 1 Preparation
G4 Mobile Recorder• Installation Guide and Platform Settings Chapter 1 Preparation Construction Preparation Technicians should have a good command of the following aspects: The functions and application of the G4 device. The components and working principle of the whole system. ... - Page 7 G4 Mobile Recorder• Installation Guide and Platform Settings Tools No. Tool Function Requirements Picture Illustration Strips off the electrical insulation from wires. Wire Stripper Detects the electrical wires. General type Electroprobe Opens the center console. Length: approx. Straight/Cross 20 cm Screwdriver Detects the power cathode General type...
-
Page 8: Device Preparation
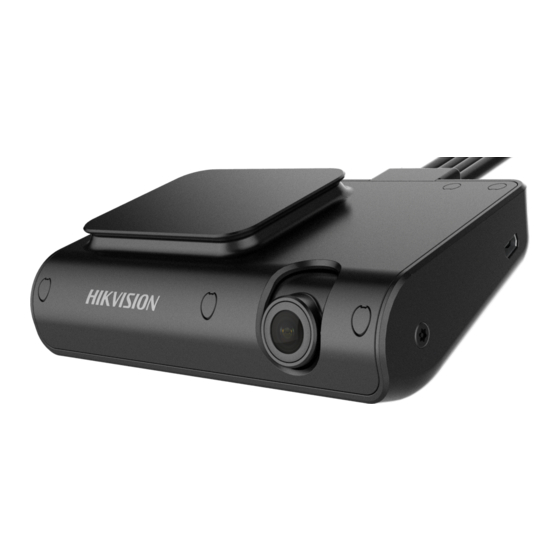
G4 Mobile Recorder• Installation Guide and Platform Settings Device Preparation Device Information No. Device Model Picture Illustration G4 Mobile Recorder AE-DI5042-G4(AI/Lite)(GPS + 4G) TF Card (Supports dual AE-DF5TF128G-T1 TF cards) Front Row Camera AE-VC143T-ITS(2.1 mm) (0.3 m) (Optional) Rear Row Camera AE-VC143T-ITS(2.1 mm) (2 m) - Page 9 G4 Mobile Recorder• Installation Guide and Platform Settings the center console as the installation site, make sure the terminal is firmly installed to avoid device moving during driving. Heat dissipation: Make sure the device is away from the heat source of the vehicle and is installed on the location with good ventilation.
-
Page 10: Chapter 2 Installation
G4 Mobile Recorder• Installation Guide and Platform Settings Chapter 2 Installation Connect Cables to Device Identify Cables Identify the function of each cable before connection. Main Bundle Definition Color Definition Yellow ACC Signal Cable Black Ground Power Cord Black Alarm Buttons Black Connects to Device Power Interface Cable Definition... -
Page 11: Connect To Device
G4 Mobile Recorder• Installation Guide and Platform Settings Connect to Power Steps: Find the vehicle signal cables: power anode, power cathode (ground), and ignition signal (ACC ON). Use the electro probe to test whether the cable is powered after turning off the vehicle. If the current is detected, this cable is connected to constant power and then you can test the voltage. - Page 12 G4 Mobile Recorder• Installation Guide and Platform Settings Route Cable There are five cables extended from the G4 device. Identify the cable function from the following table. Function of G4 Device Cables Label Interface Function 8-Pin Plug Connects to power. TVI1 (DBA) 4-Pin Plug Connects to the DBA camera.
-
Page 13: Install Device
G4 Mobile Recorder• Installation Guide and Platform Settings Connect the cameras to their corresponding interfaces. Otherwise, it may cause channel switch mess in the app live view. There is a notch on the power cord and TVI camera interface. Align the notch and the bulge to avoid pin damage when connecting the cable to the interface. - Page 14 G4 Mobile Recorder• Installation Guide and Platform Settings Press Wi-Fi Button on Device 2) Run the app and connect to the Wi-Fi whose SSID is HIKVISION-G4-XXXX. The default password is Hik12345. The app jumps to the main interface after Wi-Fi is connected.
- Page 15 G4 Mobile Recorder• Installation Guide and Platform Settings Management Parameter Center Settings Channel Switch Live View Manual Capture or Recording View Pictures and Recordings in the Memory Card Main Interface Select a device installation location. Normally, the G4 terminal is installed on the center of the front windshield.
- Page 16 G4 Mobile Recorder• Installation Guide and Platform Settings The lens is adjustable. Install Device Before the installation, clean the interior interface of the windshield and peel off the protective film of the 3M tape. Connect the device to the app and switch to Channel 1 to check the live view of the device on the app.
- Page 17 G4 Mobile Recorder• Installation Guide and Platform Settings Tighten the screws on both sides of the device. Fix Camera Lens Steps: Install the DBA camera on the console in front of the steering wheel. Location 1 is recommended. You can also install the camera on Location 2 or 3 according to the actual vehicle.
- Page 18 G4 Mobile Recorder• Installation Guide and Platform Settings Adjust the DBA camera angle. 1) Loosen the screws on the base and then loosen the two screws on the upper side of the base with hex screwdriver. 2) Rotate the camera to adjust the surveillance angle. Adjustment range: pan: 0° to 5°, tilt: 0°...
- Page 19 G4 Mobile Recorder• Installation Guide and Platform Settings Adjust Camera 5) Fix the camera on the installation location with 3M tape and tighten the base with the extra screws to avoid camera moving. Steps: Install the front row camera on the windshield facing the front passenger seat. ...
- Page 20 G4 Mobile Recorder• Installation Guide and Platform Settings Install Baffle Run the app, switch to Channel 3, and rotate the lens to adjust surveillance angle to make sure the live view image can completely cover the front passenger seat. Peel off the protective film on the baffle and hold it for 30 seconds to fix the adjusted angle. Clean the front windshield, paste the electrostatic film, and avoid bubbles.
- Page 21 G4 Mobile Recorder• Installation Guide and Platform Settings Steps: Install the rear row camera on the interior vehicle roof. Before installation, feed the cable through the baffle. Run the cable along the right side of the vehicle. The cable runs from the G4 device, along the A pillar and B pillar, to the sunroof or the dome light.
- Page 22 G4 Mobile Recorder• Installation Guide and Platform Settings Steps: Install the backup camera on the left side of the trunk. Run the cable from the left side of the vehicle. Lead the cable from the G4 device and run the cable along A pillar and B pillar to the trunk. You can use the iron wire to reach into the vehicle from the rear row or trunk to B pillar.
-
Page 23: Cautions
G4 Mobile Recorder• Installation Guide and Platform Settings Run the app, switch to Channel 5, and rotate the lens to adjust surveillance angle to make sure the live view image can completely cover the trunk. Fix the camera on the installation location with 3M tape and tighten the camera with two screws. -
Page 24: Chapter 3 Function Settings
G4 Mobile Recorder• Installation Guide and Platform Settings Chapter 3 Function Settings ADAS Settings ADAS function is realized by the built-in camera of the G4 device. Set the camera before using the ADAS function. Steps: Run the app and go to Settings > ADAS Settings > Camera Settings. Set Camera Parameters Measure the camera related parameters and calibrate the camera based on the horizon. -
Page 25: Dba Settings
G4 Mobile Recorder• Installation Guide and Platform Settings Set Parameters and Calibrate Camera Follow the instructions to adjust the camera angle to align the red line with the horizon. Make sure the intersection of the lane and the horizon coincides with the red point. Set ADAS related alarms. -
Page 26: Basic Parameters
G4 Mobile Recorder• Installation Guide and Platform Settings Set DBA Alarms Basic Parameters Go to Settings > Basic Parameters. Set Basic Parameters... -
Page 27: Network Parameters
G4 Mobile Recorder• Installation Guide and Platform Settings Demo Mode: You can turn it on/off. When the mode is on, the alarm interval shortens, which is suitable for demonstration. Delay Time of Shutdown: You can set the delay time of device shutdown after turning off the vehicle. -
Page 28: Image Parameters
G4 Mobile Recorder• Installation Guide and Platform Settings Image Parameters For Channel 1, you can set parameters such as resolution, bit rate, sub-stream resolution, sub-bit rate, encoding format, etc. For other channels, you can set the following parameters: resolution, bit rate, sub-stream resolution, sub-stream bit rate, and I frame interval. Set Image Parameters for Channel 1 Storage Parameters Go to Settings >... -
Page 29: Device Parameters
G4 Mobile Recorder• Installation Guide and Platform Settings Set Storage Parameters Device Parameters Go to Settings > Device Parameters. You can restart the device, restore device settings, and view device information and algorithm information. Set Device Parameters... -
Page 30: Chapter 4 Platform Settings
G4 Mobile Recorder• Installation Guide and Platform Settings Chapter 4 Platform Settings Enable Ehome Platform on Device Steps: Connect the G4 device to the app and go to Settings > Platform Parameters > Ehome. Tap Enable Ehome. Enter IP address and port in order. The device serial number is filled in by default. Tap Save and restart the G4 device to take the settings into effect. -
Page 31: Add Device To Platform
G4 Mobile Recorder• Installation Guide and Platform Settings Add Device to Platform Enter the device information, select Area in Channel Information, and click Add to add device. Add Device Steps: Go to the list of driving recorder, and click the device you want to view to enter the device information interface. -
Page 32: Edit G4 Information On Platform
G4 Mobile Recorder• Installation Guide and Platform Settings View Device Information Edit the G4 device information and click Save. Edit G4 Information On the driving recorder interface, select the G4 device you want to delete, and click Delete. - Page 33 G4 Mobile Recorder• Installation Guide and Platform Settings Delete G4 Device Set streaming server for the area where the G4 device is located to make sure live view can be enabled. Set Streaming Server Log in to the client. Unfold the device list and you can view the G4 device that has been added to the platform.
-
Page 34: Live View Of G4 Device
G4 Mobile Recorder• Installation Guide and Platform Settings Find G4 Device Select one G4 device, click it, and the platform displays the channel conditions of this device. Select one channel and click to view this channel. Live View of G4 Device... -
Page 35: Playback
G4 Mobile Recorder• Installation Guide and Platform Settings Select one channel of the G4 device and click . The window on the right side will play back recordings of this channel. Playback Click Track or to locate the G4 device. The GPS information will be displayed when the positioning succeeds. - Page 36 G4 Mobile Recorder• Installation Guide and Platform Settings Display GPS Information Steps: Click Pattern and enter the pattern playback interface. Enter Patter Playback Mode Select Start Time and End Time and click Start Playback to play back the pattern.
- Page 37 G4 Mobile Recorder• Installation Guide and Platform Settings Play Back Pattern Pattern Illustration Steps: Log in to the web interface of the platform and enter the Alarm interface. Click Add to add an alarm.
- Page 38 G4 Mobile Recorder• Installation Guide and Platform Settings Add Alarm Select the G4 device as Source, select the alarm type and channel you want to set, and click Save. Add Alarm Video tampering, fatigue driving, making telephone calls, and smoking alarms are reported by the channel with driving behavior analysis ( ).
- Page 39 G4 Mobile Recorder• Installation Guide and Platform Settings You can view the set alarms in the alarm list. View Set Alarms The alarm center displays the received real-time alarms in the alarm list when the set alarm of the G4 device is triggered. View Real-Time Alarm For the G-Sensor collision alarm, click in Handle Alarm to view the alarm recording.
- Page 40 G4 Mobile Recorder• Installation Guide and Platform Settings Play Back G-Sensor Collision Alarm Recording Steps: Log in to the client. In the alarm center, click to enter the search interface of history alarms. Select Driving Recorder as the alarm source and select the G4 device in the device tree. Select the alarm type, start time, and end time, and click Search.
-
Page 41: Search History Alarm Record On Client
G4 Mobile Recorder• Installation Guide and Platform Settings Search History Alarm Record Click of the collision alarm. A new window will pop up and play the alarm pre-recording. Play Alarm Pre-Recording Steps: Click Upgrade File to upload the upgrade file. -
Page 42: Upgrade G4 Device Remotely
G4 Mobile Recorder• Installation Guide and Platform Settings Upload Upgrade File Select the device you want to upgrade and click Upgrade. Select the upgrade file in the pop-up window and click Upgrade to start upgrading the selected device. Upgrade Device You need to release the configuration file in the client to realize device remote settings. -
Page 43: Set The G4 Device Remotely
G4 Mobile Recorder• Installation Guide and Platform Settings Set G4 Device Remotely Go to the live view interface of the client and click on the bottom of the live view to enable two-way audio. Enable Two-Way Audio TTS can only be used under 4G network. Steps: Go to the live view page of the client. - Page 44 G4 Mobile Recorder• Installation Guide and Platform Settings Click and click Send Message. Enable Send Message Select the G4 device. Edit the content and click OK to send message. Send Message...
-
Page 45: Chapter 5 Upgrade And Faqs
G4 Mobile Recorder• Installation Guide and Platform Settings Chapter 5 Upgrade and FAQs What should I do when the mobile phone cannot connect to the device hotspot? Steps: Go to My > General Settings > Clear Cache. Shut down the apps. Restart the app and connect to the hotspot again. -
Page 46: Upgrade The G4 Device In Batch By Tf Card
G4 Mobile Recorder• Installation Guide and Platform Settings Rename the digicap.dav file as factory.bin and put the file under the root directory of the TF card. Insert the TF card into the TF1 card slot of the device. Power off the device and power up the device after the LED lights run off. Wait for about two minutes. - Page 47 UD21638B...