Advertisement
Quick Links
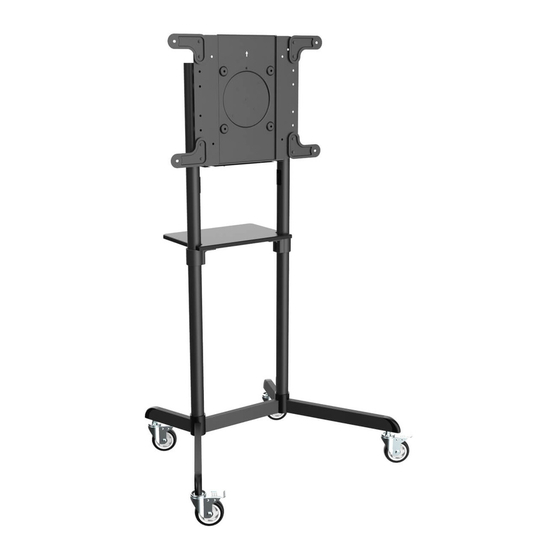
Mobile Rotating Display Cart
Este manual esta disponible en español en la página de Tripp Lite: tripplite.com
Ce manuel est disponible en français sur le site Web de Tripp Lite : tripplite.com
Русскоязычная версия настоящего руководства представлена на веб-сайте компании
Dieses Handbuch ist in deutscher Sprache auf der Tripp Lite-Website verfügbar: tripplite.com
WARRANTY REGISTRATION
Register your product today and be
automatically entered to win an ISOBAR
surge protector in our monthly drawing!
tripplite.com/warranty
Owner's Manual
Model: DMCS3770ROT
WARNING! Always use an assistant or mechanical lifting equipment to safely lift and
position equipment.
200 x 200 / 300 x 300
350 x 350 / 400 x 200
400 x 400 / 600 x 200
600 x 400
Tripp Lite по адресу: tripplite.com
1111 W. 35th Street, Chicago, IL 60609 USA • tripplite.com/support
Copyright © 2020 Tripp Lite. All rights reserved.
70"
Rated for TV
Rated for TV
MAX
154 lb. /
154 lb. /
70 kg
70 kg
®
1
Rated for DVD
Rated for DVD
11 lb. /
11 lb. /
5 kg
5 kg
Advertisement

Related Manuals for Tripp Lite DMCS3770ROT


Summary of Contents for Tripp Lite DMCS3770ROT
- Page 1 600 x 400 Este manual esta disponible en español en la página de Tripp Lite: tripplite.com Ce manuel est disponible en français sur le site Web de Tripp Lite : tripplite.com Русскоязычная версия настоящего руководства представлена на веб-сайте компании Tripp Lite по адресу: tripplite.com Dieses Handbuch ist in deutscher Sprache auf der Tripp Lite-Website verfügbar: tripplite.com...
-
Page 2: Important Safety Instructions
PRODUCT REGISTRATION Visit tripplite.com/warranty today to register your new Tripp Lite product. You’ll be automatically entered into a drawing for a chance to win a FREE Tripp Lite product!* * No purchase necessary. Void where prohibited. Some restrictions apply. See website for details. -
Page 3: Parts List
Parts List IMPORTANT: Before beginning installation, be sure you have received all the parts listed below. If any parts are missing or faulty, contact Tripp Lite for replacements. Base Caster Base Column Upper Column (x1) (x4) (x2) (x2) Equipment Shelf... -
Page 4: Required For Installation
Required for Installation Assembly and Installation Installing the Wheel Casters Keep casters locked prior to beginning installation. Attaching the Columns to the Base Align the column as shown, ensuring the cable management holes and the shorter legs are on the same side. - Page 5 Assembly and Installation Installing the Columns Position the cable management holes (found on each upper column leg) facing in as shown.
- Page 6 Assembly and Installation Installing the Shelf Mounting Brackets...
- Page 7 Assembly and Installation Installing the Front Cover and Equipment Shelf Position as indicated, ensuring the front of and the longer legs are on the same side. Make sure and the shorter legs are on the same side. CAUTION: Fully tighten the screws under the base.
- Page 8 Assembly and Installation Attaching the Mounting Plate to the Display VESA 200x200 / 300x300 / 350x350 / 400x200/ 400x400 Note: Choose the appropriate screws, washers and spacers (if necessary) according to the type of screen.
- Page 9 Assembly and Installation 6B-1: Installing the VESA Extension Adapter Arms VESA 600 x 200 VESA 600 x 400...
- Page 10 Assembly and Installation 6B-2: Attaching the Mounting Plate to the Display Note: Choose the appropriate screws, washers and spacers (if necessary) according to the type of screen.
- Page 11 Assembly and Installation Mounting the Display onto the Screws CAUTION: Adjust the columns to the desired height before installing the display. To adjust the height of the columns after the display is installed, remove the equipment shelf before adjusting the columns to the desired height.
- Page 12 Assembly and Installation Adjusting the Tilting Angle of the Display Default Position (0°) Tilted Position (5°) Adjusting the Rear Bolts Securely...
- Page 13 Assembly and Installation Fixing the Display in Landscape / Portrait Position (Optional) Tighten the screw to fix the display. Tighten the screw to fix the display.
- Page 14 Assembly and Installation Routing the Cables 11B-1: Attaching the Cable Clip Holders...
- Page 15 Assembly and Installation 11B-2: Routing Cables through the Cable Clips...
- Page 16 Assembly and Installation Attaching the Cable Covers...
- Page 17 Assembly and Installation Attaching the Rear Cover...
- Page 18 Assembly and Installation Maintenance • Check at regular intervals (at least every three months) to be sure the bracket remains secure and safe to use. • Please visit tripplite.com/support if you have any questions.
- Page 20 1111 W. 35th Street, Chicago, IL 60609 USA • tripplite.com/support 20-06-087 93-3CB8_RevA...