
Related Manuals for Lenovo T1


Summary of Contents for Lenovo T1
- Page 1 Smart Robot Vacuum Cleaner T1 User Manual Please read the User Manual before using---Warranty card included, pictures are for reference only.
-
Page 3: Safety Information
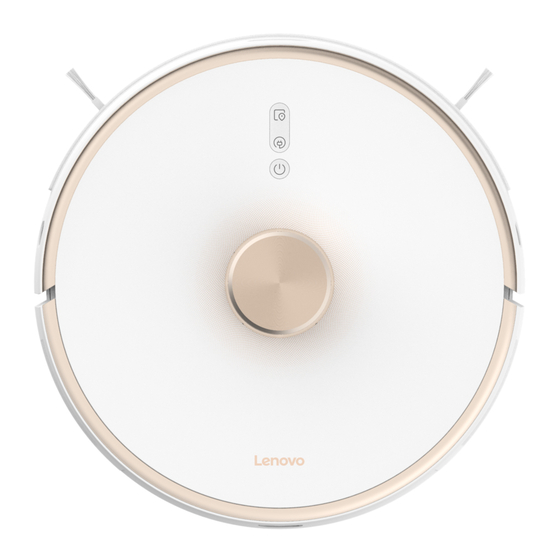
Safety information Service restriction This product is intended for floor cleaning use only in the home environment. Do not use it outdoors (such as open balcony), non-ground surface (such as sofas), commercial or industrial environments. nvironment (such as a duplex flat, open balcony, top of home) without a protective fence. - Page 4 Packing list and introduction Main machine x1 Partial cleaning button Short press to activate partial cleaning. Charging button Short press to activate the charging function. Cleaning/Power button Short press to activate the cleaning function. Reset WiFi Press and hold the Partial cleaning button and the Charging button for more than 3 seconds at the same time.
-
Page 5: Main Machine
Packaging list and introduction Main machine Laser distance sensor Speaker Infrared charger sensor/ Infrared anti-collision sensor TOF sensor for wall/ Infrared auxiliary charger sensor Collision sensor Laser head cover Laser head cover pressure sensor Infrared auxiliary charger sensor Dust box Dust box opening button Vent outlet... - Page 6 Packaging list and introduction Main machine Docking electrode slice for charging Universal wheel Side brush Driving wheel Rolling brush Docking electrode slice for dust collecting Accessories list for Smart Robot Vacuum Cleaner Water tank x1 Disposable mop x10...
- Page 7 Packaging list and introduction Dust box module x1 Mopping module x1 Find and install the filter screen before using Find and install the water tank and mop (or disposable mop) before using Dust box fastene Water tank Water tank Cleaning tool cover Paste area Dust box upper bracket...
- Page 8 Packaging list and introduction List of optional accessories (Users can choose one of the two sets according to actual demands----Charging base + Charging base adapter or Dust collector + Dust collector charging wire.) 1.Charging base Charging base indicator Signal emission zone Charging Contact Pins Power port Front side of charging base...
-
Page 9: Installation
Installation 1.Install the charging base Place the charging base on a flat surface against the wall. Against the wall Not against the wall Ensure that there is more than 1.2-meter clear space in front and more than 0.5-meter clear space on both sides of the charging base. - Page 10 Installation Long press the button for power-on. Press the charging ley, the machine will find the charging base automatically for charging. The color of power button indicates the power of the battery. White light: power>15% Orange breathing light: power<15% on the charging clip of the charging base. The orange light of the power button will be always on when charging.
- Page 11 Installation 2.Install the dust collector Place the dust collector 6mm or more away from the wall on a flat surface 0.06m away from the wall Ensure that there is more than 1.2-meter clear space in front and more than 0.5-meter clear space on both sides of the dust collector. Note: If choosing the charging base, please ignore the installation of dust collector When charging base and dust collector exist at the same time, place them in...
- Page 12 In addition, WiFi name and password should exclude English double quotes). 5.Add Device Click “Add Device” in the main interface of “Lenovo Cleaner T1”APP or “My Device Interface”. Android phone: Apple iphone: a. Input WiFi name and password, then, click “the Next Step”;...
- Page 13 Installation Installation and removal of mopping module Install mop: Wet out the mop and dry it until there is no water Fill the water tank: Open the water tank cover, drop. Put the mop on the mopping module and stick it firmly. fill it with water and install it back.
-
Page 14: Cleaning Mode
Instructions Whole house cleaning Long press button for power-on. The indicator of the button Press the button to start the whole house cleaning turns on slowly, and the machine gets in standby state. When (see the picture of cleaning route as below). Press any button to pause while cleaning. - Page 15 Instructions Partial cleaning Sleep mode When the machine is on standby or pause, press the partial If there is no operation for more than 20 minutes, the machine cleaning button to start partial cleaning. This mode can clean will enter sleep mode automatically. In the sleep mode, after a 1.6m x 1.6m square area taking the machine as the center.
-
Page 16: Routine Maintenance
Routine maintenance Main brush Usage of the cleaning tool of center (Weekly cleaning is recommended) rolling brush 1.Turn over the machine, press down the fastener and remove the main brush cover. 2.Take the main brush out and clean the main brush bearing. 3.Cut the winding hair on the main brush with the matching cleaning tool of the main brush. -
Page 17: Side Brush
Routine maintenance Side brush (Weekly cleaning is recommended) Use a screwdriver to unscrew and clean the side brush. Note: Battery The machine has built-in high performance rechargeable lithium battery pack. For maintaining battery performance, please keep the machine in charging for daily use. Note: If not use it for long, please shut down and store it. - Page 18 Routine maintenance Dust box and filter screen (Weekly cleaning is recommended) 1.Press the dust box releasing button to remove it. 2.Open the dust box fastener. 3. Clean up the garbage. 4.Open the dust box cover and remove the mesh cover and filter screen(HEPA).
- Page 19 Routine maintenance 6.Fill the dust box with clean water, close and shake it, then pour out the dirty water inside. Repeat this step several times until the dust box is cleaned up. Note: It is recommended to replace the filter every 3-6 weeks. (Cleaning after each use is recommended) 1.Remove the mop from the mopping module.
- Page 20 Routine maintenance Machine Sensor Wipe the sensors of the machine with a soft and dry cloth, including: Charging docking electrode slice 2.Wall sensor on the right side of the machine. 3.Charging docking electrode slice at the bottom of the machine 4.The dust collecting electrode slice at the bottom of the machine.
-
Page 21: Charging Base
Routine maintenance Filter element part Universal wheel (Replacement of every 1-3 months (Monthly cleaning is recommended) is recommended) 1.Remove the old filter element part on the left and right side Wheel 1.Turn over the machine along the notch with your fingers. and pull out the universal 2.Install the new filter element part and confirm that it is in place. -
Page 22: Basic Parameters
Basic parameters Machine Charging base Name Parameter Name Parameter 350 350 98mm External size External size 140 99mm Battery type 3200mAh Rated power Product weight 3.6kg Rated input 1.2A Rated voltage Rated output 1.2A 14.4V Rated power Troubleshooting When abnormalities occur in the operation of the machine, the power button indicator flashes orange quickly. Please refer to the table below for troubleshooting. -
Page 23: Fault Prompt
Fault prompt Resolution The machine may be stuck or trapped. Please clear the obstacles Please check whether the main wheel is stuck. around the machine. Please install the dust box and filter screen, and make sure that they Dust box removed are installed in place. - Page 24 Fault prompt Resolution There are too many obstacles near the charging base. Please put the charging base in an open area. Fail to return to the charging base The machine is too far from the charging base. Please put the machine near the charging base and retry.
-
Page 25: Warranty Information
Warranty information Warranty Warranty Warranty Product Period Service Type Remarks Part name coverage name (Month) Fetch, send, express Main components Machine and repair Fetch, send, express Peripheral Charging base, power cord components and repair Robot Vacuum Edge brush, main brush, filter Consumables Cleaner screen, main brush cover, mop,... -
Page 26: Warranty Card
Warranty card Dear users, this warranty card is your certificate to apply for warranty, please cooperate with the seller to fill in and keep it properly! Address Postal Code Information Contact number Product Bar Product name Code/Serial Product Number/Batch Product model information Number Name... -
Page 27: Fcc Statement
FCC STATEMENT 1. This device complies with Part 15 of the FCC Rules. Operation is subject to the following two conditions: (1) This device may not cause harmful interference, and (2) This device must accept any interference received, including interference that may cause undesired operation. 2.