
Related Manuals for Lenovo Robotic

Summary of Contents for Lenovo Robotic
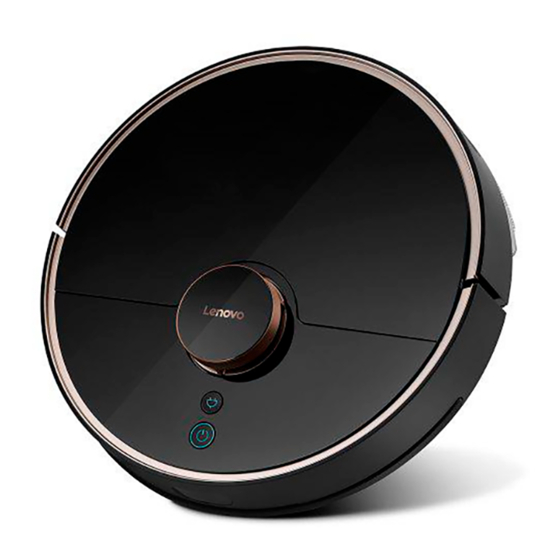
- Page 1 Lenovo Robotic Vacuum Cleaner X1 User Manual Please read the User Manual before using---Warranty card included, pictures are for reference only.
- Page 3 Contents ............................................... English German ..............................................
-
Page 4: Dear Customers
Robot and keep the operating instructions for future reference. We know you will love this vacuum! Lenovo Robot is a highly intelligent sweeping robot that utilizes high-precision radar and an array of other sensors, all working together through navigation algorithms to create and follow sophisticated, accurate maps and plans. -
Page 5: Packing List
Packing List Main machine x 1 Charging dock x 1 Water tank x 1 Mopping cloth x 1 Damp proofing pad x 1 Power adapter x 1 User manual x 1 Cleaning tools x 1 Universal plug x 4 Water tank filter elements x 6... -
Page 6: Product Overview
Product Overview Main machine Recharge/Spot cleaning button • Short press to recharge/pause • Long press and hold to start Spot cleaning Cleaning/Power button • Short press to start sweeping/pause • Press and hold for 3 seconds to turn on/off • If abnormal condition, please press and hold for 15 seconds to force poweroff Note:... - Page 7 Product Overview Main machine Main brush cover and buckle Cover Main brush LDS laser Main wheel distance sensor (driving wheel) Protection strip Dust brush Recharge button Universal wheel Power button...
- Page 8 Product Overview Main machine Water tank Installation switch Radar cover/ collision sensor Water inlet TOF Wall sensors Recharging sensors...
- Page 9 Product Overview Dust bin Wi-Fi indicator light Reset hole Dust bin cover Dust bin bracket Dust bin bracket HEPA Filter...
-
Page 10: Charging Dock
Product Overview Charging dock Wire slot exit Power indicator light Charging Power port electrode strips Signal emission area Bottom cover... -
Page 11: Installation Instructions
Installation Instructions 1) Connect the power cord, put extra wire in the slot. Note: • The extra power cord touched the ground can be pulled by the main unit to cause the interruption of charging. • The charging dock indicator is always on and goes off when charging. Wall Ground 2) Place the charging dock on a level ground and connect the power... - Page 12 After Search for “Lenovo Cleaner X1” in Google Play or Apple the device is turned on, it can be usde normally.
-
Page 13: Cleaning Method
Operating Instructions Clean/Pause Cleaning method Method 1: After the power is turned on,short press the power After startup, the robot will scan to generate maps and key on the main unit to start cleaning(press any key to intelligently create areas. In these areas, the cleaning paths pause while cleaning) are planned as along the wall firstly, followed by the Method 2: Click the Sweep in the APP to start cleaning (press... -
Page 14: Spot Cleaning
Operating Instructions Loss of regional information Spot cleaning Case 1: Starting the Robot in a new area to clean can 1) Customized area cleaning cause the Robot to re-create map. Users can define one or more of the size and location of the cleaning area. - Page 15 Operating Instructions Specified room 2)Set up off-limit area It is also possible to set certain area as a restricted area The Robot will mapping automatically and divides where Robot will not enter. The restricted area can also be the room. When you need to clean a room set as a permanent forbidden zone which applies to a room separately, you can select “Specify Room”.
- Page 16 Operating Instructions Loss of regional information Accessories purchase Case 1: Starting the Robot in a new area to clean can After the expiration of the accessories, the accessory cause the Robot to re-create map. can be purchased in the advanced function-accessories Case 2: The big changes of the environment may purchase, and reset operation is required after replacing result in the failure of reposition and may trigger to...
-
Page 17: Do Not Disturb Mode
Operating Instructions Do-not-disturb mode Usage of water tank During the Do-Not-Disturb period, Robot will not Note: In order to have a better mopping effect, it is automatically power off and play voice. The Do-Not-Dis- recommended to use the water tank to mop after the robot turb mode is enabled by default after the main unit has vacuum completes at least three indoor cleanings. -
Page 18: Routine Maintenance
Routine Maintenance Water tank In order to ensure the continuous and effective cleaning ability of the product, please clean the water tank and mop after using the water tank assembly. Step 1 Step 2 Step 3 Hold the two buttons above the water tank Remove mopping cloth Clean mopping cloth and pull out the water tank... -
Page 19: Dust Bin And Filter
Routine Maintenance Dust bin and Filter Step1 Step2 Step3 Step4 Step5 Step1: Open cover to remove the dust bin. Step2: Open the dust bin buckle and empty the dust bin. To avoid spilling the dust, keep the top cover of the dust bin facing up. - Page 20 Routine Maintenance Side brush Main brush ( recommended monthly cleaning) (weekly cleaning) 1 ) Turn the machine over, open the main brush cover by 1) Turn the machine over, remove the screw of side pressing the buckle on it, and then remove the main brush. brush, remove and clean the internal entangled hair and 2 ) Use a blade attached to the dusting brush to cut off the dirt, then reinstall it.
- Page 21 Routine Maintenance Sensors Universal wheel (recommended monthly cleaning) Wipe Robot sensors with a soft, dry cloth, including: Turn robot vacuum upwards, pull out the universal wheel, 1) Wall sensor on the right side of Robot clean up the wheel body, hair and dirt on the axle, and then 2) Four anti-drop sensors on the bottom of Robot reinstall and compress it.
-
Page 22: Firmware Upgrade
Routine Maintenance Charging electrode strips Firmware Upgrade The part, as shown in the diagram, is the charging The firmware can be upgraded through the phone App. electrode strips. Please clean the charging electrode After detecting the new firmware, follow the prompts to strips of Robot and the charging dock with a dry rag carry out the upgrade. -
Page 23: Specifications
Specifications Main machine Charging dock Name Parameter Name Parameter Dimensions 350*350*100mm Dimensions 255*130*67mm Product weight 3.68KG Rated power 22.8W Minimum:3000mAh, 44A0Wh Rated output 22.8W Battery capacity Standard: 3200mAh, 47.36Wh Rated voltage 14.4V Rated power... -
Page 24: Frequently Asked Questions (Faq)
Frequently Asked Questions (FAQ) Problem types Causes and solutions 1) When the battery is running low, please place Robot on the charging dock and align it with the charging electrode plates and Robot will power on automatically (when it’s completely out of power, Robot needs to be Unable to power on charged for a while before it powers on automatically) 2)Ambient temperature is too low or too high (below O°C/32°F or above 50°C/120°F), please use this product... -
Page 25: Usage Restrictions
Important Usage Notice Usage restrictions • For in door use only.Do not use this robot outdoor (such as open balcony), non-ground (such as sofa), commercial or industrial environments. • Do not use robot in a drop-off environment (eg duplex stairs, open balcony, furniture top) without physical barrier. •... -
Page 26: Battery And Charge
• Please do not throw away the waste batteries. They should be handled by a professional recycling agency. • If the power cord is damaged or broken, stop using it immediately and purchase or replace it through Lenovo official service. -
Page 27: Troubleshooting
Troubleshooting Failure prompt voice Problems and Solutions Error 0: Dust bin is disappeared! Sweeping when dust bin is removed The top radar is covered or placed in an open area (without any obstructions in the Error 1: The Top radar seems to be blocked. area of 6*6 square meters) Error 2: Need to change location to start. -
Page 28: After Sales Service
After-sales Service Warranty Card Warranty period If you need any support relates to your product please contact the agency you purchased from. The warranty period for Robot and accessories is 1 year. For detailed information, please contact your local authorized User’s information dealer. -
Page 29: Service Record
Service Record Service record Failure information Service date Service technician signature... -
Page 30: Eu Declaration Of Conformity
Type designation(s): X1 Trademark: Lenovo We, Lenovo (Beijing) Co., Ltd. declare under our sole responsibility that the product described above is in conformity with the relevant Union harmonization legislations: Radio Equipment Directive 2014/53/EU RoHS Directive 2011/65/EU and its amendment 2015/863/EU The following harmonized standards and/or other relevant standards have been applied, which included for Article 3.1a Health and Electrical Safety, Article...