Table of Contents
Advertisement
Quick Links
Advertisement
Table of Contents

Related Manuals for AEG 49332I-MN


Summary of Contents for AEG 49332I-MN
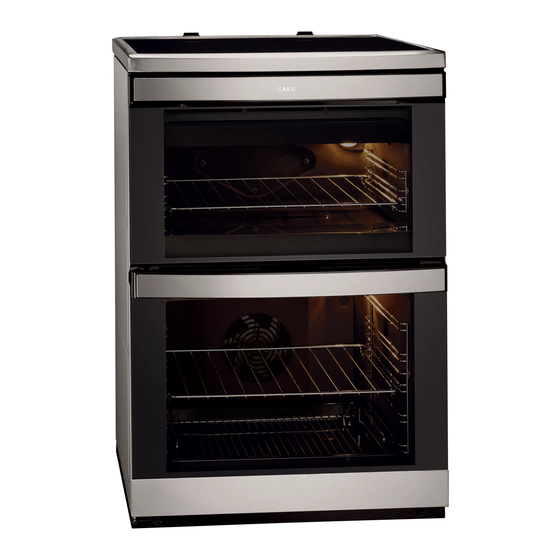
- Page 1 User Manual 49332I-MN Cooker...
-
Page 2: Table Of Contents
14. ENERGY EFFICIENCY....................35 FOR PERFECT RESULTS Thank you for choosing this AEG product. We have created it to give you impeccable performance for many years, with innovative technologies that help make life simpler features you might not find on ordinary appliances. Please spend a few minutes reading to get the very best from it. -
Page 3: Safety Information
ENGLISH SAFETY INFORMATION Before the installation and use of the appliance, carefully read the supplied instructions. The manufacturer is not responsible if an incorrect installation and use causes injuries and damages. Always keep the instructions with the appliance for future reference. - Page 4 Never try to extinguish a fire with water, but switch off • the appliance and then cover flame e.g. with a lid or a fire blanket. Do not store items on the cooking surfaces. • Do not use a steam cleaner to clean the appliance.
-
Page 5: Safety Instructions
ENGLISH 2. SAFETY INSTRUCTIONS 2.1 Installation with the power supply. If not, contact an electrician. WARNING! • Always use a correctly installed Only a qualified person must shockproof socket. install this appliance. • Do not use multi-plug adapters and extension cables. •... - Page 6 • Be careful when you open the • Use a deep pan for moist cakes. Fruit appliance door while the appliance is juices cause stains that can be in operation. Hot air can release. permanent. • Do not operate the appliance with •...
-
Page 7: Product Description
ENGLISH 2.6 Disposal • If you use an oven spray, obey the safety instructions on the packaging. • Do not clean the catalytic enamel (if WARNING! applicable) with any kind of Risk of injury or suffocation. detergent. • Disconnect the appliance from the mains supply. -
Page 8: Before First Use
3.2 Cooking surface layout Induction cooking zone 2300 W with the Power function 3200 W Steam outlet - number and position depend on the model Induction cooking zone 2300 W with the Power function 3200 W Induction cooking zone 2300 W with... -
Page 9: Hob - Daily Use
ENGLISH 4. Let the appliance operate for 15 Preheat the two ovens. Heat minutes. up one oven at a time. 5. Set the function and the Set the functions listed maximum temperature. below, if applicable. 6. Let the appliance operate for 15 minutes. - Page 10 Sensor Function Comment field To increase or decrease the time. To set a heat setting. Power function To activate and deactivate the function. 5.2 Heat setting displays Display Description The cooking zone is deactivated. The cooking zone operates. STOP+GO function operates.
- Page 11 ENGLISH seconds (a pan, a cloth, etc.). An heat setting comes on. After 3 seconds acoustic signal sounds and the hob comes on. deactivates. Remove the object or clean the control panel. To deactivate the function: touch • the hob gets too hot (e.g. when a saucepan boils dry).
- Page 12 Minute Minder To activate the function: activate the You can use this function as a Minute hob with . Do not set the heat setting. Minder when the hob is activated and Touch for 4 seconds. comes on. the cooking zones do not operate (the...
-
Page 13: Hob - Hints And Tips
ENGLISH 6. HOB - HINTS AND TIPS WARNING! Cooking zone Cookware diam- Refer to Safety chapters. eter (mm) 6.1 Cookware Right rear 125 - 210 For induction cooking zones Right front 125 - 210 a strong electro-magnetic Left front 125 - 210 field creates the heat in the cookware very quickly. -
Page 14: Hob - Care And Cleaning
Heat setting Use to: Time Hints (min) Keep cooked food warm. as nec- Put a lid on the cookware. essary 1 - 2 Hollandaise sauce, melt: but- 5 - 25 Mix from time to time. ter, chocolate, gelatine. 1 - 2... -
Page 15: Oven - Daily Use
ENGLISH 8. OVEN - DAILY USE 8.1 Oven Control Panel WARNING! Refer to Safety chapters. Use the sensor fields to operate the appliance Sensor Function Comment field – Display Shows the current settings of the appliance. ON / OFF To activate or deactivate the oven. Oven selection To move between the top and main oven. - Page 16 Name Description Lamp / Defrost indica- Shows that the Lamp / Defrost function is active. Heat-up and residual Shows that the Heat-up / residual heat is active. heat indicator Temperature / Clock in- Shows the temperature and the time in minutes.
- Page 17 ENGLISH Symbol Oven function Application Pie/Pizza To bake food on 1 shelf position for a more in- tensive browning and a crispy bottom. Set the temperature 20 - 40 °C lower than for Conven- tional Cooking. Low Tempera- To prepare very lean, tender roasted food. ture Cooking Thermal Grilling To roast larger meat joints or poultry with bones on 1 shelf position.
- Page 18 8.10 Residual heat indicator When you deactivate the oven, the display shows the residual heat. 8.11 Lock and Child Safety Device Lock and Child Safety Device function locks the hob and oven at the same time. Wire shelf and the deep pan together: Push the deep pan between the guide Refer to Hob - Daily Use chapter.
-
Page 19: Oven - Clock Functions
ENGLISH 2. Put the deep pan into the oven on 2. Put the deep pan into the oven on the necessary shelf position. the necessary shelf position. You can use the trivet to grill flat dishes in large quantities and to toast. 1. -
Page 20: Oven - Hints And Tips
1. Set the time with the clock functions With Duration and End Duration and / or End , the oven deactivates 2. Press again and again until the automatically. display shows the symbol Keep warm 9.3 Activating Heat + Hold (if 3. - Page 21 ENGLISH Baking results Possible cause Remedy The cake sinks and becomes The oven temperature is too The next time you bake, set soggy, lumpy or streaky. high. a slightly lower oven temper- ature. The cake sinks and becomes The baking time is too short. Set a longer baking time. soggy, lumpy or streaky.
- Page 22 Food Temperature (°C) Time (min) Shelf posi- tion Cakes: Flapjack 160 - 170 25 - 30 Cakes: Shortbread 130 - 150 45 - 60 Cakes: Apple Pie 170 - 180 50 - 60 Casseroles: Beef / Lamb 160 - 170...
- Page 23 ENGLISH Food Temperature Time (min) Shelf posi- (°C) tion Bread 200 - 220 30 - 35 Cakes: Small & Queen 160 - 180 18 - 25 Cakes: Sponges 170 - 180 20 - 25 Cakes: Madeira 150 - 160 60 - 80 Cakes: Rich Fruit 140 - 150 120 - 150...
- Page 24 Food Temperature (°C) Time (min) Shelf posi- tion Biscuits 180 - 190 10 - 20 1 – 3 Bread 190 - 210 30 - 35 Cakes: Small & Queen 150 - 170 18 - 25 1 – 3 Cakes: Sponges...
- Page 25 ENGLISH 10.9 Roasting • To prevent the meat juices or fat from burning onto the pan, put some liquid • Use heat-resistant ovenware to roast into the deep pan. (refer to the instructions of the • If necessary, turn the roast (after 1/2 - manufacturer).
- Page 26 The grilling area is set in centre of the shelf. 10.12 Dual Grill - Top Oven Food Time (min) Shelf position Bacon Rashers 5 - 6 Beefburgers 10 - 20 Chicken Joints 20 - 40 Chops - Lamb 15 - 25...
- Page 27 ENGLISH Food Quantity (kg) Temperature Time (min) Shelf posi- (°C) tion Pork: Pork chop 1 - 1.5 160 - 180 60 - 90 Pork: Meatloaf 0.75 - 1 160 - 170 45 - 60 Pork: Knuckle of 0.75 - 1 150 - 170 90 - 120 pork (pre-cooked)
- Page 28 Food Quantity Temperature Preheating time (min) Shelf po- (°C) sition Rare Medium Roast beef (well done) 1200 - 1600 g 120 - 130 160 - 170 Rib of beef 600 - 1000 g 55 - 75 95 - 110 Shoulder of beef, 3.5 cm high...
-
Page 29: Oven - Care And Cleaning
ENGLISH 11. OVEN - CARE AND CLEANING WARNING! Spots or discolouration of Refer to Safety chapters. the catalytic surface have no effect on catalytic properties. 11.1 Notes on cleaning • Clean the front of the appliance with a WARNING! soft cloth with warm water and a Keep children away when cleaning agent. - Page 30 2. Pull the rear end of the shelf support away from the side wall and remove 3. Pull the door trim to the front to remove it. 4. Remove the glass panels. To install the panels, do the same steps in reverse.
-
Page 31: Troubleshooting
ENGLISH 1. Deactivate the appliance. To replace the glass panels, 2. Remove the fuses from the fuse box do the same steps in or deactivate the circuit breaker. reverse. Before you lower The back lamp the trim, attach the A trim part to the door. - Page 32 Problem Possible cause Remedy The hob deactivates. You put something on the Remove the object from the sensor field. sensor field Residual heat indicator does The zone is not hot because If the zone operated suffi- not come on.
-
Page 33: Installation
ENGLISH Problem Possible cause Remedy The oven display shows Lock function operates. Refer to "Hob - Daily use" "LOC". chapter. The lamp does not operate. The lamp is defective. Replace the lamp. It takes too long to cook the The temperature is too low Adjust the temperature if dishes or they cook too or too high. - Page 34 Minimum distances Dimension 1. Install the anti-tilt protection (A) on the wall. Make sure that the wall is made of a solid material. If not, you need to make the wall sufficiently strong to 13.3 Levelling of the appliance...
-
Page 35: Energy Efficiency
14. ENERGY EFFICIENCY 14.1 Product information for hob according to EU 66/2014 Model identification 49332I-MN Type of hob Hob inside Freestanding Cooker Number of cooking zones Heating technology Induction Diameter of circular cooking zones (Ø) - Page 36 • Before you activate the cooking zone put the cookware on it. 14.3 Product Fiche and information for ovens according to EU 65-66/2014 Supplier's name Model identification 49332I-MN Top oven: 105.6 Energy Efficiency Index Main oven: 104.7 Top oven: A Energy efficiency class...
- Page 37 ENGLISH • Cooking with fan - when possible, deactivate automatically 10% use the cooking functions with fan to earlier. The fan and lamp continue save energy. to operate. • Residual heat • Keep food warm - if you want to use –...
- Page 38 www.aeg.com...
- Page 39 ENGLISH...
- Page 40 www.aeg.com/shop...