
Related Manuals for Honeywell Manning AirScan iR


Summary of Contents for Honeywell Manning AirScan iR
- Page 1 Honeywell Analytics 405 Barclay Boulevard Lincolnshire, Ilinois 60069 sales@manningsystems.com Tel: +1 847 955 8200 www.gasalarm.com Toll free: +1 800 538 0363 19100AirScan-iR-ind 1/2014 REVD Fax: +1 847 955 8208...
-
Page 3: Table Of Contents
AirScan iR - Industrial Introduction ........................ 5 Sensor Description ..................... 6 Installation ........................7 Locating the Sensor ....................7 Wiring ........................8 Operation ........................9 Start-Up Procedure ....................9 Pushbutton Operation, LED Indicators, Adjustment Pots, and Test Points ..10 LED Indicators and Blink Sequence .............. - Page 4 AirScan iR - Industrial...
-
Page 5: Introduction
AirScanTMiR Sensor. Warranties made by Honeywell Analytics with respect to this equipment will be voided if the equipment is not used and serviced in accordance with the instructions in this manual. If in doubt about a procedure, please contact Honeywell Analytics before proceeding. -
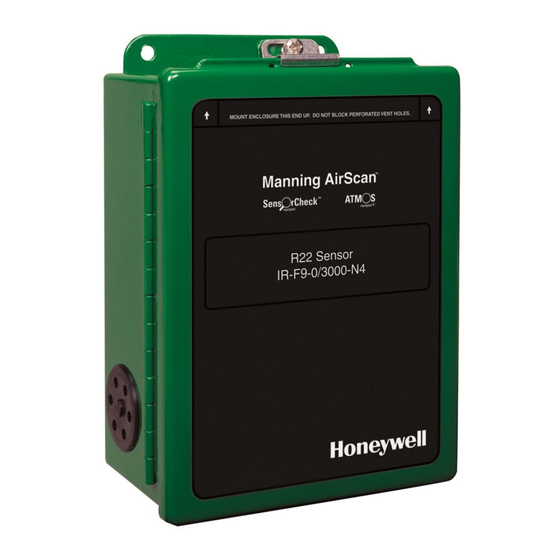
Page 6: Sensor Description
If sensor is SUPER HEAT equipped (—15° then bandpass filtered to produce a narrow range of F and below), contact Honeywell Analytics for cable frequencies characteristic of the refrigerants’ (CFC/ recommendations. -
Page 7: Installation
AirScan iR - Industrial Installation shown in Figure 1, and always mount vertically. Locating the Sensor Penthouses: Multi-Coil (defrost one coil at a time) In this case Because each sensor can only “report” what it is the best location is usually in the center of the seeing at the moment, it is very important that the penthouse four or five feet above the grate. -
Page 8: Wiring
Ceiling Hung Evaporators: When mounting Manning If the AirScan iR is to be used with the AirAlertTM96d, please call Honeywell Analytics for AirScanTMiR sensors near evaporators, mount the specific wiring instructions sensor no higher than two feet below the top of the evaporator coil. -
Page 9: Operation
CARB Compliance: To ensure continued compliance with CARB performance guidelines, calibrate the unit in the environment in which it will be used. Frequency of calibration can improve accuracy; Honeywell Analytics recommends calibration every 6 months. -
Page 10: Pushbutton Operation, Led Indicators, Adjustment Pots, And Test Points
AirScan iR - Industrial Pushbutton Operation, LED Indicators, • “Zero” adjustment pot — adjusts output calibration of the 4 mA nominal resting point. Adjustment Pots, and Test Points • “Span” adjustment pot — adjusts the 20 mA concentration level or unit span/sensitivity. The Manning AirScanTMiR has two internal push- •... -
Page 11: Led Indicators And Blink Sequence
AirScan iR - Industrial LED Indicators and Blink Sequence • Fast blink indicates 4/20 mA loop failure or load resistance too high Green Source LED • One blink every 2 seconds indicates when source is energized and also that the source is not short circuited. -
Page 12: Led Indicator Summary
AirScan iR - Industrial LED Indicator Summary See LED indicators and blink sequence descriptions on page 11. Figure 7. LED symbols Figure 10. 4-20 mA Loop Test Mode Figure 8. Normal Run Mode Figure 9. Calibration mode... - Page 13 AirScan iR - Industrial Figure 11. Fault Indicator Error Sequences - part 1 Figure 12. Fault Indicator Error Sequences - part 2...
-
Page 14: Modes Of Operation
AirScan iR - Industrial Modes of Operation Normal run mode without output filtering This mode outputs a signal that nominally rests at 4 The Manning AirScanTMiR has various modes of mA and can range continuously from 0 to 27 mA. Any operation and calibration: subtle changes in sensor response will be sent to the •... -
Page 15: 4/20 Ma Loop Test
AirScan iR - Industrial 4/20 mA Loop Test To proceed to the next step in the mA test, press and hold S1 for 1 second or more until the yellow {22 mA full-scale and .5 mA fault check} “calibrate” LED is a medium double blink. See the following example. -
Page 16: Calibration/Programming Modes
AirScan iR - Industrial Calibration/Programming Modes: Exit: To program the “span” setting and exit this mode, press and hold S2 for 1 second or until the Refer to the Calibration section before proceeding. yellow “system” LED resumes the state before the calibration mode was initiated and the yellow Auto “ZERO”... -
Page 17: Calibration
See the following example. Should this occur, please contact Honeywell Analytics for assistance! Figure 20. Non-calibrated sensor or loss of factory calibration... -
Page 18: Filtered Output Mode
AirScan iR - Industrial Non-Filtered Output Mode (no signal dead- Before continuing with the calibration procedure, determine which of the two Normal output modes is band) best for the control scheme. Filtered output holds a Start: Press and hold both the “zero” (S1) and “span” stable 4 mA signal within a dead-band range while (S2) buttons simultaneously for one second or until the non-filtered output allows the signal to be seen... - Page 19 AirScan iR - Industrial STEP 1 STEP 2 4-20 mA Output Calibration Zero Calibration This procedure calibrates the 4/20 mA output to This procedure sets the internal reference that match a PLC input converter or various devices that is indicative of 0 ppm of target gas. It MUST be interpret the 4/20 mA signal output to ensure the performed before proceeding or every other 4 mA output rests at a true 4 mA even with minor...
- Page 20 AirScan iR - Industrial Press and hold the “span” button (S2) for 1 second or more until the yellow “calibrate” LED blinks fast and Figure 26. the yellow “system” LED is blinking slowly. See the following example. Figure 27. Span calibration Figure 25.
-
Page 21: Diagnostic Procedures
AirScan iR - Industrial Diagnostic Procedures Exit: Press and hold both the “zero” (S1) and “span” (S2) buttons simultaneously for 1 second or more until Simple Zero Test “system” LED is continuous ON. Unit should be ready This test will ensure the unit is calibrated for a true for long-term operation. -
Page 22: Ma Low Signal Output Test For Fault Conditions
AirScan iR - Industrial Figure 30. During 4-20 mA loop test (22 mA high) w/error on output Figure 31. During 4/20 mA loop test (0.5 mA low) 0.5 mA Low Signal Output Test for Fault Conditions NOTE: The unit must be in the 4/20 mA loop (22 mA high) test to proceed with this test. -
Page 23: Troubleshooting
AirScan iR - Industrial Troubleshooting Sensor On-board Diagnostic System Electrical Interference It is possible to have the mA output fail during normal run mode. In some instances a mA output circuit This sensor has been designed to be highly resistant that is incorrectly setup can supply 4 mA to the to EMI/RFI using multiple stages of filtering and load reasonably well;... -
Page 24: Error On 4/20 Ma Output Or During 4/20 Ma Test 20 Ma High
AirScan iR - Industrial Error on 4/20 mA output or during 4/20 mA Gas Concentration Indicated With No Re- test 20 mA high frigerant Present The AirScanTMiR is designed to be quite specific to CFC/HCFC/HFC’s that are colorless, odorless gases which can’t be sensed by humans at low levels. -
Page 25: Maintenance
Periodically, sensors should be exposed to refrigerant sample and the results logged. For proper operation it is essential that the test and calibration schedule be adhered to. Honeywell Analytics recommends the following maintenance schedule: • Calibration should be performed with certified calibration gas every six months. -
Page 26: Limited Warranty
IT IS UNDERSTOOD AND AGREED THAT package or an equivalent. The product will be repaired HONEYWELL ANALYTIC’S LIABILITY, WHETHER IN or replaced if it is determined by Honeywell Analytics CONTRACT, IN TORT, UNDER ANY WARRANTY, IN that the part failed due to defective materials or NEGLIGENCE OR OTHERWISE SHALL NOT EXCEED workmanship. - Page 27 AirScan iR - Industrial...
- Page 28 AirScan iR - Industrial...
- Page 31 AirScan iR Industrial 19100 Revision D May 2016 ©2016 Honeywell Analytics...