Cisco ASR 9010 Unpacking And Installing
Hide thumbs
Also See for ASR 9010:
- Overview and reference manual (170 pages) ,
- Installation manual (284 pages) ,
- Manual (44 pages)
Advertisement
Quick Links
Unpacking and Installing the Chassis
This chapter describes how to unpack and install the chassis into a rack.
•
•
•
•
•
•
•
Pre-Installation Considerations and Requirements
Before you perform any procedures in this chapter, review the following sections:
Observe the guidelines for preventing electrostatic discharge (ESD) damage described in
Discharge
See the Regulatory Compliance and Safety Information for the Cisco ASR 9000 Series Router document for
additional safety and compliance information,
Caution
This router is not designed to be installed as a shelf-mounted or a free-standing router. The router must be
installed in a rack that is secured to the building structure. You must install the router in either a telco-style
frame or a 4-post equipment rack.
Installation Overview
The following figure shows how the Cisco ASR 9010 Router is shipped and strapped to a shipping pallet.
Pre-Installation Considerations and Requirements, on page 1
Installation Overview, on page 1
Unpacking the Router, on page 3
Removing Components Before Installing the Chassis, on page 20
Rack-Mounting the Router Chassis, on page 48
Supplemental Bonding and Grounding Connections, on page 64
Installing Chassis Accessories, on page 68
Damage.
Preventing Electrostatic
Unpacking and Installing the Chassis
1
Advertisement

Related Manuals for Cisco ASR 9010


Summary of Contents for Cisco ASR 9010
- Page 1 You must install the router in either a telco-style frame or a 4-post equipment rack. Installation Overview The following figure shows how the Cisco ASR 9010 Router is shipped and strapped to a shipping pallet. Unpacking and Installing the Chassis...
- Page 2 Unpacking and Installing the Chassis Required Tools and Equipment Figure 1: Cisco ASR 9010 Router Packaged on a Shipping Pallet A fully equipped router with six power modules can weigh as much as 375 lbs (170.5 kg); an empty chassis weighs 150 lbs (67.8 kg).
- Page 3 The following instructions describe how to unpack the Cisco ASR 9000 Series Router from its shipping container. Unpacking the Cisco ASR 9006 Router Follow these steps to unpack the Cisco ASR 9006 Router from its shipping container (see the figure below). Procedure Step 1 Cut the straps that secure the cardboard shipping container to the pallet.
- Page 4 Unpacking and Installing the Chassis Unpacking the Cisco ASR 9006 Router Figure 2: Unpacking the Cisco ASR 9006 Router from the Shipping Container and Pallet Top cardboard Cardboard Chassis accessories packaging cap packaging container Three packaged Cardboard accessory Foam packaging...
- Page 5 Step 5 Save the packaging materials in case the router needs repackaging or shipping. Unpacking the Cisco ASR 9010 Router Follow these steps to unpack the Cisco ASR 9010 Router from its shipping container. Procedure Step 1 Cut the straps that secure the cardboard shipping container to the pallet.
- Page 6 Unpacking and Installing the Chassis Unpacking the Cisco ASR 9010 Router Figure 3: Unpacking the Cisco ASR 9010 Router from the Shipping Container and Pallet Foam packaging Front hold-down Rear hold-down material- top cap bracket secured bracket secured by two screws to...
- Page 7 Unpacking and Installing the Chassis Unpacking the Cisco ASR 9904 Router Unpacking the Cisco ASR 9904 Router Follow these steps to unpack the Cisco ASR 9904 Router from its wooden shipping container. Procedure Step 1 Cut the straps that secure the cardboard shipping container to the pallet.
- Page 8 Step 6 Save the packaging materials in case the router needs repackaging or shipping. Unpacking the Cisco ASR 9906 Router Follow these steps to unpack the Cisco ASR 9906 Router from its shipping container (see the figure below). Procedure Step 1 Cut the straps that secure the cardboard shipping container to the pallet.
- Page 9 Unpacking and Installing the Chassis Unpacking the Cisco ASR 9906 Router Figure 5: Unpacking the Cisco ASR 9906 Router from the Shipping Container and Pallet Straps Shipping pallet Connecting clips Hold-down bracket and screws Top cardboard packaging Cardboard accessory tray...
- Page 10 Unpacking and Installing the Chassis Unpacking the Cisco ASR 9910 Router Unpacking the Cisco ASR 9910 Router Follow these steps to unpack the Cisco ASR 9910 Router from its shipping container. Procedure Step 1 Cut the straps that secure the cardboard shipping container to the pallet.
- Page 11 Unpacking and Installing the Chassis Unpacking the Cisco ASR 9910 Router Figure 6: Unpacking the Cisco ASR 9910 Router from the Shipping Container and Pallet Unpacking and Installing the Chassis...
- Page 12 Unpacking and Installing the Chassis Unpacking the Cisco ASR 9910 Router Unpacking and Installing the Chassis...
- Page 13 Step 6 Save the packaging materials in case the router needs repackaging or shipping. Unpacking the Cisco ASR 9912 Router Follow these steps to unpack the Cisco ASR 9912 Router from its wooden shipping container. Procedure Step 1 Cut the straps that secure the cardboard shipping container to the pallet.
- Page 14 Step 5 Save the packaging materials in case the router needs repackaging or shipping. Unpacking the Cisco ASR 9922 Router Follow these steps to unpack the Cisco ASR 9922 Router from its wooden shipping container. Unpacking and Installing the Chassis...
- Page 15 Refer to the right and middle figures in Figure 8: Unpacking the Cisco ASR 9922 Router from the Shipping Container, on page Step 3 Remove the crate cap. Disengage the twist locks located around the bottom of the crate cap...
- Page 16 Unpacking and Installing the Chassis Unpacking the Cisco ASR 9922 Router Figure 9: Cross-brace and Attachment Bolts on the Shipping Rack Step 6 Use a Phillips screwdriver to unscrew the rear mounting flange from the system and rack. Step 7 Use a Phillips screwdriver to unscrew the front mounting flange from the rack.
- Page 17 Unpacking and Installing the Chassis Unpacking the Cisco ASR 9922 Router Figure 10: Hold-Down Brackets on the Cisco ASR 9922 Router Shipping Pallet Do not unbolt the shipping rack from the pallet. Note Step 9 Save the rear brackets and screws from the shipping packaging for reuse in rack mounting of the chassis (see the figure below).
- Page 18 Unpacking and Installing the Chassis Unpacking the Cisco ASR 9922 Router Figure 11: Rack Mount Installation Kit for the Cisco ASR 9922 Router Step 10 Remove components, such as line cards and fan trays, to reduce the weight before lifting or moving the chassis.
- Page 19 Router, Cisco ASR 9910 Router, and Cisco ASR 9912 Router Use a safety hand truck to move the Cisco ASR 9006 Router, Cisco ASR 9010 Router, Cisco ASR 9904 Router, Cisco ASR 9906 Router, Cisco ASR 9910 Router, or Cisco ASR 9912 Router to its final location for rack installation.
- Page 20 Removing Components Before Installing the Chassis The Cisco ASR 9000 Series Routers are designed to be lifted for mounting into a rack. To reduce the weight of the system, you must remove some of the components before attempting to mount it into the rack.
- Page 21 Unpacking and Installing the Chassis Removing a Fan Tray from the Cisco ASR 9010 Router, Cisco 9910 Router, Cisco ASR 9922 Router, and Cisco ASR 9912 Router Note If an accessory grill is installed on the front of the Cisco ASR 9010 Router, remove the grill by pulling it towards you until it comes loose.
- Page 22 Unpacking and Installing the Chassis Removing a Fan Tray from the Cisco ASR 9010 Router, Cisco 9910 Router, Cisco ASR 9922 Router, and Cisco ASR 9912 Router Figure 14: Removing or Installing the Fan Tray on the Cisco ASR 9910 Router Chassis...
- Page 23 Unpacking and Installing the Chassis Removing a Fan Tray from the Cisco ASR 9010 Router, Cisco 9910 Router, Cisco ASR 9922 Router, and Cisco ASR 9912 Router Figure 15: Removing or Installing the Fan Tray on the Cisco ASR 9922 Router Chassis...
- Page 24 Removing a Fan Tray from the Cisco ASR 9006 Router Removing a Fan Tray from the Cisco ASR 9006 Router Follow these steps to remove a fan tray from the Cisco ASR 9006 Router (see the figure below). Procedure Step 1 Loosen the captive screw that secures the fan tray door to the chassis and open the door.
- Page 25 Figure 18: Removing or Installing the Fan Tray on the Cisco ASR 9904 Router Chassis Removing a Fan Tray from the Cisco ASR 9906 Router Follow these steps to remove a fan tray from the Cisco ASR 9906 Router (see the figure below). Procedure Step 1 Loosen the screws that secure the fan tray door to the chassis and open the door.
- Page 26 Unpacking and Installing the Chassis Removing Cards from the Chassis Figure 19: Removing or Installing the Fan Tray on the Cisco ASR 9906 Router Chassis Removing Cards from the Chassis To reduce additional weight from the chassis, you can remove all Route Switch Processor (RSP), Route Processor (RP), Switch Fabric Card (FC), shared port adapter (SPA), SPA interface processor (SIP), and line cards (LCs).
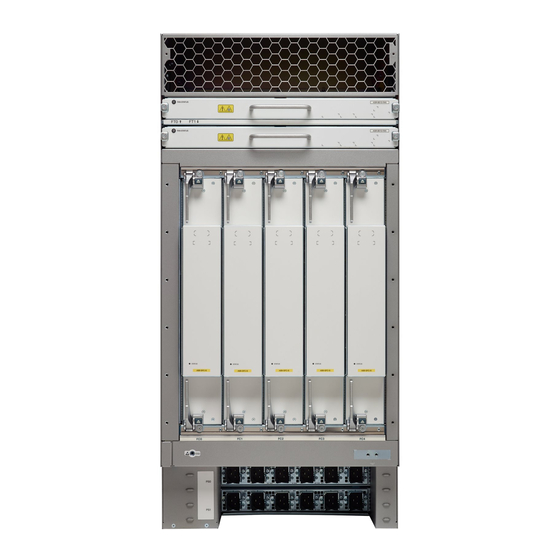
- Page 27 38) and describe the router components and slot numbering for each router. Table 1: Router Components and Slot Numbering for the Cisco ASR 9006 Router, Cisco ASR 9010 Router, Cisco ASR 9904 Router, Cisco ASR 9906 Router, and Cisco ASR 9910 Router...
- Page 28 Unpacking and Installing the Chassis Removing RSP Cards and Line Cards from the Cisco ASR 9006, 9010, 9904, 9906, and 9910 Routers Router Model Number Router Components and Slot Numbering Cisco ASR 9906 Router • 6 slots. • Version 3 power system...
- Page 29 Figure 21: Cisco ASR 9006 Router Components and Slot Numbering with Version 2 DC Power System Figure 22: Cisco ASR 9010 Router Components and Slot Numbering with Version 1 Power System or Version 3 AC Power System Unpacking and Installing the Chassis...
- Page 30 Removing RSP Cards and Line Cards from the Cisco ASR 9006, 9010, 9904, 9906, and 9910 Routers Figure 23: Cisco ASR 9010 Router Components and Slot Numbering with Version 2 Power System or Version 3 DC Power System Figure 24: Cisco ASR 9904 Router Components and Slot Numbering with Version 2 DC Power System...
- Page 31 Unpacking and Installing the Chassis Removing RSP Cards and Line Cards from the Cisco ASR 9006, 9010, 9904, 9906, and 9910 Routers Figure 25: Cisco ASR 9906 Router Components and Slot Numbering with Version 3 AC Power System Figure 26: Cisco ASR 9906 Router Components and Slot Numbering with Version 3 DC Power System...
- Page 32 Unpacking and Installing the Chassis Removing RSP Cards and Line Cards from the Cisco ASR 9006, 9010, 9904, 9906, and 9910 Routers Figure 27: Cisco ASR 9910 Router Components and Slot Numbering with Version 3 AC Power System Figure 28: Cisco ASR 9910 Router Components and Slot Numbering with Version 3 DC Power System...
- Page 33 Unpacking and Installing the Chassis Removing RSP Cards and Line Cards from the Cisco ASR 9006, 9010, 9904, 9906, and 9910 Routers Figure 29: Cisco ASR 9910 Router Components and Slot Numbering for Fabric Cards Follow these steps to remove RSP and line cards from the chassis.
- Page 34 Unpacking and Installing the Chassis Removing RSP Cards and Line Cards from the Cisco ASR 9006, 9010, 9904, 9906, and 9910 Routers Figure 30: Removing a Line Card from the Cisco ASR 9006 Router Chassis Loosen the captive Pivot the ejector Slide the card out of screws.
- Page 35 Unpacking and Installing the Chassis Removing RSP Cards and Line Cards from the Cisco ASR 9006, 9010, 9904, 9906, and 9910 Routers Figure 31: Removing a Line Card from the Cisco ASR 9010 Router Chassis Loosen the captive Pivot the ejector Slide the card out of screws.
- Page 36 Unpacking and Installing the Chassis Removing RSP Cards and Line Cards from the Cisco ASR 9006, 9010, 9904, 9906, and 9910 Routers Figure 32: Removing a Line Card from the Cisco ASR 9904 Router Chassis Loosen the captive Pivot the ejector Slide the card out of screws.
- Page 37 Unpacking and Installing the Chassis Removing RP Cards, Fabric Cards, and Line Cards from the Cisco ASR 9922 Router and Cisco ASR 9912 Router Loosen the captive Pivot the ejector Slide the card out of screws. levers to unseat the the chassis.
- Page 38 Unpacking and Installing the Chassis Removing RP Cards, Fabric Cards, and Line Cards from the Cisco ASR 9922 Router and Cisco ASR 9912 Router Table 2: Router Components and Slot Numbering for the Cisco ASR 9922 Router and Cisco ASR 9912 Router...
- Page 39 Unpacking and Installing the Chassis Removing RP Cards, Fabric Cards, and Line Cards from the Cisco ASR 9922 Router and Cisco ASR 9912 Router Figure 35: Cisco ASR 9922 Router Components and Slot Numbering with Version 2 DC Power System...
- Page 40 Unpacking and Installing the Chassis Removing RP Cards, Fabric Cards, and Line Cards from the Cisco ASR 9922 Router and Cisco ASR 9912 Router Figure 36: Cisco ASR 9922 Router Components and Slot Numbering with Version 3 DC Power System...
- Page 41 Unpacking and Installing the Chassis Removing RP Cards, Fabric Cards, and Line Cards from the Cisco ASR 9922 Router and Cisco ASR 9912 Router Figure 37: Cisco ASR 9922 Router Components and Slot Numbering with Version 2 AC Power System...
- Page 42 Unpacking and Installing the Chassis Removing RP Cards, Fabric Cards, and Line Cards from the Cisco ASR 9922 Router and Cisco ASR 9912 Router Figure 38: Cisco ASR 9922 Router Components and Slot Numbering with Version 3 AC Power System...
- Page 43 Unpacking and Installing the Chassis Removing RP Cards, Fabric Cards, and Line Cards from the Cisco ASR 9922 Router and Cisco ASR 9912 Router Figure 39: Cisco ASR 9912 Router Components and Slot Numbering with Version 2 DC Power System...
- Page 44 Removing RP Cards, Fabric Cards, and Line Cards from the Cisco ASR 9922 Router and Cisco ASR 9912 Router Figure 40: Cisco ASR 9912 Router Components and Slot Numbering with Version 3 AC Power System Follow these steps to remove RP cards, FCs, and LCs from the Cisco ASR 9922 Router and Cisco ASR 9912 Router chassis.
- Page 45 Unpacking and Installing the Chassis Removing RP Cards, Fabric Cards, and Line Cards from the Cisco ASR 9922 Router and Cisco ASR 9912 Router Figure 41: Removing a Switch Fabric Card from the Cisco ASR 9922 Router Chassis Loosen the captive Pivot the ejector levers screws.
- Page 46 Unpacking and Installing the Chassis Removing RP Cards, Fabric Cards, and Line Cards from the Cisco ASR 9922 Router and Cisco ASR 9912 Router Figure 42: Removing a Switch Fabric Card from the Cisco ASR 9912 Router Chassis Loosen the captive screws.
- Page 47 Unpacking and Installing the Chassis Removing RP Cards, Fabric Cards, and Line Cards from the Cisco ASR 9922 Router and Cisco ASR 9912 Router Figure 43: Removing a Line Card from the Cisco ASR 9922 Router Top Card Cage Loosen the captive...
- Page 48 In a front-mounted position, the chassis rack-mounting flanges are secured directly to the rack posts. Note The Cisco ASR 9922 Router and Cisco ASR 9912 Router are designed to mount in only 4-post racks. Unpacking and Installing the Chassis...
- Page 49 An empty chassis weighs approximately 150 pounds (68 kg). You need two people to slide the chassis into the equipment rack safely. This figure shows the orientation of the Cisco ASR 9010 Router chassis to the rack posts (3” or 6” channel width) of an industry-standard 2-post rack and components used in the installation.
- Page 50 (5” channel width) of the GR-63 Zone 4 Seismic 2-post rack. The below figure shows the orientation of the Cisco ASR 9010 Router chassis to the Seismic 2-post rack and components used in the installation.
- Page 51 The figure below shows the orientation of the Cisco ASR 9006 Router chassis to the rack posts and components used in the installation. Unpacking and Installing the Chassis...
- Page 52 Four screws per side (minimum) to attach the router chassis to the rack. The figure below shows the orientation of the Cisco ASR 9904 Router chassis to the rack posts and components used in the installation. Unpacking and Installing the Chassis...
- Page 53 Six screws per side (minimum) to attach the router chassis to the rack. The figure below shows the orientation of the Cisco ASR 9906 Router chassis to the rack posts and components used in the installation. Unpacking and Installing the Chassis...
- Page 54 Unpacking and Installing the Chassis Installing the Chassis in a 2-Post Rack Figure 50: Installing the Cisco ASR 9906 Router Chassis in a Standard 2-Post Rack Six screws per side (minimum) to attach the router chassis to the rack. Unpacking and Installing the Chassis...
- Page 55 Unpacking and Installing the Chassis Installing the Chassis in a 2-Post Rack Figure 51: Installing the Cisco ASR 9910 Router Chassis in a 2-Post Seismic Rack Use screw and brackets from 2 post rack mount bracket kit. Follow these steps to install the chassis in the equipment rack.
- Page 56 Unpacking and Installing the Chassis Installing the Chassis in a 2-Post Rack Figure 52: Correct Lifting Positions Do not grasp the card cage or the air inlet grill when lifting the router chassis (see the figure below). Caution Figure 53: Incorrect Lifting Handholds Step 2 Position the chassis until the rack-mounting flanges are flush against the mounting rails on the rack.
- Page 57 To mount the Cisco ASR 9010 Router, Cisco ASR 9906 Router, Cisco ASR 9910 Router, Cisco ASR 9922 Router or Cisco ASR 9912 Router chassis in a 4-post open rack, two side brackets must be attached to the chassis and the rear posts. See...
- Page 58 Step 3 On the rear of the Cisco ASR 9922 Router is an integrated handle that is used to pull the chassis from the pallet jack into the rack where the chassis is to be installed.
- Page 59 Unpacking and Installing the Chassis Preparing the 19 Inch 45-RU Rack Figure 55: Installing the Cisco ASR 9006 Router Chassis in a 4-Post Rack Figure 56: Installing the Cisco ASR 9904 Router Chassis in a 4-Post Rack Unpacking and Installing the Chassis...
- Page 60 Unpacking and Installing the Chassis Preparing the 19 Inch 45-RU Rack Figure 57: Installing the Cisco ASR 9906 Router Chassis in a 4-Post Rack Unpacking and Installing the Chassis...
- Page 61 Unpacking and Installing the Chassis Preparing the 19 Inch 45-RU Rack Figure 58: Installing the Cisco ASR 9910 Router Chassis in a 4-Post Rack Use screws to attach the Use screws and four post router chassis to the rack. rack mount brackets from...
- Page 62 Unpacking and Installing the Chassis Preparing the 19 Inch 45-RU Rack Figure 59: Rack Mount Installation Kit for the Cisco ASR 9922 Router and Cisco ASR 9912 Router Unpacking and Installing the Chassis...
- Page 63 Unpacking and Installing the Chassis Preparing the 19 Inch 45-RU Rack Figure 60: Installing the Cisco ASR 9922 Router Chassis in a 4-Post Rack Unpacking and Installing the Chassis...
- Page 64 For more information on supplemental bonding and grounding cable requirements, see NEBS Supplemental Unit Bonding and Grounding Guidelines, page 1-60 The table below references the grounding receptacle locations for the Cisco ASR 9000 Series Routers. Table 3: Grounding Receptacle Locations Model Number Grounding Receptacle Location...
- Page 65 Prepare the other end of the grounding wire and connect it to the appropriate grounding point at your site to ensure an adequate earth ground. Figure 62: NEBS Bonding and Grounding for the Cisco ASR 9010 Router Unpacking and Installing the Chassis...
- Page 66 Unpacking and Installing the Chassis Supplemental Bonding and Grounding Connections Figure 63: NEBS Bonding and Grounding for the Cisco ASR 9006 Router Figure 64: NEBS Bonding and Grounding for the Cisco ASR 9904 Router Unpacking and Installing the Chassis...
- Page 67 Unpacking and Installing the Chassis Supplemental Bonding and Grounding Connections Figure 65: NEBS Bonding and Grounding for the Cisco ASR 9906 Router Figure 66: NEBS Bonding and Grounding for the Cisco ASR 9922 Router Unpacking and Installing the Chassis...
- Page 68 Figure 67: NEBS Bonding and Grounding for the Cisco ASR 9912 Router Installing Chassis Accessories The Cisco ASR 9000 Series Routers ship with a base set of chassis accessories. To install the base accessories and optional accessories, see the appropriate installation procedure below for your router:...
- Page 69 Install two ball studs (one per side) into the chassis front edge (see the figure below) near the top of the chassis grill. Tighten the ball studs to a torque of 8 in-lb (0.90 N-m). Figure 68: Installing Ball Studs: Version 1 Power Cisco ASR 9010 Router (Base Accessories Installation) Step 2 Attach two plastic strips (one per side) along the chassis front edge.
- Page 70 Unpacking and Installing the Chassis Installing Optional Chassis Accessories on the Cisco ASR 9010 Router Figure 69: Installing Base Chassis Accessories on the Cisco ASR 9010 Router Two are ball Two side strips Accessory grill studs inserted in attach to front...
- Page 71 Install six ball studs (three per side) into the chassis front edge (item 7 in the figure below and Figure 71: Locations for the Six Ball Studs on the Cisco ASR 9010 Router, on page 73). Tighten the ball studs to a torque of 8 in-lb (0.90 N-m).
- Page 72 Unpacking and Installing the Chassis Installing Optional Chassis Accessories on the Cisco ASR 9010 Router Figure 70: Optional Chassis Accessories for the Cisco ASR 9010 Router Door (one per side) Screws for attaching the L-shaped bracket to the hinge bracket (one screw...
- Page 73 Unpacking and Installing the Chassis Installing Optional Chassis Accessories on the Cisco ASR 9010 Router Figure 71: Locations for the Six Ball Studs on the Cisco ASR 9010 Router Step 5 Attach the left and right hinge brackets to the chassis using four screws for each bracket. Tighten the screws to a torque of 11 in-lb (1.20 N-m).
- Page 74 Unpacking and Installing the Chassis Installing Optional Chassis Accessories on the Cisco ASR 9010 Router Figure 72: Installing the Hinge Brackets and L-Shaped Brackets on the Cisco ASR 9010 Router Install each hinge bracket, After the hinge brackets with an L-shaped bracket...
- Page 75 Unpacking and Installing the Chassis Installing Base Chassis Accessories on the Cisco ASR 9006 Router Figure 73: Installing Optional Chassis Accessory Doors on the Cisco ASR 9010 Router Step 9 Install the front grill (item 8 in the Step 4, on page 71 by aligning and engaging it to the bottom two ball studs and pressing it in.
- Page 76 Attach the left metal mounting bracket to the front upper left corner of the chassis with three screws. Figure 74: Installing Plastic Fan Tray Door Accessory and Metal Mounting Brackets on the Cisco ASR 9006 Router Plastic fan tray door...
- Page 77 Step 6 Attach the right plastic corner piece to the mounting bracket at the front upper right corner of the chassis. Figure 76: Installing Plastic Chassis Corners on the Cisco ASR 9006 Router (Base Accessories Installation) Unpacking and Installing the Chassis...
- Page 78 After the chassis has been installed in the rack and all chassis accessories have been attached, you can install the fan trays, power supply modules, and RSP and line cards. See the chapter Installing Cards and Modules in the Chassis in the book Cisco ASR 9000 Series Aggregation Services Router Hardware Installation Guidefor detailed installation instructions.
- Page 79 Unpacking and Installing the Chassis Installing Optional Chassis Accessories on the Cisco ASR 9006 Router Figure 77: Installing Ball Stud Assemblies on the Cisco ASR 9006 Router (Shown with Version 1 Power System) Step 3 Attach the door to the upper chassis panel (see the figure below) using two hex nuts per side to secure the door hinges to the panel.
- Page 80 Installing Optional Air Baffles on the Cisco ASR 9006 Router The Cisco ASR 9006 Router has an optional air baffle accessory kit (800-43858-01) for mounting the router chassis in a 2-post or 4-post 19-inch rack. The accessory kit includes: •...
- Page 81 Procedure Step 1 Attach the support bracket (part number: 800-43857-01) to the left side of the Cisco ASR 9006 Router using six 12-24 x 0.5 in. pan-head screws (part number: 48-0523-01). See the figure below. Figure 80: Attaching the Support Bracket to the Left Side of the Cisco ASR 9006 Router Chassis...
- Page 82 Unpacking and Installing the Chassis Installing Optional Air Baffles on the Cisco ASR 9006 Router Figure 81: Attaching Plastic Glide Strip to Chassis Step 3 Install the plenum in the rack. Insert and tighten four customer-supplied screws to secure the plenum to the front of the rack-post (two on each side).
- Page 83 Unpacking and Installing the Chassis Installing Optional Air Baffles on the Cisco ASR 9006 Router Figure 82: Plenum with Pre-Installed Front Mounting Brackets Front rack-mounting bracket, pre-installed Step 4 Attach the rear rack-mounting brackets (part number: 700-47414-01) to the left and right sides of the plenum base, using twelve 8-32 x 0.5 in.
- Page 84 Unpacking and Installing the Chassis Installing Optional Air Baffles on the Cisco ASR 9006 Router Figure 83: Installing the Plenum in a Two-Post 19-Inch Rack Screw attaching rear-rack Screws attaching rear-rack mounting bracket to mounting bracket to rack plenum (six per bracket)
- Page 85 Installing Optional Chassis Accessories on the Cisco ASR 9006 Router, on page The figure below shows the air baffle accessory kit and Cisco ASR 9006 Router with its optional accessories fully installed in a two-post 19-inch rack. Unpacking and Installing the Chassis...
- Page 86 Unpacking and Installing the Chassis Installing Optional Air Baffles on the Cisco ASR 9904 Router Figure 85: Cisco ASR 9006 Router Fully Installed with Air Baffle Accessory Kit and Optional Chassis Accessories Installing Optional Air Baffles on the Cisco ASR 9904 Router The Cisco ASR 9904 Router has an optional air baffle accessory kit (ASR-9904-BAFFLE=) for mounting the router chassis in a 2-post 23-inch rack.
- Page 87 (we recommend a minimum of ten per side). These screws can vary in size and type depending on the rack that you use. Torque the screws to the weight specified for your particular rack. Figure 86: Attaching the Adapter Plates to the Left and Right Rack Rails on the Cisco ASR 9904 Router Chassis Step 2...
- Page 88 800-41357-01). Step 4 Tighten the screws to a torque of 41 in-lb. Figure 88: Attaching the Air Deflectors on the Cisco ASR 9904 Router Chassis Top View Top air deflector 12-24 screws for attaching...
- Page 89 Unpacking and Installing the Chassis Installing Optional Air Baffles on the Cisco ASR 9904 Router Figure 89: Securing the Cisco ASR 9904 Router Chassis Side Baffles to the Air Deflectors (Rear View) Step 6 Use six 12-24 screws to fasten each side of the chassis to the 23-inch rack. Torque each of the six screws to 41 in-lbs.
- Page 90 Installing Optional Air Baffles on the Cisco ASR 9904 Router Figure 91: Cisco ASR 9904 Router Chassis with Air Baffle in 2-Post 23-Inch Rack An electrical conducting path must exist between the product chassis and the metal surface of the enclosure or rack in which it is mounted, or to a grounding conductor.
- Page 91 Unpacking and Installing the Chassis Installing Optional Air Baffles on the Cisco ASR 9904 Router Baffle ground location Figure 93: Cisco ASR 9904 Router Air Baffle Dimensions Top View Unpacking and Installing the Chassis...
- Page 92 If you ordered the optional accessories set, follow these steps to install the accessories: Procedure Step 1 Remove the two screws that secure the bottom edge of the cable management tray to the chassis. Four ball studs are preinstalled on the Cisco ASR 9922 Router chassis. Note Unpacking and Installing the Chassis...
- Page 93 Unpacking and Installing the Chassis Installing Optional Chassis Accessories on the Cisco ASR 9922 Router Figure 95: Optional Fan Tray Covers for the Cisco ASR 9922 Router Figure 96: Optional Card Cage Doors for the Cisco ASR 9922 Router Unpacking and Installing the Chassis...
- Page 94 After the chassis has been installed in the rack and all chassis accessories have been attached, you can install the fan trays, power supply modules, RP cards, FCs and LCs. See Installing Cards and Modules in the Chassis in the book Cisco ASR 9000 Series Aggregation Services Router Hardware Installation Guide for detailed installation instructions.
- Page 95 After the chassis has been installed in the rack and all chassis accessories have been attached, you can install the fan trays, RP cards, FCs and LCs. See the chapter Installing Cards and Modules in the Chassis in the book Cisco ASR 9000 Series Aggregation Services Router Hardware Installation Guide for detailed installation instructions.
- Page 96 Attach the left (if not pre-installed) and right hinge brackets to the chassis using three screws (M4 thread) for each bracket (see the below figure). Tighten the screws to a torque of 11 in-lb (1.20 N-m). Figure 99: Optional Card Cage Door on the Front of the Cisco ASR 9912 Router Card cage door...
- Page 97 After the chassis has been installed in the rack and all chassis accessories have been attached, you can install the fan trays, RP cards, FCs, and LCs. See Installing Cards and Modules in the Chassis in the book Cisco ASR 9000 Series Aggregation Services Router Hardware Installation Guide for detailed installation instructions.
- Page 98 Unpacking and Installing the Chassis Installing Optional Chassis Accessories on the Cisco ASR 9912 Router Unpacking and Installing the Chassis...