Advertisement
Table of Contents
- 1 Petunjuk Penggunaan
- 2 Safety Precautions
- 3 SAFETY PRECAUTIONS ---Electrical Requirements
- 4 Product Features
- 5 Specifications
- 6 Parts and Features
- 7 Cleaning Prior to Initial Use
- 8 Operation
- 9 Dispensing Cold Water
- 10 Dispensing Hot Water
- 11 Replacing an Empty Bottle
- 12 Proper Care & Cleaning
- 13 General Cleaning
- 14 Troubleshooting
- 15 Sound's You Might Hear
- Download this manual
Advertisement
Table of Contents

Related Manuals for Sharp SWD-77EH-BK


Summary of Contents for Sharp SWD-77EH-BK
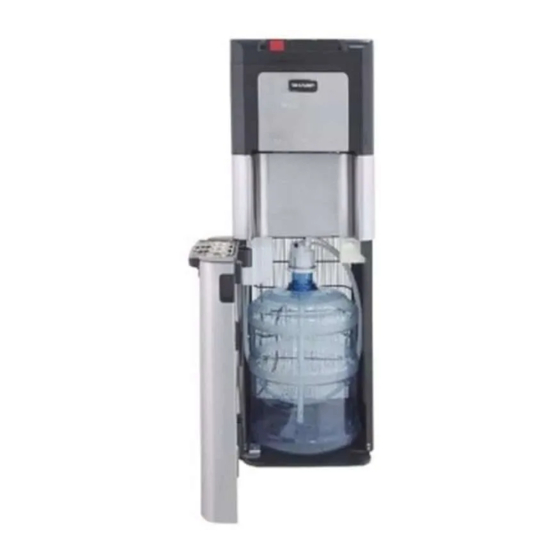
- Page 1 Bottom Bottle Cooler TOP AND BOTTOM LOAD WATER DISPENSER PETUNJUK PENGGUNAAN In Case of Power Failure Switch Bottle from Bottom to the Top SWD-77EH-BK The product in this manual may differ slightly from that pictured. No.Reg.: I.6.SEI2.00101.0111 PN: 5M000013XW00...
-
Page 2: Petunjuk Penggunaan
Permasalahan SWD-77EH-BK Pelanggan yang terhormat, Terima kasih anda telah membeli produk SHARP. Unit ini dilengkapi dengan pemeriksaan kualitas yang nyaman untuk memberikan anda kepuasan. Sebelum menggunakan DISPENSER baru milik anda, dan untuk mendapatkan hasil yang ekonomis dan penggunaan yang efisien, silahkan baca Petunjuk Penggunaan dan simpanlah ditempat yang aman untuk referensi dimasa mendatang No.Reg.:I.6.SEI2.00101.0111... -
Page 3: Safety Precautions
SAFETY PRECAUTIONS Your safety and the safety of others are very important. We have provided many important safety messages in this manual and your appliance. Always read and follow all safety messages. This is the safety alert symbol. This symbol alerts you to potential hazards that can kill or hurt you and others. All safety messages will follow the safety alert symbol and either the word “DANGER”or “WARNING”... -
Page 4: Safety Precautions ---Electrical Requirements
SAFETY PRECAUTIONS ---Electrical Requirements WARNING Electrical shock Hazard Plug into a grounded 3 prong outlet. Do not remove ground prong. Do not use an adapter. Do not use an extension cord. Failure to follow these instructions can result in death, fire, or electrical shock. -
Page 5: Specifications
SPECIFICATIONS Daya 220V~/50Hz <3.5A Tipe Pendingin R-134A Daya air dingin 220V/70W, Max:<100W kapasitas pendingin/ jam 5 L/H Tingkat suhu pendingan 3°C – 10°C Daya air panas 650W kapasitas pemanas/ jam 4 L/H Tingkat suhu pemanas 80°C – 92°C Dimensi (WxHxDmm) 320x 1031.5x 380 (Small drip tray) 320 x 1031.5x 480 (Big drip tray) Berat bersih... - Page 6 ASSEMBLY Keep plastic bags away from children. 1. Remove dispenser from packaging. 2. Unpack the drip tray and insert into the dispenser. As shown in figure 3. Remove the bottle receptacle from packaging and insert into the stainless steel cold tank . As shown in figure 4.
- Page 7 SELECTABLE WATTAGE HOT TANK OPERATING INSTRUCTIONS 1.Hot switch: • Turn On: It will turn Hot Tank ON. Thermostat will control temperature. Needed to be ON for Selectable Power to work. • Turn OFF: Heating system stop working. 2.Cold switch: • Turn ON: It will turn Cooling System ON.
-
Page 8: Cleaning Prior To Initial Use
CLEANING PRIOR TO INITIAL USE To remove any odors or dust that may have accumulated during shipment, you may want to clean the dispenser prior to first use. Time Required: 45 minutes. Notice: Do NOT plug in power cord yet. 1. -
Page 9: Operation
OPERATION IMPORTANT This unit is intended for water dispensing only. Do NOT use other liquids. Do NOT use for other purposes. Warranty is void if used with any other liquids such as coffee, tea, juices, beer or wine. This dispenser has been designed to use water bottles with a 3, 5, or 5.2 gallon capacity. -
Page 10: Dispensing Cold Water
NOTICE: When using a 5 gallon bottle, slide it into place as shown in illustration below. • If the probe tube A and B(see page 8) are not sealed, the pump will run a few minutes and the night lights will flash. To correct, open the door, re-attach the probe, and close the door. -
Page 11: Dispensing Hot Water
1. Position the bottle, glass, pitcher, or cooking pot securely below the cold water tap. • The right triangle below the cold water control indicates the location of the cold water tap(See Parts & Features NO. 5). • The circular shapes in the drip plate help align the flow of water. This unit dispenses water at a fast rate. - Page 12 CLEANING PRIOR TO INITIAL USE To remove any odors or dust that may have accumulated during shipment, you may want to clean the dispenser prior to first use. DO NOT PLUG THE COOLER INTO AN ELECTRICAL POWER OUTLET AT THIS TIME. Time Required for Set Up: 40 minutes.
-
Page 13: Proper Care & Cleaning
PROPER CARE & CLEANING General Cleaning Perform: As needed Time Required: 5 minutes. Note: Do NOT use abrasive materials or chemical cleaners. 1. Clean cabinet surfaces with a soft cloth and warm soapy water. 2. Wipe dust from back of dispenser to improve efficiency. 3. - Page 14 Step B: Sanitize Probe and Taps 1. In a clean container, make a sanitizing solution of 1.5 gallons of tap water and 1.5 tablespoons of unscented household bleach composition(I.E.5.25% sodium hypochlorite) . 2. Wipe the probe and the area around all the taps with a soft cloth moistened with the sanitizing solution.
- Page 15 Step D: Rinse Reservoirs 1. Dispose of the water and bleach mixture and rinse the bottle with tap water. 2. Fill the bottle with tap water and insert the probe into the bottle. 3. Push the probe down until it is seated. 4.
-
Page 16: Troubleshooting
TROUBLESHOOTING Dispenser is not operating. • Make sure that the power cord is properly connected to a working outlet. Water is leaking. Replace water bottle. Most common cause is a cracked bottle. • • The bottle may have a leak. Remove the bottle and replace it with a new bottle. •... -
Page 17: Sound's You Might Hear
LED night lights are flashing and the dispenser is making beeping noises. • Replace the empty bottle. If unavailable, leave the door ajar or unplug the cooler to stop the beeping noise and the flashing lights. • There may be an air leak. Check the air hose connections. Dispenser is noisy.